via UI
What you'll learn
- How to Deploy your Training Code as a Job via Truefoundry User Interface.
- How to add Params configuration to your Jobs for ease of experimentation
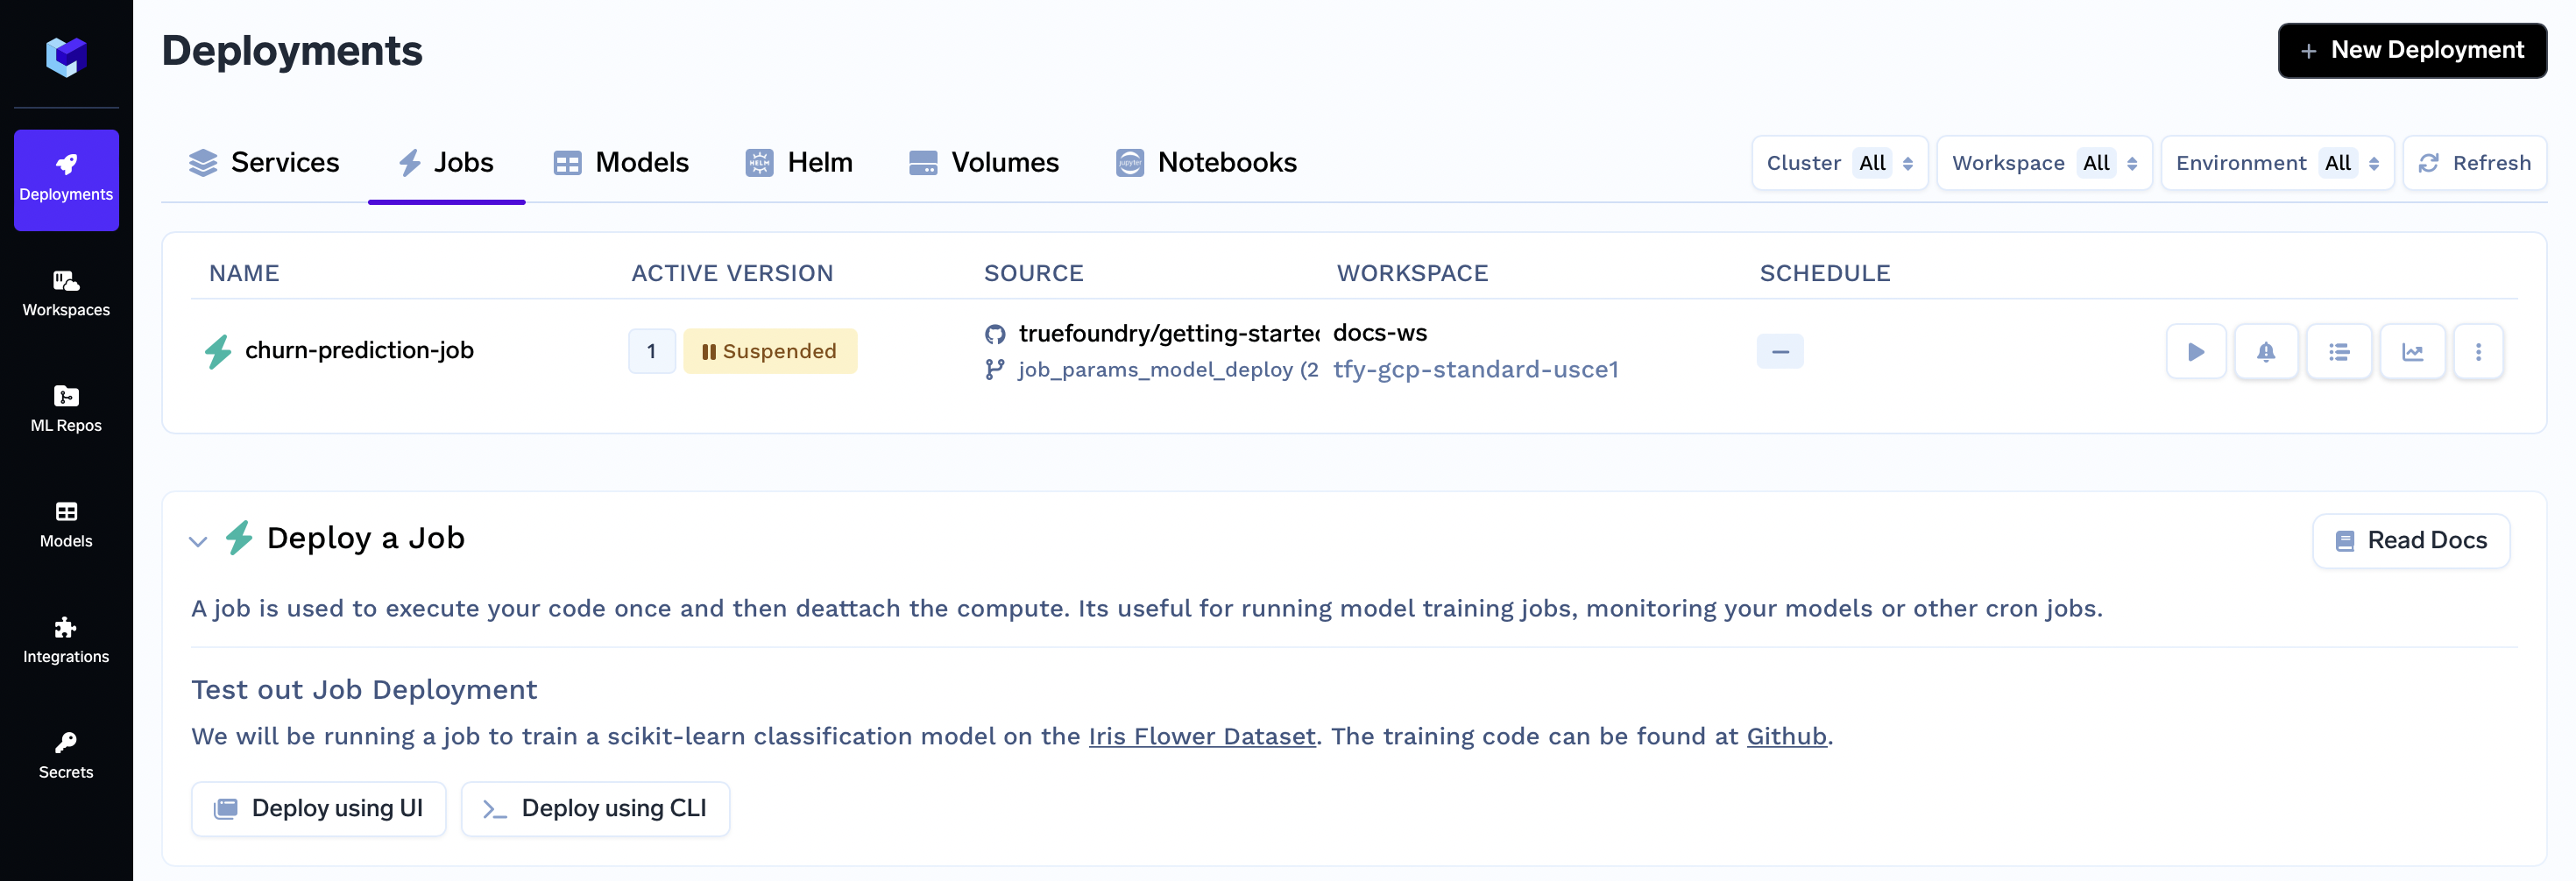
After you complete the guide, you will have successfully deployed a job to train a model on the customer churn dataset. Your jobs deployment dashboard will look similar to this:
Configuring Your Job for Ease of Experimentation and Deploying It
Step 1: ML Repo Creation
In TrueFoundry, an ML Repository collects runs, models, and artifacts for a high-level Machine Learning use-case. Access controls are configured at the ml-repo level.
After creating the ML Repo, it centralizes storing experiment runs, hyperparameters, metrics, and models. Log each run's details in the corresponding ML Repo for easy analysis. Deploy top models via Model Deployment for efficient workflow enhancement.
Creating an ML Repo:
- On the left panel of the TrueFoundry user interface, locate and click on the "ML Repos" tab.
- You'll find a "+ New ML Repo" button at the top. Click this button to start the process of creating a new ML Repo.
- In the creation form, you'll need to provide the following details:
- Name: Unique identifier for your ML Repo.
- Description: Write a brief description that outlines the purpose and goals of this ML Repo.
- Storage Integration: Choose a storage integration where the data will be stored.
For this guide fill the following
Name:
churn-pred
- Click the "Create" button to finalize the creation of your ML Repo.
Step 2: Give ML Repo access to your Workspace
You will also need to provide access to your ML Repo within the Workspace where you intend to deploy your training code as a Job and utilize the ModelDeployment feature on the logged model.
Follow these steps to configure access:
- On the left panel of the TrueFoundry user interface, locate and click on the "Workspaces" tab.
- In the list of workspaces, find and select the specific workspace that you intend to use for your deployments. If you don't have a workspace yet, you can refer to this guide to create one. While creating the workspace, make sure to grant ML Repo access to the workspace.
- Click on the "Edit" symbol associated with the selected workspace. This will open up the workspace settings for editing.
- Within the workspace settings, locate the option to enable ML Repo access. Toggle the button to enable this feature and then click on the "+ Add ML Repo Access" button.
- In the dropdown labeled "Search ML Repo ..." choose the
churn-predML Repo we had created in the previous step. And in dropdown labeled "Select Role ..." choose theProject Admin - Click the "Update" button to save your changes. This now provides the access of the ML Repo to your workspace.
Step 3: Initiating Deployment via UI
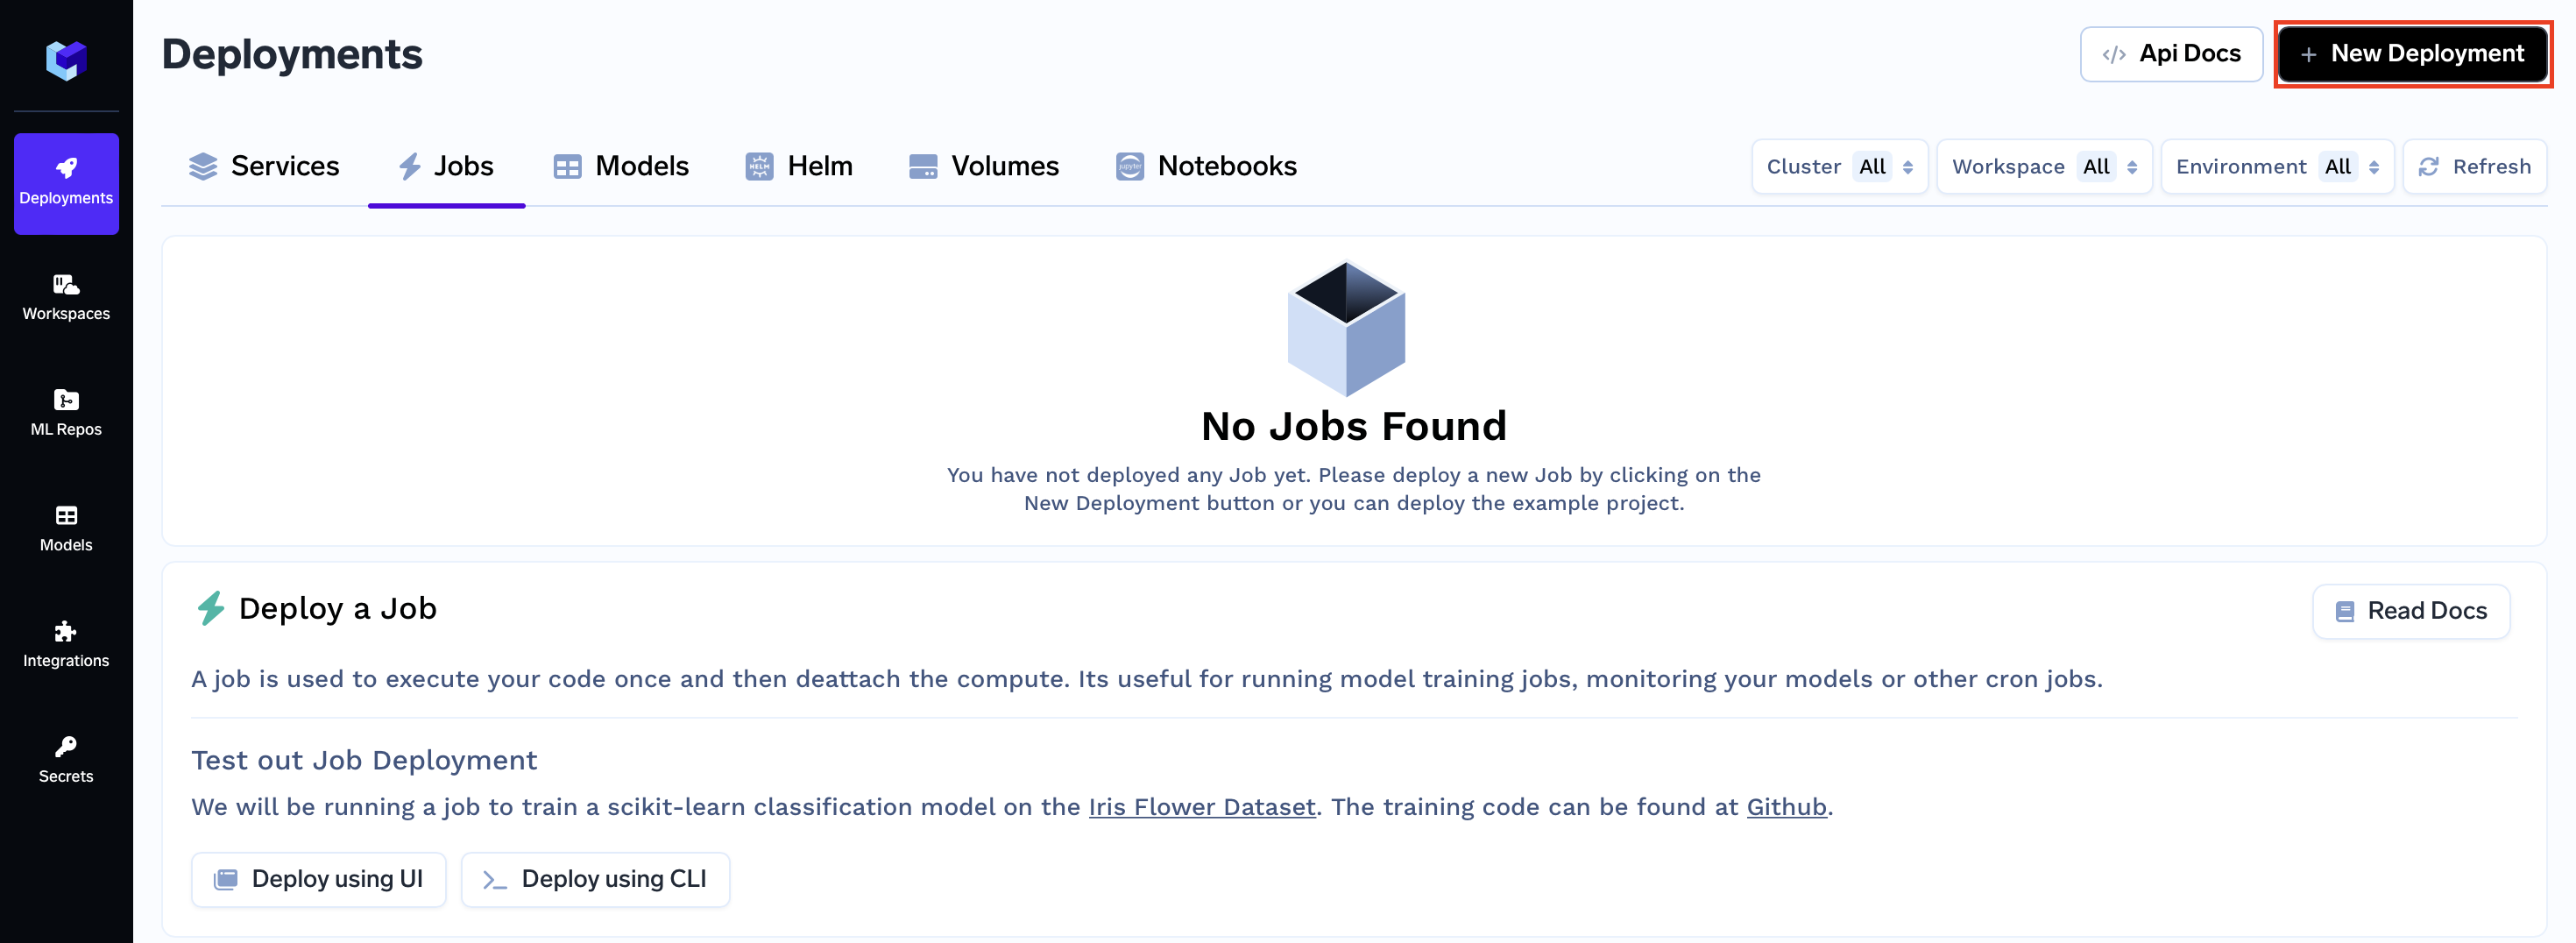
- On the left panel of the TrueFoundry user interface, locate and click on the "Deployments" tab. From here, navigate to the "Jobs" tab located in the top bar.
- Click on the "New Deployment" button, and a form will appear with various deployment options. Click on the "Job" button to select job deployment (will be pre-selected)
- In the same form there will be a field "Where would you like to deploy?" option. Click on the "Search Workspace" bar, and select the desired workspace for your deployment (The one that we gave access of our ML Repo to in the 2nd step)
Note:
If you don't have any workspace right now, you can create a new workspace by clicking the Create New Workspace link and following along this Documentation or contact your cluster admin in case of some issues
- Once selected click on the "Next Step" button to continue with the deployment.
Code Structure
Before we proceed, let's take a quick look at the structure of the code you'll be deploying:
.
|_ main.py : Contains the training code
|_ requirements.txt : Dependency file
Let's help you understand the key elements in the main.py code that you'll be deploying:
- Hyperparameters and argparse:
Firstly, the argparse library is used to handle hyperparameters as command-line arguments. This dynamic approach allows altering hyperparameters without modifying the code itself. These command-line hyperparameters are then passed to the train_model function. train_modelFunction:
The train_model function is responsible for training the K-Nearest Neighbors (KNN) classifier using the provided hyperparameters. It also calculates the metrics for evaluating the model. Then it passes all of this info toexperiment_trackfunctionexperiment_trackFunction:
The experiment_track function logs experiment-related details into the ML Repo. Specifically:- It Initializes the mlfoundry client.
- Creates an ML Repo named "churn-pred."
- Creates a run within the ML Repo to track this experiment.
- Logs hyperparameters and metrics.
- Logs the trained model using the log_model method, enabling deployment via Model Deployment.
import pandas as pd
from sklearn.neighbors import KNeighborsClassifier as Classification
import mlfoundry as mlf
from sklearn.metrics import accuracy_score, f1_score, precision_score, recall_score
from sklearn.model_selection import train_test_split
import matplotlib.pyplot as plt

def experiment_track(model, params, metrics):
    # initialize the mlfoundry client.
    mlf_api = mlf.get_client()

    # create a ml repo
    mlf_api.create_ml_repo("churn-pred")
    # create a run
    mlf_run = mlf_api.create_run(
        ml_repo="churn-pred", run_name="churn-train-job"
    )
    # log the hyperparameters
    mlf_run.log_params(params)
    # log the metrics
    mlf_run.log_metrics(metrics)
    # log the model
    model_version = mlf_run.log_model(
        name="churn-model",
        model=model,
        # specify the framework used (in this case sklearn)
        framework=mlf.ModelFramework.SKLEARN,
        description="churn-prediction-model",
    )
    # return the model's fqn
    return model_version.fqn


def train_model(hyperparams):

    df = pd.read_csv("https://raw.githubusercontent.com/nikp1172/datasets-sample/main/Churn_Modelling.csv")
    X = df.iloc[:, 3:-1].drop(["Geography", "Gender"], axis=1)
    y = df.iloc[:, -1]
    # Create train test split
    X_train, X_test, y_train, y_test = train_test_split(X, y, test_size=0.2, random_state=42)

    # Initialize the KNN Classifier
    classifier = Classification(
        n_neighbors=hyperparams['n_neighbors'],
        weights=hyperparams['weights'],
    )

    # Fit the classifier with the training data
    classifier.fit(X_train, y_train)
    y_pred = classifier.predict(X_test)

    # Get the metrics
    metrics = {
        "accuracy": accuracy_score(y_test, y_pred),
        "f1_score": f1_score(y_test, y_pred, average="weighted"),
        "precision": precision_score(y_test, y_pred, average="weighted"),
        "recall": recall_score(y_test, y_pred, average="weighted"),
    }

    # Log the experiment
    experiment_track(classifier, classifier.get_params(), metrics)


if __name__ == "__main__":
    import argparse

    # Setup the argument parser by instantiating `ArgumentParser` class
    parser = argparse.ArgumentParser()
    # Add the hyperparameters as arguments
    parser.add_argument(
        "--n_neighbors",
        type=int,
        required=True,
    )
    parser.add_argument(
        "--weights",
        type=str,
        required=True,
    )
    args = parser.parse_args()
    hyperparams = vars(args)

    # Train the model
    train_model(hyperparams)
Step 4: Configure Deployment
Now, let's dive into the configuration options for your deployment form. Each of these options plays a crucial role in shaping how your job is deployed and executed.
We will not only explain these options to you but also provide clear instructions on what to fill in each field to ensure a seamless deployment process.
Name:
The Name field allows you to assign a unique identifier to the job within your workspace.
Name:
churn-prediction-job
Build Source (Deploy a Docker Image or Build and Deploy Source Code):
The Build Source option lets you specify whether you want to deploy a pre-built Docker image or build a Docker image from your source code and Deploy it.
Choose "Source Code (Build and deploy source code)"
Repo URL:
https://github.com/truefoundry/getting-started-examples
Build Specification (Build Using Dockerfile or Using Buildpack):
The Build Specification helps determine the method you want to use for building your service. You can choose to build using a Dockerfile, providing custom configuration for your environment, or you can opt for a Buildpack, which automates the build process based on your application's requirements.
In the Command field, enter the command to execute your training job, including placeholders for hyperparameters like {{n_neighbors}}, {{weights}}, etc.
These are going to be the same names we specify in the Params configuration below, so keep this in mind.
Choose "Python Code (I don't have Dockerfile)"
Path to build context:
./job-params-model-deploy/Command:
python main.py --n_neighbors {{n_neighbors}} --weights {{weights}}
Params for input:
The Params for input option empowers you to configure hyperparameters and pass them to create distinct job runs. Toggle the button to activate it, then click on "Add Params for input" to input individual parameters.
For each parameter, provide the following details:
- Name: Enter a descriptive name for the parameter.
- Default value: Specify the default value for the parameter.
- Description: Include a brief description of the parameter's purpose.
- Param type: Can be either string or an ML Repo
Click on the toggle to enable Params
Click on "+ Add Params for Input"
Name:
n_neighbors
Default value:5
Description:Number of neighbors to use by defaultName:
weights
Default value:uniform
Description:Weight function used in prediction. Possible values: uniform, distance
Step 5: Submit the form
Now that all the deployment options are filled, you can proceed by clicking the "Create" button. This will initiate your deployment process. After clicking "Create," your Job Dashboard will resemble the following:

While your deployment is in progress, you can hover over the spinner icon to check the status of the deployment. After a brief moment, the deployment should become active, and your Job Dashboard will transform to appear as follows:

Effortless Hyperparameter Experimentation
Once your deployment is active, navigate to your specific job by clicking on it. This action will open a dedicated dashboard displaying various job details, including the Run Job button.

Clicking this button will trigger a modal to appear:
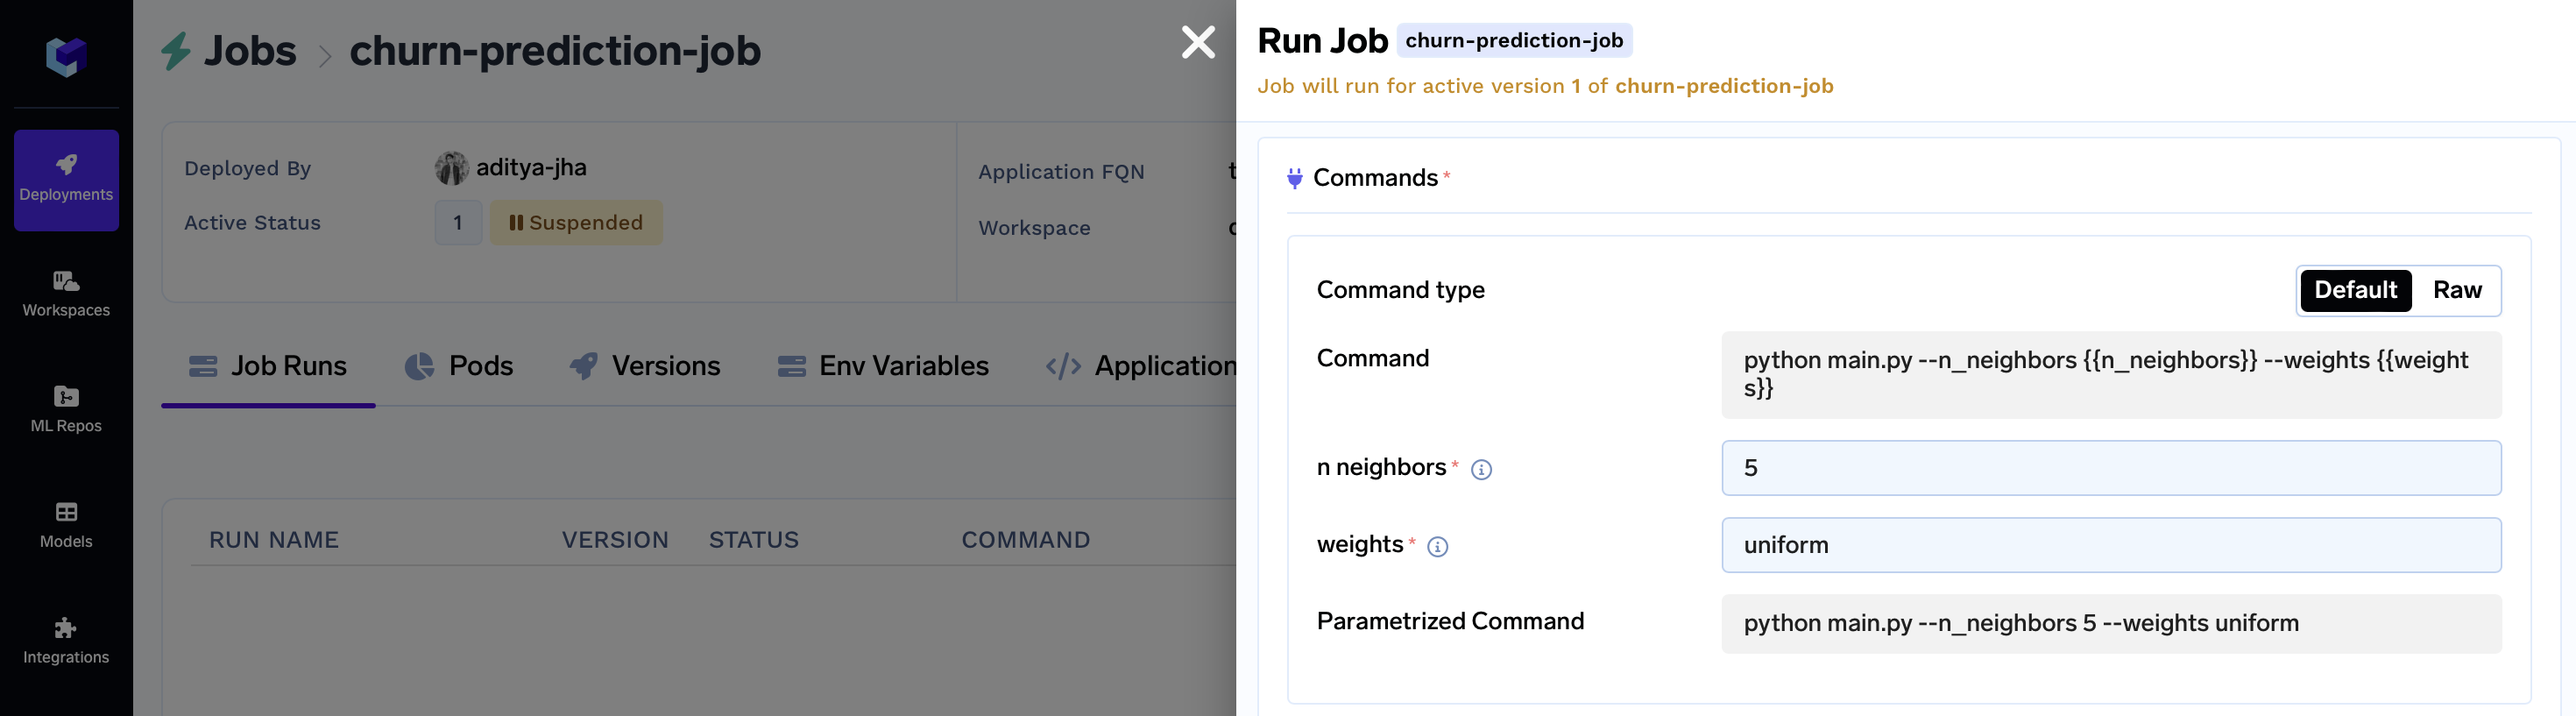
Within this modal, you can effortlessly adjust hyperparameter values for rapid experimentation.
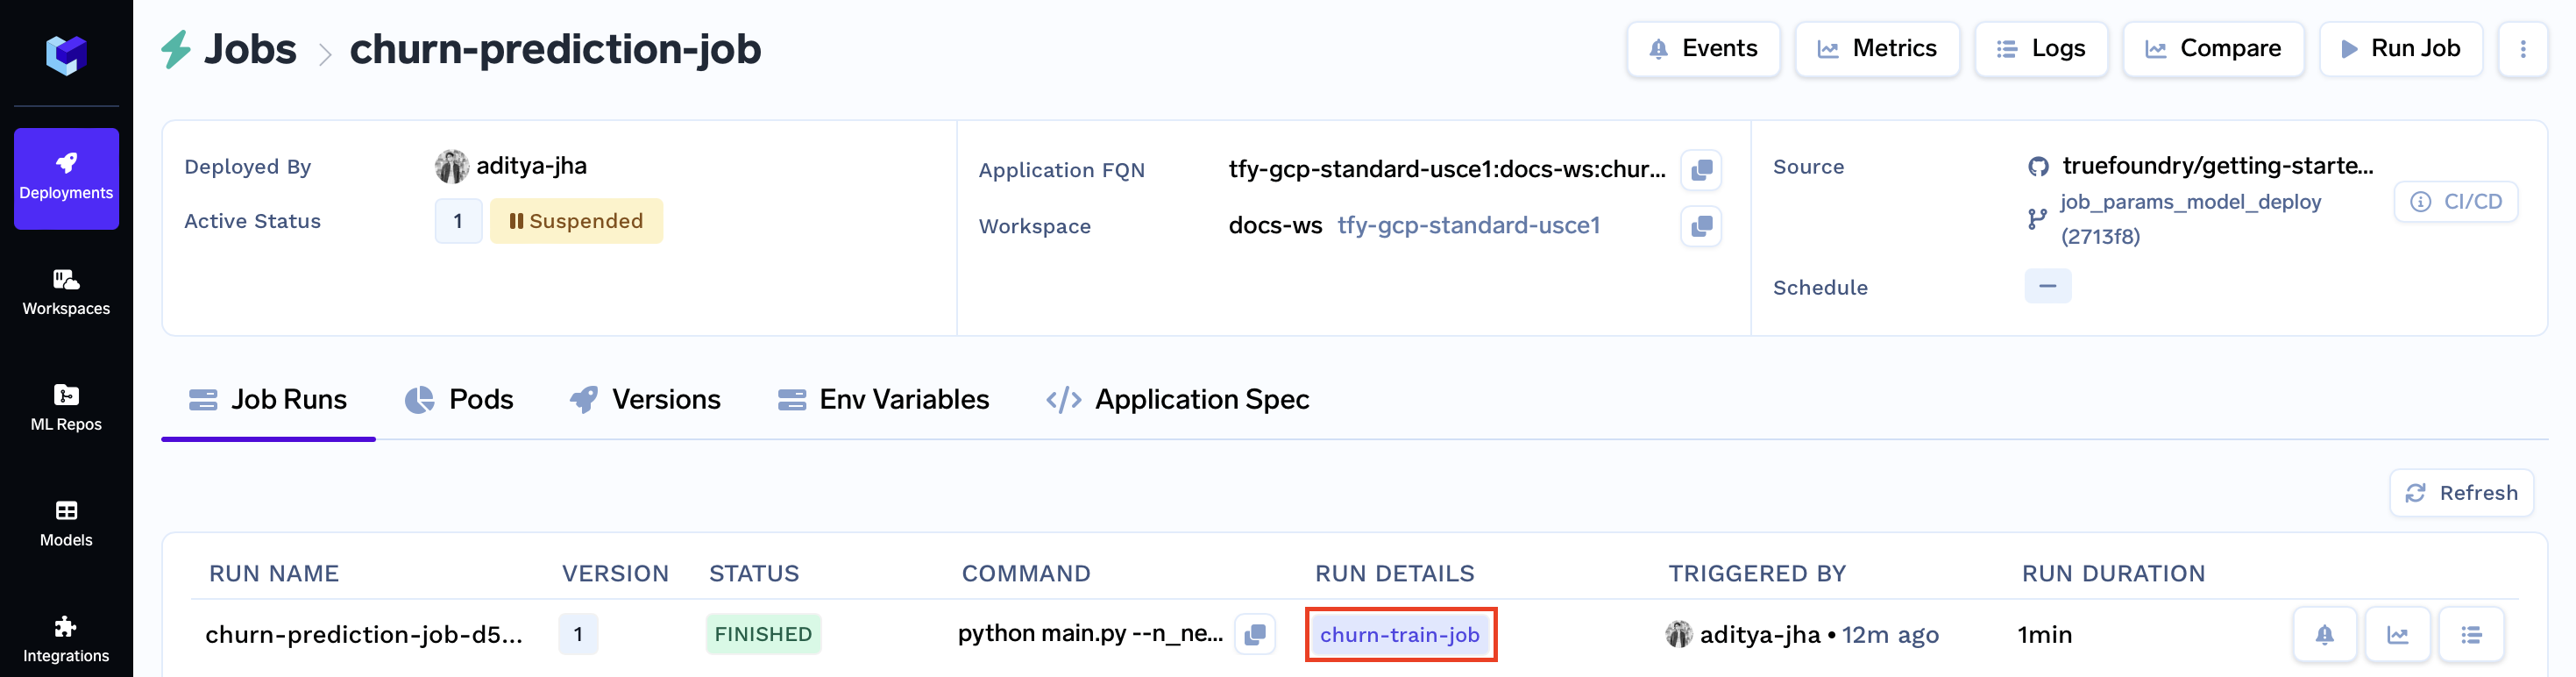
After configuring the modal, submit it using the Run Job button. This action will redirect you to the Job Runs tab. Within a few moments, your job status should switch to Finished.
Proceed by clicking on the logs button to access your job's results:

Now closing, clicking the purple churn-train-job badge will grant you access to the Key Metrics, Hyperparameters, Logged Model, and Associated Artifacts from the run.
Additional Capabilities of Jobs
Let's delve into the advanced functionalities that Jobs offer, extending beyond deployment strategies:
- Continuous Integration/Continuous Deployment (CI/CD) via Truefoundry: Integrate Jobs with Truefoundry for streamlined CI/CD pipelines, ensuring efficient code integration, testing, and deployment.
- Cron Jobs: Schedule Jobs to run at specified intervals using cron-like expressions, automating recurring tasks and processes.
- Job Parametrization: Configure Jobs with parameters, allowing you to customize execution by providing dynamic input values.
- Programmatic Job Triggers: Trigger Jobs programmatically via APIs, enabling seamless automation and integration with external systems.
- Additional Configurations: Access a range of supplementary configurations to fine-tune job behavior and optimize performance.
Updated 11 months ago