Create and Setup your account

Create your account on TrueFoundry

Step 1. Fill out the registration form

  1. To register for a TrueFoundry account please navigate to the "Create your account" page.
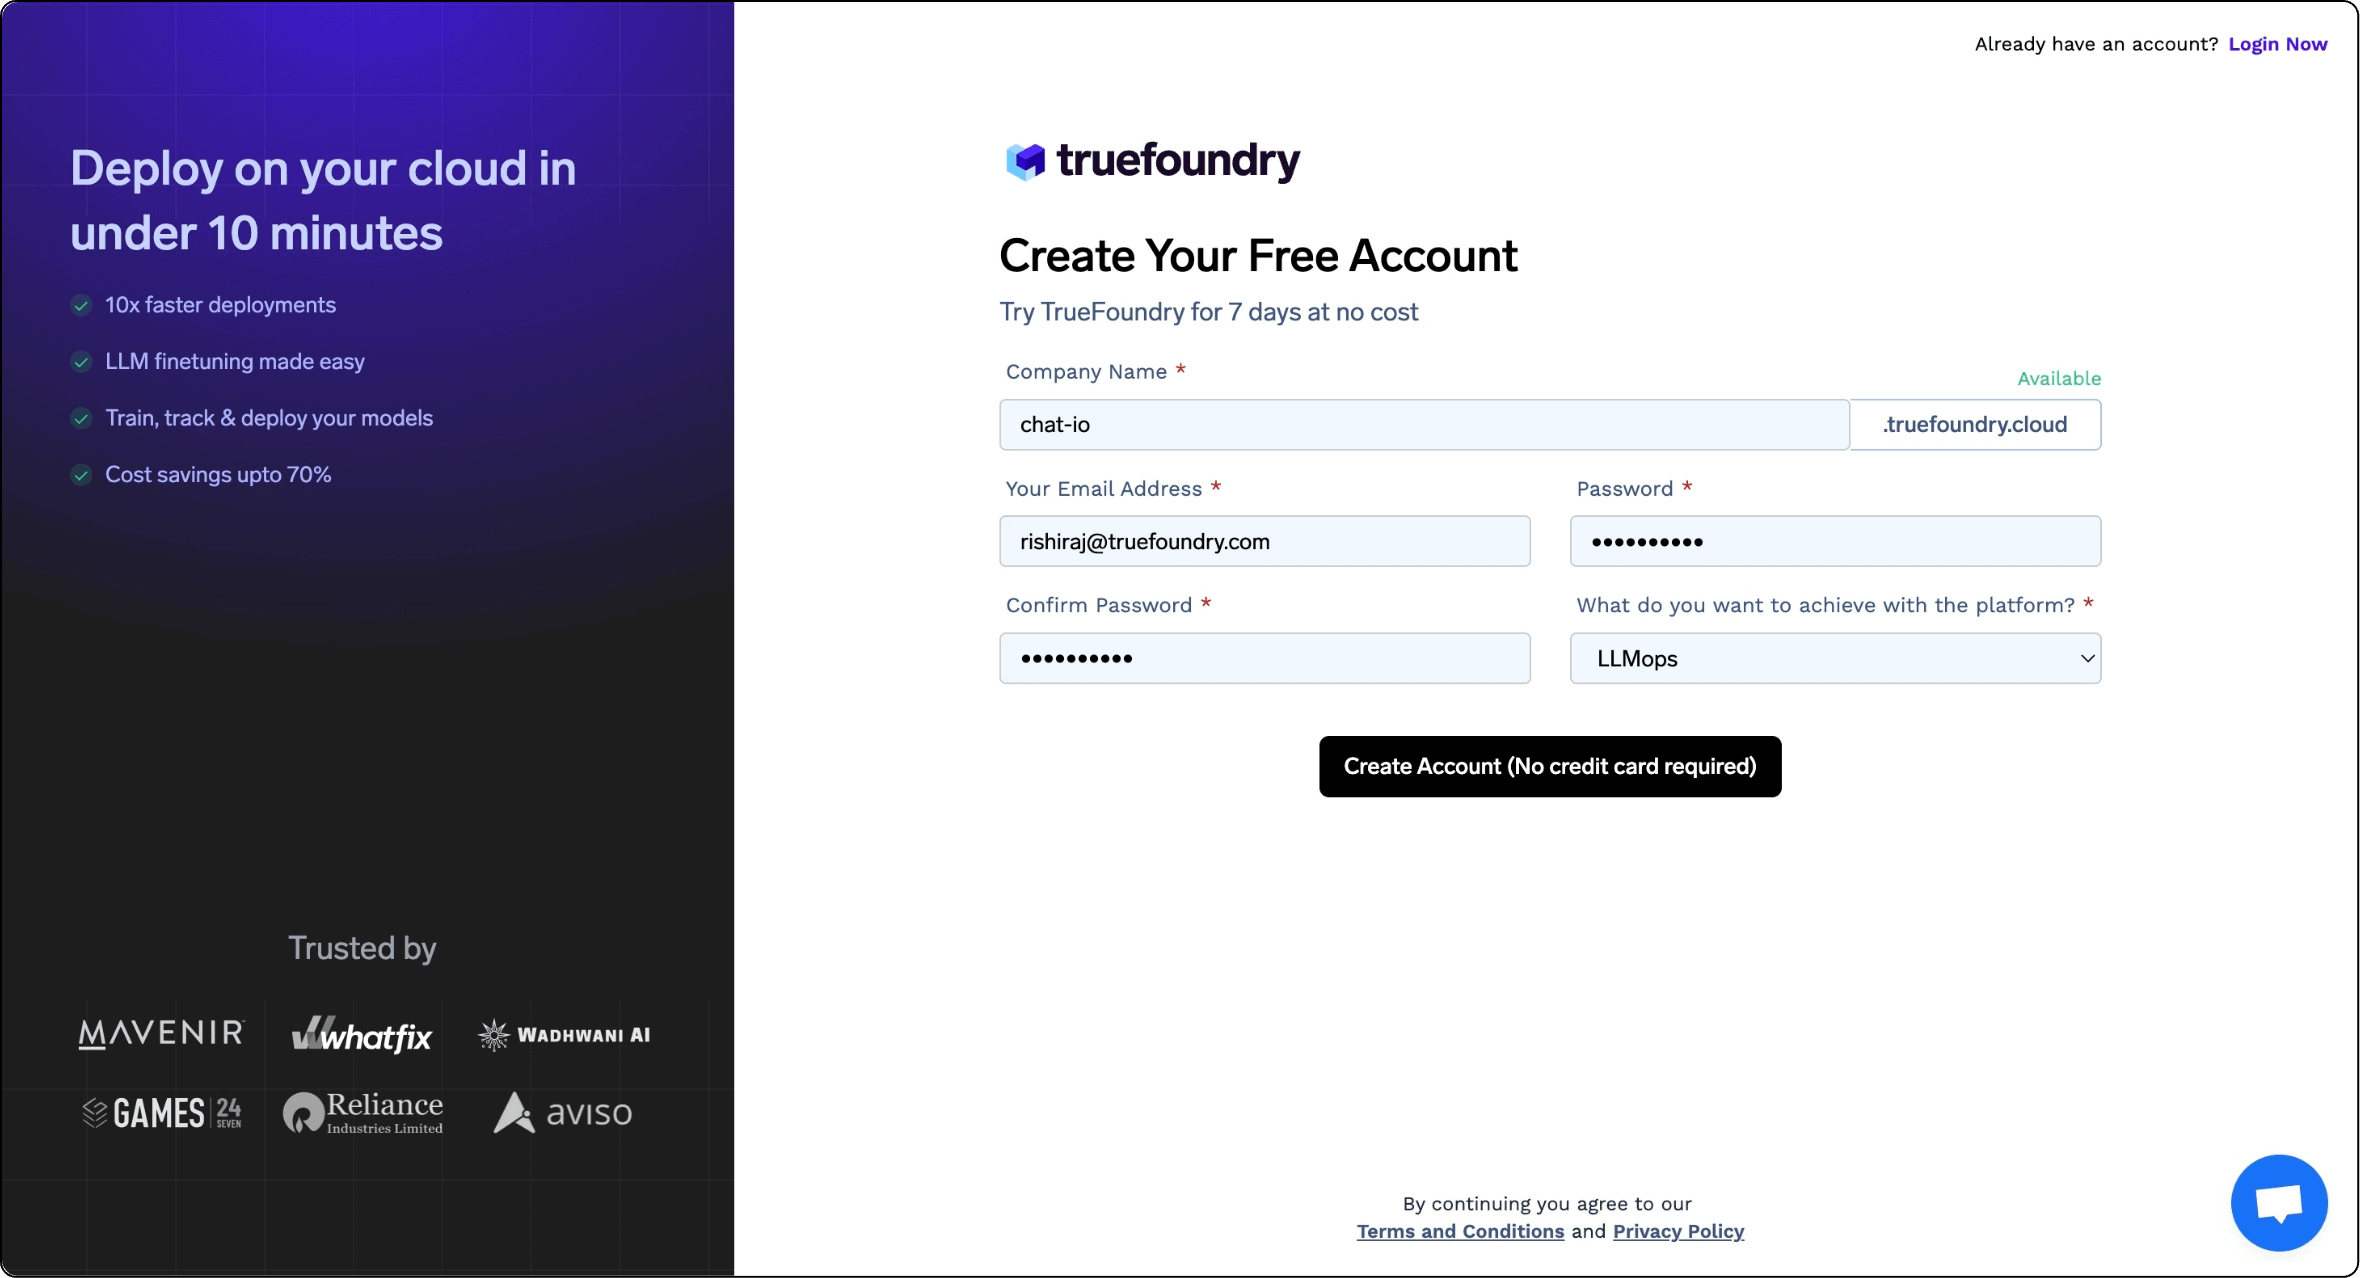
  2. In the “Create your account” form, specify your company name, work email, username, and password, and click the “Create Account” button.

Please note: The value you enter in the company name field will be used to create a unique URL that you will use to access your TrueFoundry account. For example, if you enter “chat-io” then your access URL will be “chat-io.truefoundry.cloud”

Step 2: Activate your account & login

  1. Once you fill out the form and submit it. You will receive an email to activate your account. Please open that email and click on the link. This is a mandatory step, only after activation you will be able to log in.
  2. After successful activation of your account, you will be redirected to the login page. Please enter your credentials and log in to the app.

Setup your account on TrueFoundry

Step 1: Choose the type of infrastructure for your first cluster

TrueFoundry provides you with two options for cluster setup. You can either connect your own Kubernetes cluster or you can choose to get a TrueFoundry cluster for a 14-days period with limited resources.

Connect your own clusterUse TrueFoundry’s cluster
DurationLifetime free for 1 userAvailable for 14 days
ResourcesYou can set your own cluster resourcesRAM: 8GB, CPU: 4 cores, Storage: 60GB
Ease of setupYou will need some Kubernetes knowledge to set up your own clusterNo Kubernetes knowledge required

Please note: You can connect multiple clusters across different cloud providers like AWS, GCP, Azure, or even an on-prem cluster.

Step 2: Setup & connect a cluster

Connect to a TrueFoundry-managed cluster

  1. Click on the “TrueFoundry-managed cluster” card.
  2. Enter a name that you want your cluster to have.
  3. Click on Launch Cluster and wait for your cluster to connect. It takes around 5-8 minutes to get ready.
  4. You can optionally choose to “Setup Host Domain”. This will help you put your deployments behind an Endpoint, making them easier to access and share.
  5. A docker registry is needed to store the docker image that is generated by TrueFoundry for your deployment.
    1. If you plan to deploy your code from DockerImage or a model from HuggingFace then you can skip this.
    2. If you have your code on your laptop or Git then you will need to integrate this.
  6. In the last step, you can choose to deploy a sample deployment or skip this step and deploy your code.

Connect to your own Kubernetes cluster

You should have an active Kubernetes cluster. TrueFoundry offers support for the three major cloud providers: AWS EKS, GCP GKE, and Azure AKS, as well as local clusters using kind and minikube.

For the complete range of platform features, it is recommended to use one of the three major cloud providers. Please note that kind and minikube may not support all the platform features, such as service exposure, autoscaling, GPUs, and more.

If you don't already have a Kubernetes cluster, you can quickly create one based on the cloud you are using:

  1. Create and connect an AWS EKS cluster to TrueFoundry
  2. Create and connect an Azure AKS cluster to TrueFoundry
  3. Create and connect a GCP GKE cluster to TrueFoundry
  4. Create and connect a kind cluster on a local machine to TrueFoundry (Partial feature set available)
  5. Create and connect a minikube cluster on a local machine to TrueFoundry (Partial feature set available)

If you already have a running cluster, you can simply proceed using the steps given in the platform and refer to this document

Additional setup (Optional)

  1. Environments: You can use the environments feature to tag your cluster with different environments like dev, staging, or prod. You can set up environments under the “Environment tab in Settings”. Once an environment is created you can click on edit cluster, select the environments, and hit the save button. Setup Environments
  2. Docker Registry Integration: TrueFoundry needs to access your Docker registry to save images built for deploying code or repositories and to deploy images from the registry to one of your connected workspaces. Integrate Docker Registry
  3. Git Integration: TrueFoundry needs to be able to access your Git repository to deploy source code from private git repositories to TrueFoundry. Integrate Git
  4. Blob Storage Integration: TrueFoundry needs to be able to access your blob storage to store the generated artifacts, logs, and metrics. Integrate Blob Storage
  5. Install applications: You can install additional applications on a cluster to enable new functionalities like Notebooks, Volumes, Autoscaling, Metrics, Logs, etc. On the cluster card, click on "Manage" next to "Installed Applications" to install new applications on your cluster.
  6. Add collaborators: You can invite users and create teams on TrueFoundry. These users and teams can be assigned different roles to access and perform different operations on the cluster. On the cluster card, click on the menu and then click on "Manage collaborators" to add/remove access of users and teams from your cluster.
  7. Secret Store Integration: TrueFoundry needs to be able to access your secret store to Store secrets securely. Integrate Secret Store