Cluster
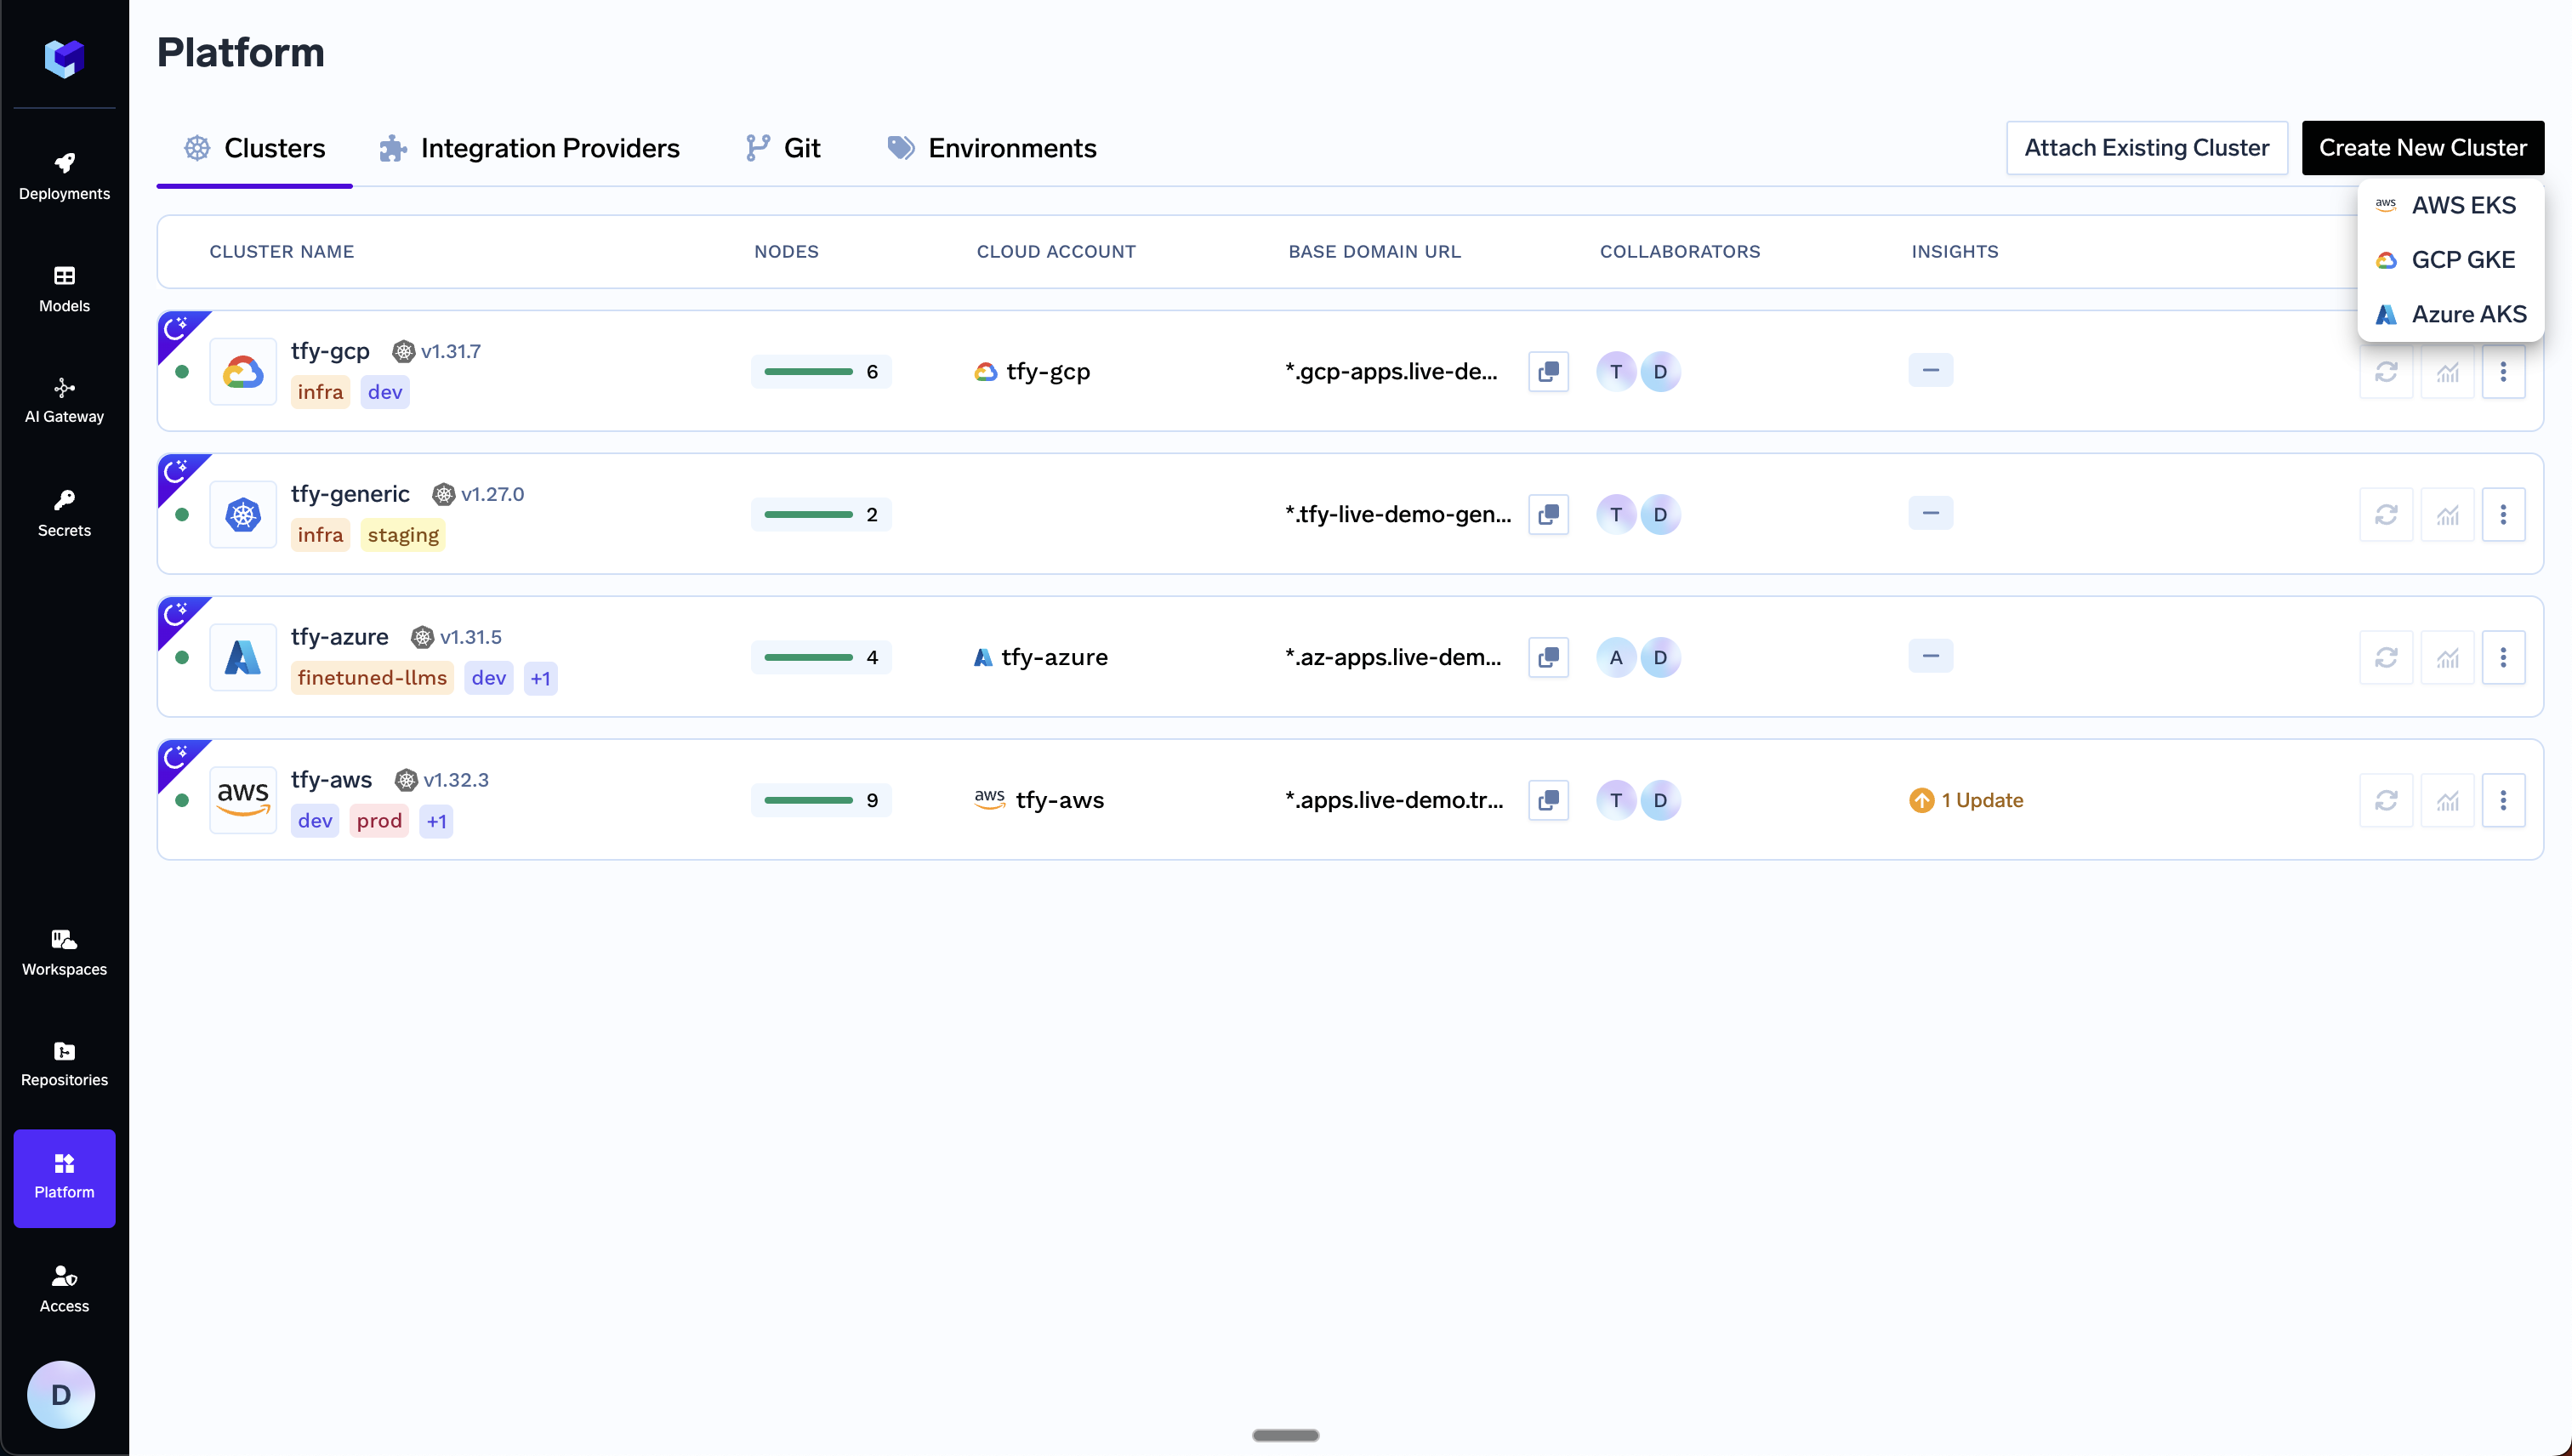
A Cluster in TrueFoundry refers to an actual Kubernetes cluster in one of your cloud accounts or on-prem.A Kubernetes cluster is a group of computers that work together to automatically run, scale, and manage your applications without you having to worry about the underlying infrastructure.
Creating / Attaching a cluster
Creating / Attaching a cluster
You can create a new Kubernetes cluster or attach an existing one from the Platform -> Cluster tab in the portal.

Workspace
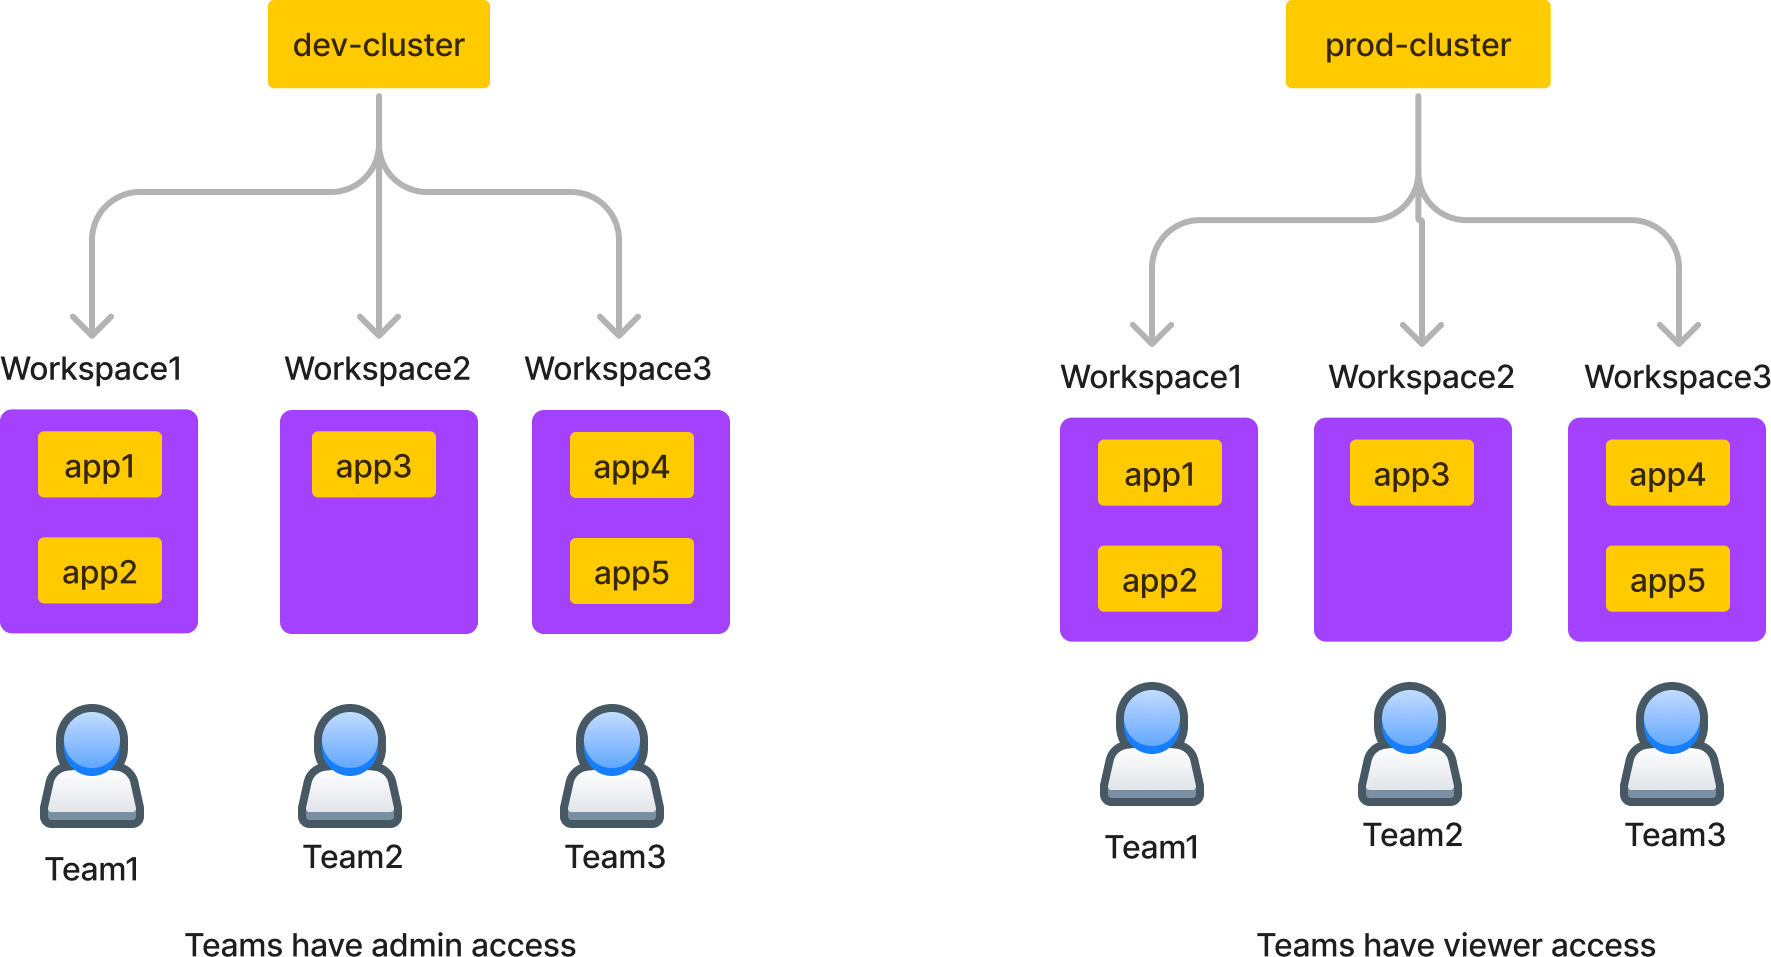
A TrueFoundry workspace refers to namespace in Kubernetes. A cluster can have multiple workspaces. Each workspace is a logical separation within a cluster so that different teams, applications, and environments can sit within a cluster. For e.g, let’s say there are three teams within a company. Team1 manages application1, application2, team2 manages application3, and team3 manages application4 and application5. Each of the applications further has three environments - dev, staging, and production. One way to organize the workspaces can be:
Creating a Workspace
Creating a Workspace
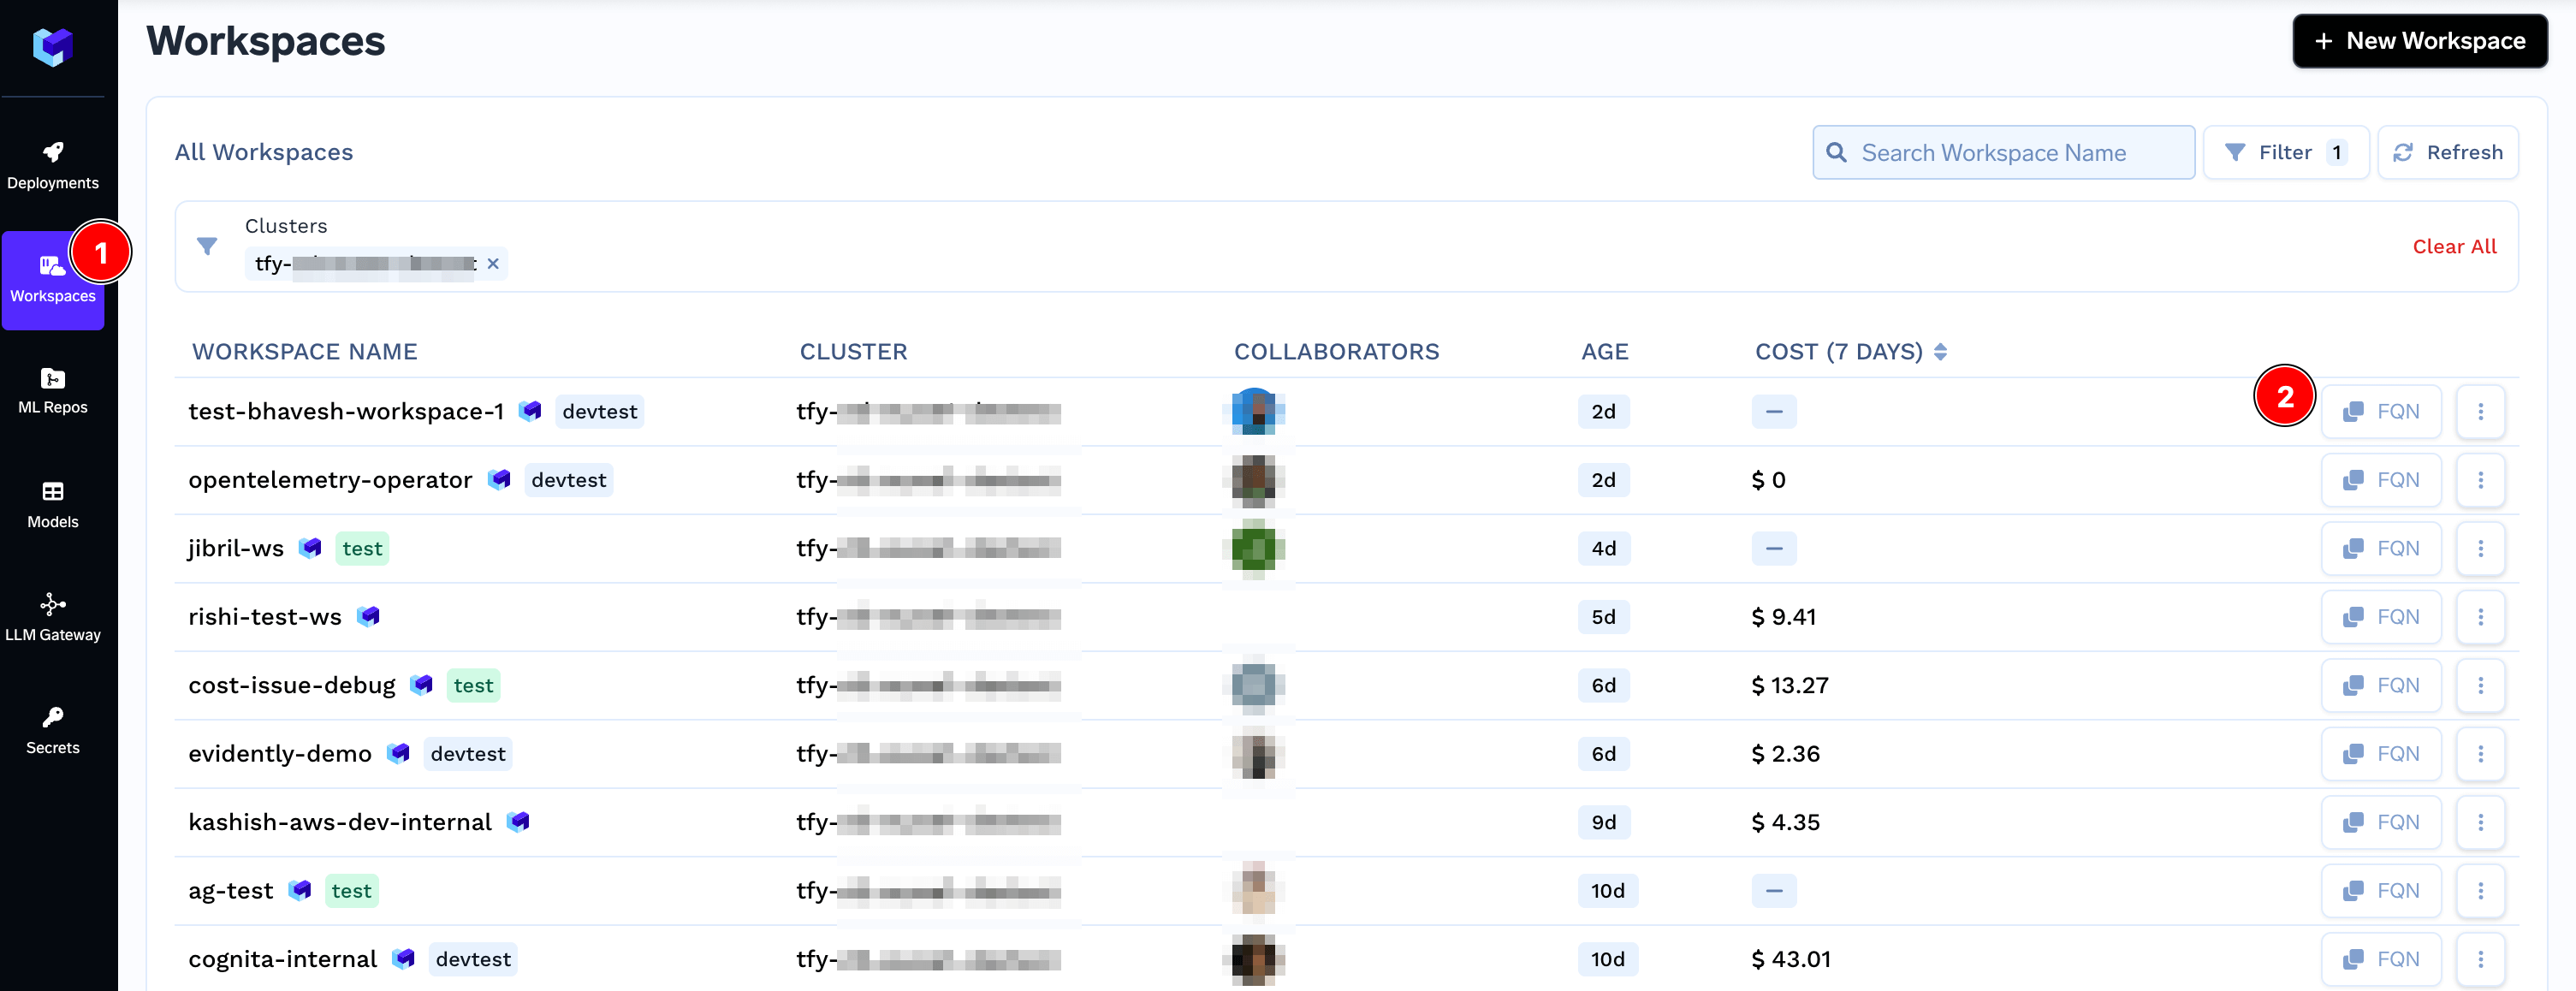
You can create a workspace from the Workspace tab in the platform. Once you create, you can get the FQN of the workspace from the FQN button.
Repositories (also called MLRepo)
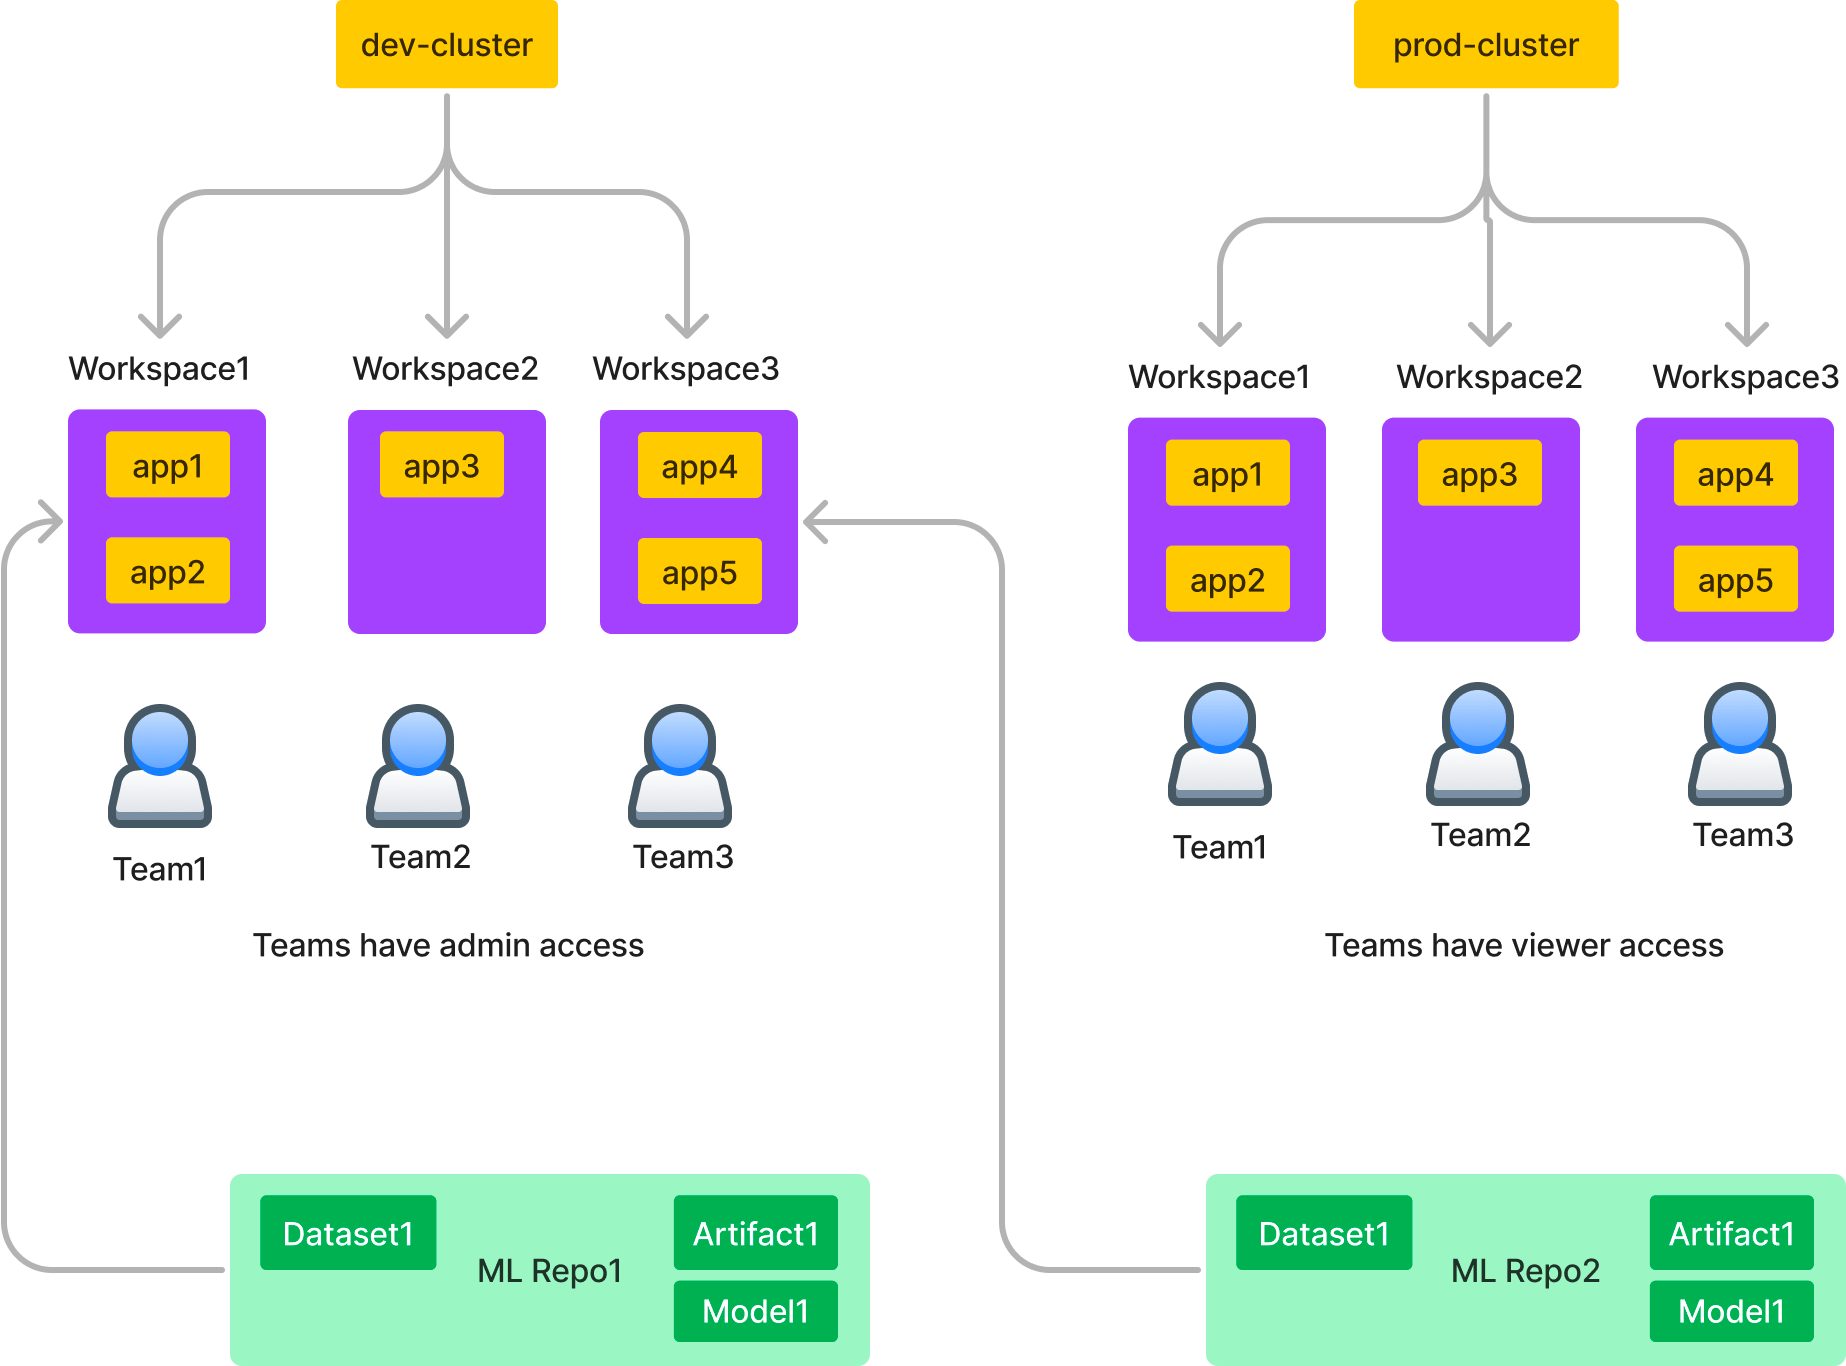
Repositories in TrueFoundry are repositories to store models, data, artifacts and prompts. They are backed by a blob storage like S3, GCS, or Minio. Like in Git repositories, you can configure access to read, or write to different users, you can similarily configure access control in TrueFoundry repositories. You can also grant access of repositories to certain workspaces. Once a workspace has access to an ML repo, all applications inside the workspace can then read or write to the MLRepo depending on whether the workspace has viewer or editor access. This way, we don’t need to inject any keys and this makes the entire system much more secure.
Creating a Repository
Creating a Repository
Prerequiste - Blob Storage Integration
Before you can create a Repository, you’d need to connect one or more Blob Storages (S3, GCS, Azure Blob, MinIO, etc) to store artifacts and models associated with a ML Repo. If this one time setup is already done, you can skip to next sectionYou can refer to one of the following pages to connect your blob storage to TrueFoundry- AWS S3
- Google Cloud Storage
- Azure Blob Storage
- Any S3 API Compatible Storage
Grant access of Repository to Workspace
Grant access of Repository to Workspace
Providing access to a certain ML Repos to a workspace ensures that every application in the Workspace gains access to that ML Repo. You can Grant access to an ML Repo to a Workspace while creating or editing a Workspace.
Environment
An environment is a tag applied to workspaces to categorize them based on factors like development stage - for example: dev, staging, production. We create three environments initially dev, staging and prod - the names of which you can change at any point of time. A cluster can be associated to multiple environments but a workspace can only be associated to one environment. For each environment, you will need to define its for production and if it needs to be optimized for cost or availability. These settings are used to power the recommendations to improve your applications.Creating an environment
Creating an environment
To create an environment in TrueFoundry, follow these steps:
Attach an environment to a cluster and workspace
Attach an environment to a cluster and workspace
To tag a workspace with an environment, first, the Cluster where the workspace resides needs to have those environments added.
For this, you will have to add all environments relevant to your cluster (one cluster can have multiple environments) in the cluster, using the instructions provided below.
Now all your applications deployed within that specific workspace will have the environment of the workspace show up beside them.
FQN
FQN stands for Fully Qualified Name and is a more human-readable version of the id in the TrueFoundry platform. Every entity - be it a cluster, workspace, respository, secret, model has a FQN. You can copy the FQN from the UI for every entity.Get Workspace FQN
Get Workspace FQN
In the Workspace section, locate your workspace and then click the FQN button on the right side to copy the FQN to your clipboard
