The notebook will go live in a few minutes. It takes a few minutes since the image will need to be downloaded on the machine first. Once the notebook becomes live, you will see the status turn to Running and an endpoint will start showing up. Clicking on the endpoint will take you to the Jupyter Notebook.

Stop and resume your notebook
When you’re done working with a notebook instance, you can stop it to conserve resources and reduce costs. Clicking on the Stop button shuts down the notebook instance environment and releases associated resources.
Configure your Notebook
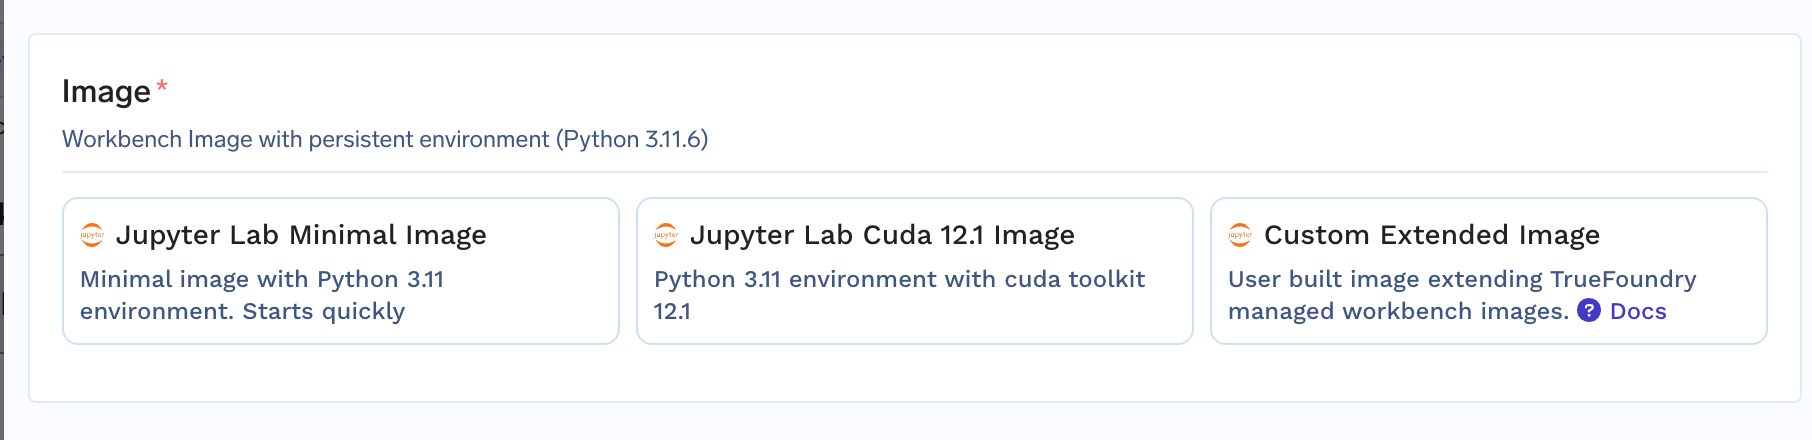
In the notebook creation form, you can configure the following options:Image
When creating a Jupyter Notebook, you can choose between three image options:- Minimal Image: A lightweight image with no pre-installed packages, providing a clean slate for customization and package installation.
- Cuda 12.1 Image: A pre-configured image with Cuda 12.1 pre-installed
- Custom Extended Image: You can extend an Image created by truefoundry and add your custom packages to it. You can read about extended images here.
Auto Shutdown on Inactivity
By default, Notebook instances are configured to automatically stop after 30 minutes of inactivity. This helps prevent unnecessary resource consumption when Notebook instances are left idle. You can change the Stop After (minutes of inactivity) setting within the deployment form.Install Apt packages in the notebook
By default anything you install outside of home directory will NOT be persistent across notebook restarts. This means all apt installs (done directly from notebook) will NOT be persistent across restarts of notebook. To make these apt packages persistent across restarts, you can add a “Build Script” in the notebook as follows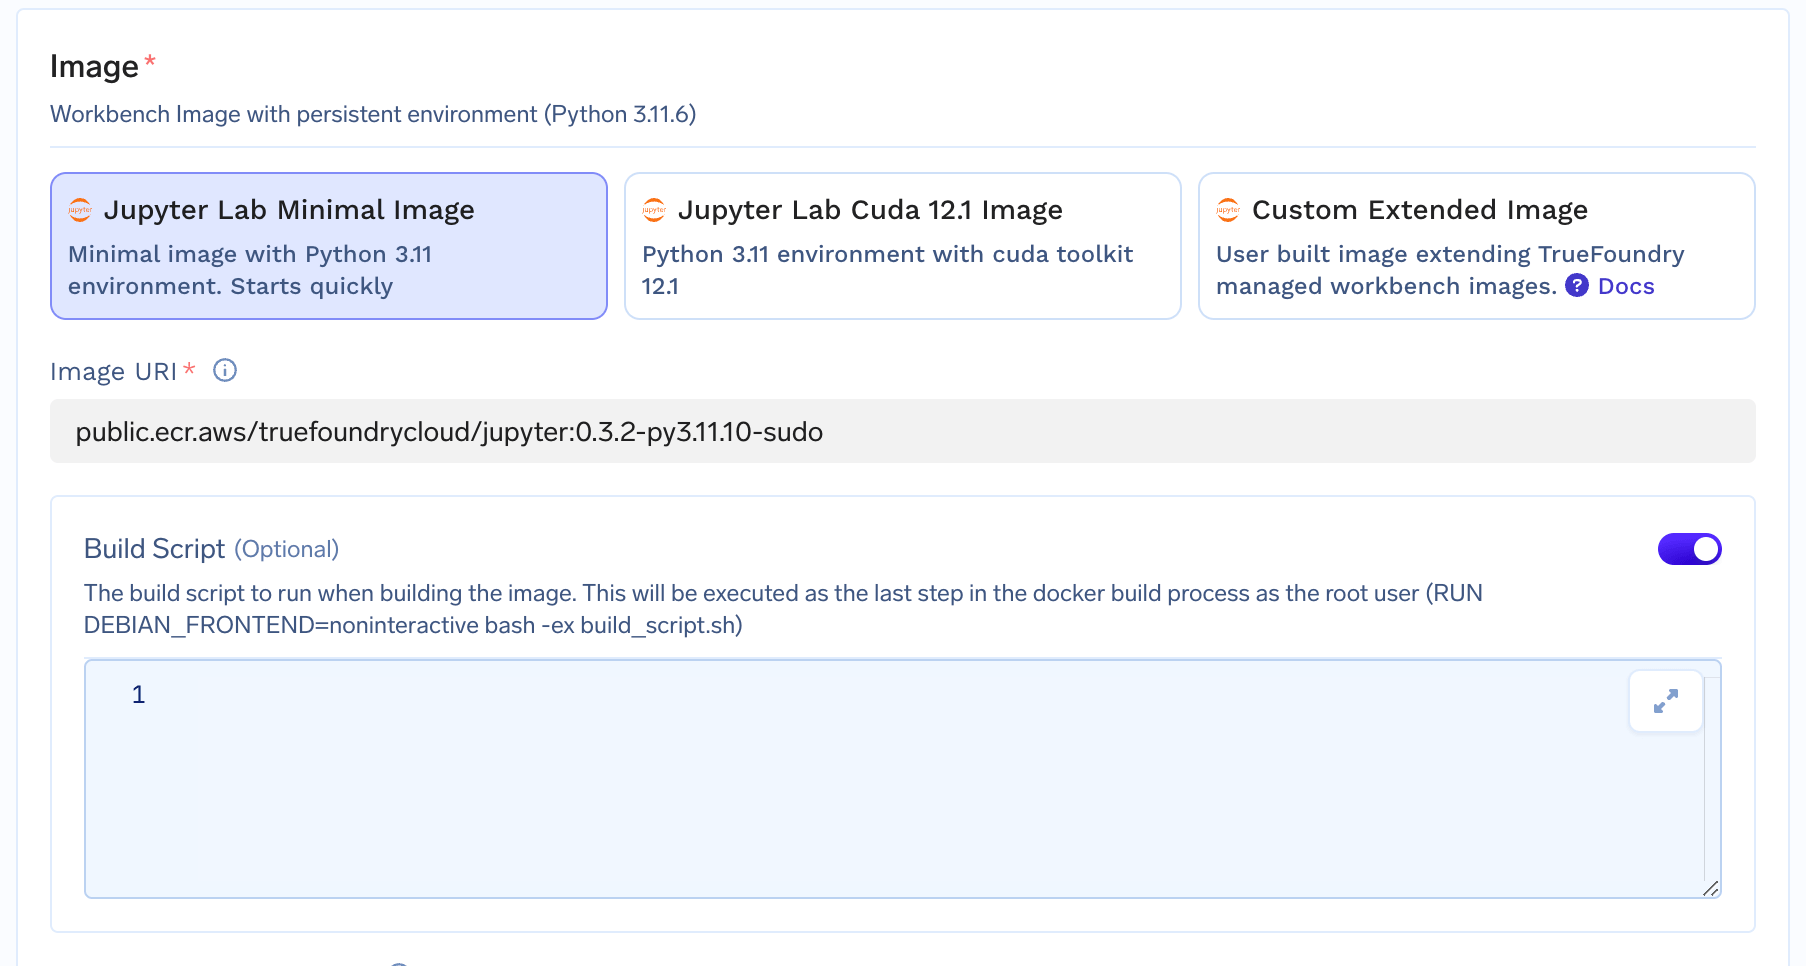
Storage Size
Specify the amount of storage space you require for your notebook instance. This is persistent storage that will be used to store your notebook files, data, and any other artifacts generated during your work.Set resources for your Notebook
Define the computational resources allocated to your notebook instance. You can adjust the CPU and memory allocation to meet the requirements of your data science tasks.Running a Notebook instance with GPU
In case you want to use GPU in your Notebook Instance, you can follow these steps:
Upon successful deployment, your GPU Notebook instance instance will be provisioned with the specified GPU type. You can then utilize the GPU resources to accelerate your computations, such as training deep learning models or running GPU-intensive workloads.
Access data from S3 or other clouds
In some instances, your Jupyter Notebooks may need to access data stored in S3 or other cloud storage platforms. To facilitate this access, you can employ one of two approaches:Credential-Based Access through environment variables
This approach involves defining specific environment variables that contain the necessary credentials for accessing the cloud storage platform. For instance, to access S3, you would set environment variables for the AWS access key ID and secret access key, the environment variables being:AWS_ACCESS_KEY_ID and AWS_SECRET_ACCESS_KEY
IAM Role-Based Access through Service Account
The second approach is to provide your Notebook with a Role with the necessary permission through Service Accounts. Service Accounts provide a streamlined approach to managing access without the need for tokens or complex authentication methods. This approach involves creating a Principal IAM Role within your cloud platform, granting it the necessary permissions for your project’s requirements. Here are detailed guides for creating Principal IAM Roles in your respective cloud platforms and integrating them as Service Accounts within the workspace:- AWS: Authenticate to AWS services using IAM service account
- GCP: Authenticate to GCP using IAM serviceaccount
Show Advanced Fields option at the bottom of the form. This will reveal an expanded set of options, from which you can select the desired Service Account using the provided dropdown menu.

Access data in volume from the notebook
Mounting a volume to a notebook allows you to access data stored on the volume from within the notebook environment. This can be useful for a variety of tasks, such as loading data for analysis, training machine learning models, and deploying applications. You can follow these steps for mounting a volume to the notebook:
Once mounted, in your Notebook you will be able to access the data in your Volume from within the Notebook

Configuring Python Environments Inside a Notebook
Truefoundry’s Deployed Notebooks by default start with a conda environment with Python Version = 3.11. In case you are working on several projects simultaneously, and you want to maintain multiple Python environments for different Python versions / different sets of tasks. You can do so by following these steps:
Command to be executed:
Launching Jupyter Notebook with Custom Images
Instead of using the pre-built Jupyter Lab Images provided by TrueFoundry, you have the flexibility to create and deploy your custom images. This allows you to pre-install specific libraries, tools, and configurations within your notebook environment, tailoring it to your specific needs and project requirements. To create a custom image, start by using the TrueFoundry Jupyter Notebook Image as a base. Below are the docker images TrueFoundry uses to support Jupyter base and Jupyter full notebooks.| Image URI | Size | Jupyter Lab | CUDA 12.4 Toolkit |
|---|---|---|---|
tfy.jfrog.io/tfy-images/jupyter:0.4.1-py3.11.10-sudo | ~1 GB | ✅ | |
tfy.jfrog.io/tfy-images/jupyter:0.4.1-cu124-py3.11.10-sudo | ~6 GB | ✅ | ✅ |
ffmpeg and a few pip packages like gradio. We will create a new Dockerfile using these existing images as the base and push to a registry for later use.
Example: Installing CUDA 11.8 and cuDNN 8
Git Login Instructions for JupyterLab Users
Git integration is already installed for you via the JupyterLab Git extension. This guide outlines how to configure Git and authenticate using two recommended methods. You can access the extention from the left panel or menu bar from the top as shown below. You can clone your repository directly from this extention or via terminal.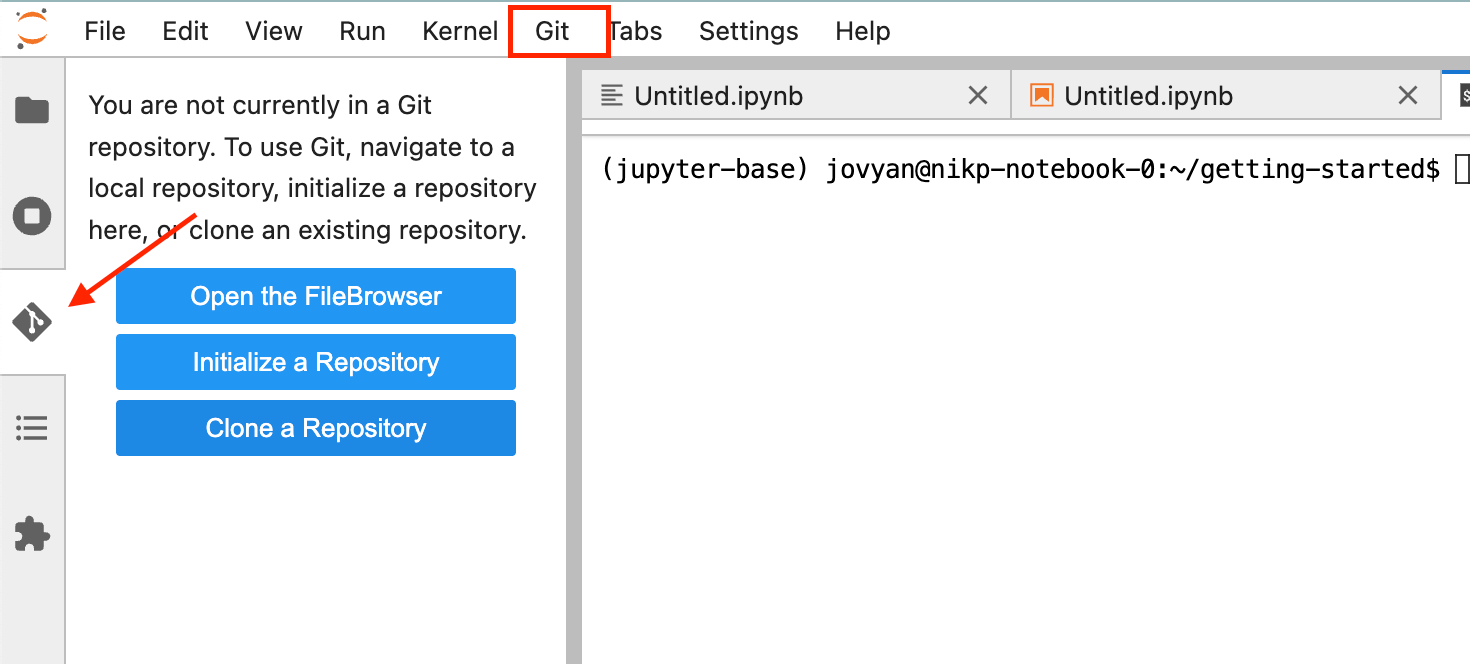
Option 1: Personal Access Token (Recommended for GitHub/GitLab)
GitHub and GitLab have deprecated password authentication. Personal Access Tokens (PATs) are the most secure and recommended way. Steps:- Generate a Token:
- For GitHub: https://github.com/settings/tokens
- For GitLab: https://gitlab.com/-/profile/personal_access_tokens
- Scope: Select at least repo or read/write permissions
- Clone or Pull a Repository: Use the Git extension in JupyterLab or the terminal:
- Authenticate: When prompted for a username/password, paste your username in the username section and “token” in password section
Option 2: SSH Key Authentication
Use SSH for password-less authentication after one-time setup. Follow platform-specific instructions to generate and add your SSH key:- GitHub SSH Help: https://docs.github.com/en/authentication/connecting-to-github-with-ssh
- GitLab SSH Guide: https://docs.gitlab.com/user/ssh/