How to find your SSH Public Key?
Your SSH public key is typically stored in the~/.ssh/ directory on your local machine. Look for a file ending in .pub, which contains the public key. For example:
id_rsa.pub(default key)
type $home\.ssh\id_rsa.pub( windows powershell)
For Mac/Linux: cat ~/.ssh/id_rsa.pub
Creating a New SSH Key Pair
If you don’t have an SSH Key Pair. You can generate one using the command:Installing ProxyTunnel
To installproxytunnel , follow the steps below for your Operating System:
Windows
Open PowerShell and run the following command:MacOS
Ubuntu
Other Linux Distros
Findproxytunnel in your package manager respositoriesOr Build from Source: https://github.com/proxytunnel/proxytunnel
Connect Local VS Code with SSH
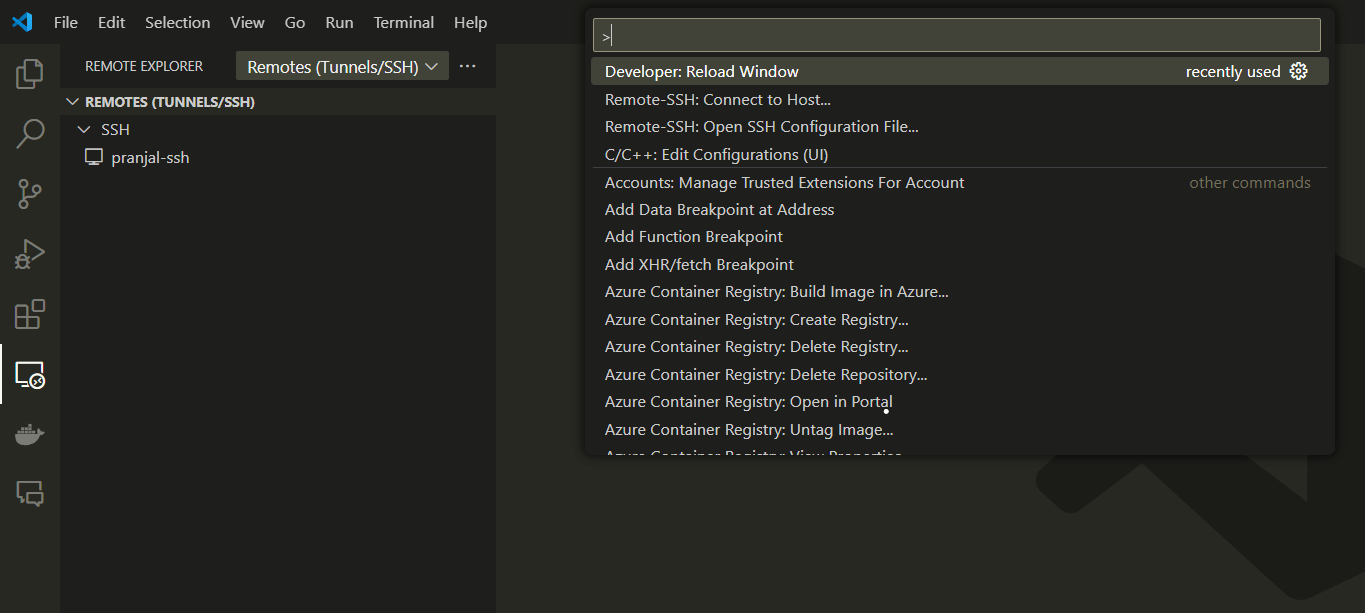
To connect Visual Studio Code to a remote SSH server, follow these steps:- Install the extension: Remote-SSH
- After installing the extension, reload VS Code to ensure all changes are applied.
- Once VS Code reloads, you’ll see a new icon labeled
Remote Explorerin the activity bar on the left side. Click on this icon to manage your SSH connections. - Enter your password or passphrase to complete the connection.

Adding more users to SSH Server
To add more users to the SSH Server. You need to add the SSH keys to the users to themkdir -p /home/jovyan/.ssh/authorized_keys
Copying Files from SSH Server to Local Machine
To copy files from an SSH server to your local machine, use the following command in PowerShell. Make sure to update the placeholders with the correct values for your environment.<deploymentName>: The name of the SSH server on the platform<remote-file-path>: The path to the file or directory on the SSH server that you want to copy. <local-file-path>: The destination path on your local machine where you want to save the copied file.
Copying Files from Local Machine to SSH Server
To copy files from your local machine to an SSH server, use the following command in PowerShell. Make sure to update the placeholders with the correct values for your environment.<deploymentName>: The name of the SSH server on the platform<remote-file-path>: The destination path on the SSH server where you want to save the copied file. <local-file-path>: The path to the file or directory on your local machine that you want to copy.
Using rsync to Copy Files Between Local Machine and SSH Server
rsync is a tool for synchronizing files and directories between a local machine and a remote server via SSH. It only transfers the changes made to files, making it efficient for backups and file synchronization.
Copying Files from Local Machine to SSH Server
To copy files from your local machine to an SSH server usingrsync, use the following command:
<deploymentName>: The name of the SSH server on the platform<remote-file-path>: The path to the file or directory on the SSH server that you want to copy. <local-file-path>: The destination path on your local machine where you want to save the copied file.
- The
-aflag enables archive mode, preserving file permissions and timestamps. - The
-vflag enables verbose output, so you can see the progress of the transfer. - The
-zflag enables compression during transfer, which can speed up the process for larger files.
Copying Files from SSH Server to Local Machine
To copy files from an SSH server to your local machine usingrsync, use the following command:
<deploymentName>: The name of the SSH server on the platform<remote-file-path>: The path to the file or directory on the SSH server that you want to copy. <local-file-path>: The destination path on your local machine where you want to save the copied file.
- The
-aflag enables archive mode, preserving file permissions and timestamps. - The
-vflag enables verbose output, so you can see the progress of the transfer. - The
-zflag enables compression during transfer, which can speed up the process for larger files.
Create More Python Environments
You can create python version with the following commands:Install Apt packages in the SSH Server
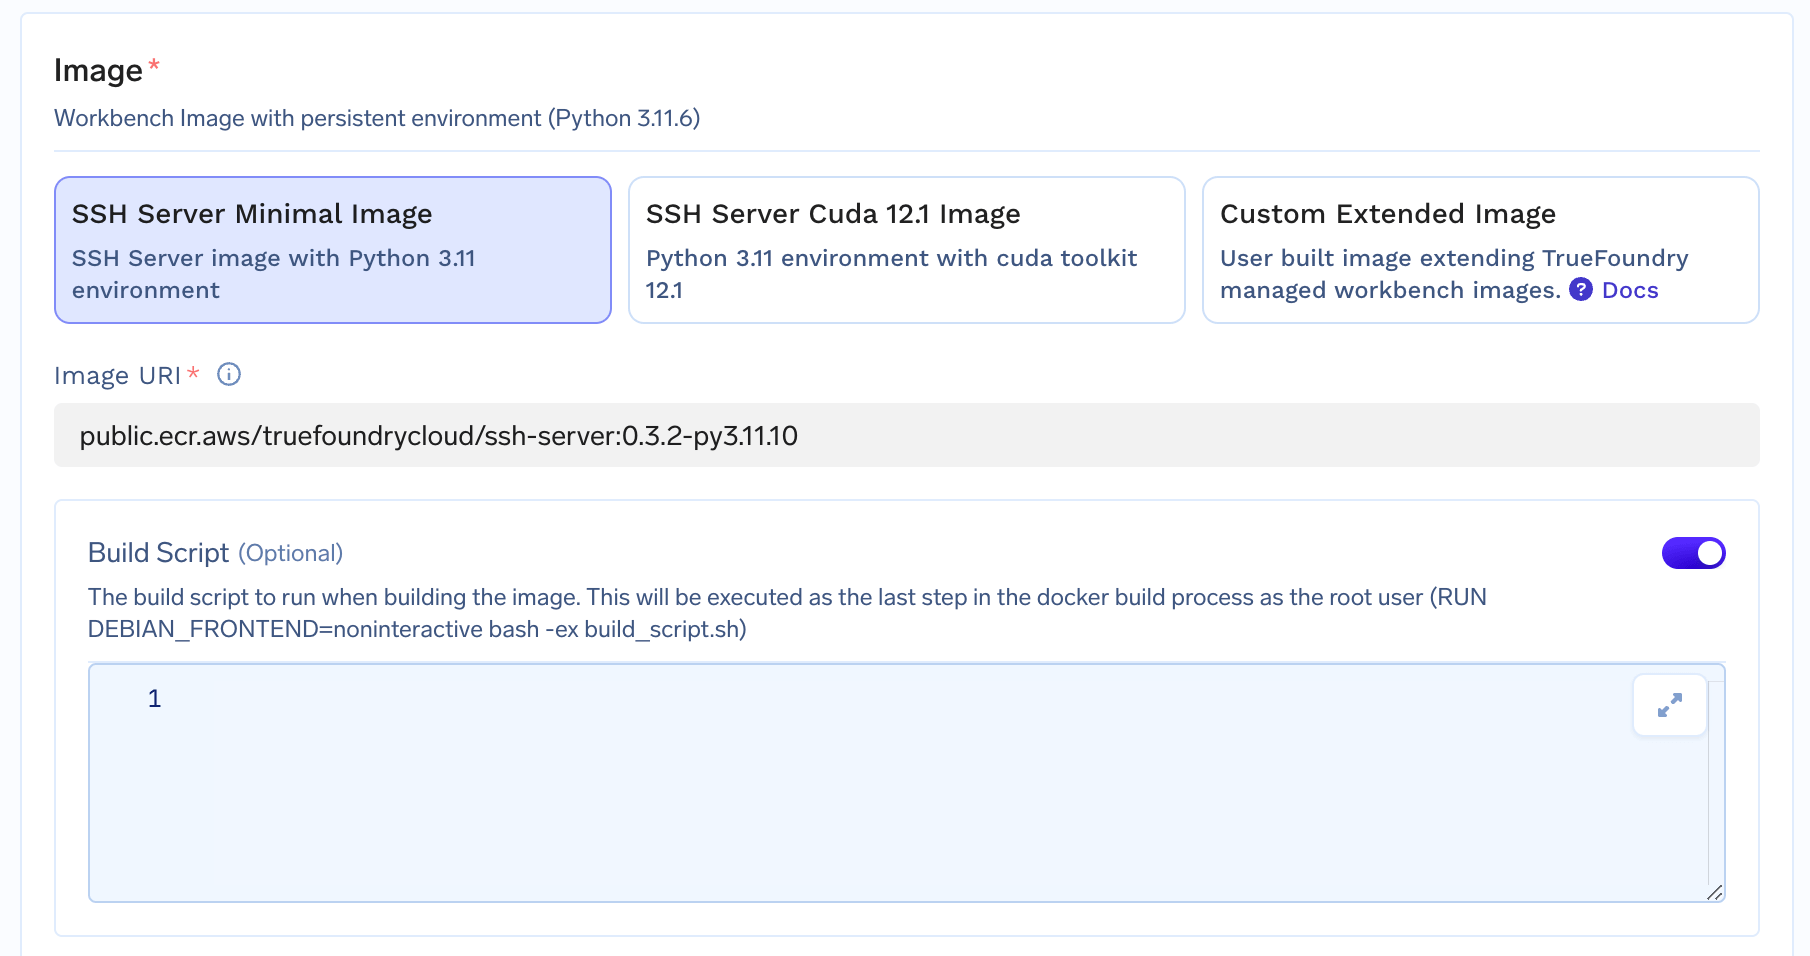
By default anything you install outside of home directory will NOT be persistent across notebook restarts. This means all apt installs (done directly from notebook) will NOT be persistent across restarts of notebook. To make these apt packages persistent across restarts, you can add a “Build Script” in the notebook as follows
Setting up the scale to zero
- You can now set up the scale to zero feature for the SSH server to stop the server after X minutes of inactivity.
- You can add this by setting the value of Stop after field which is the minutes of inactivity after which you want to stop the server.

- An active SSH connection(including connection to vscode).
- Any application or service running in the foreground.
- The applications running(both background and foreground) in tmux or screen session.
- Applications running in the background in SSH server.