Integrations section of your truefoundry dashboard, and go to the Git section.
In the git integrations, we currently have three types of integrations:
Github
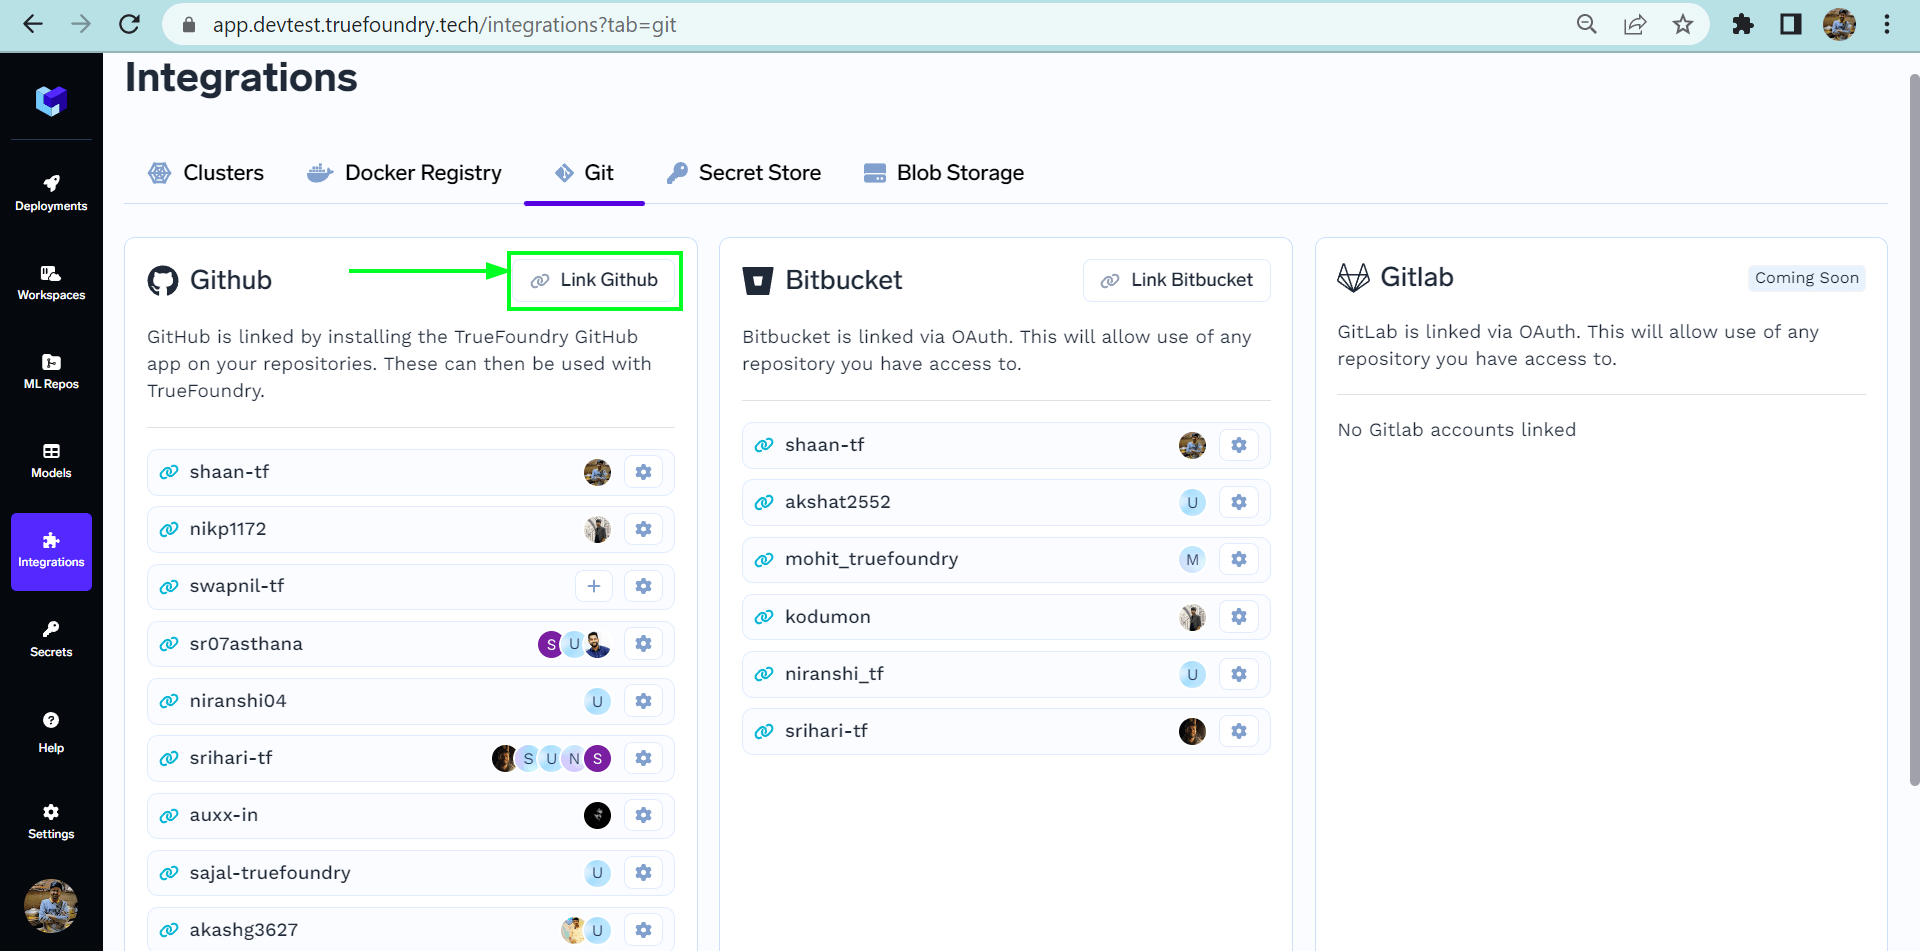
GitHub is linked by installing the TrueFoundry GitHub app on your repositories. These can then be used with TrueFoundry. We can easily link our Github account in few steps as mentioned below:- Click on the
Link Githubbutton present in the top right corner of the Github tab for linking your Github account as shown below:
- Now a pop-up window will appear asking where to install Github app as shown below:
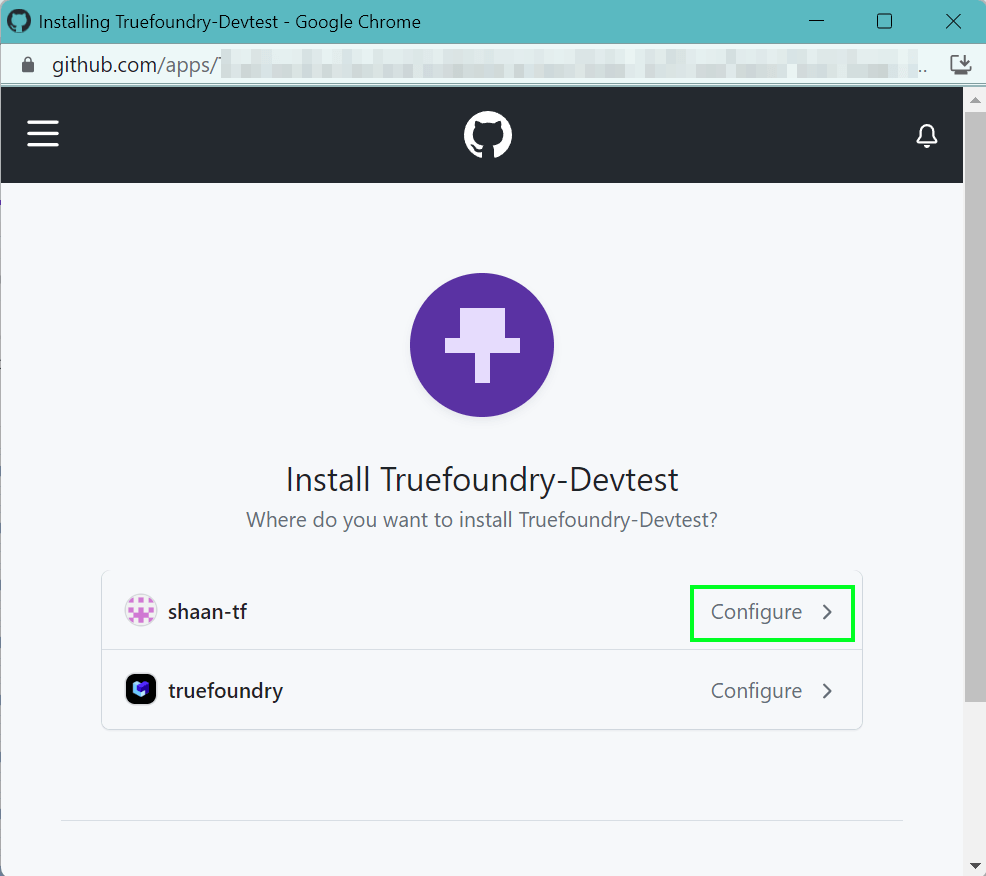
- Now click on
configurewhere you want to install the app. Then it will ask for permissions from your github account as shown below:
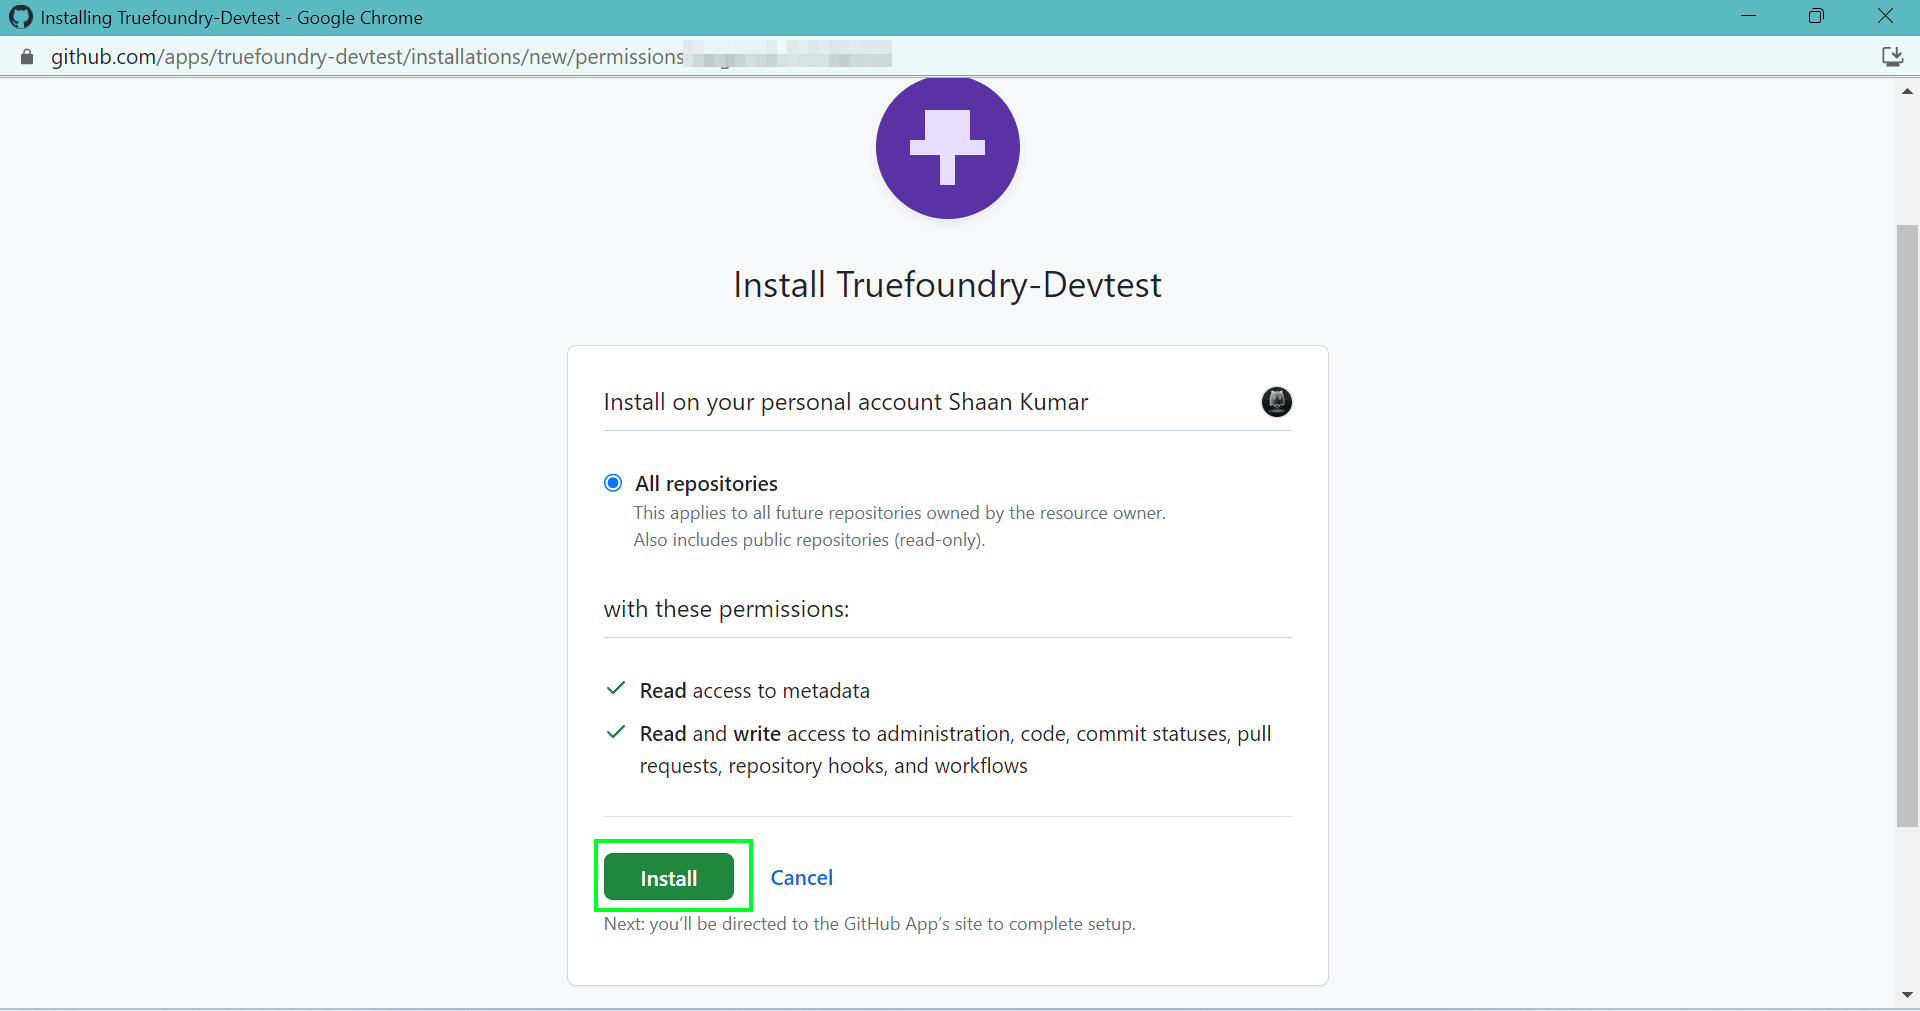
- Now, by clicking on
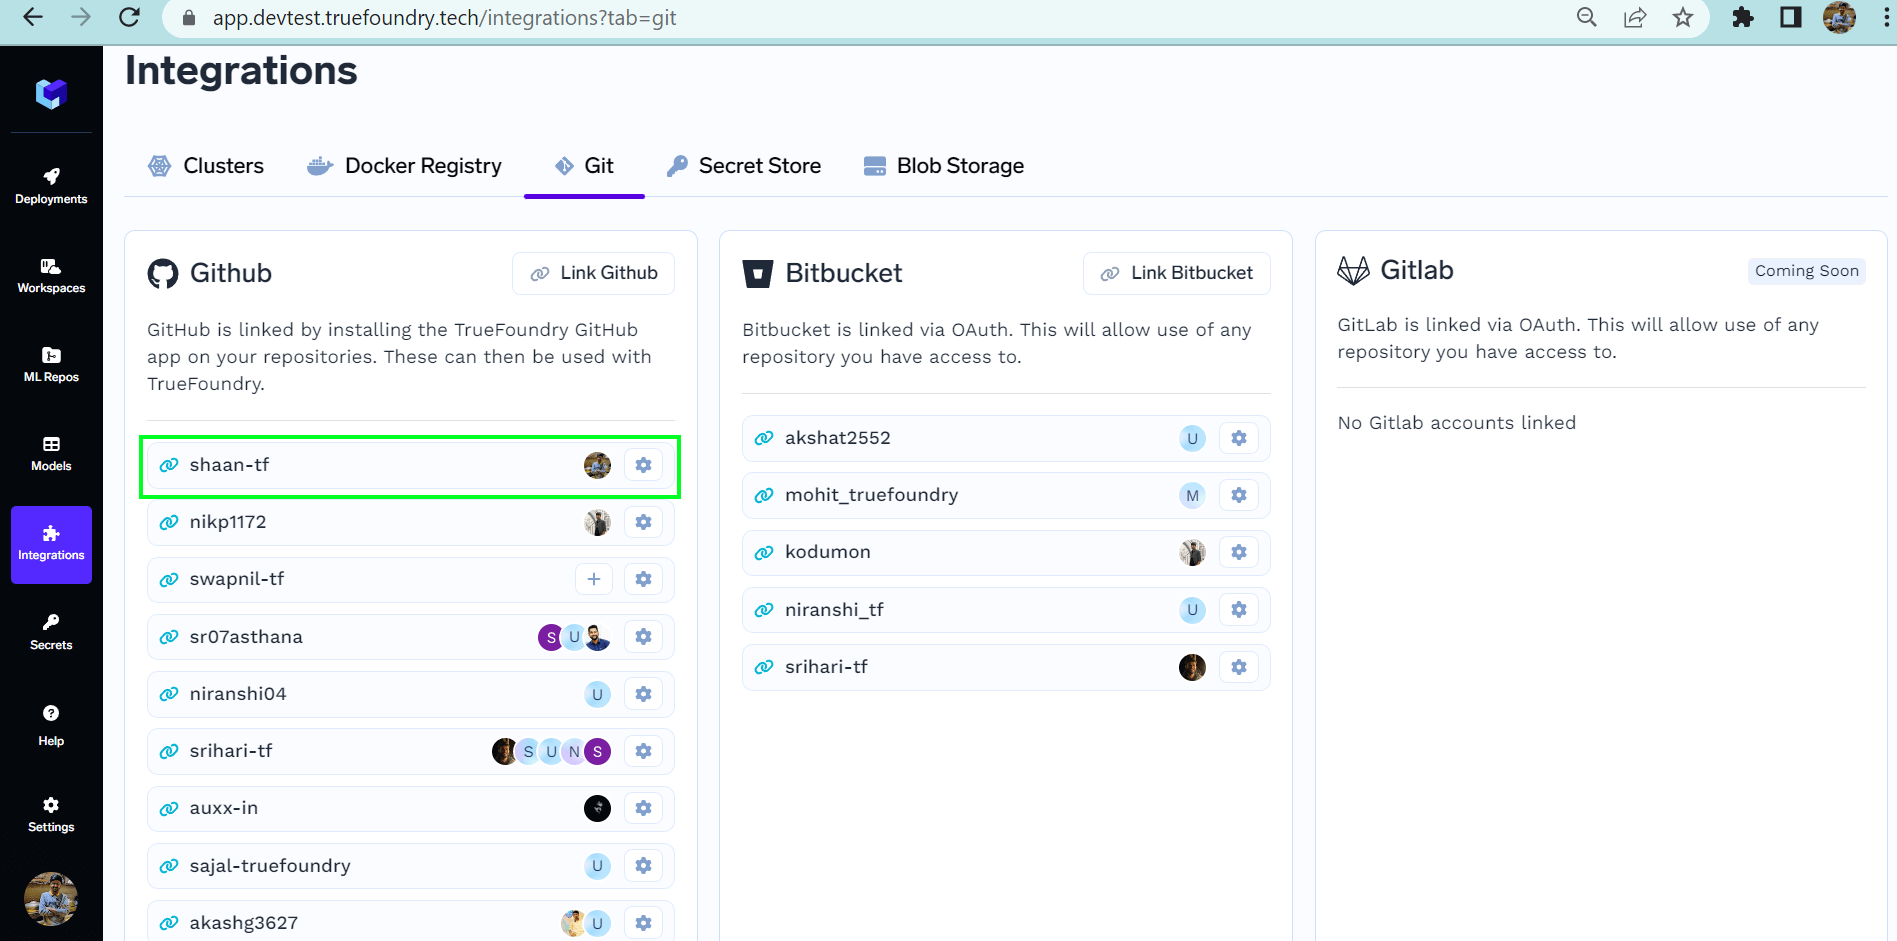
installbutton, the app will get installed on your account. You will now be able to see your account on the dashboard as shown below:
- You can also see the connected repositories of your account by clicking on
⚙️button on the right side of that particular account.
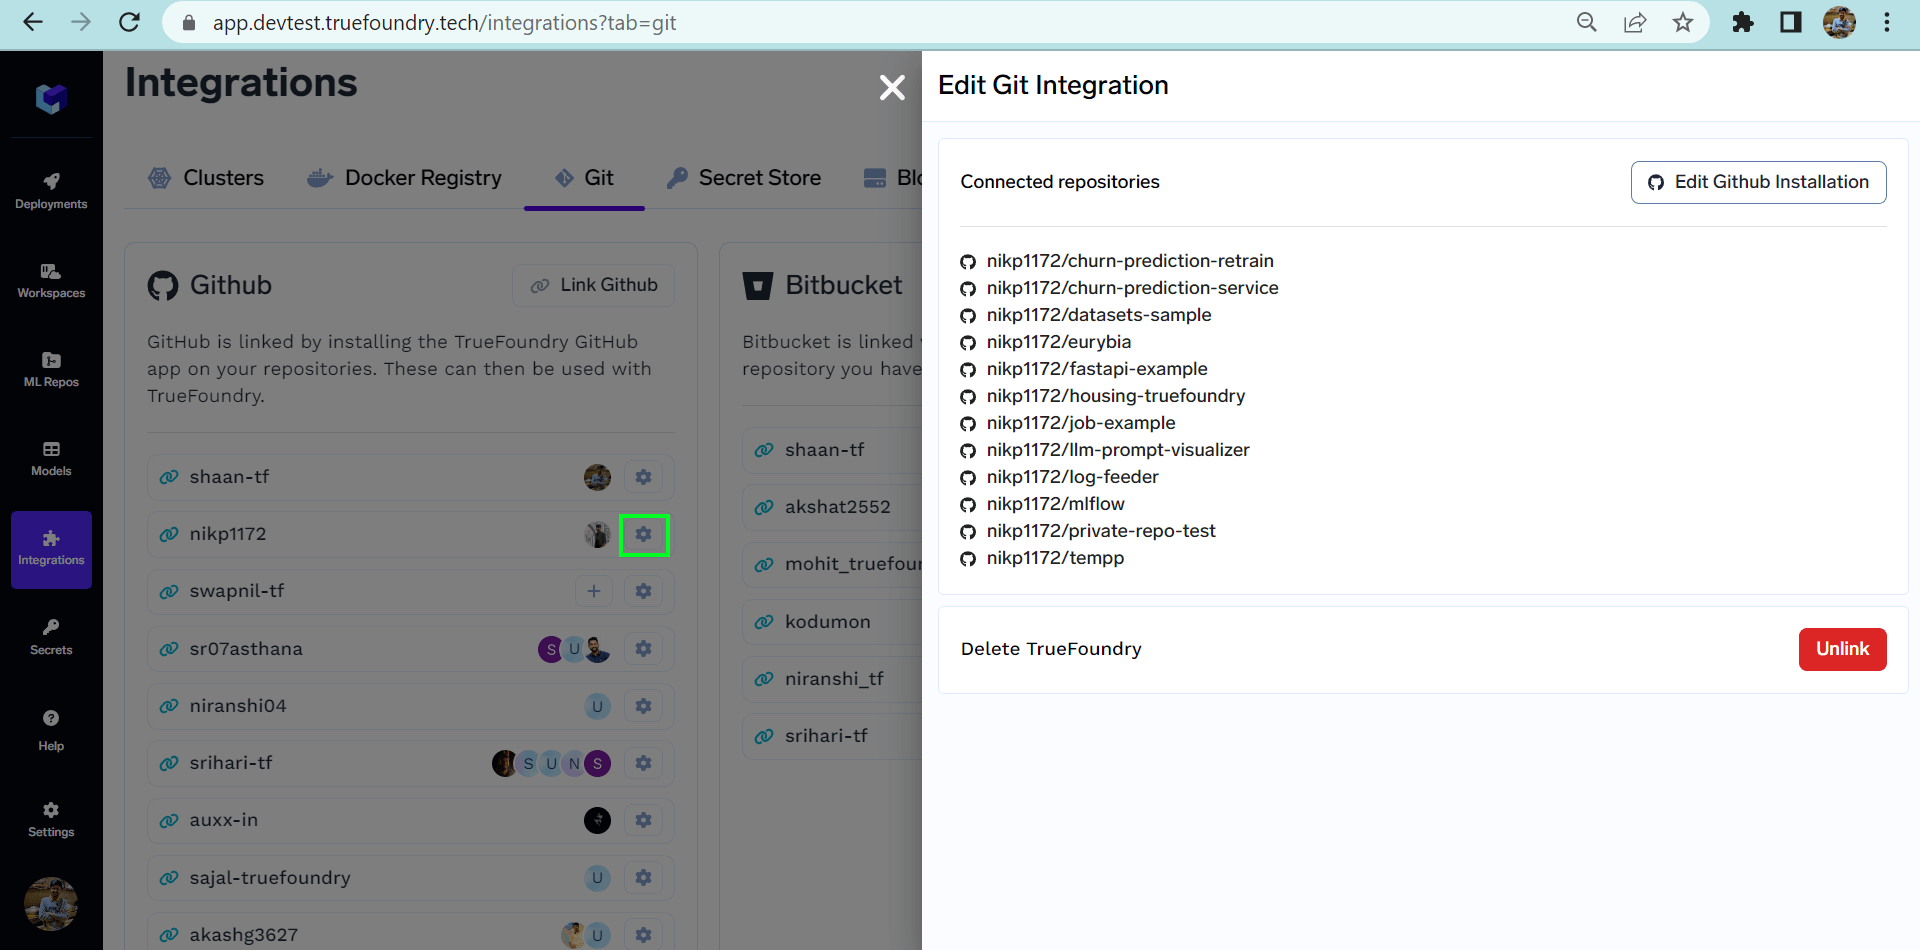
List of connected repositories
- You can also unlink your account by
unlinkbutton. It can be seen in the above figure.
Bitbucket
Enable BitBucket Integration in Control Plane
To enable Bitbucket integration in your app, you need to create a Bitbucket OAuth Consumer app using your BitBucket account. This Bitbucket app can then be authenticated to access repositories of users’ account. Follow these steps to create the Bitbucket OAuth Consumer app and integrate it with truefoundry:- Sign in to bitbucker.org. Navigate to Workspace Settings(preferably for your organization).
-
Navigate to
OAuth ConsumersunderApps and features.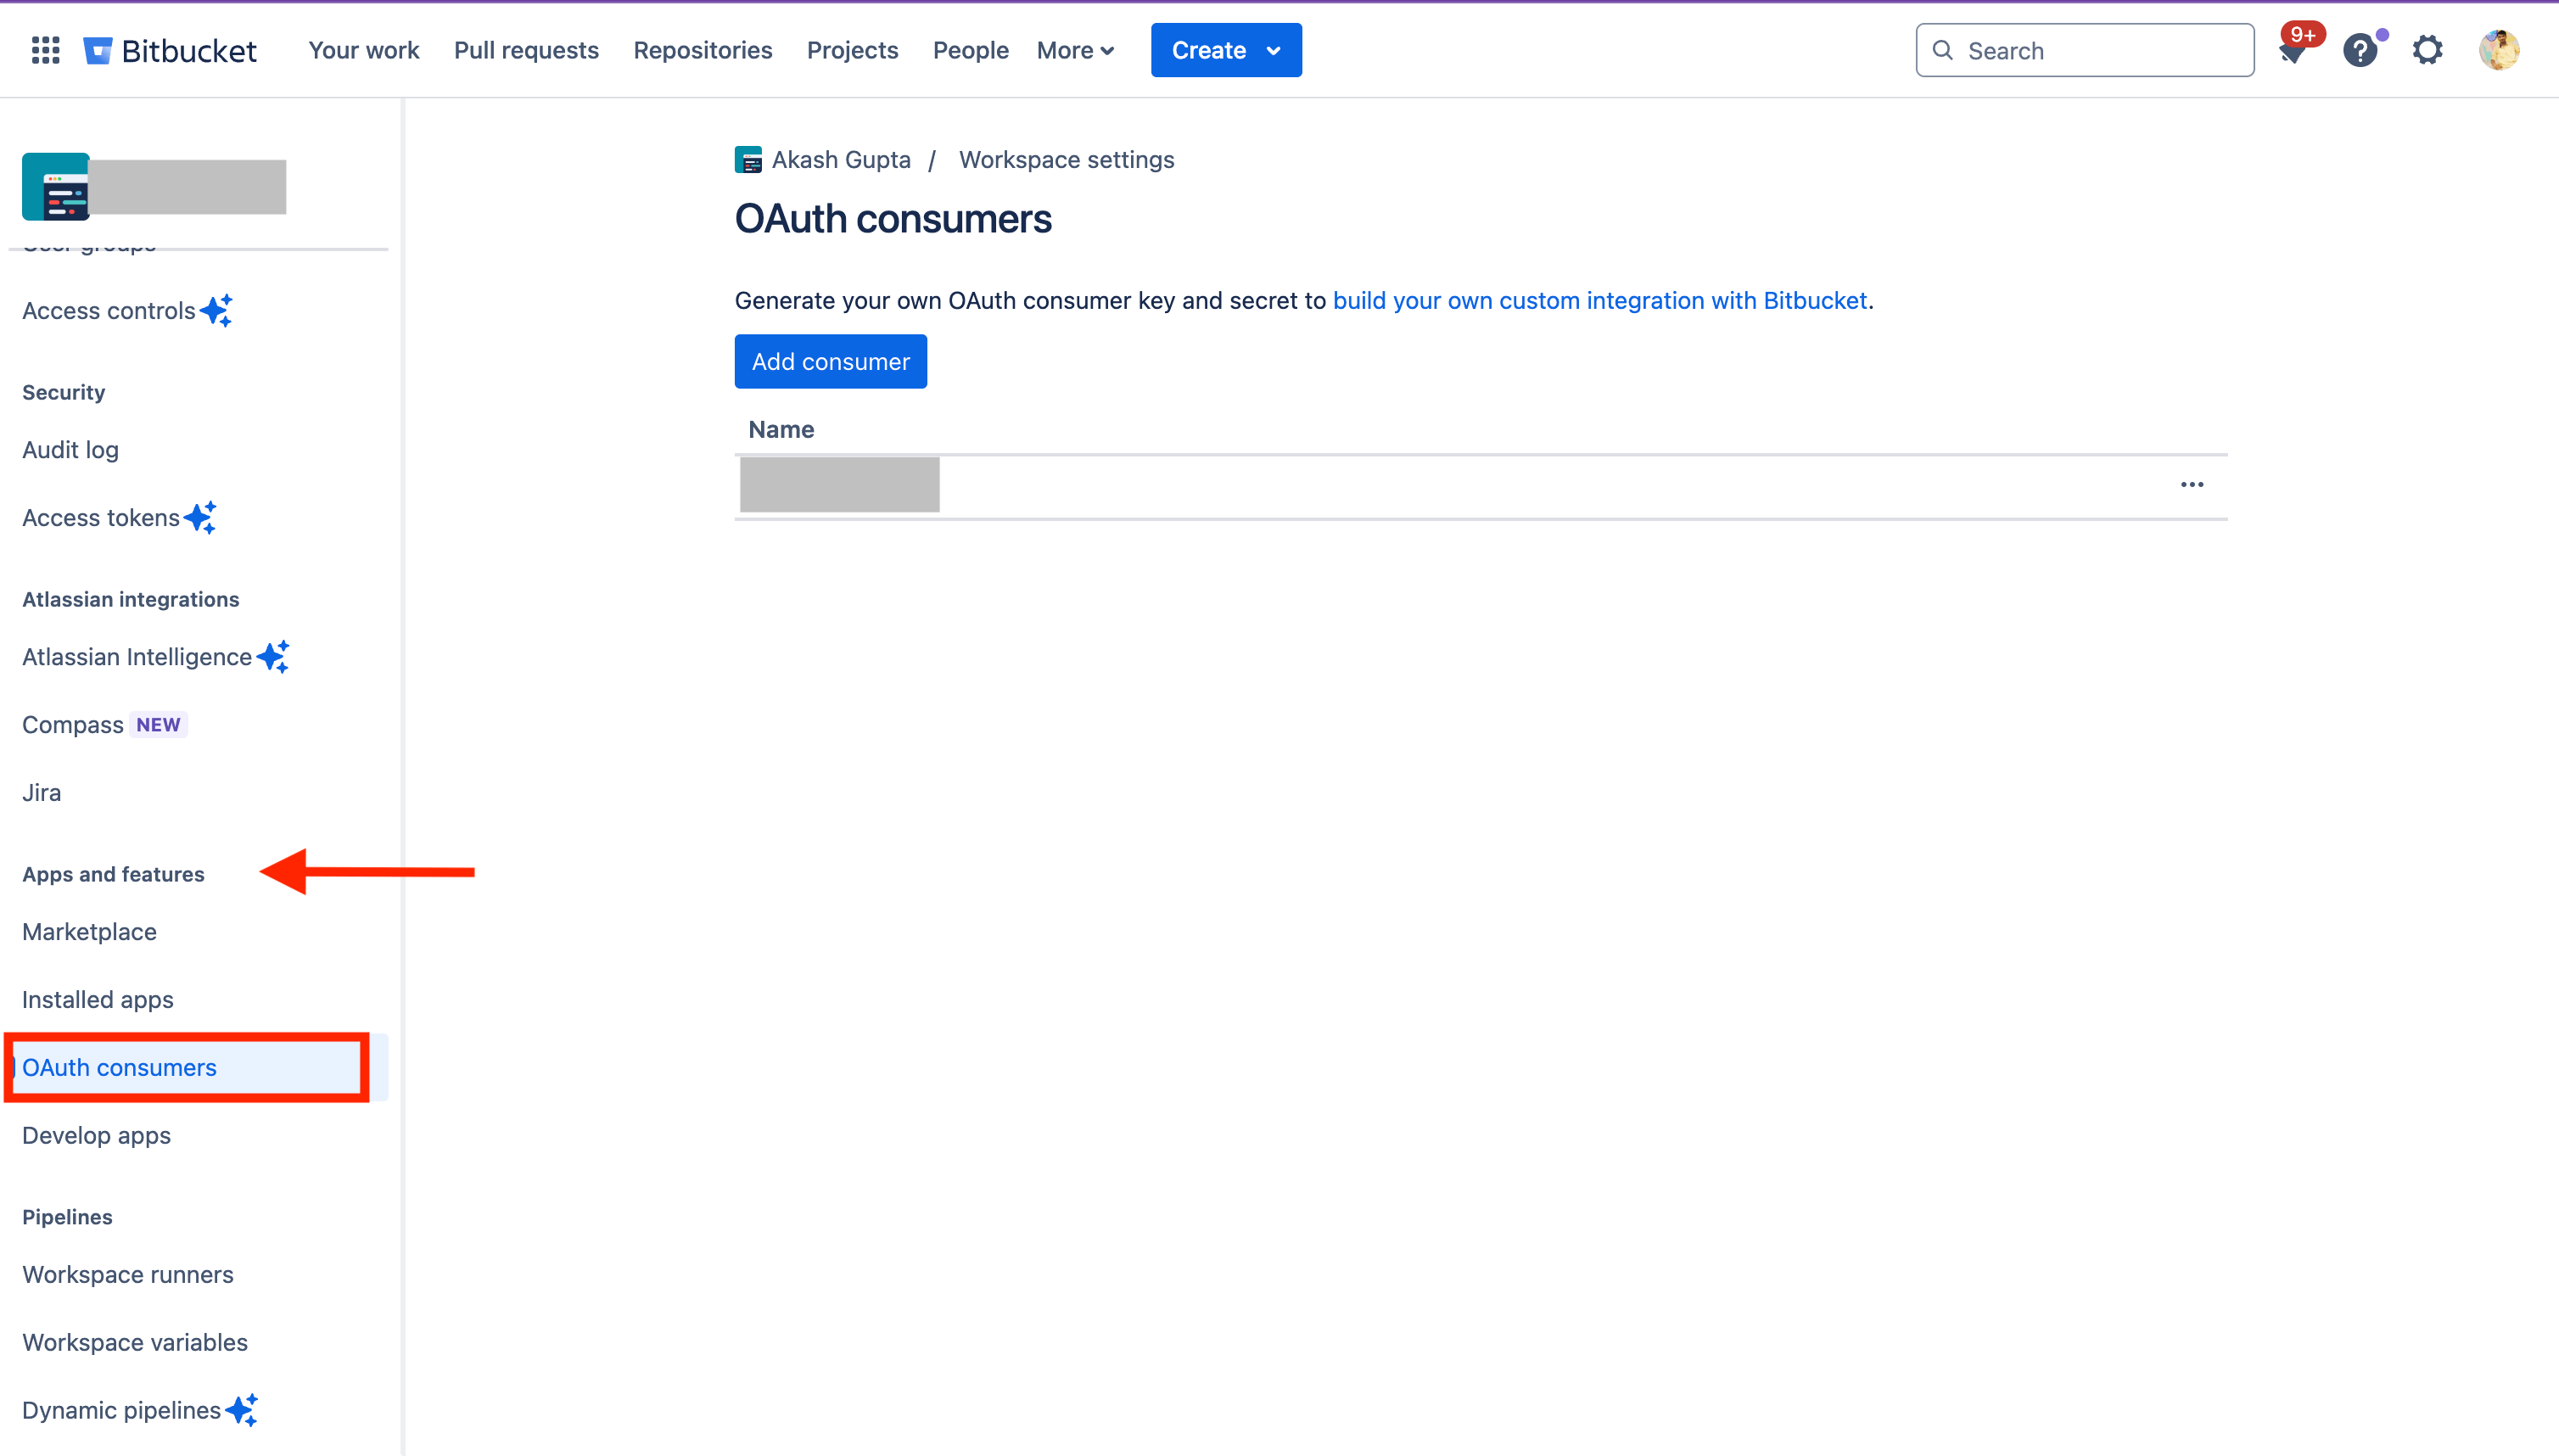
-
Click the button to
Add consumer -
Fill in the following details:
- Name: This can be anything. Consider something like <Organization>‘s Bitbucket or <Your Name>‘s Bitbucket or something else descriptive.
-
Redirect URI: https://app.example-org.truefoundry.com/api/svc/v1/vcs/bitbucket/callback (replace
app.example-org.truefoundry.comwith your control plane URL) -
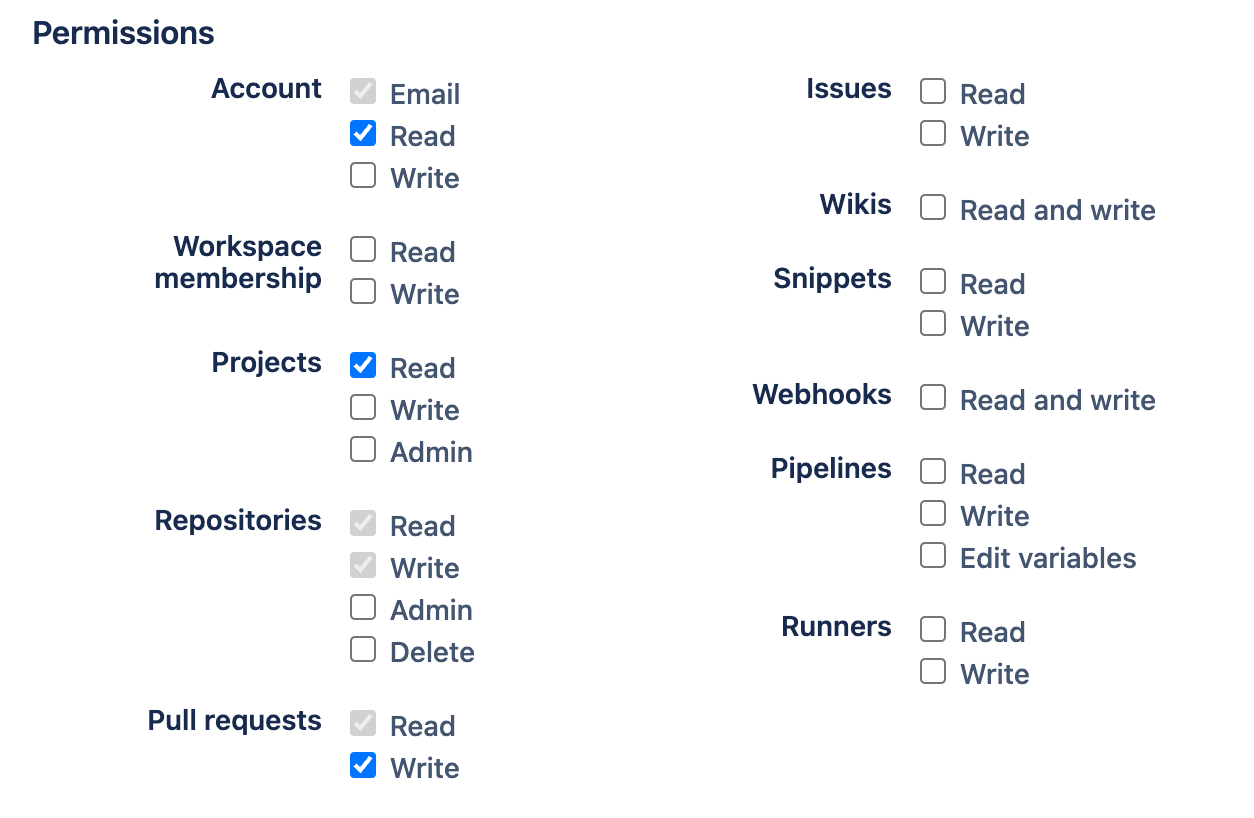
Select the following permissions:
- Account: Email, Read
- Projects: Read
- Repositories: Read, Write(to allow adding CI/CD PR)
- Pull requests: Read, Write(to allow adding CI/CD PR)
-
Apply. Copy the
KeyandSecretfrom created app. -
Set environment variables in servicefoundryServer :
BITBUCKET_CLIENT_ID=${Key}BITBUCKET_CLIENT_SECRET=${Secret} -
If using CI/CD for control plane deployment follow below:
- Add these keys and values in the
truefoundry-credsk8s secret present intruefoundrynamespace.
BITBUCKET_CLIENT_ID=${Key}BITBUCKET_CLIENT_SECRET=${Secret} - In the truefoundry application values file, use the value as
${k8s-secret/truefoundry-creds/BITBUCKET_CLIENT_ID}and${k8s-secret/truefoundry-creds/BITBUCKET_CLIENT_SECRET}
- Add these keys and values in the
Link Bitbucket
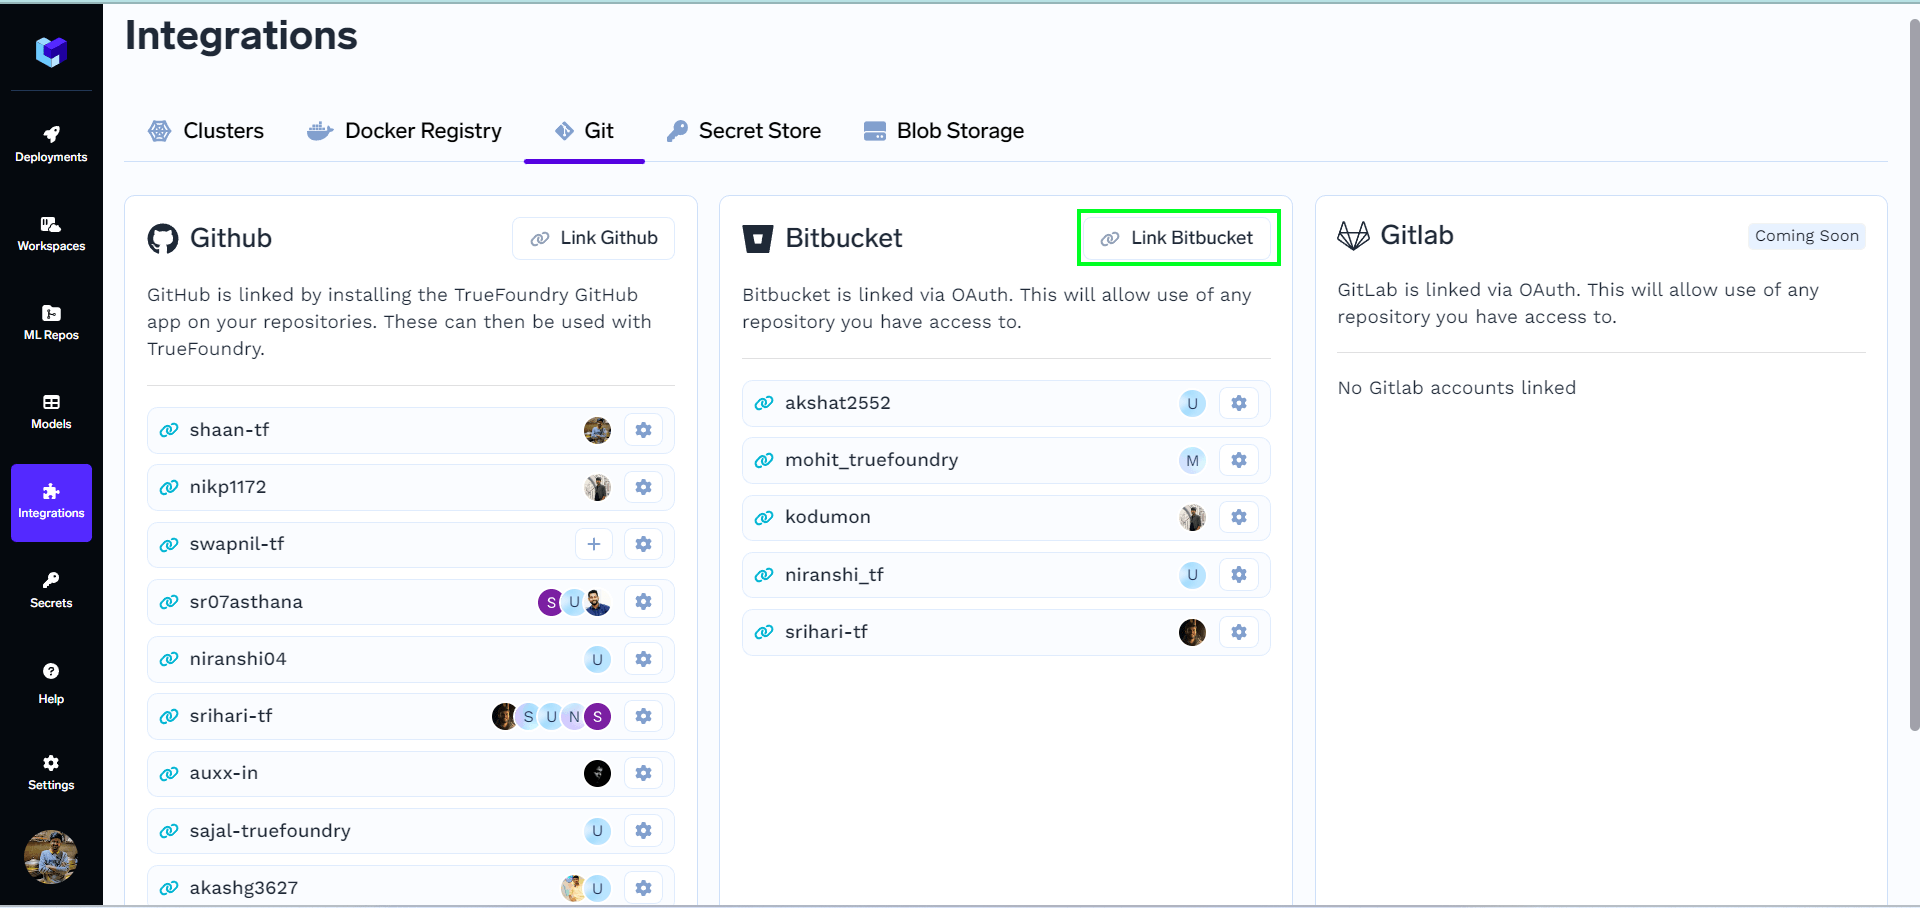
Bitbucket is linked via OAuth. This will allow use of any repository you have access to. We can easily link our Bitbucket account in few steps as mentioned below:- Click on the
Link Bitbucketbutton present in the top right corner of the Bitbucket tab for linking your Bitbucket account as shown below:
- Your bitbucket account which is signed in to your system will get linked. You will now be able to see your account on the dashboard as shown below:

- You can also see the connected repositories of your account by clicking on
⚙️button on the right side of that particular account. - Note : In this connected repositories section you will only see the repositories that you have admin access. Only these repositories can be used to make deployment on the platform.

- You can also unlink your account by
unlinkbutton. It can be seen in the above figure.
Gitlab
To enable Gitlab integration in your app, you need to create a gitlab app using your gitlab account. This gitlab app can then be authenticated to access repositories of users’ account.ℹ️Steps to follow if you have cutom gitlab domain.
- You have to set
GITLAB\_BASE\_HOSTenv variable in the tfy build helm chart under the fieldtfyBuild.truefoundryWorkflows.sfyBuilder.extraEnvs
- Also you have to set the
GITLAB\_BASE\_URLas an environment variable in the servicefoundry server, for example
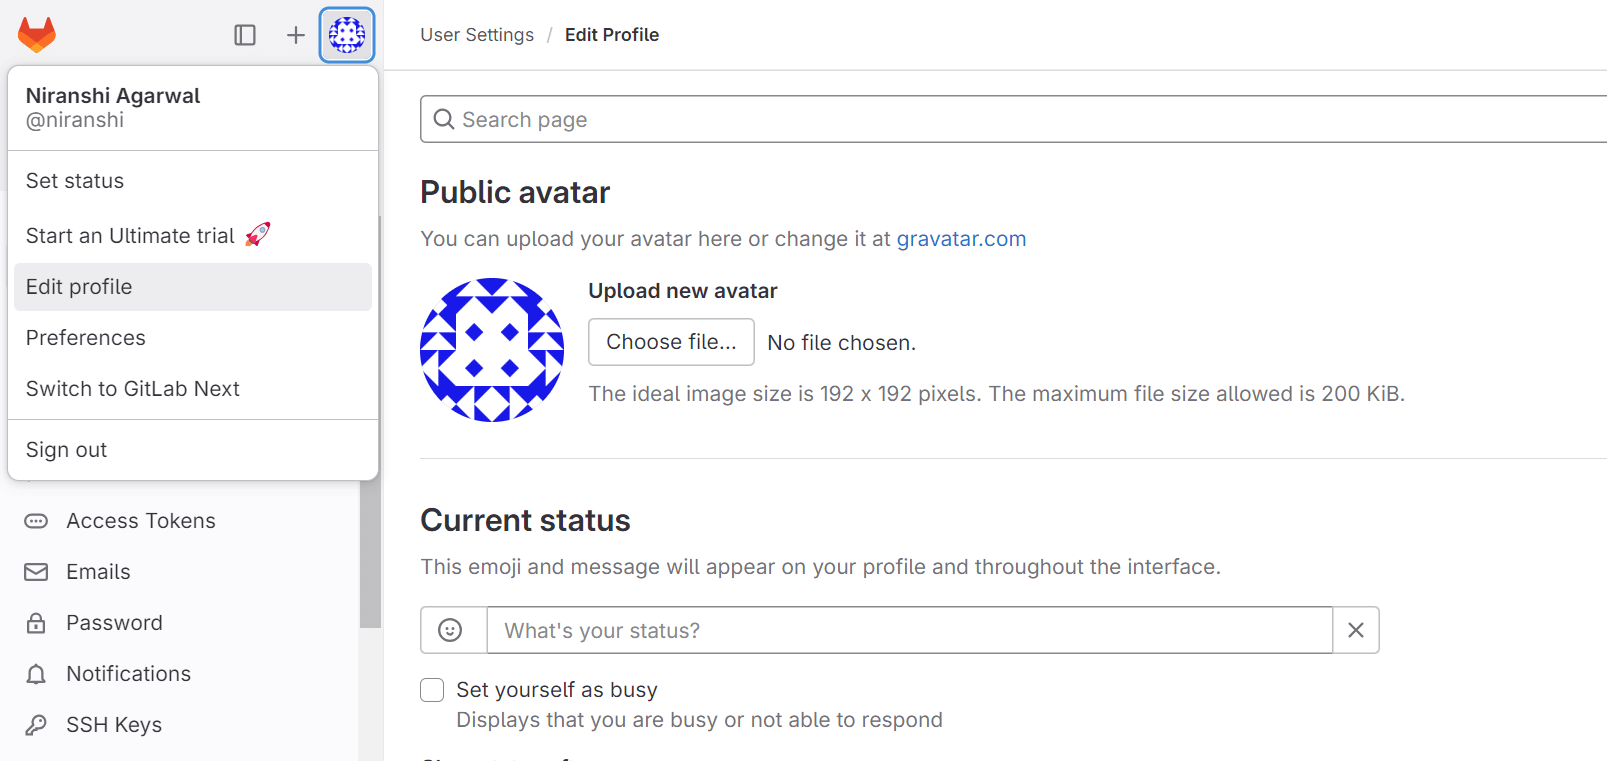
- Sign in to GitLab.com. On the left sidebar, select your avatar and select Edit profile.
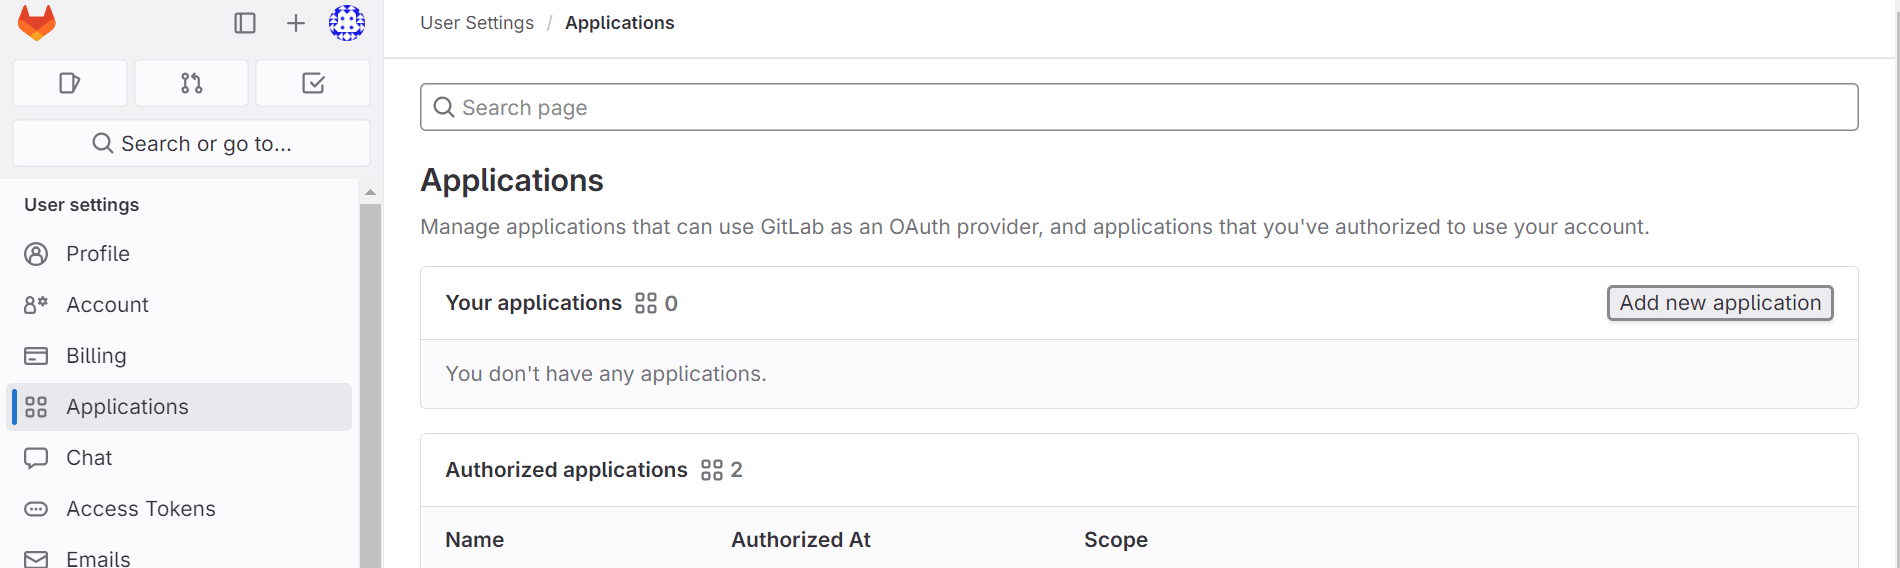
- On the left sidebar, select Applications. Click on the Add new application button right side.
-
Provide the required details for Add new application.
- Name: This can be anything. Consider something like <Organization>‘s GitLab or <Your Name>‘s GitLab or something else descriptive.
- Redirect URI: https://app.example-org.truefoundry.com/api/svc/v1/vcs/gitlab/callback
- Enable the Confidential check box.
- Select the following scopes: read_api, read_user, read_repository, write_repository.
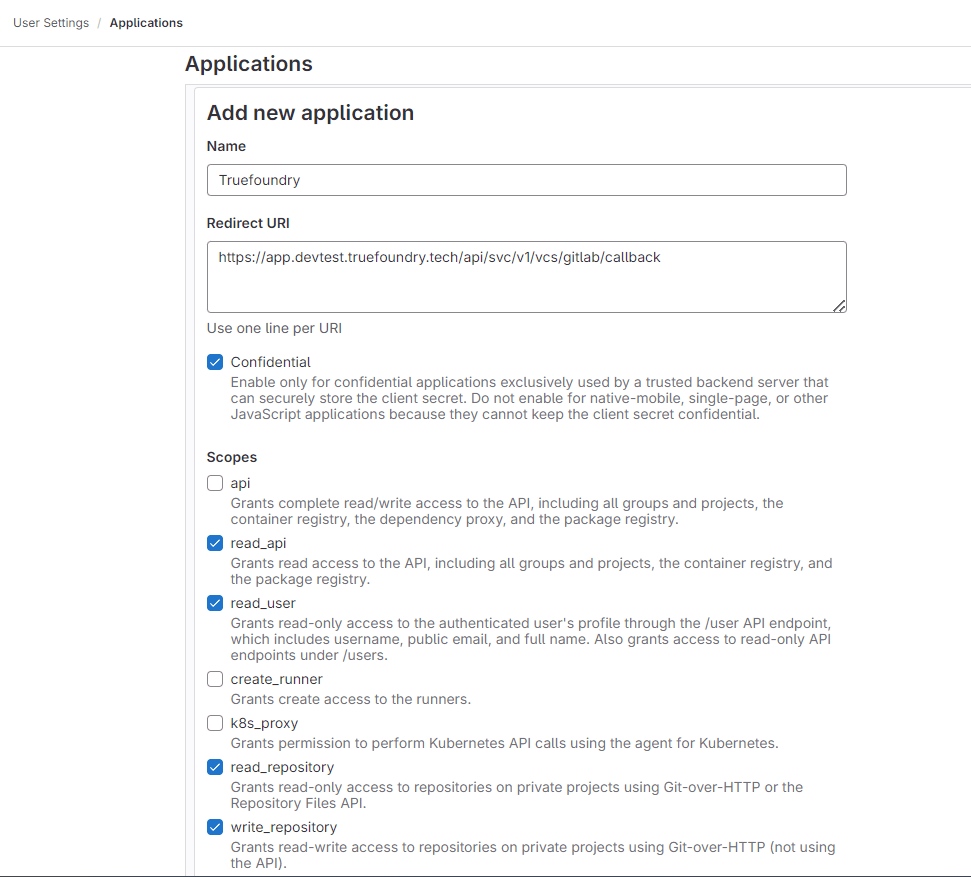
- Select Save application.
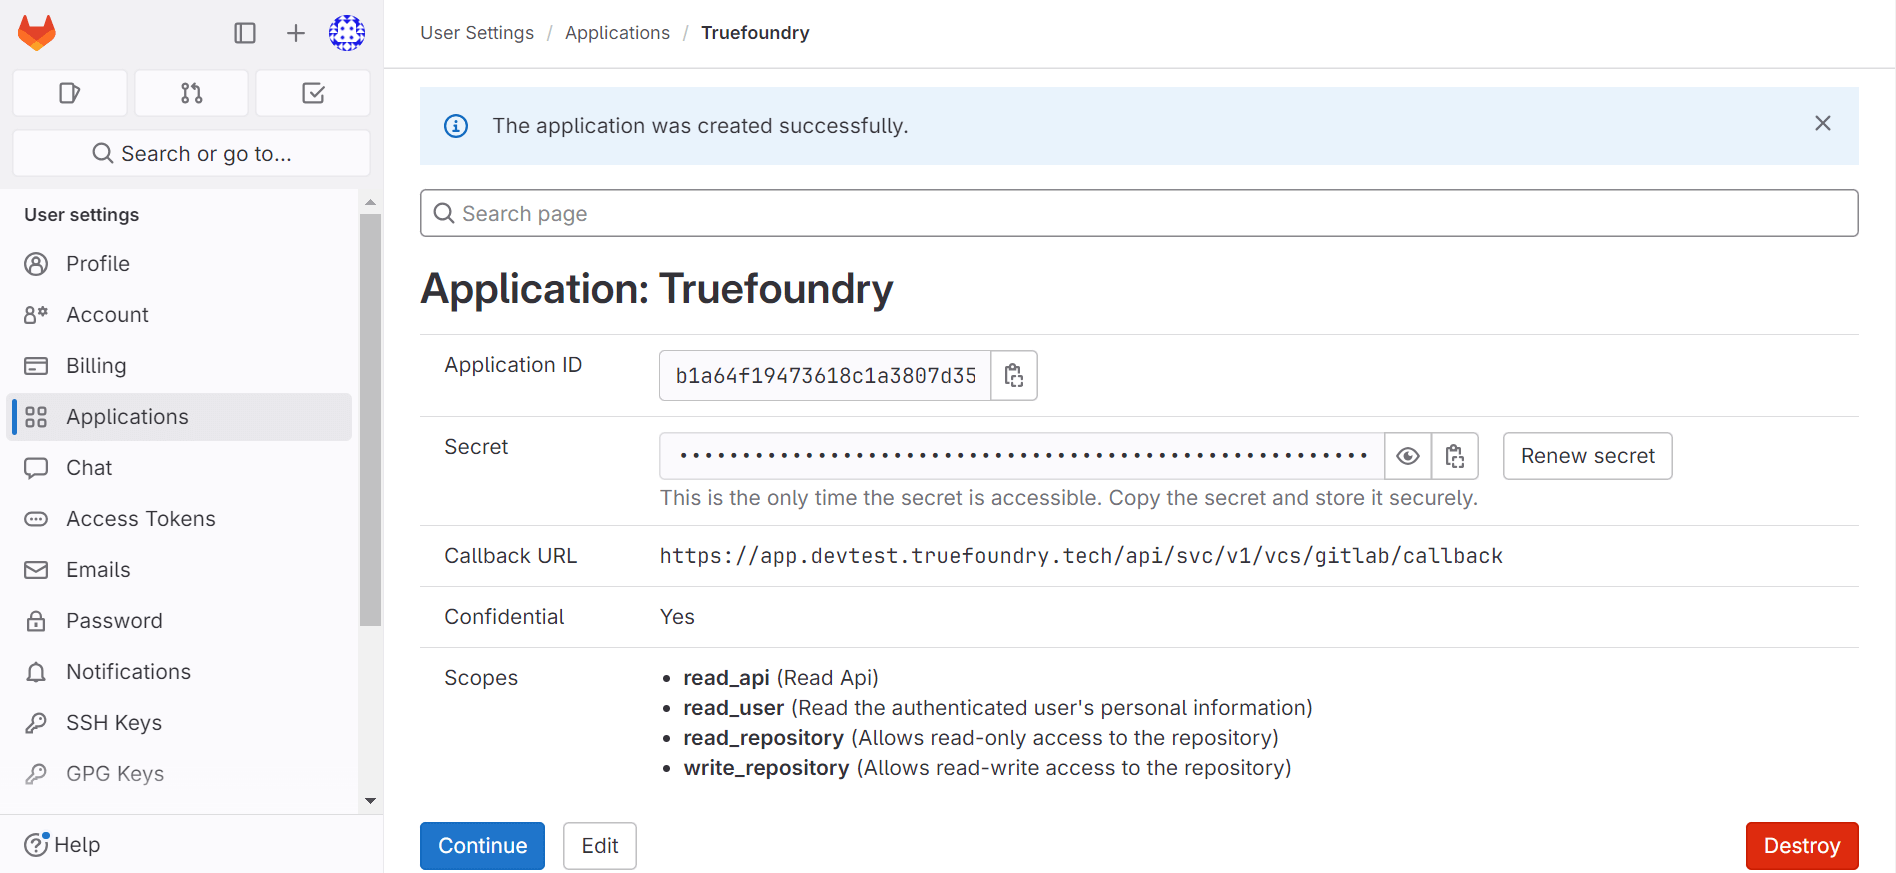
- You should now see an Application ID and Secret.
List of connected repositories
- Set environment variables in servicefoundry server :
GITLAB_APP_ID=${Application ID}GITLAB_SECRET=${Secret}GITLAB_SCOPE=read_api read_user read_repository write_repository