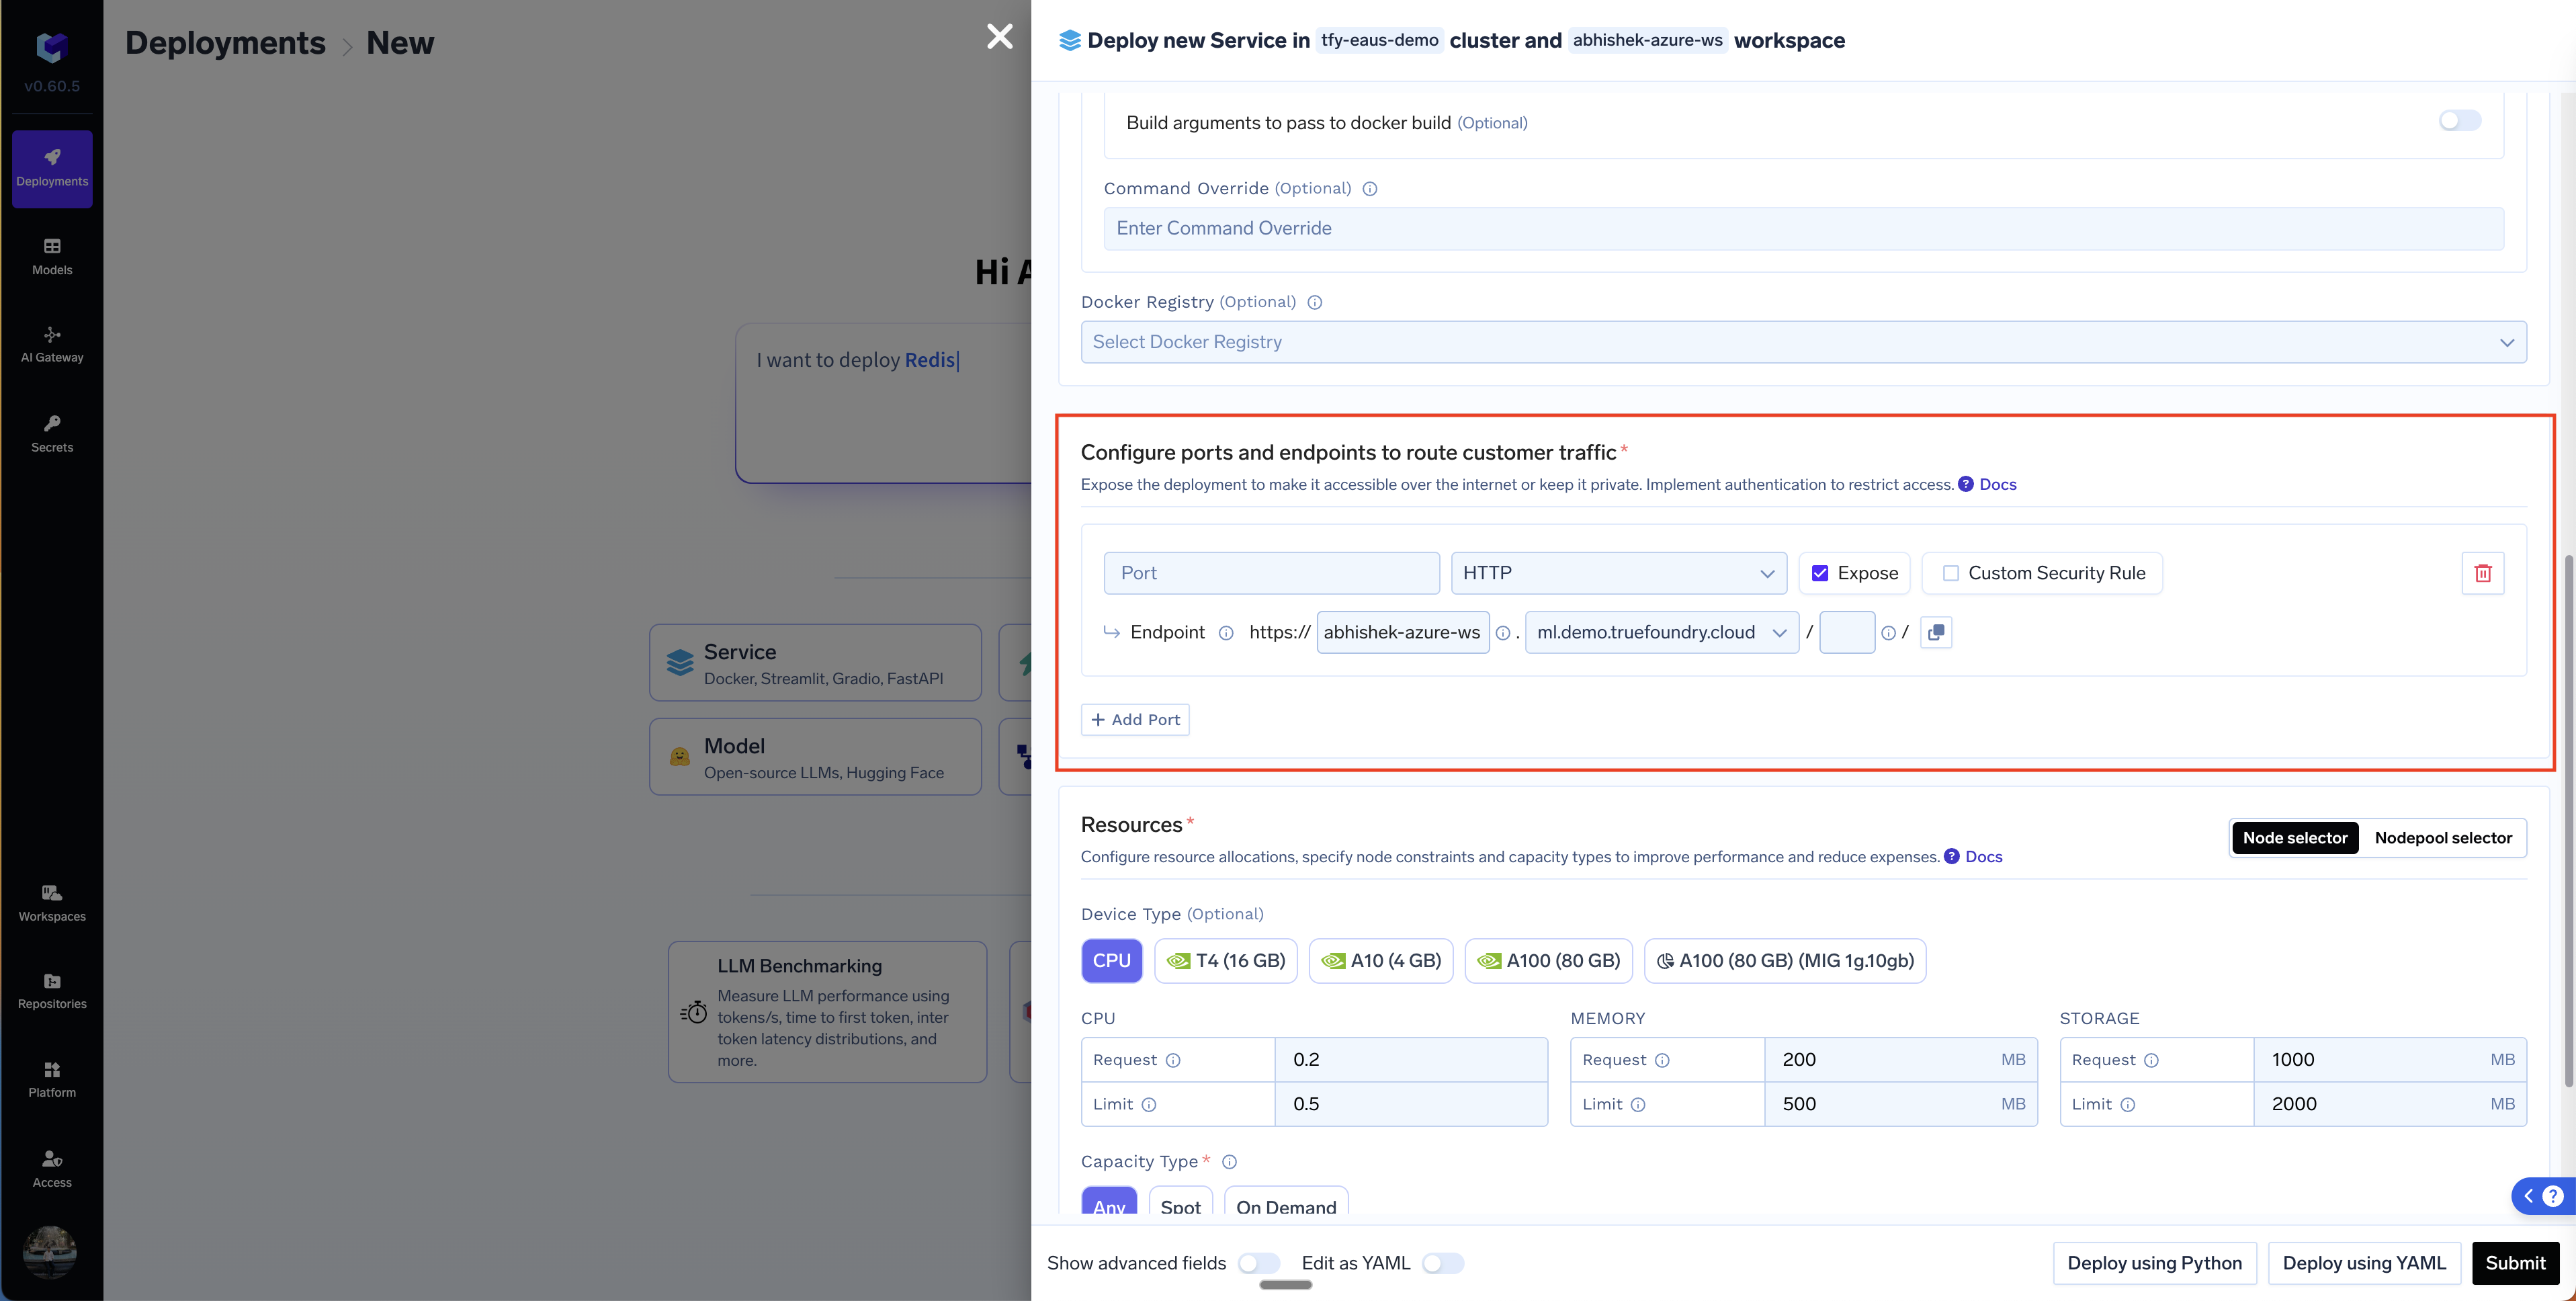
Port Number
This is the port number that the service will listen on. This is usually 8000 for FastAPI, 8501 for Streamlit and 7860 for Gradio. If you are writing a Dockerfile, this will usually be the port that you write after theEXPOSE instruction.
Port Protocol
You can choose the protocol to beHTTP in most cases where you are using REST APIs. If hosting a GRPC service, please choose GRPC.
Expose the port
This is governed by theExpose checkbox. Exposing a service will enable it to be called from anywhere using the endpoint - other users or services living outside your cluster will also be able to access it. If you do not expose a port, it will only be accessible from within the cluster using the URL: servicename-workspacename.svc.cluster.local:port
Endpoint
If you expose a port, we will need to map a URL to the endpoint using which we can access the service. You should see one/multiple domains in the dropdown - depending on what has been configured by the Infra team during the cluster setup. The domains for a cluster are configured for each cluster in the Cluster Settings page.Set domains for cluster
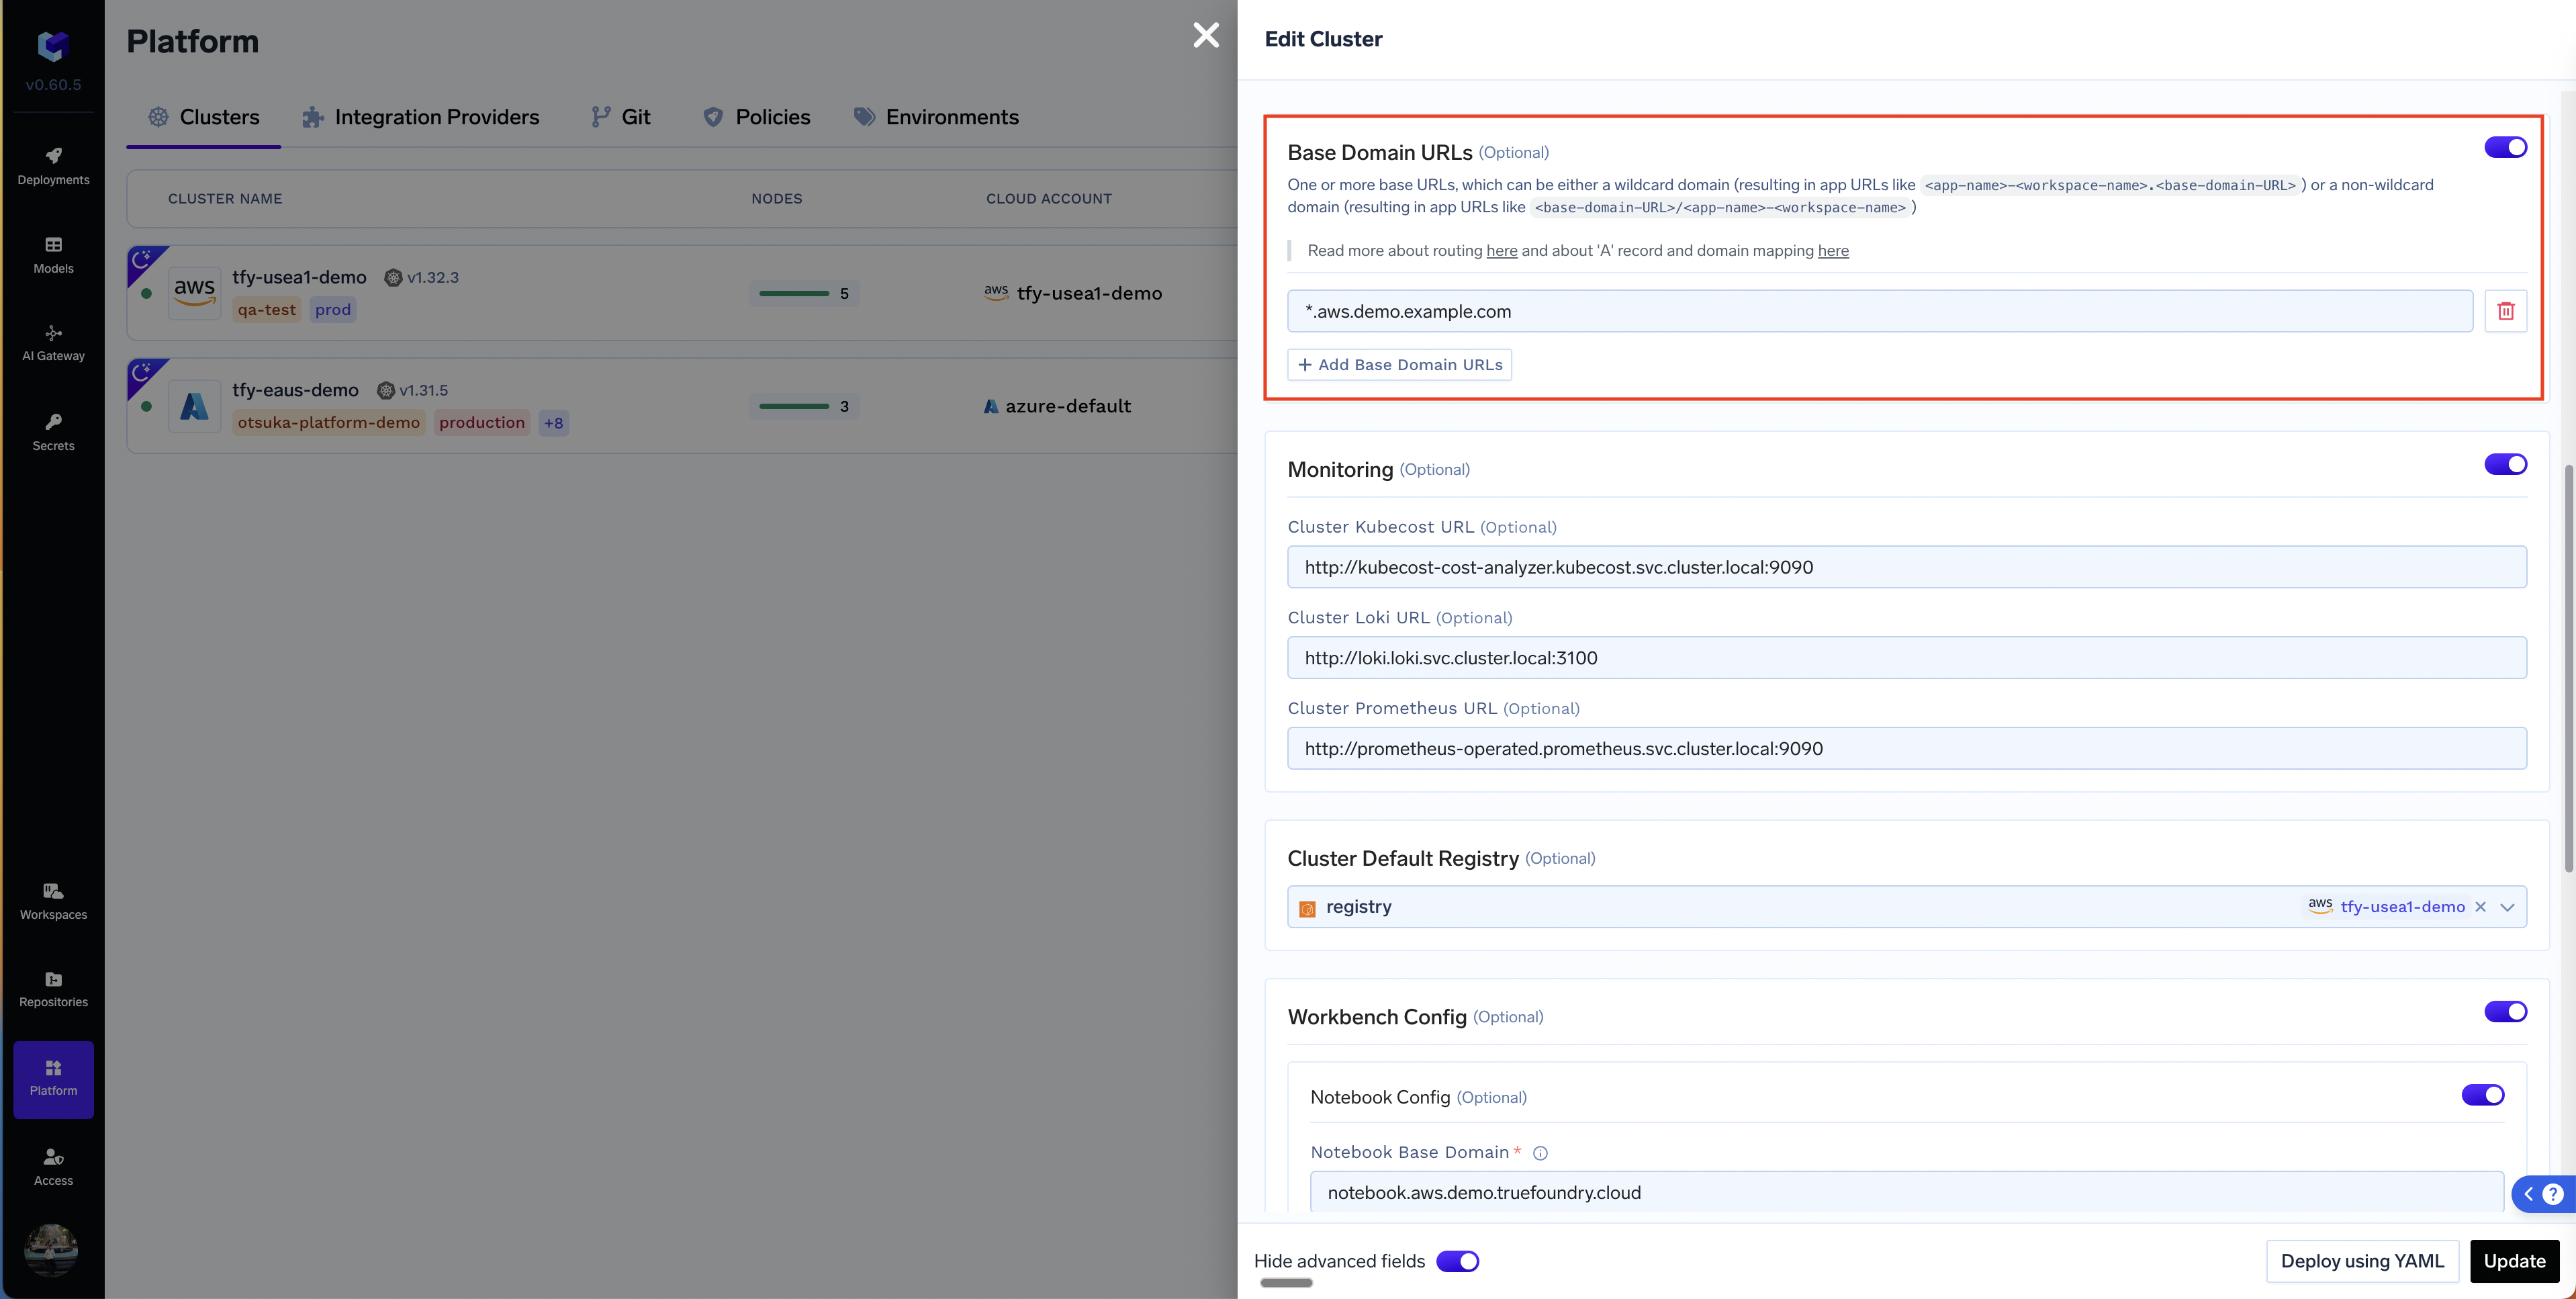
View domains for cluster
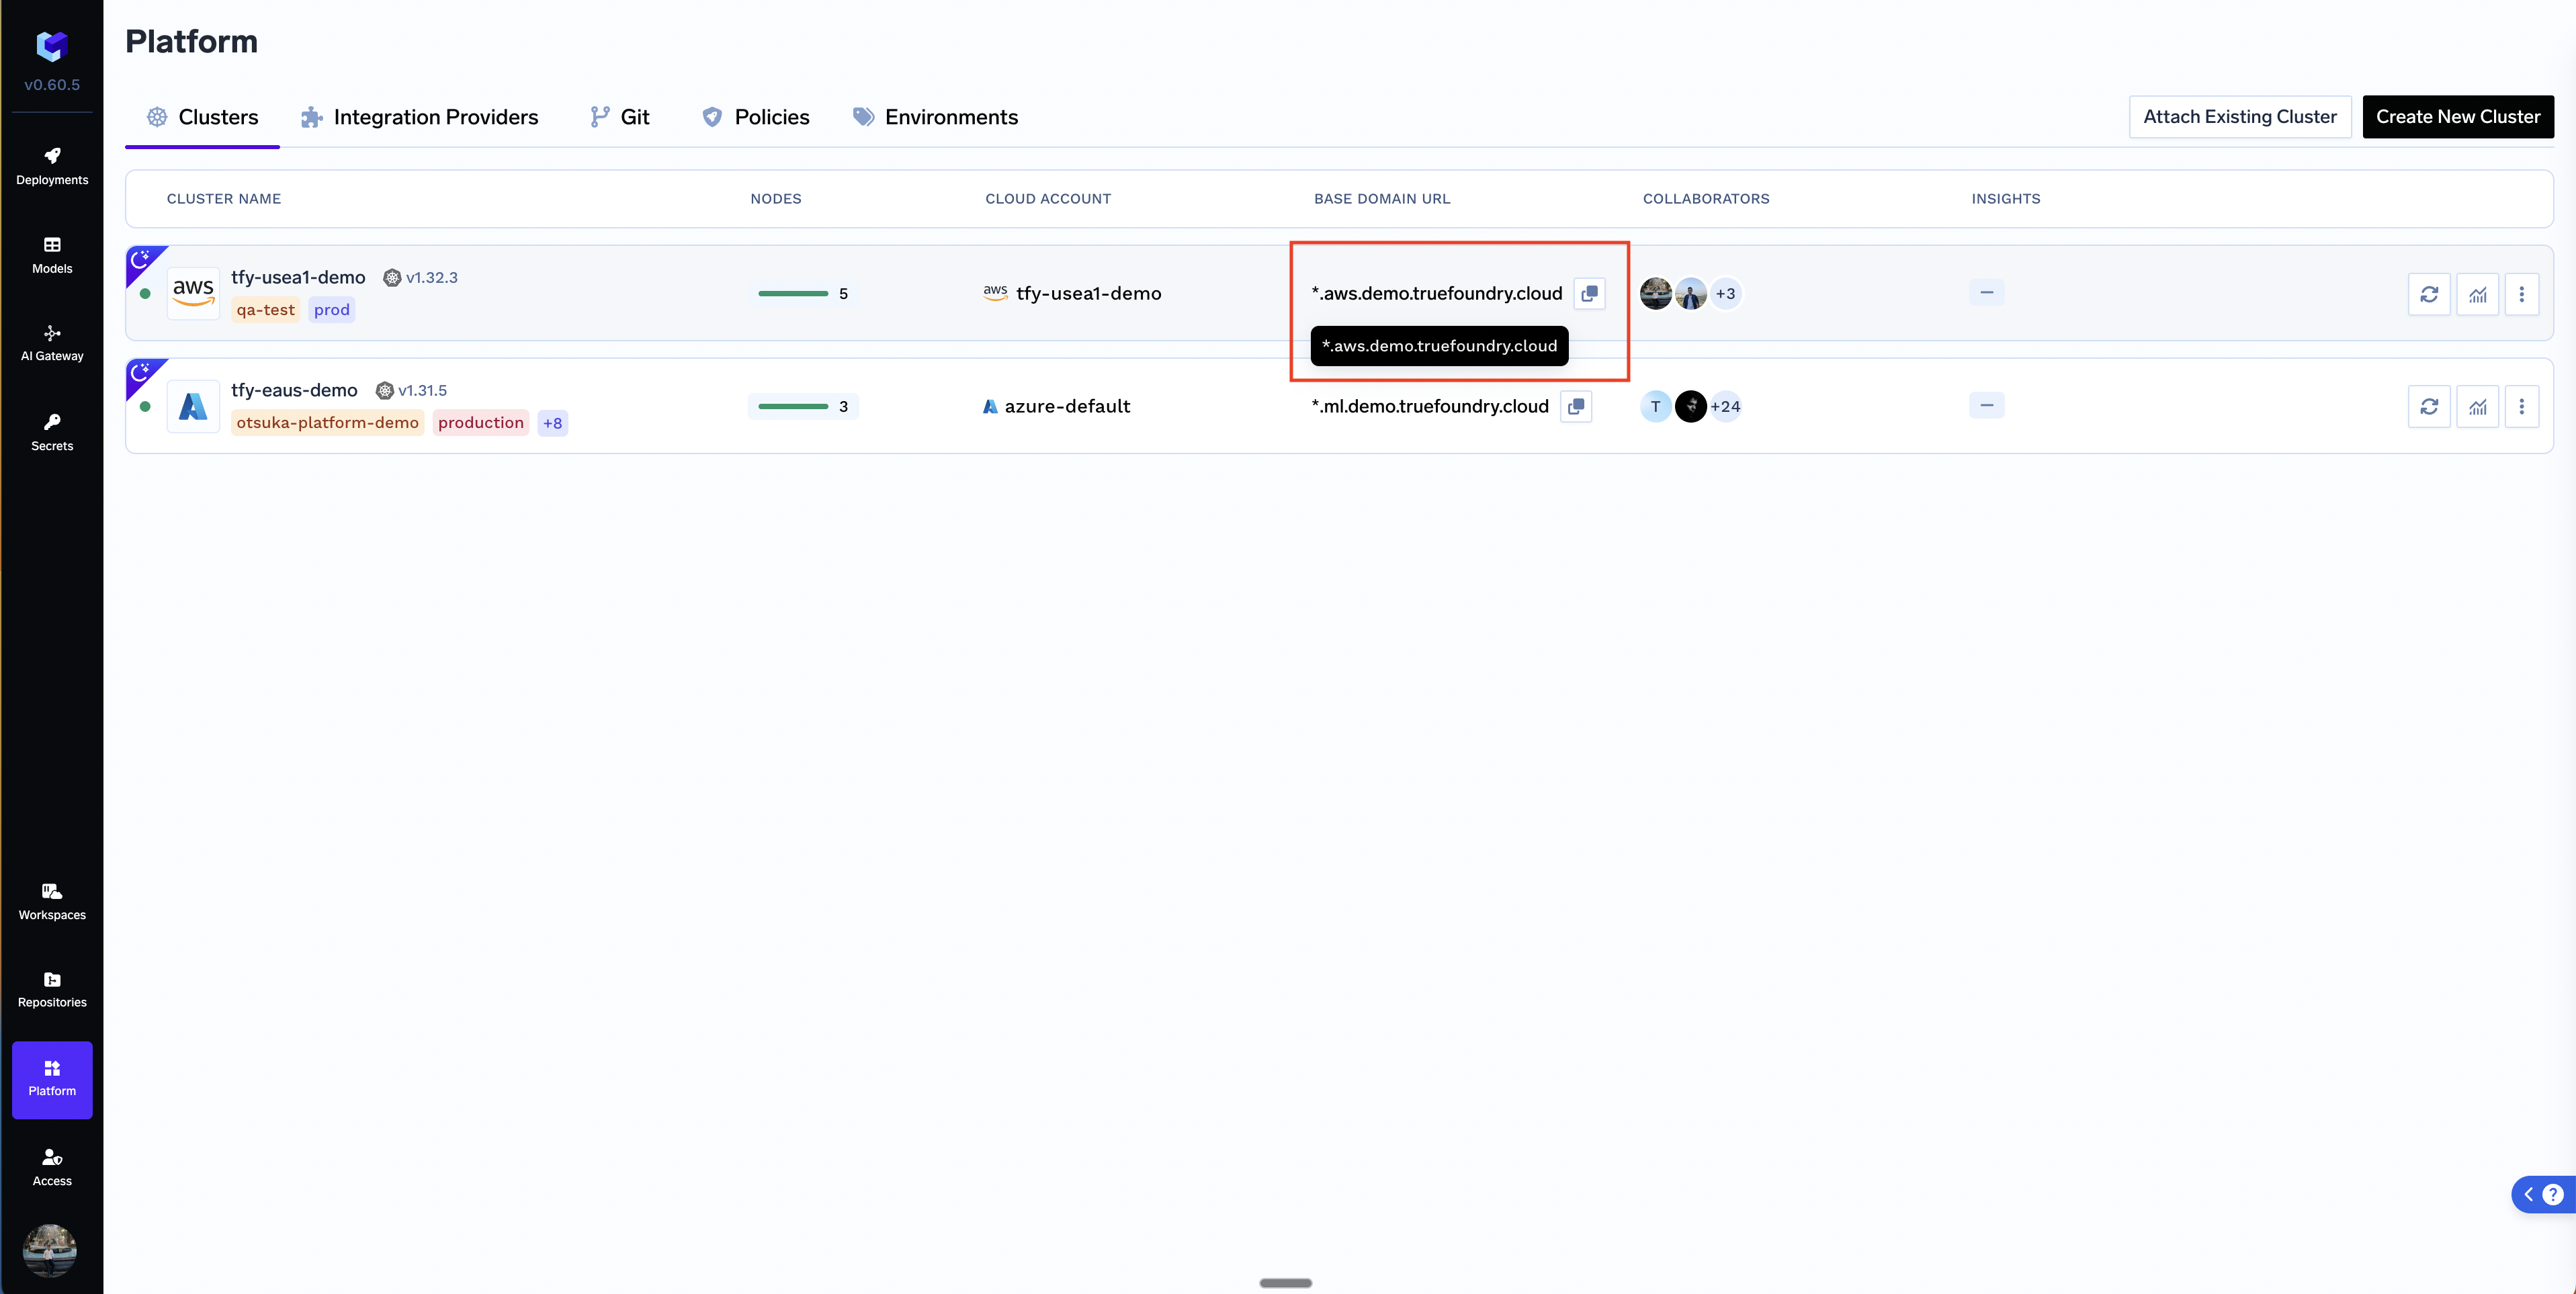
The domains are mapped to the LoadBalancer IP of the cluster. Once the traffic reaches the loadbalancer, the routing to all the services inside the cluster is done using Istio Ingress Gateway.
- Wildcard Domain(
*.your-organization.com): If we map a wildcard domain to the loadbalancer, every service deployed in the cluster can get its own subdomain like service1.your-organization.com, service2.your-organization.com etc. - Non-wildcard Domain: (
your-organization.com): If we map a non-wildcard domain to the loadbalancer, every service deployed in the cluster will share the same domain. They will be routed to via different paths - E.g. your-organization.com/service1 and your-organization.com/service2.
subdomaincan be set only if the domain in the cluster is a wildcard domain.- The UI fills up default values for the subdomain and path to service. However, you can change them as per your requirements.