How does TrueFoundry SSO work?
Truefoundry maintains a centralized Authentication Server that handles the authentication flow to the platform (as described here). The SSO integration of your IDP is done by configuring the Authentication Server to use your IdP as the Identity Provider. This helps us control the licensing and track the number of users accessing the platform. When a user logs into the control plane, the control-plane redirects to login.truefoundry.com, which is the Authentication Server. The Authentication Server then redirects to the IdP’s login page, which then redirects back to the Authentication Server with an authorization code. The Authentication Server then uses this authorization code to fetch user information from the IdP and create a new user in the platform if they don’t exist. The user is then redirected to the control plane with the authentication tokens. The flow of the request is described as follows: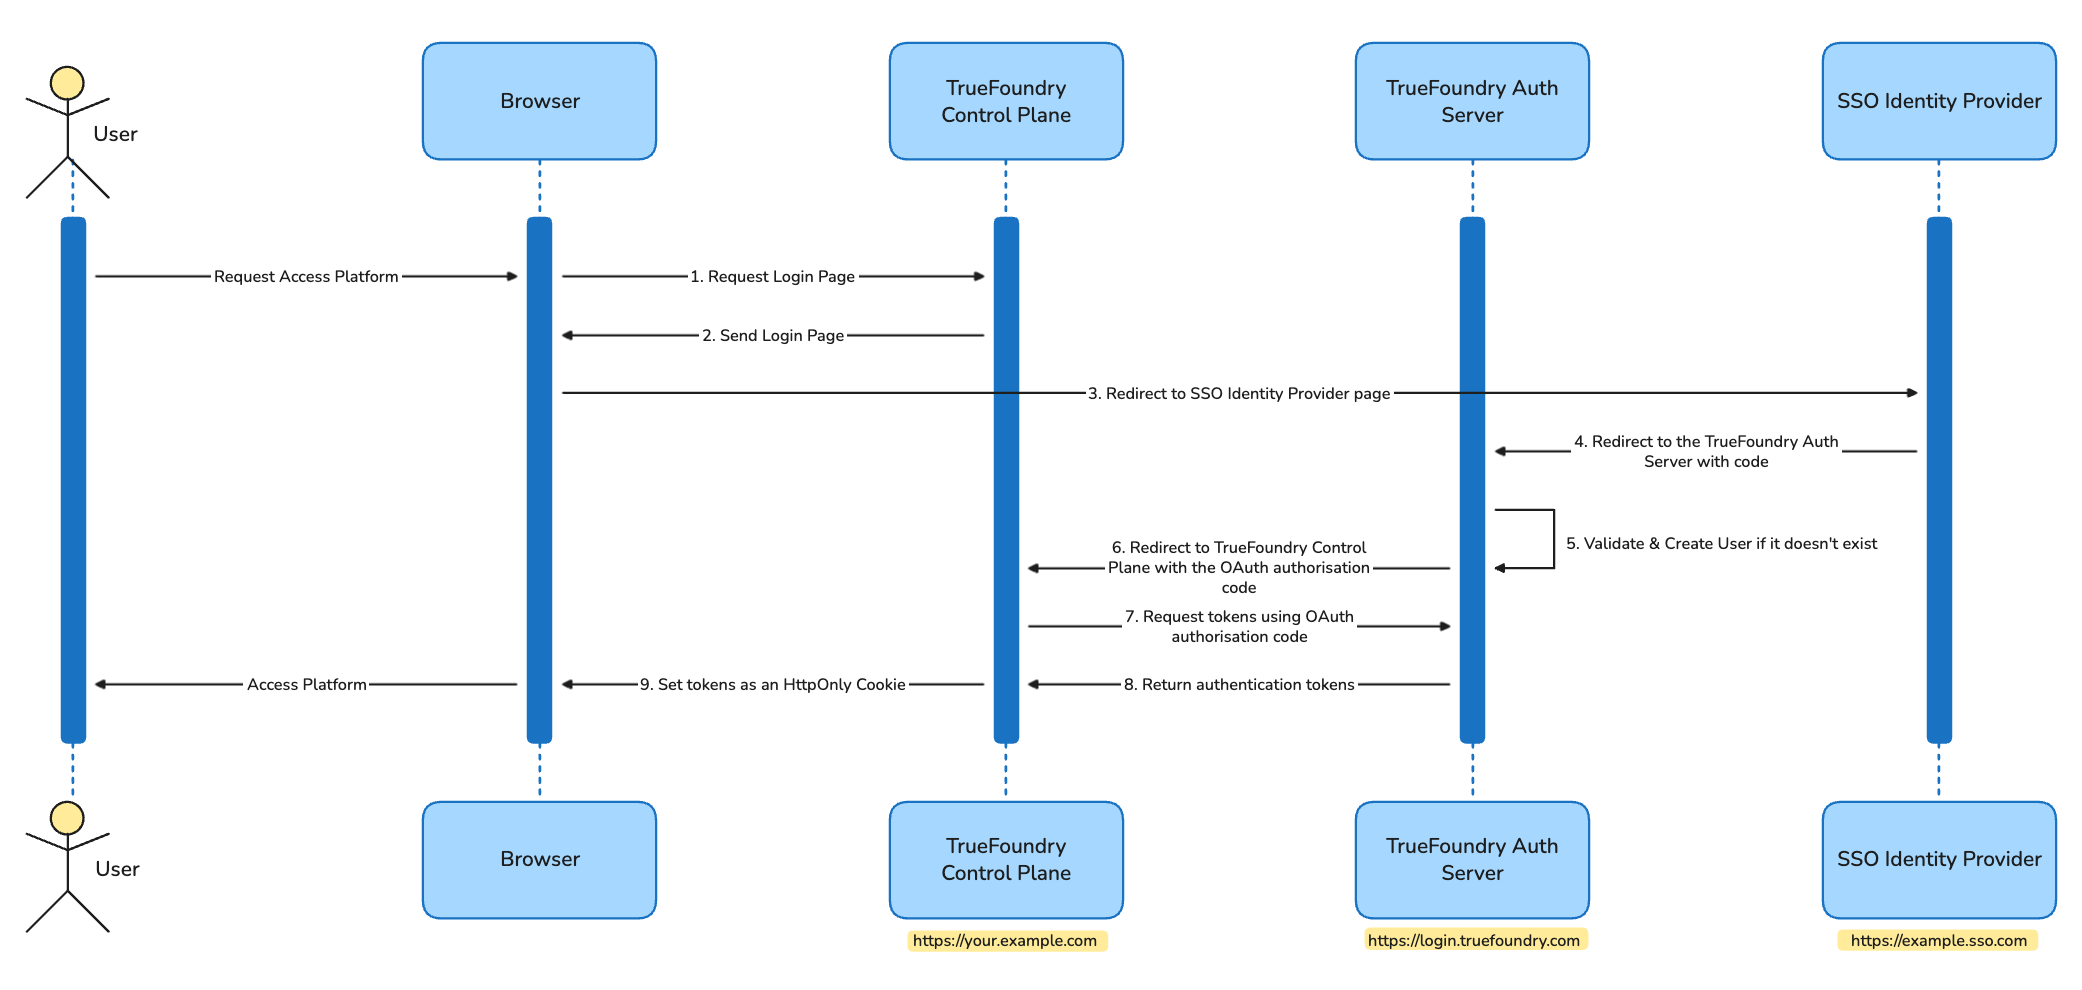
1
Request Login Page
Browser initiates the OAuth flow by requesting the login page from TrueFoundry Control Plane, with the redirect URL being the TrueFoundry Control Plane URL.
Example Request/Response
Example Request/Response
Request
Response
2
Send Login Page
Browser redirects to the Login Page URL powered by . The login page provides an interactive form for the user to choose the type of authentication, such as password-based or SSO.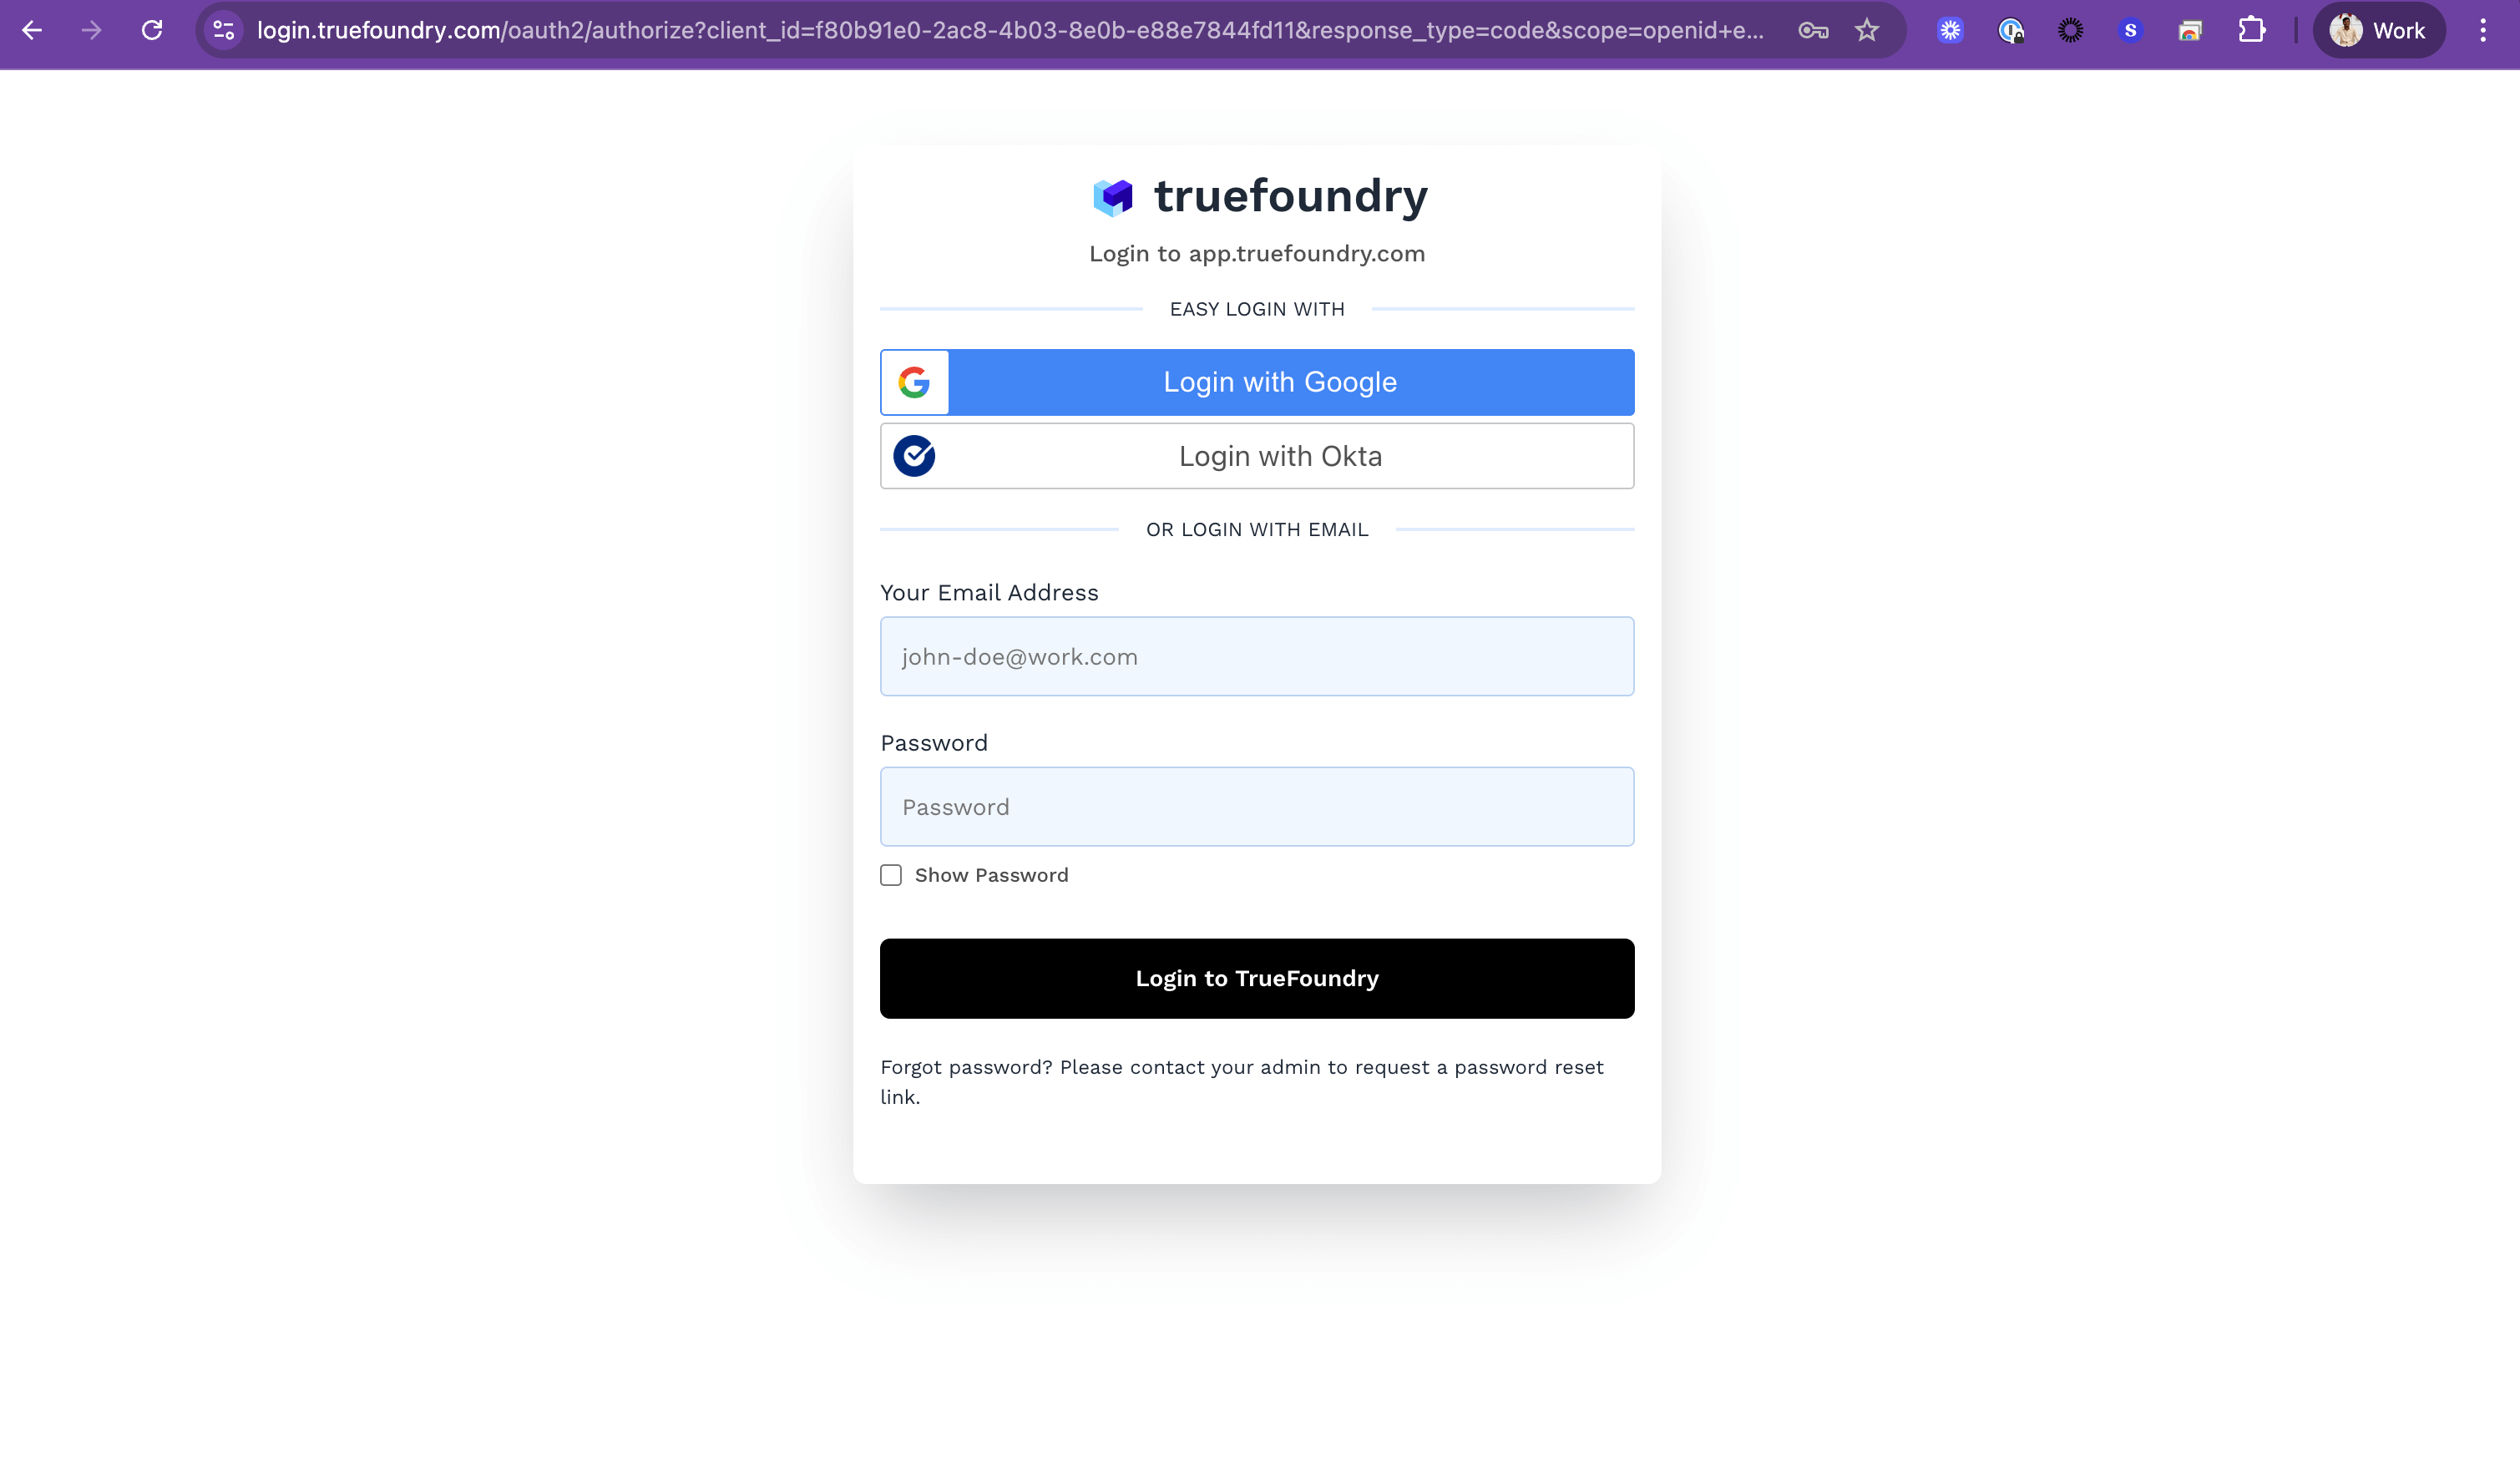
3
Redirect to SSO Identity Provider page
On selecting SSO, the browser is redirected to the SSO Identity Provider’s login page with the redirect URL as the
Example Request/Response
Example Request/Response
Request
Response
All requests to the Identity Provider are signed using a RS256 key pair. In case of SAML, destination assertion is enabled ensuring secure transfer of user authentication information between the SAML identity provider (IdP) and TrueFoundry Auth Server (SP).
4
Redirect to the TrueFoundry Auth Server with code
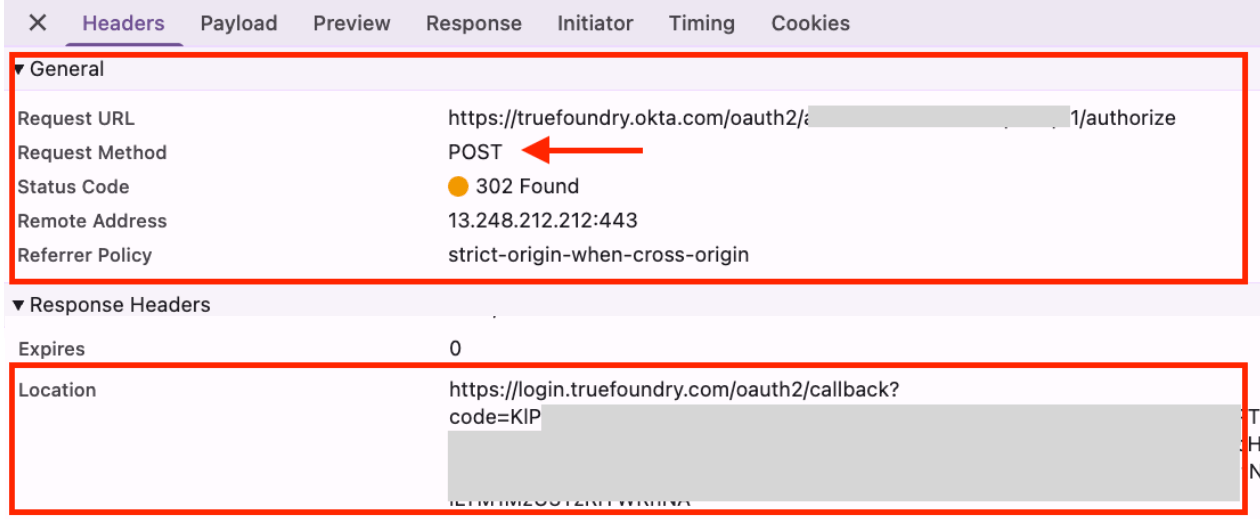
On successful authentication by SSO Identity Provider, the browser redirects to the configured redirect URL, i.e. , with an authorisation code. The Auth server then uses this authorisation code to fetch user information using a POST HTTP request to the SSO Identity Provider.
Example Request/Response
Example Request/Response
Request
Response
To protect data integrity and privacy, all data in transit to and from TrueFoundry Control Plane or Auth Server is encrypted using TLS 1.2 or higher.
5
Validate & Create User if it doesn't exist
validates the response from the SSO Identity provider and maps the user based on the email claim with the user’s email in the database, and creates a new entry if not present already.
Example Request/Response
Example Request/Response
This step is performed by the and is not visible to the user.Get Token from SSO Identity Provider:Get User information from SSO Identity Provider:Link user via email
Request
Response
Request
Response
[email protected] to user in TrueFoundry Auth Server and redirects to TrueFoundry Control Plane.Any user deactivated from the platform is rejected at this step.
6
Redirect to TrueFoundry Control Plane with the OAuth authorisation code
On user validation, the redirects the control to TrueFoundry Control Plane via browser with an authorisation code
Example Request/Response
Example Request/Response
Request
Response
7
Request tokens using OAuth authorisation code
TrueFoundry Control Plane uses the code to request tokens using a POST HTTP request to the .
Example Request/Response
Example Request/Response
Request
Response
8
Return authentication tokens
On successful code validation, responds with authentication tokens that include an access token and a refresh token, signed by .
By default, the access token is valid for 1 day and the refresh token is valid for 7 days. You can change the token expiry by contacting support.
9
Set tokens as an HttpOnly Cookie
TrueFoundry Control Plane sets these authentication tokens as HTTP-only cookies in the Browser. All further requests to TrueFoundry Control Plane contain the same cookies and are used for authentication and authorisation at the API server layer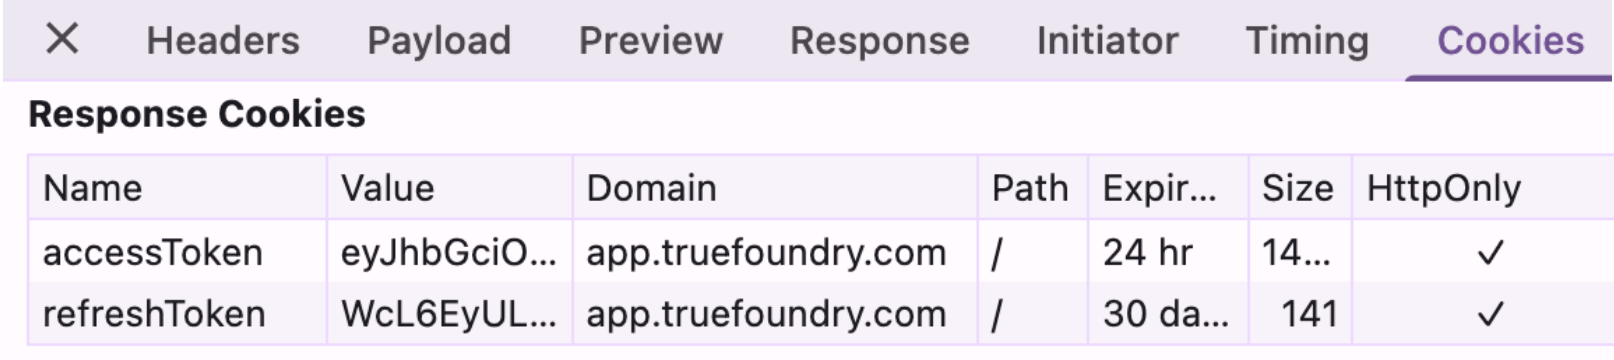
Configure SSO in TrueFoundry
Go to Platform -> Settings -> SSO, toggle Enabled, pick your SSO Provider (Okta, Google, Azure AD, or Custom), then choose OIDC or SAML v2 under Authentication Configuration.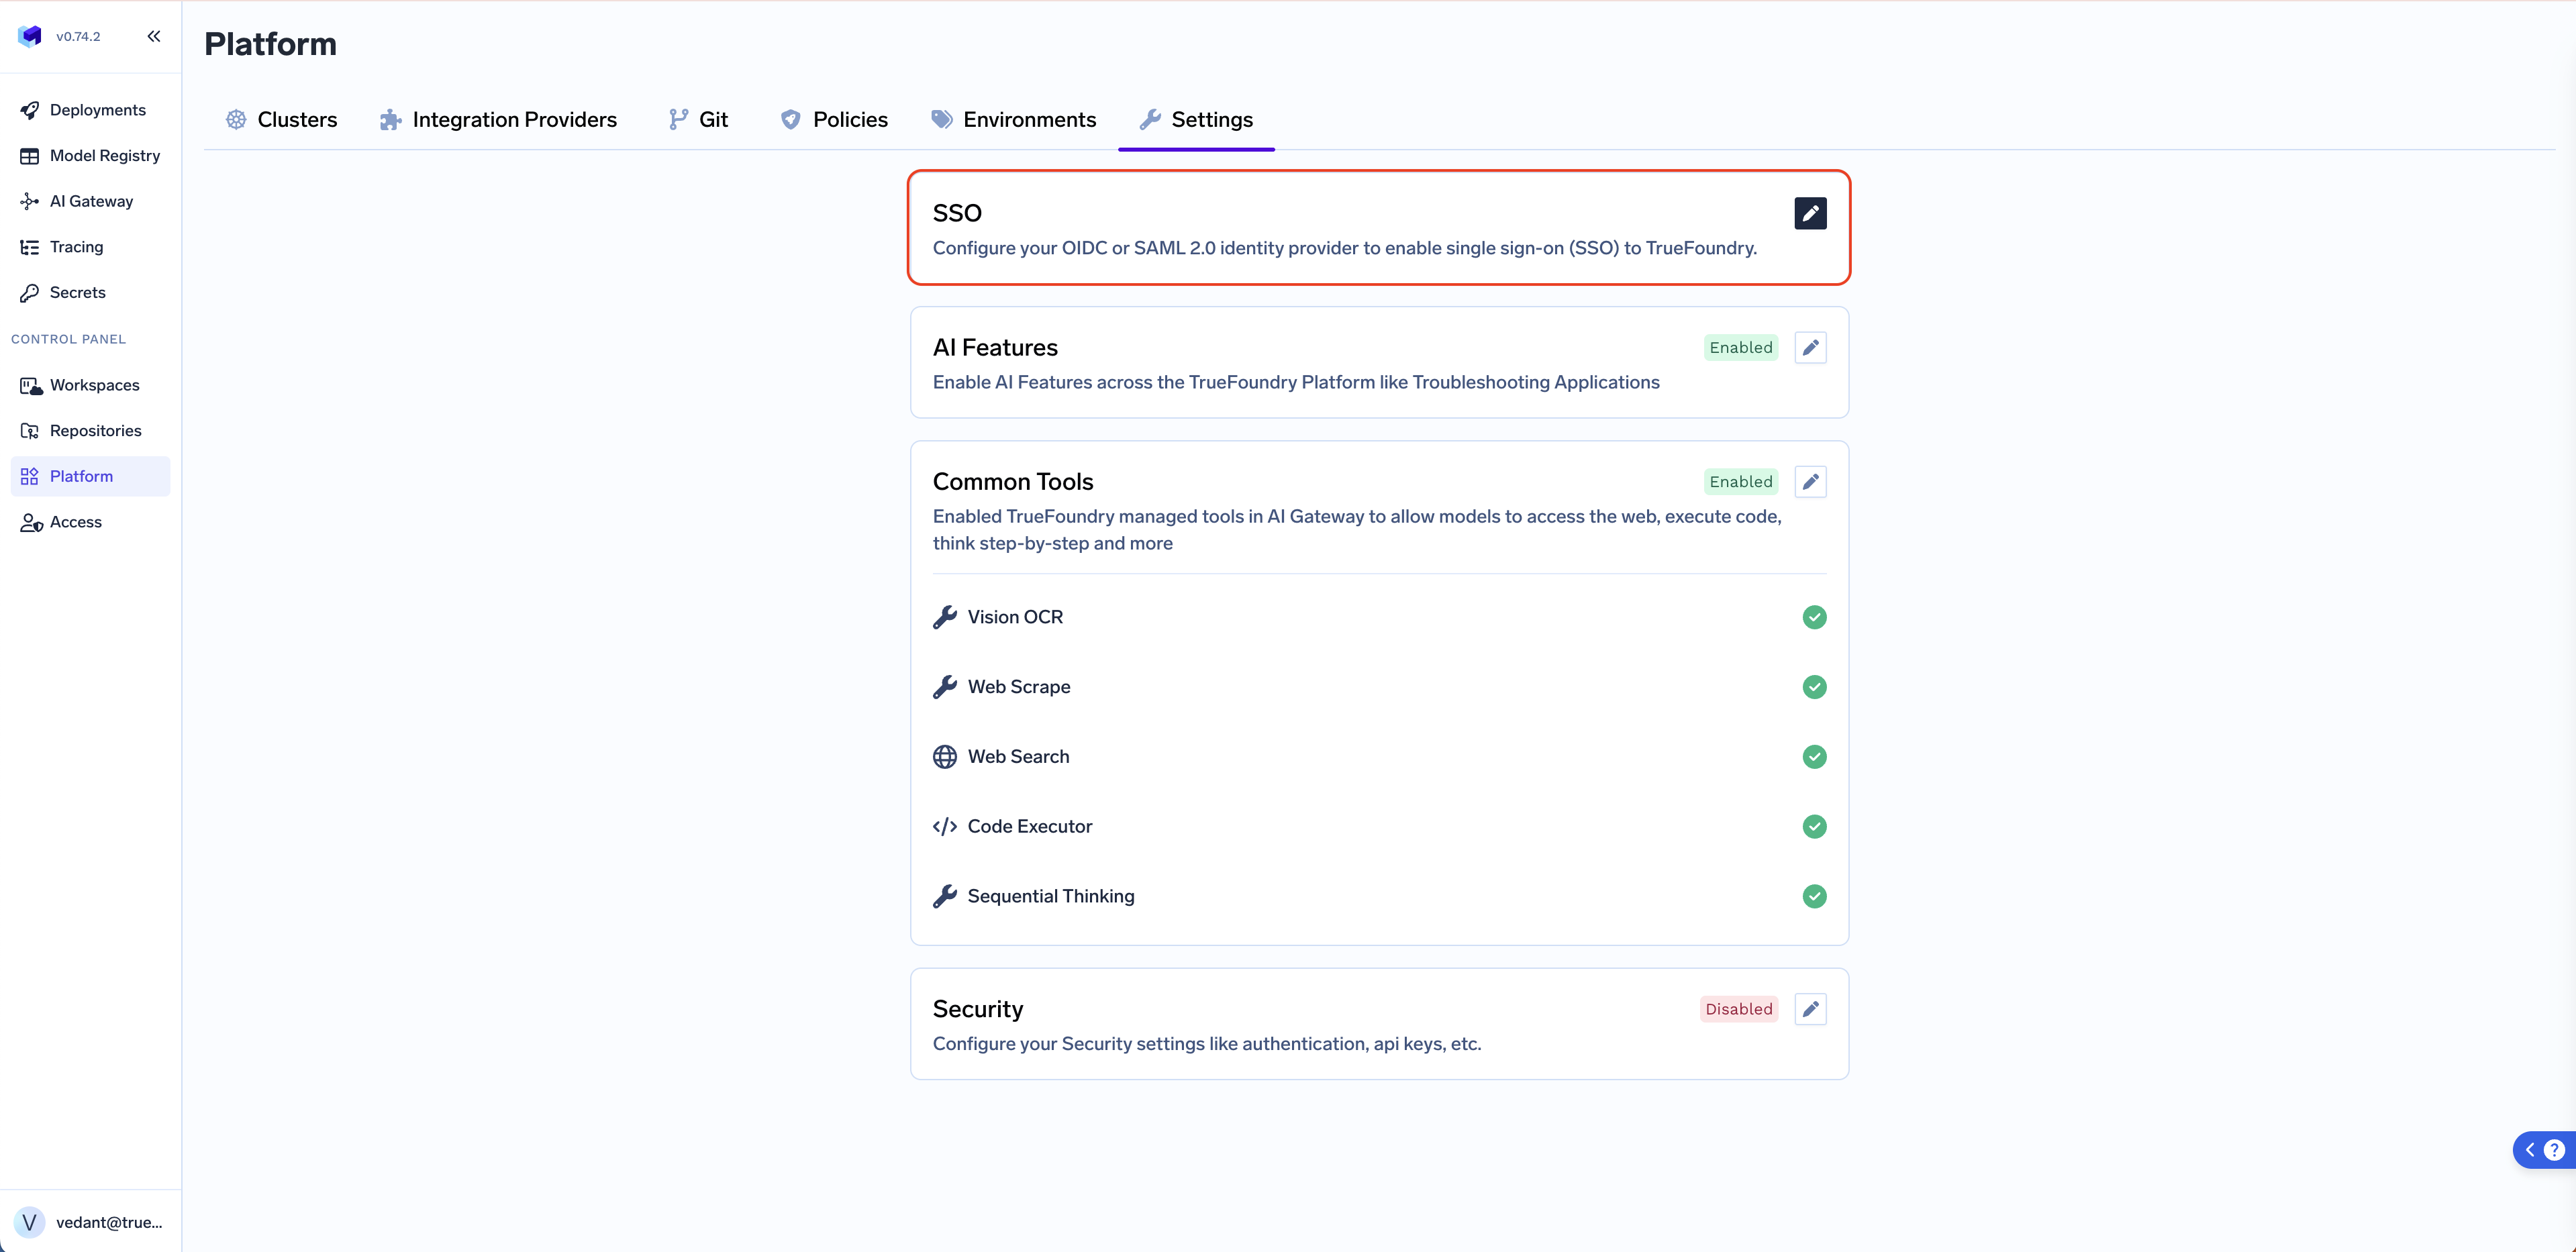
- OpenID Connect (OIDC)
- SAML v2
1
Create a client application in your IdP
Set the redirect/callback URL to
https://login.truefoundry.com/oauth2/callback2
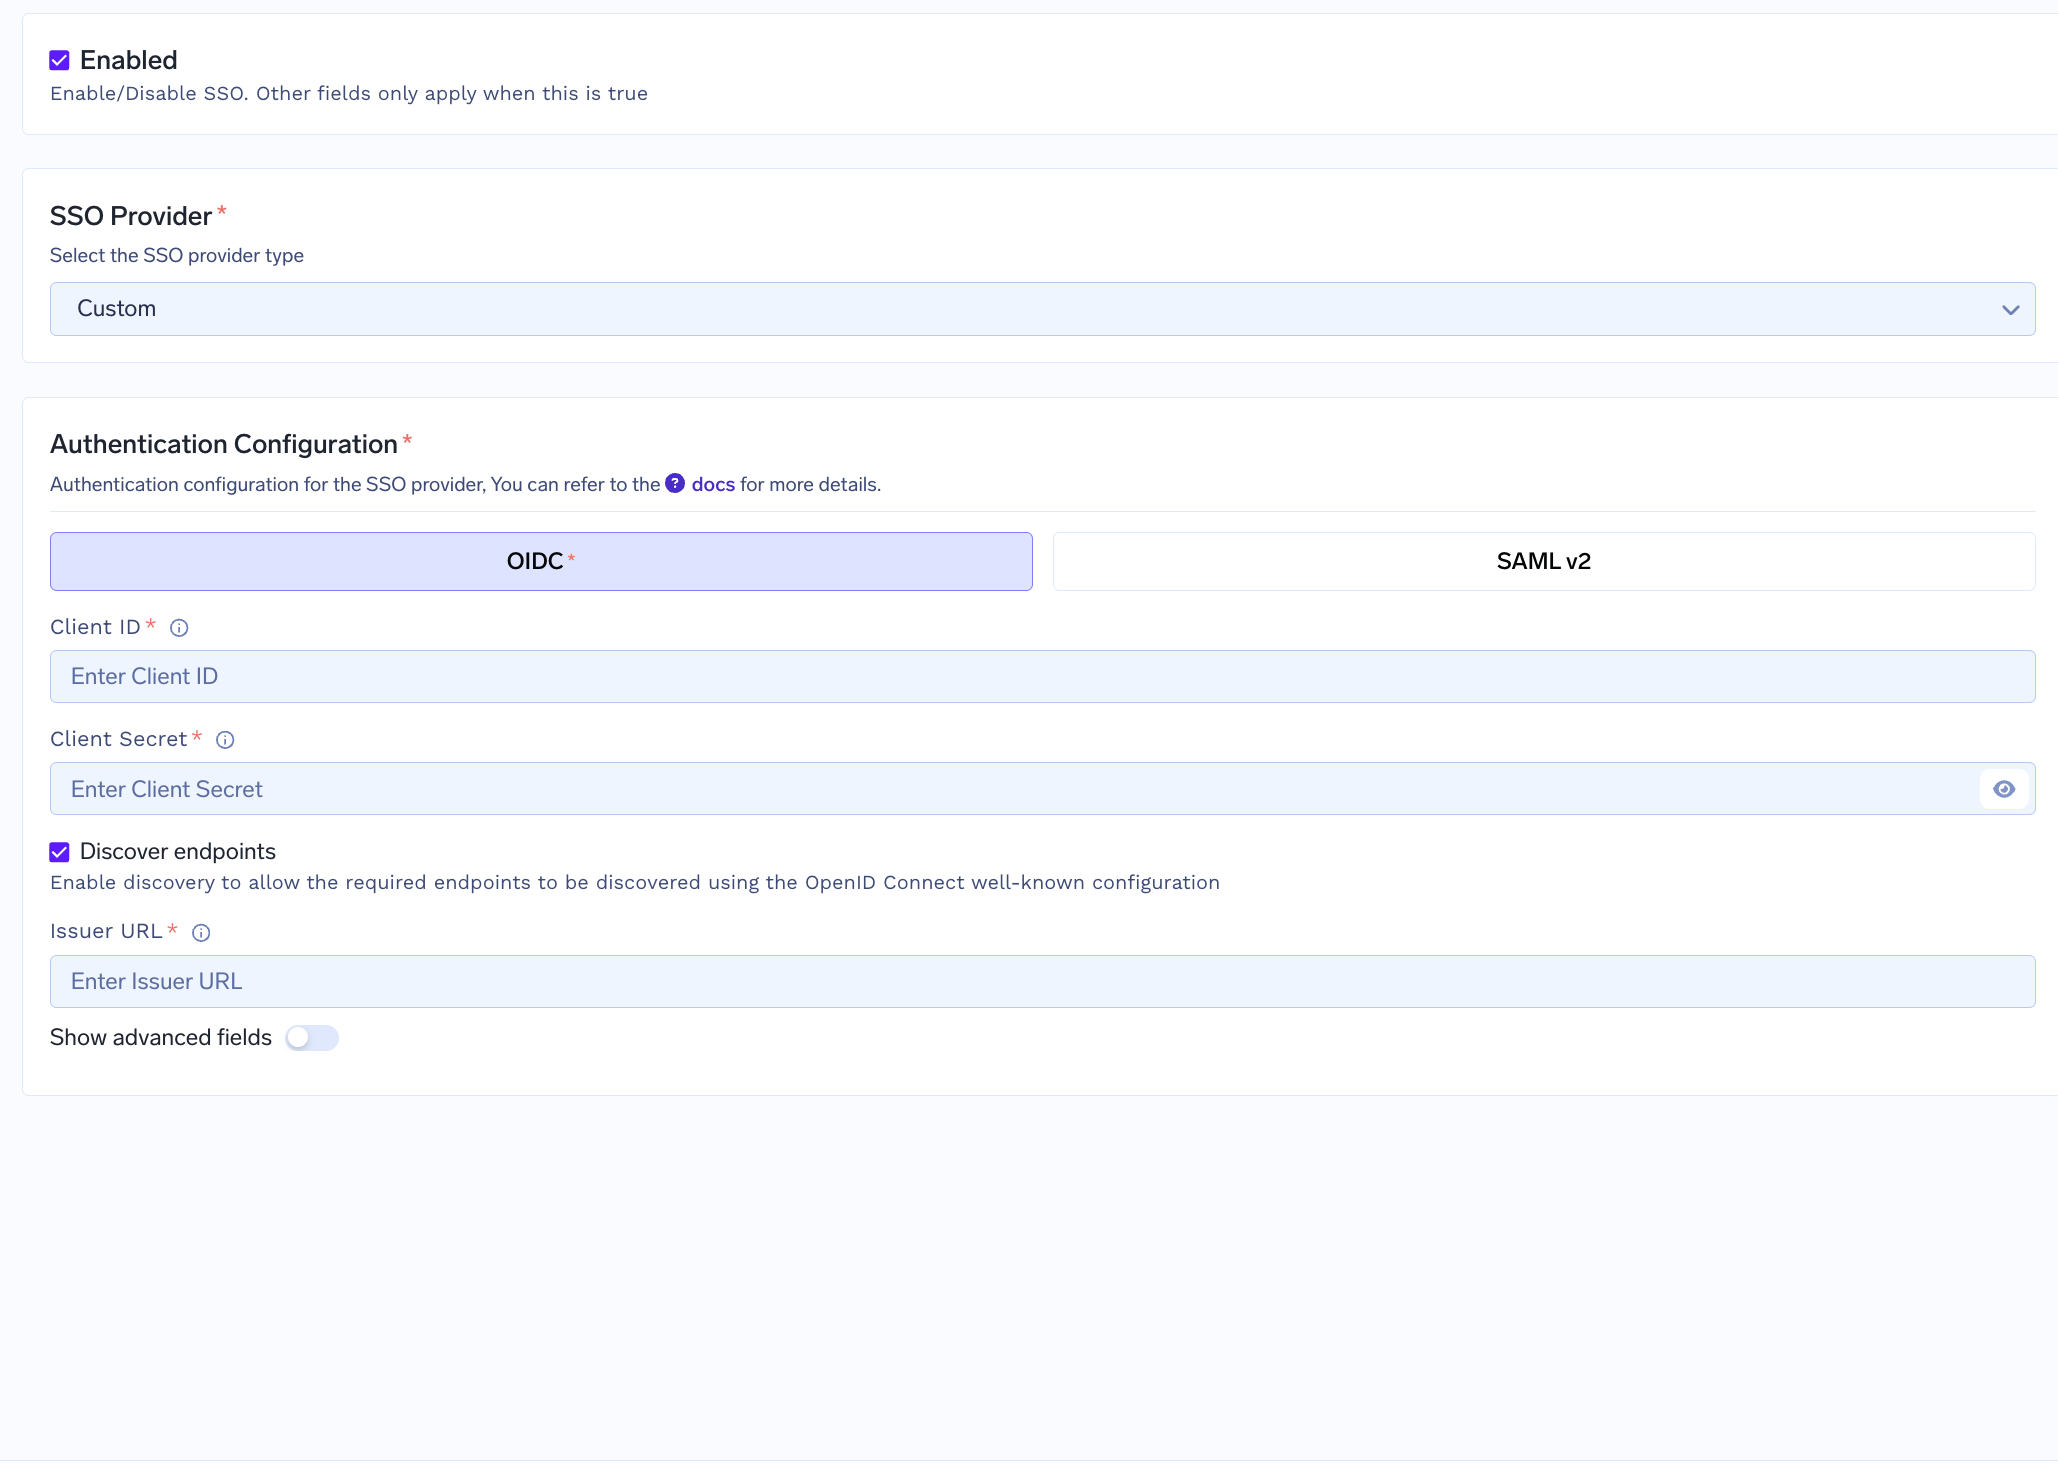
Fill up the TrueFoundry SSO settings form
Fill up the TrueFoundry SSO settings form with the fields as described
below: -
Client ID - Client Secret - Discover endpoints — If you
enable this as True, we will automatically discover the endpoints from the
issuer URL. If you mark this as disabled, you will need to manually set the
Authorization Endpoint, Token Endpoint and UserInfo Endpoint - Issuer URL - your IdP’s issuer - used with discovery to auto‑populate endpoints. -
Scopes - Space separated list of scopes. Defaults to openid emailAdvanced Customizations (apply to both OIDC and SAML)
You can customize the login button that will be shown to the user while logging into Truefoundry and token settings.Button Text/Button Image URL- customize the login button.Email Claim- claim/attribute carrying the user’s email (default:email).Unique ID Claim- claim/attribute carrying a unique user ID (default:sub).
Automated User Management and RBAC
TrueFoundry supports automated user management usinggroups in your SSO claims. You can also configure RBAC automatically using SSO group backed teams.
Features:
- Automatically register users to the platform using SSO.
- Automatically assign
Tenant Adminroles to users usinggroupsclaim in your SSO. - Automatically assign users to a SSO backed team based on
groupsclaim in your SSO. - Use the SSO backed team to configure RBAC at Model and MCP Server.
- Navigate to
Platform > Settings > SSO - Edit your configured SSO and add
Group claimunder advanced fields.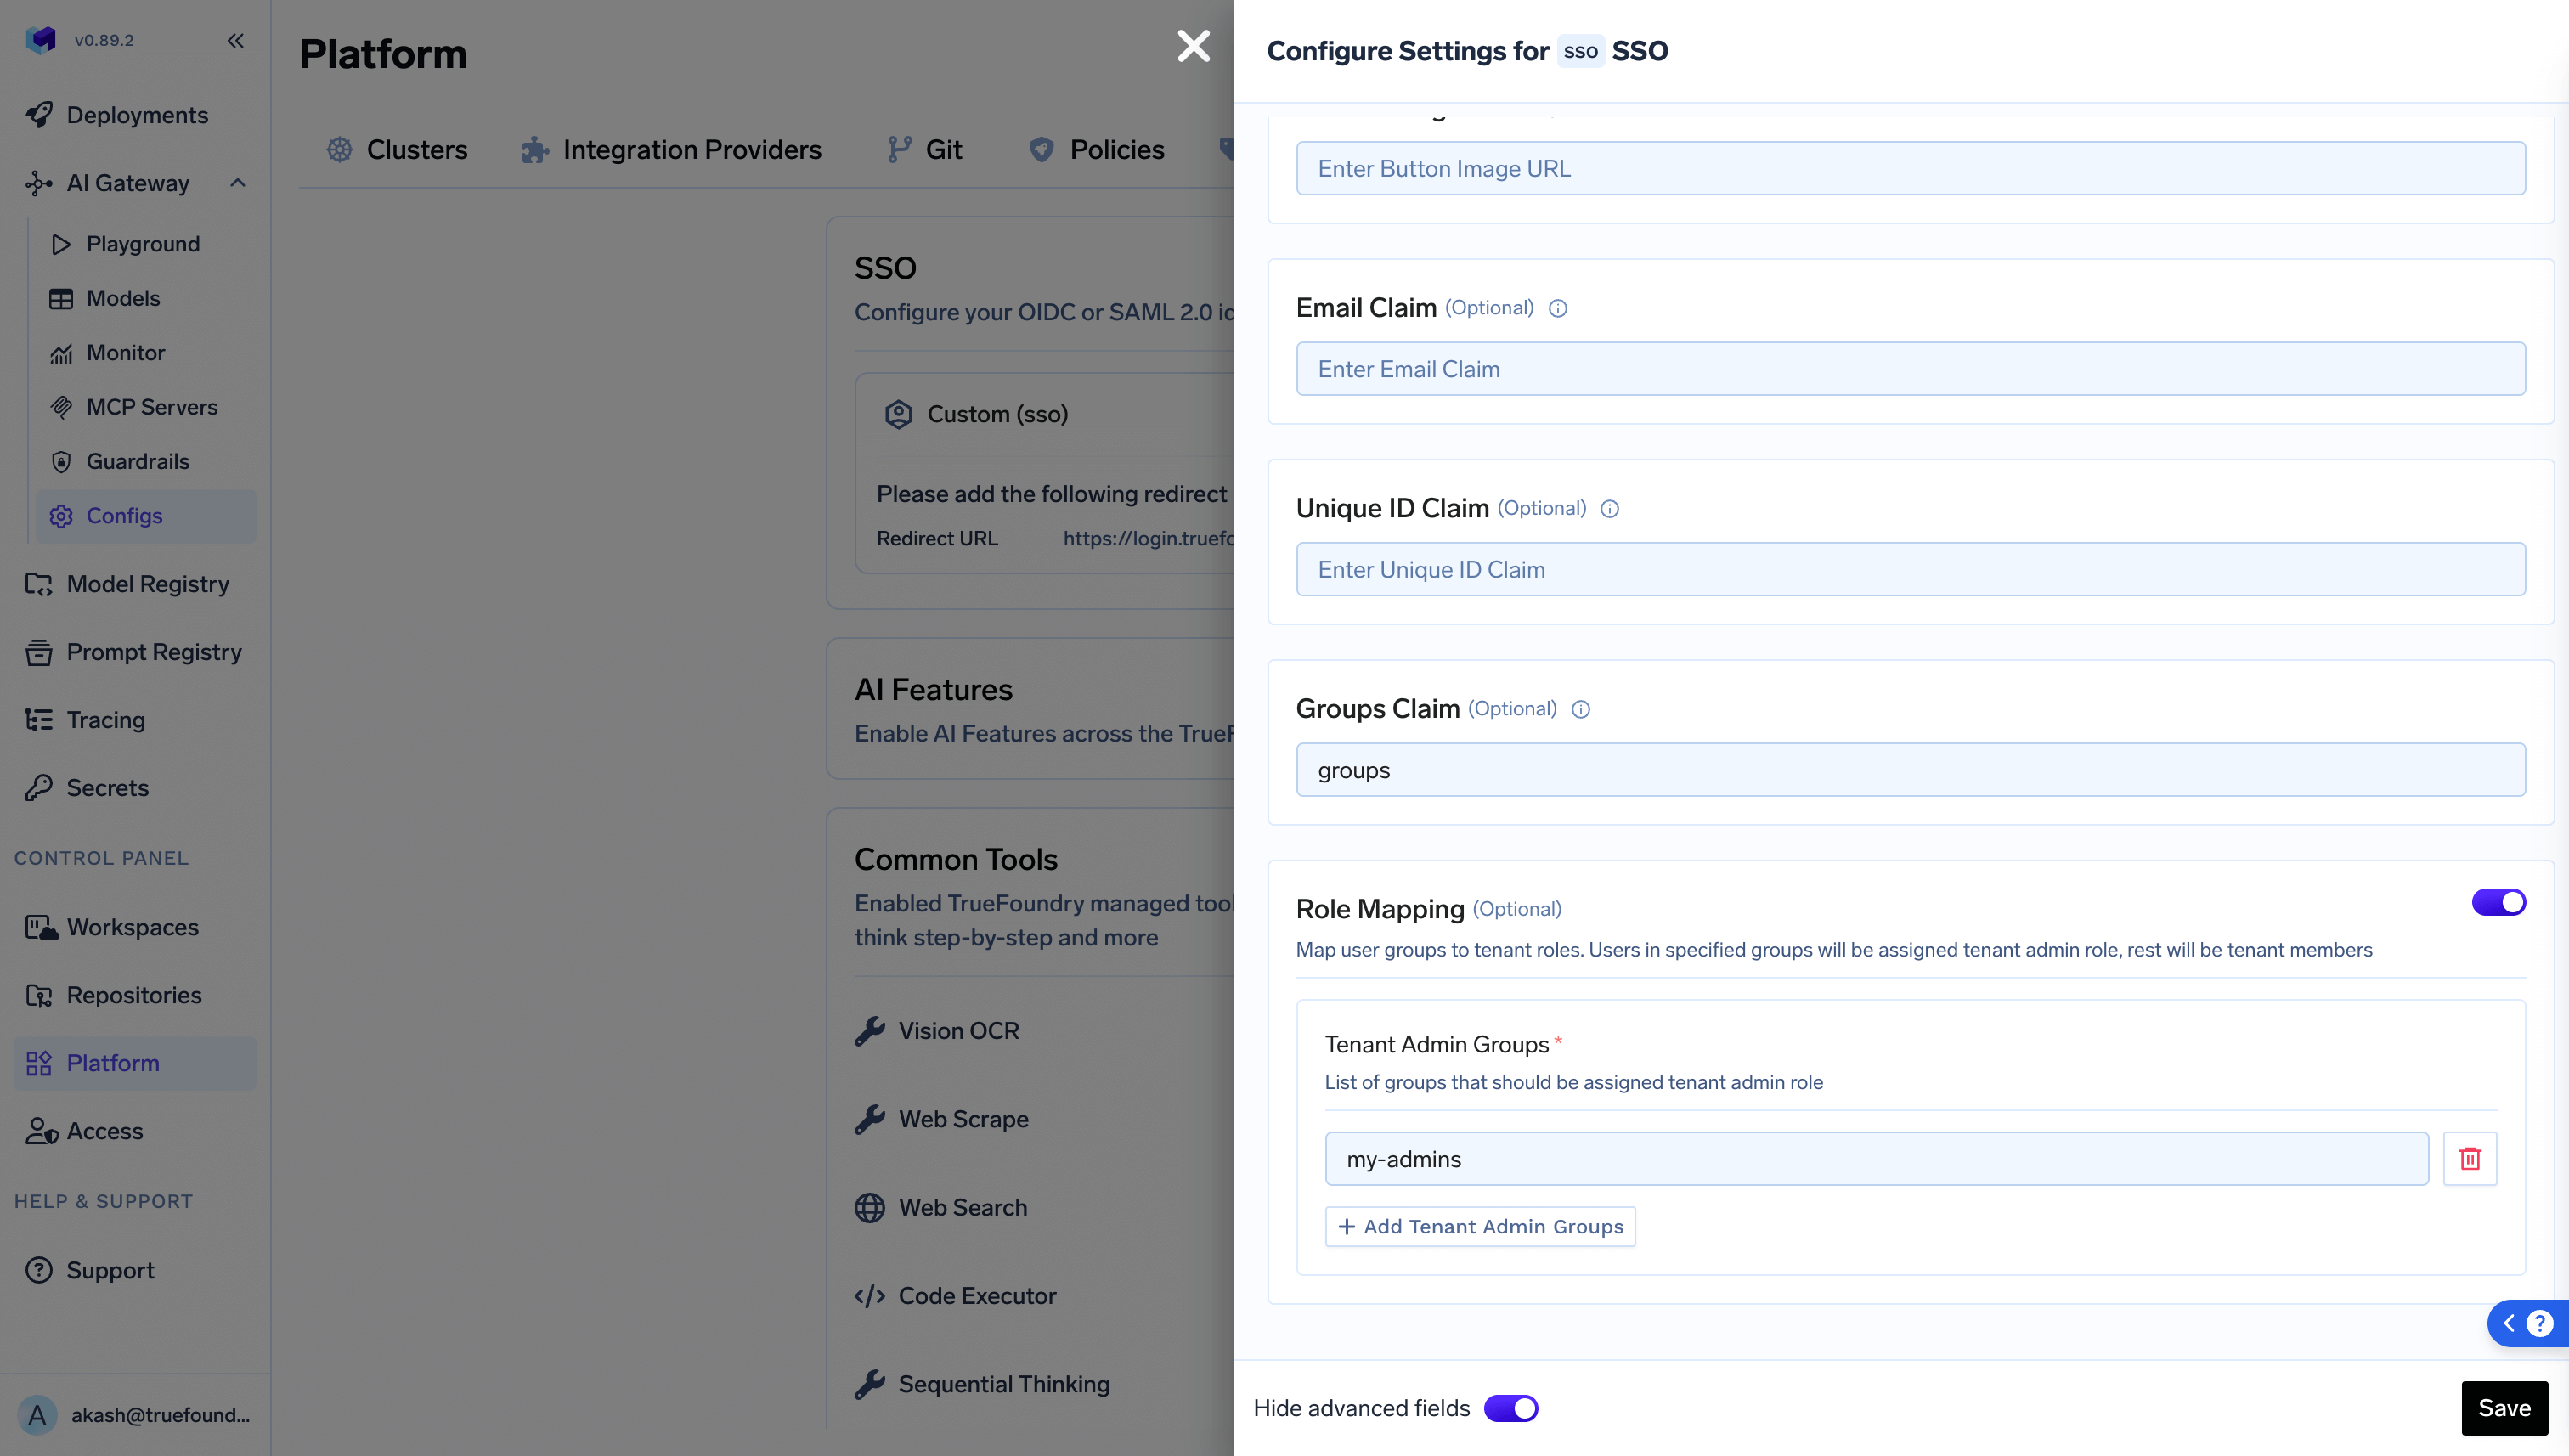
- You can also configure what
groupsshould map toTenant Admin.If once a user’s role is updated manually to tenant admin, it will take the precedence and will not be converted to tenant member even in absence of the SSO groups. - Once this is configured, you can create SSO backed teams under
Access > SSO backed teams. Users will automatically get assigned to these teams based on the groups.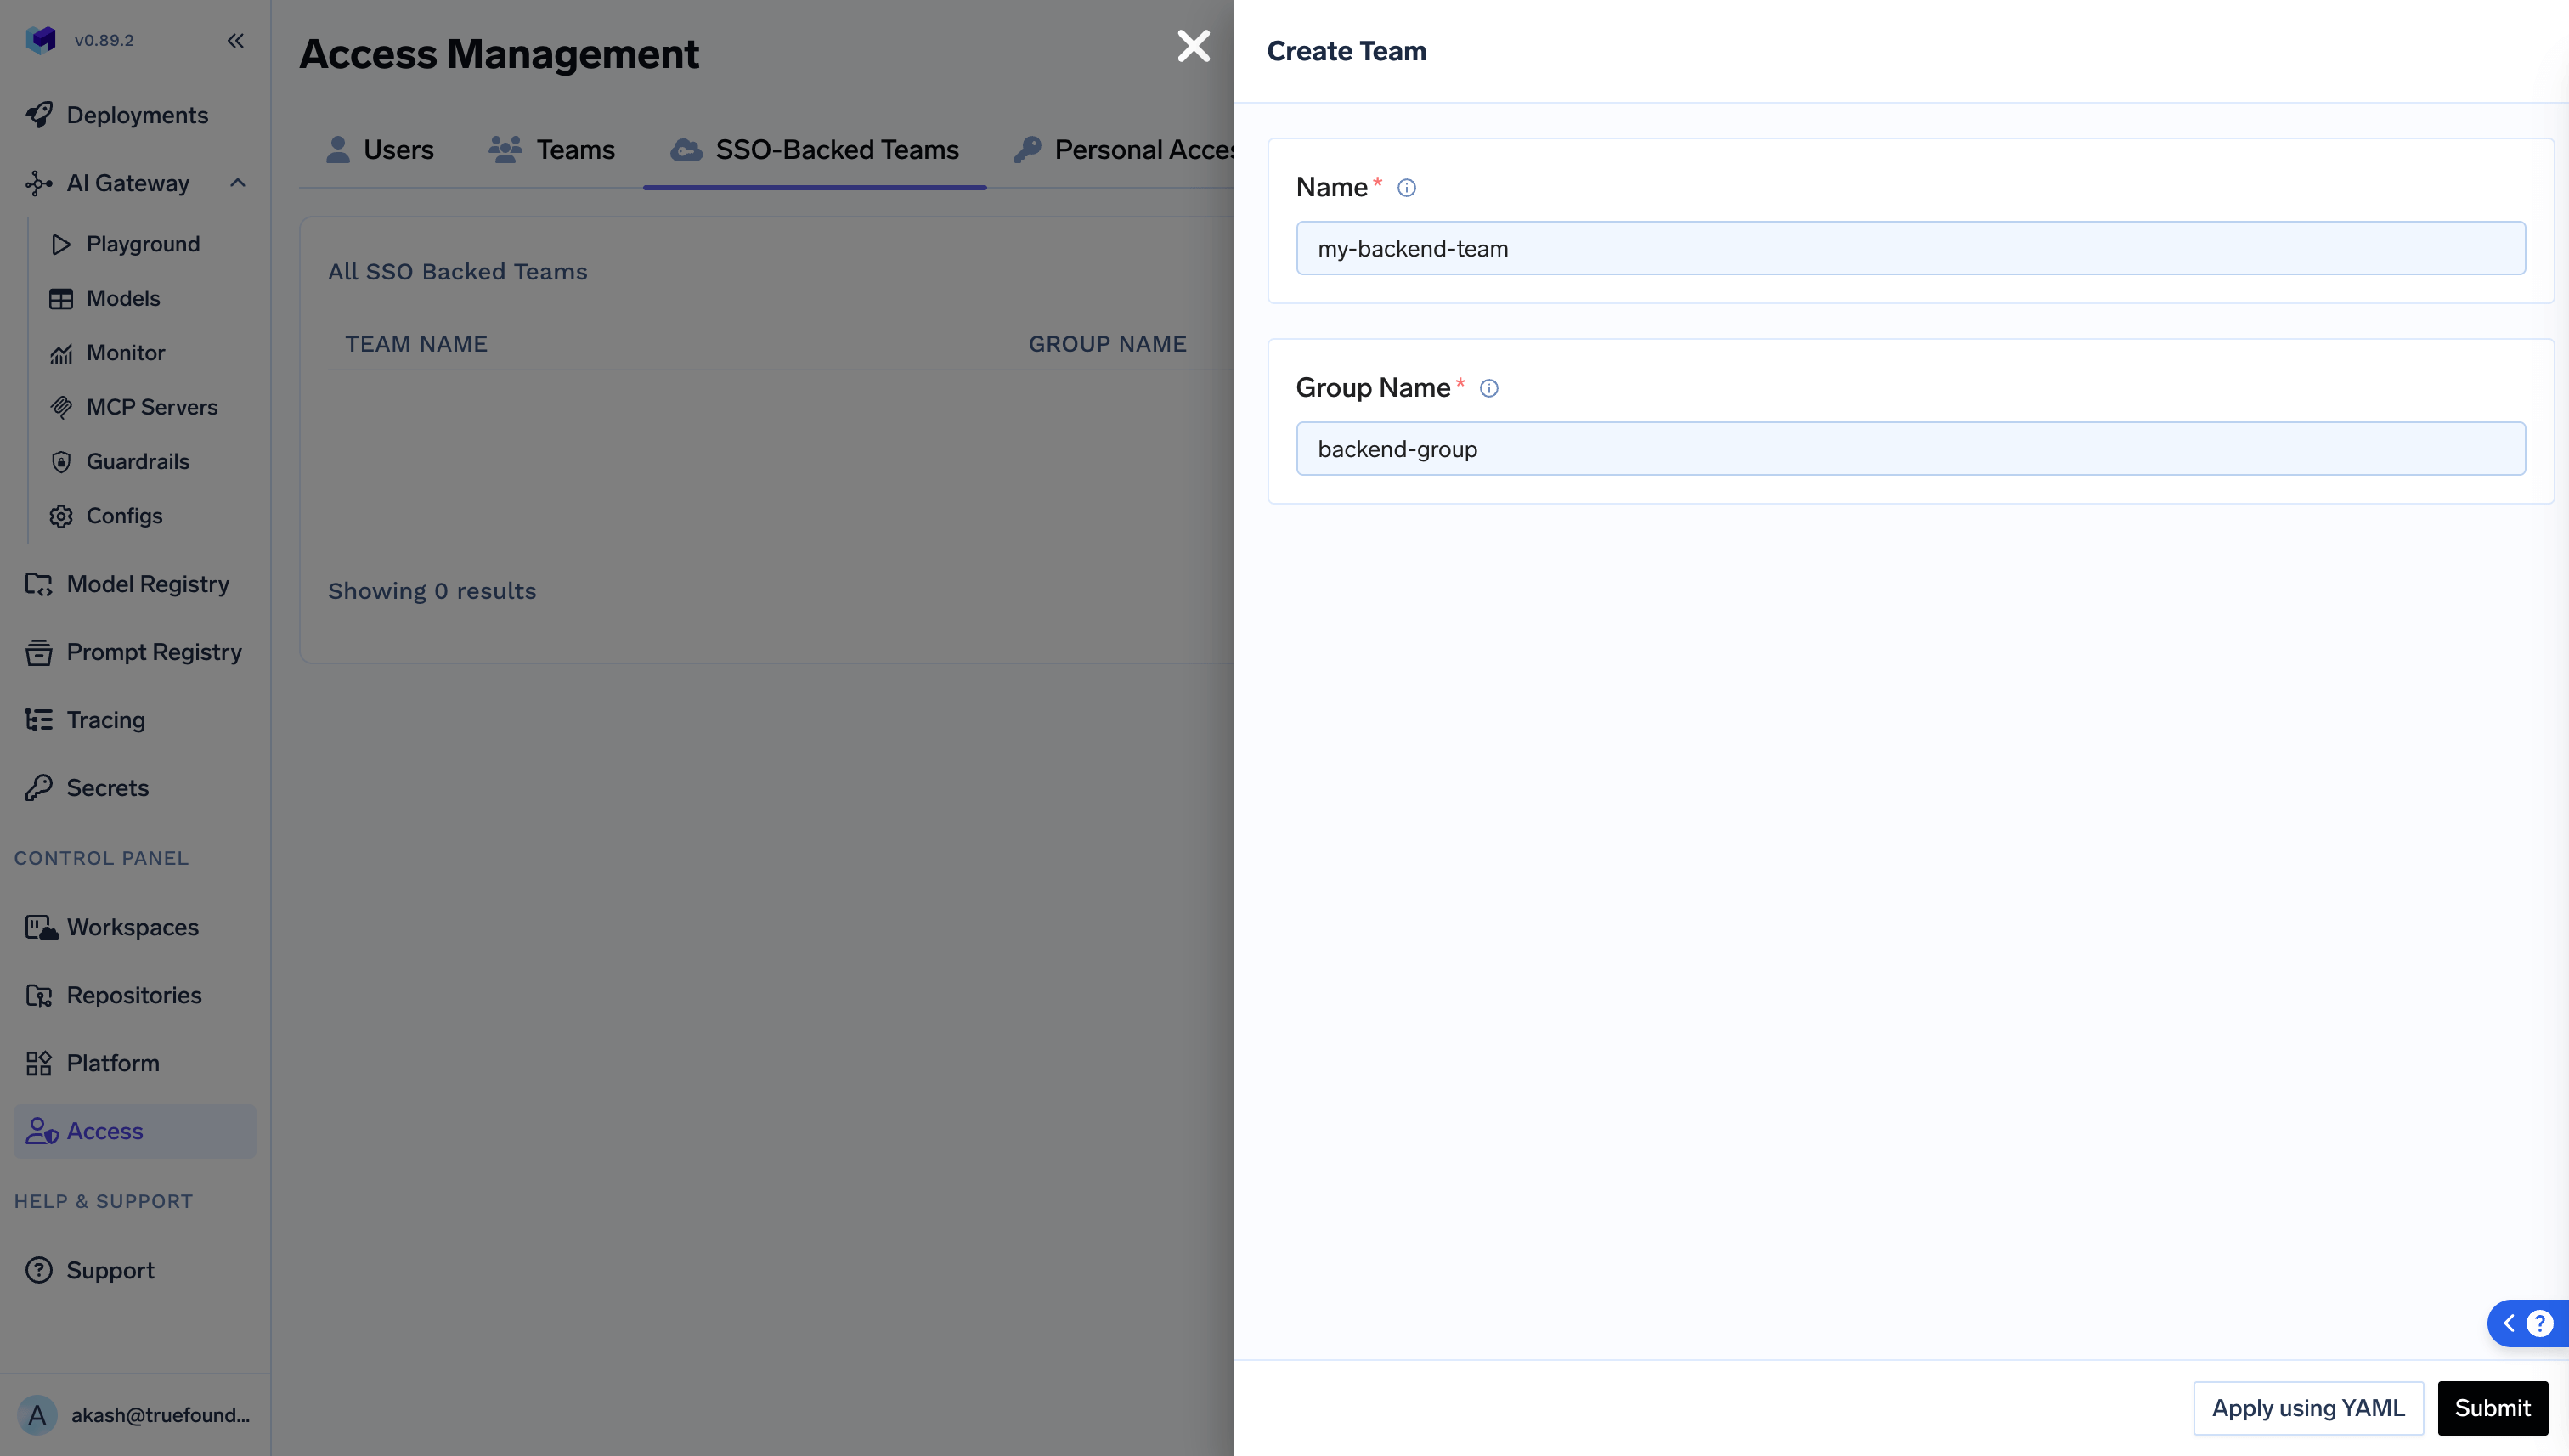
- Further, these teams can be assigned as collaborators to Models, MCP Servers, Clusters, Workspaces, etc.