- The workloads take around 2-3 GB of VRAM - so you can allocate multiple replicas of this workload on a single GPU which has around 16GB of VRAM or more.
- Each workload has sparse traffic and its not able to max out the GPU usage.
- TimeSlicing: In this approach, you can slice a GPU into a few fixed number of fractional parts and then choose a fraction of GPU for this workload. For e.g, we can decide to divide a GPU into 10 slices and then request 3 slices for one workload, 5 slices for workload2 and 2 slices for the workload3. This means that worload1 will use 0.3 GPU (compute + 30% of VRAM), workload2 will use 0.5 GPU and workload3 will use 0.2 GPU. However, timeslicing is only used for scheduling the workloads on the same GPU - it doesn’t mean any actual isolation on the machine. For example, if the GPU machine has 16GB VRAM, its on the user to actually make sure that workload1 takes less than 4.8GB VRAM, workload2 takes less than 8 GB of VRAM and workload3 takes less than 3.2 GB of VRAM. If one workload starts taking more memory suddenly, it can lead to crashing of the other processes. The compute is also shared but one workload can go upto using the complete GPU if the other workloads are idle - its basically context-switching among the three workloads. You can read about this more here.
- MIG (Multi-Instance GPUs): This is a feature provided by Nvidia only on the A100, H100 and newer generation GPUs - it doesn’t work on other GPUs. We can divide the GPUs into a fixed number of configurable parts as mentioned in the table below. The workloads can choose one of the slices and they will get compute and memory isolation. The instances are not exactly the complete fractions of the GPU, but more discrete units as mentioned in the table below. For e.g. let’s say we divide one A100 GPU of 40GB into 7 parts - then we can place 7 workloads each using around 1/7 GPU and 5GB VRAM. Please note that we cannot simply provide 2 slices to one workload in this case and expect it to get 2/7 GPU and 10 GB VRAM. Each workload can only get one slice in this case. Here are the different MIG profiles:
| Feature | TimeSlicing | MIG (Multi-Instance GPU) |
|---|---|---|
| GPU Support | Works on most GPUs. | Only supported on NVIDIA A100 and H100 GPUs. |
| Isolation | No real isolation. User is responsible for memory management. Potential for crashes if one workload exceeds its allocated memory. | Strong Isolation. Compute and memory are isolated between instances. Guaranteed resource allocation. |
| Resource Allocation | Divides GPU into fractional parts (e.g., 0.3, 0.5, 0.2). Workloads can use these fractional parts. | Divides GPU into pre-defined, discrete instance types (as per NVIDIA’s configurations). Workloads are assigned entire instances. |
| VRAM Management | User-managed. VRAM allocation is not enforced by the hardware. | Hardware-enforced. Each instance has dedicated VRAM. |
| Compute Sharing | Compute is shared via context-switching. Workloads can potentially use the entire GPU when others are idle. | Compute is partitioned and isolated to each instance. No sharing of compute resources beyond the instance’s allocation. |
| Flexibility | More flexible in terms of resource allocation fractions (e.g., can request 0.3, 0.5, etc.). | Limited to NVIDIA’s pre-defined instance types. Less flexible in terms of fine-grained resource requests. |
Deploying on Fractional GPUs via MIG
1
Create a Nodepool with MIG enabled
We will need to create a separate nodepool for MIG enabled GPUs. Every GPU has different MIG profiles as mentioned in this page: https://docs.nvidia.com/datacenter/tesla/mig-user-guide/index.html. For e.g. here are the MIG profiles for A100 GPU:
While creating the nodepool, we will need to select the MIG profile. Here are the steps to do it in different cloud providers:
| GPU | GPU Compute Fraction / Instance | Number of instances per GPU | GPU Memory / Instance | Configuration Name | GPU Instance Profile (for Azure) |
|---|---|---|---|---|---|
| A100 (40GB) | 1/7 | 7 | 5GB | 1g.5gb | MIG1g |
| A100 (40GB) | 2/7 | 3 | 10GB | 2g.10gb | MIG2g |
| A100 (40GB) | 3/7 | 2 | 20GB | 3g.20gb | MIG3g |
| A100 (80GB) | 1/7 | 7 | 10GB | 1g.10gb | MIG1g |
| A100 (80GB) | 2/7 | 3 | 20GB | 2g.20gb | MIG2g |
| A100 (80GB) | 3/7 | 2 | 40GB | 3g.40gb | MIG3g |
- Azure
- GCP
- AWS
Create a Nodepool with MIG enabled using the argument
--gpu-instance-profile of Azure CLI.Shell
2
Deploy your workload on the MIG nodepool
Once you have created the nodepool, you will be able to see the MIG nodepool in the available nodepools in 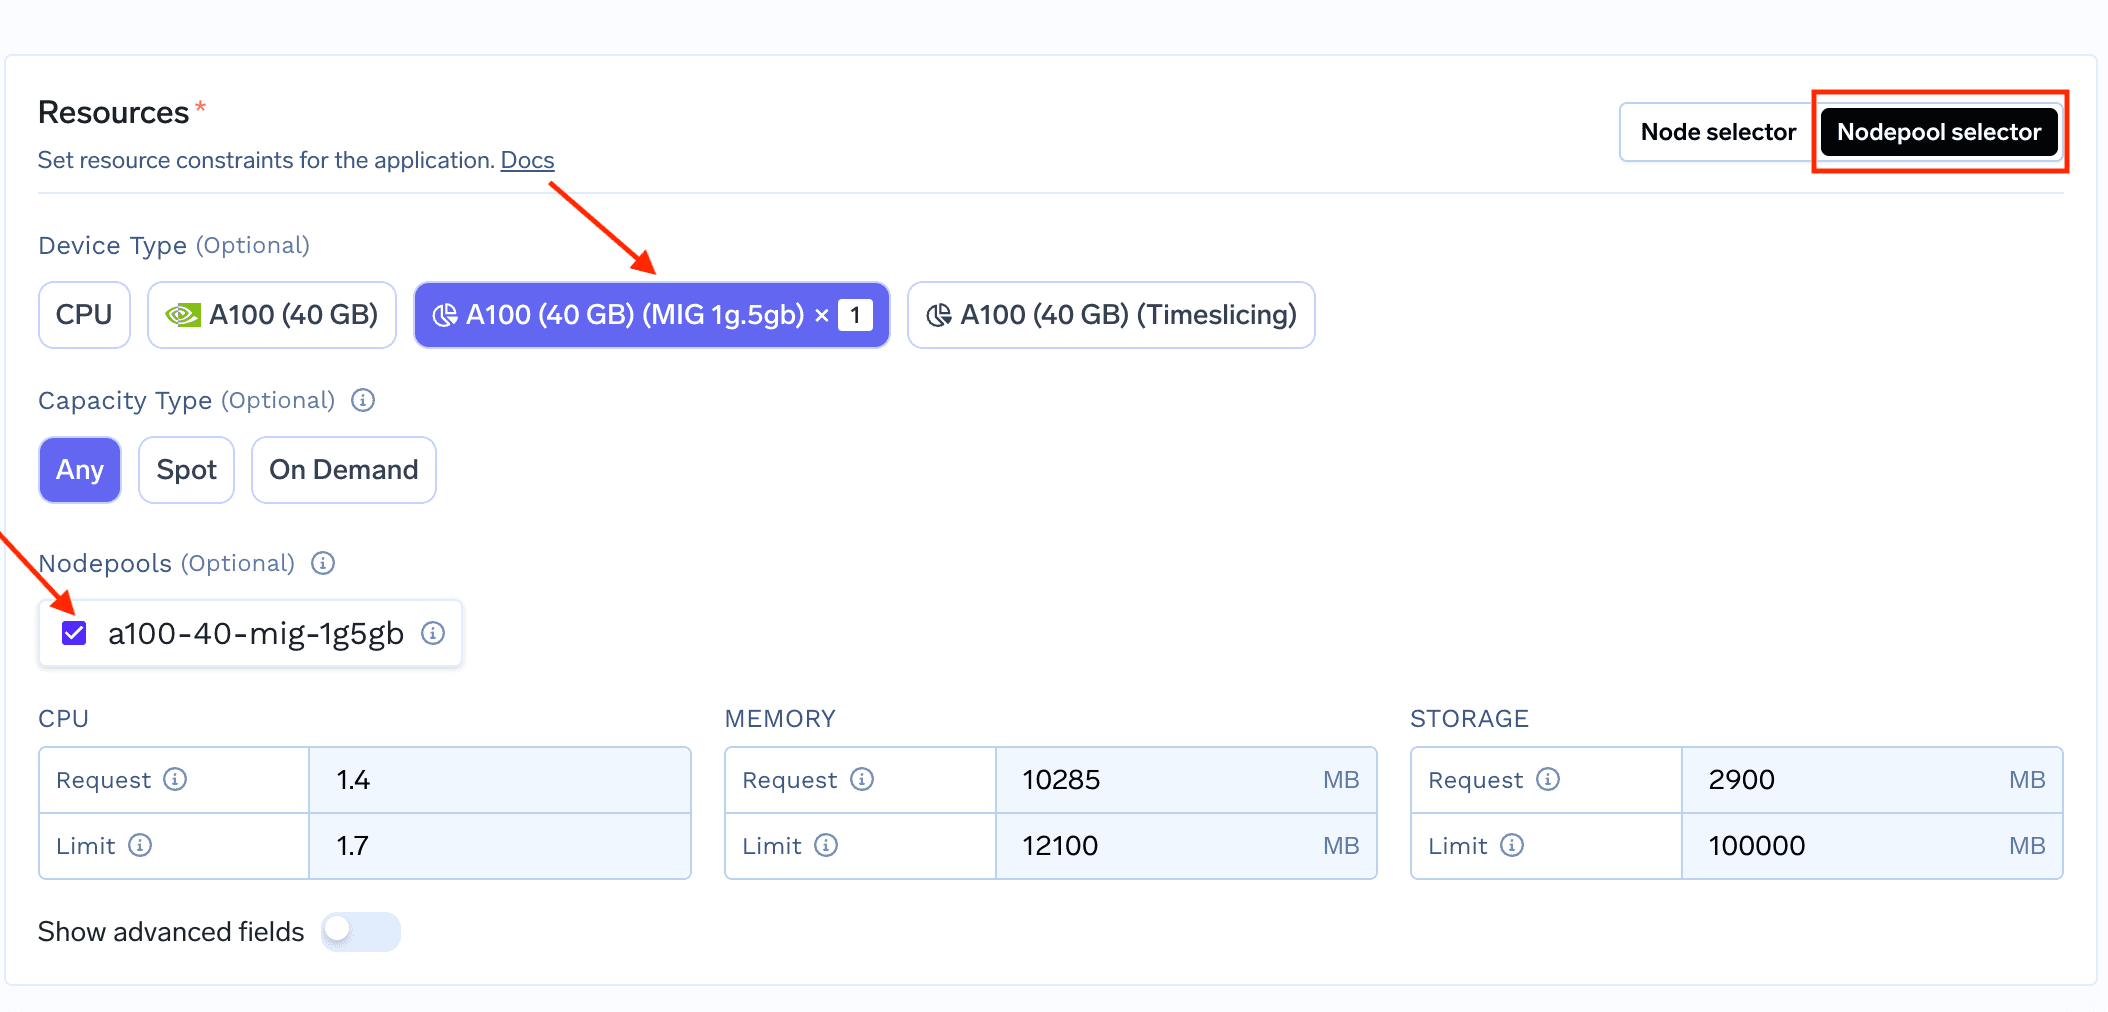
Resources section in deployment.To deploy a workload that utilizes fractional GPU, start deploying your service/job on truefoundry and in the “Resources” section, select nodepool selector.
You can now see the Fractional GPUs on the UI which you can select (as shown below)Using MIG GPU
Deploying on Fractional GPUs via Timeslicing
1
Create a Nodepool with Timeslicing enabled
- Azure
- GCP
- AWS
Create a Nodepool with
device-plugin.config pointing to the correct time-slicing config with Azure CLI.Shell
2
Deploy your workload on the Timeslicing nodepool
Once you have created the nodepool, you will be able to see the timesliced nodepool in the available nodepools in 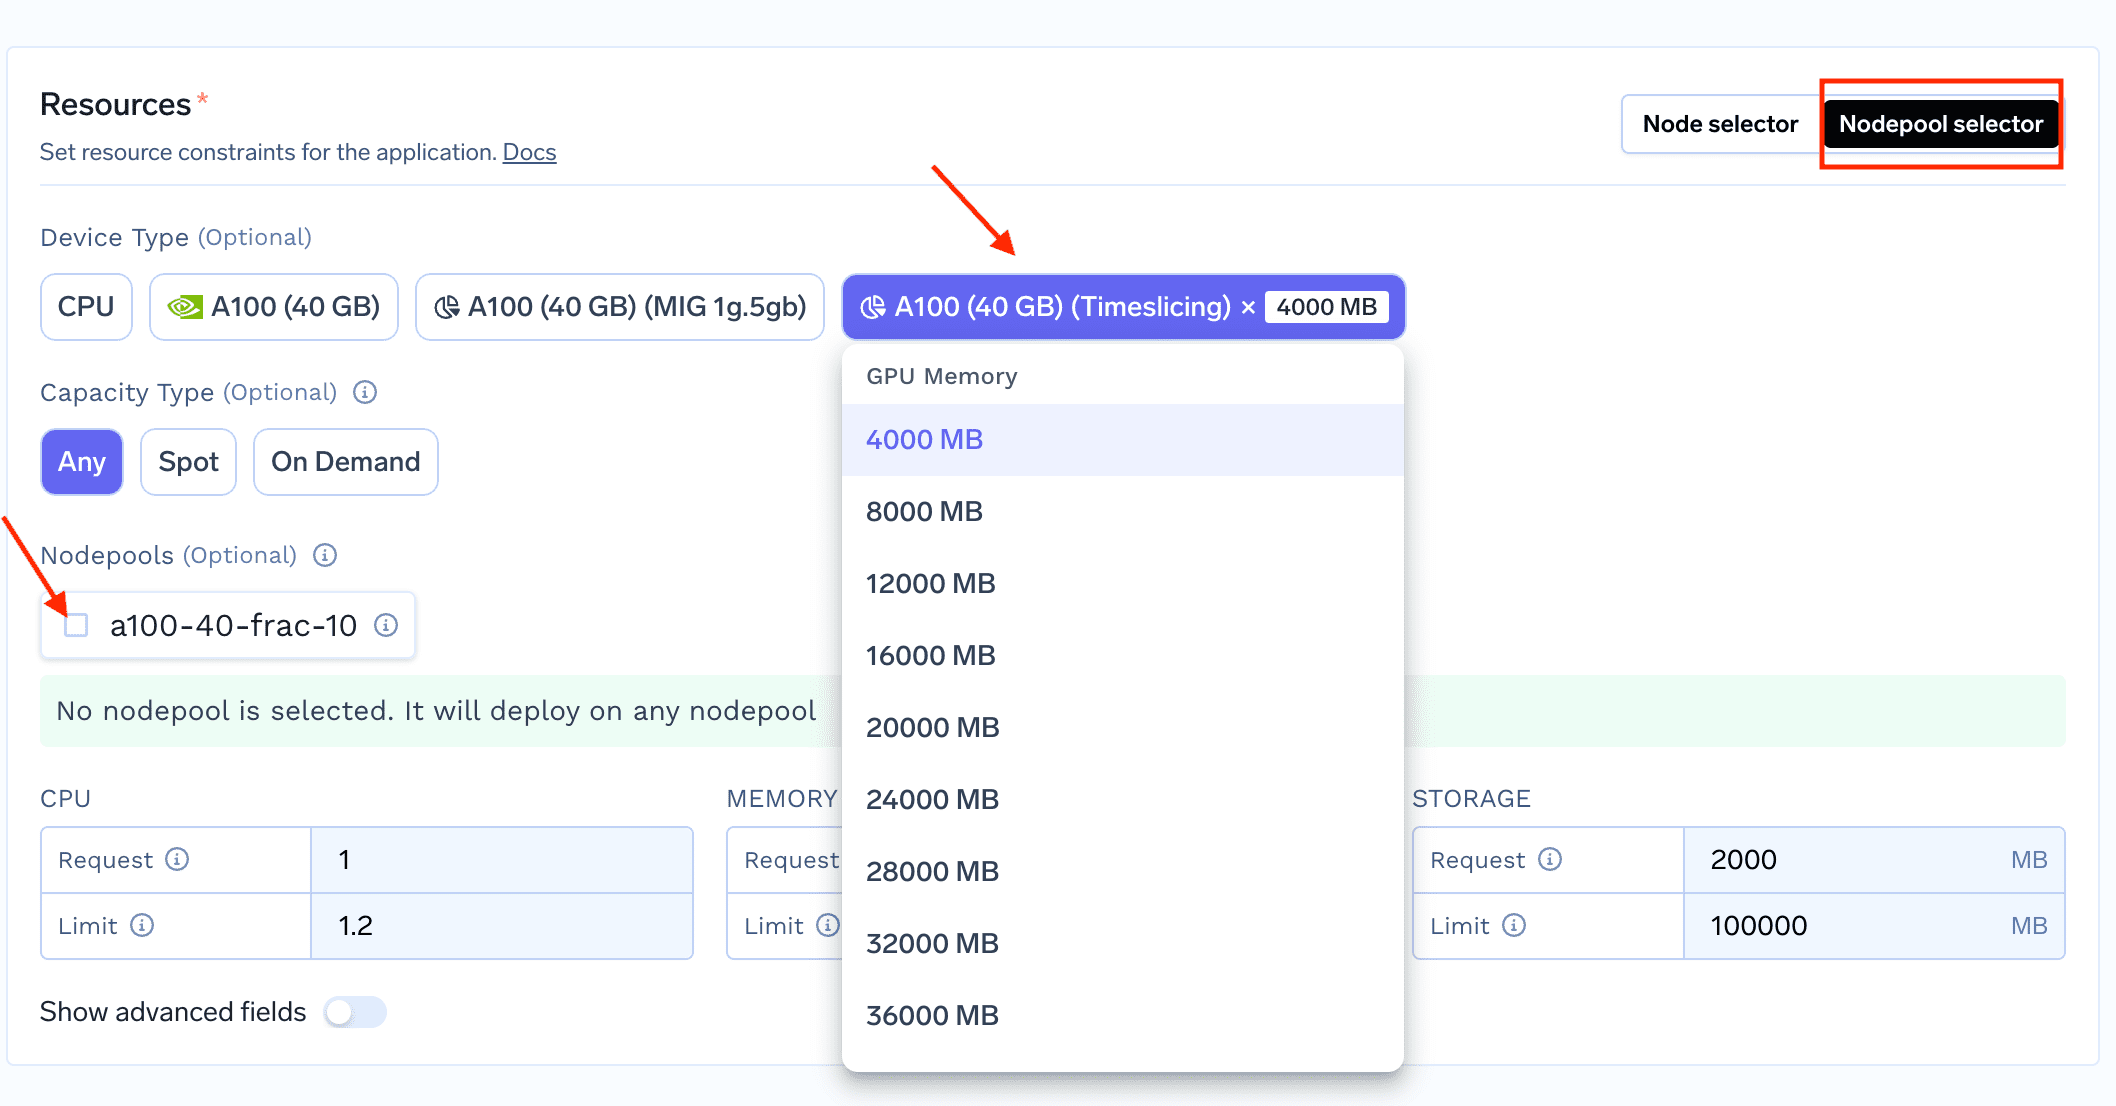
Resources section in deployment.To deploy a workload that utilizes fractional GPU, start deploying your service/job on truefoundry and in the “Resources” section, select nodepool selector.
You can now see the timesliced GPUs on the UI which you can select (as shown below)Using Timeslicing GPU