Gitlab
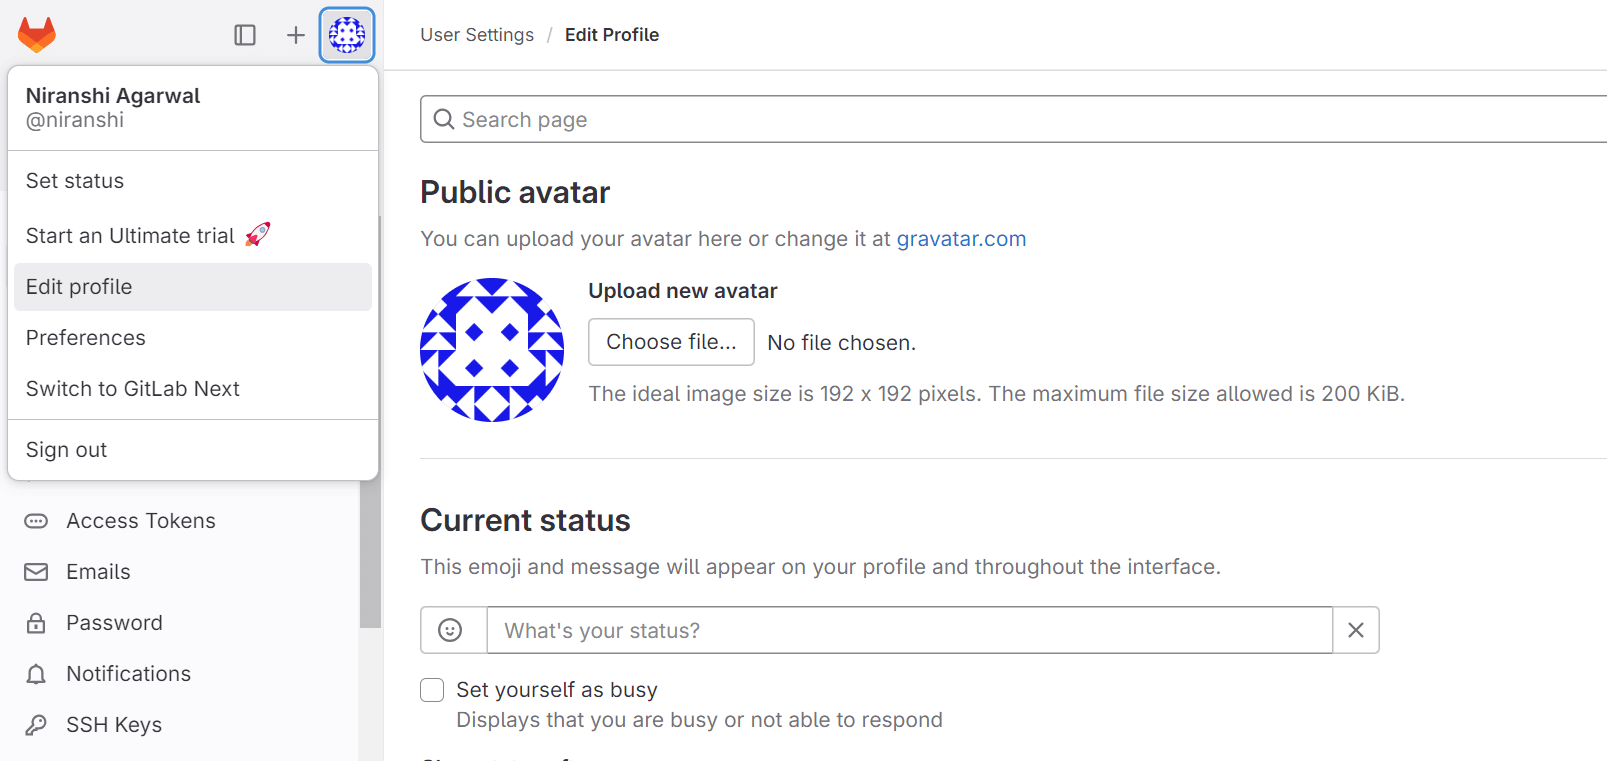
To enable Gitlab integration in your app, you need to create a gitlab app using your gitlab account. This gitlab app can then be authenticated to access repositories of users’ account. Follow these steps to create the gitlab app and integrate it with truefoundry:- Sign in to GitLab.com. On the left sidebar, select your avatar and select Edit profile.
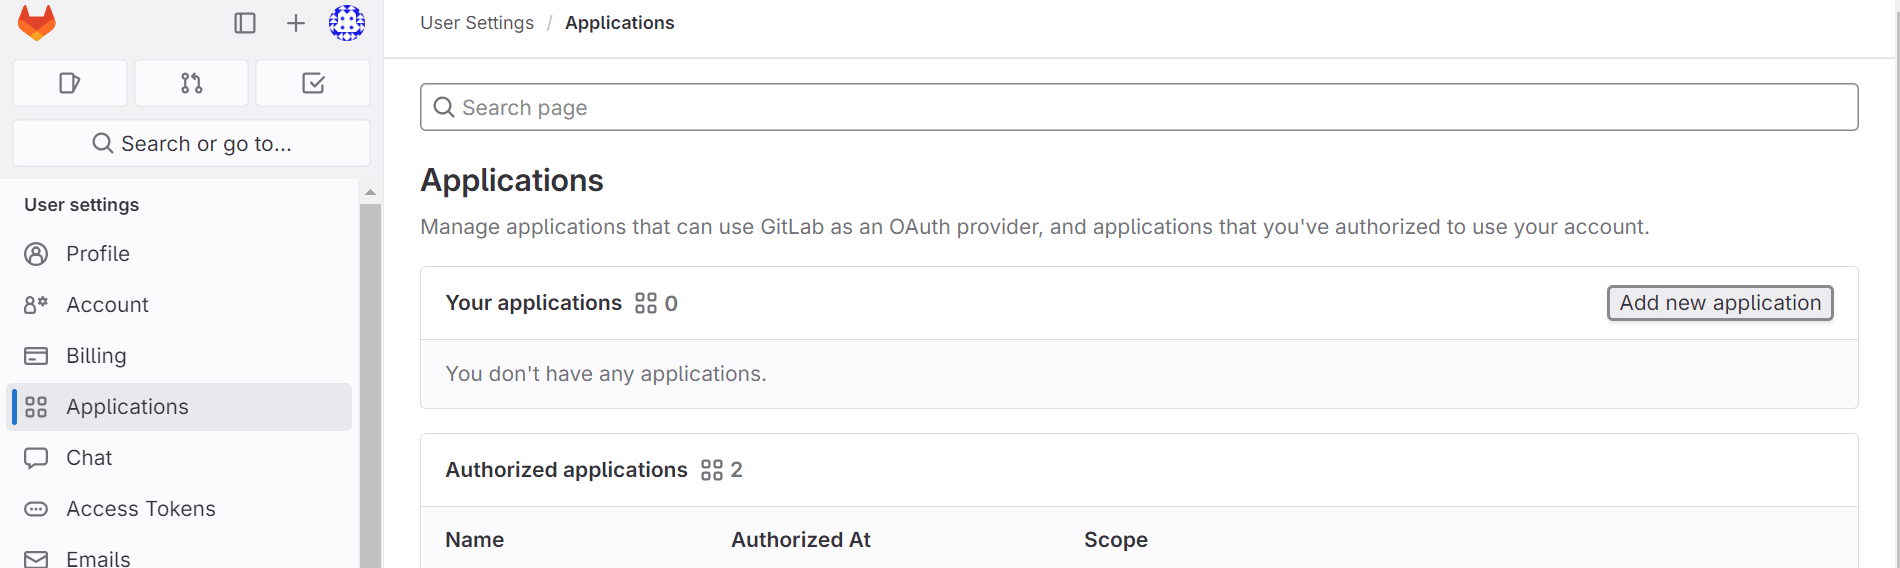
- On the left sidebar, select Applications. Click on the Add new application button right side.
-
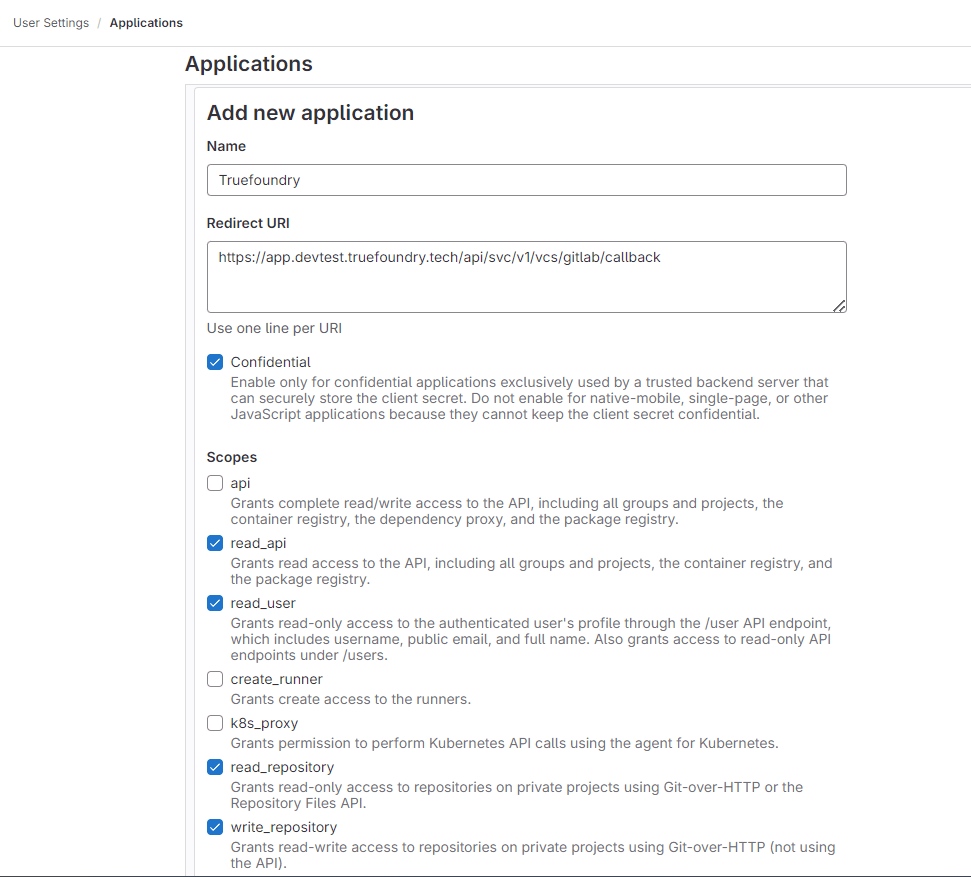
Provide the required details for Add new application.
- Name: This can be anything. Consider something like
<Organization>’s GitLab or<Your Name>’s GitLab or something else descriptive. - Redirect URI: https://app.example-org.truefoundry.com/api/svc/v1/vcs/gitlab/callback
- Enable the Confidential check box.
- Select the following scopes: read_api, read_user, read_repository, write_repository.
- Name: This can be anything. Consider something like
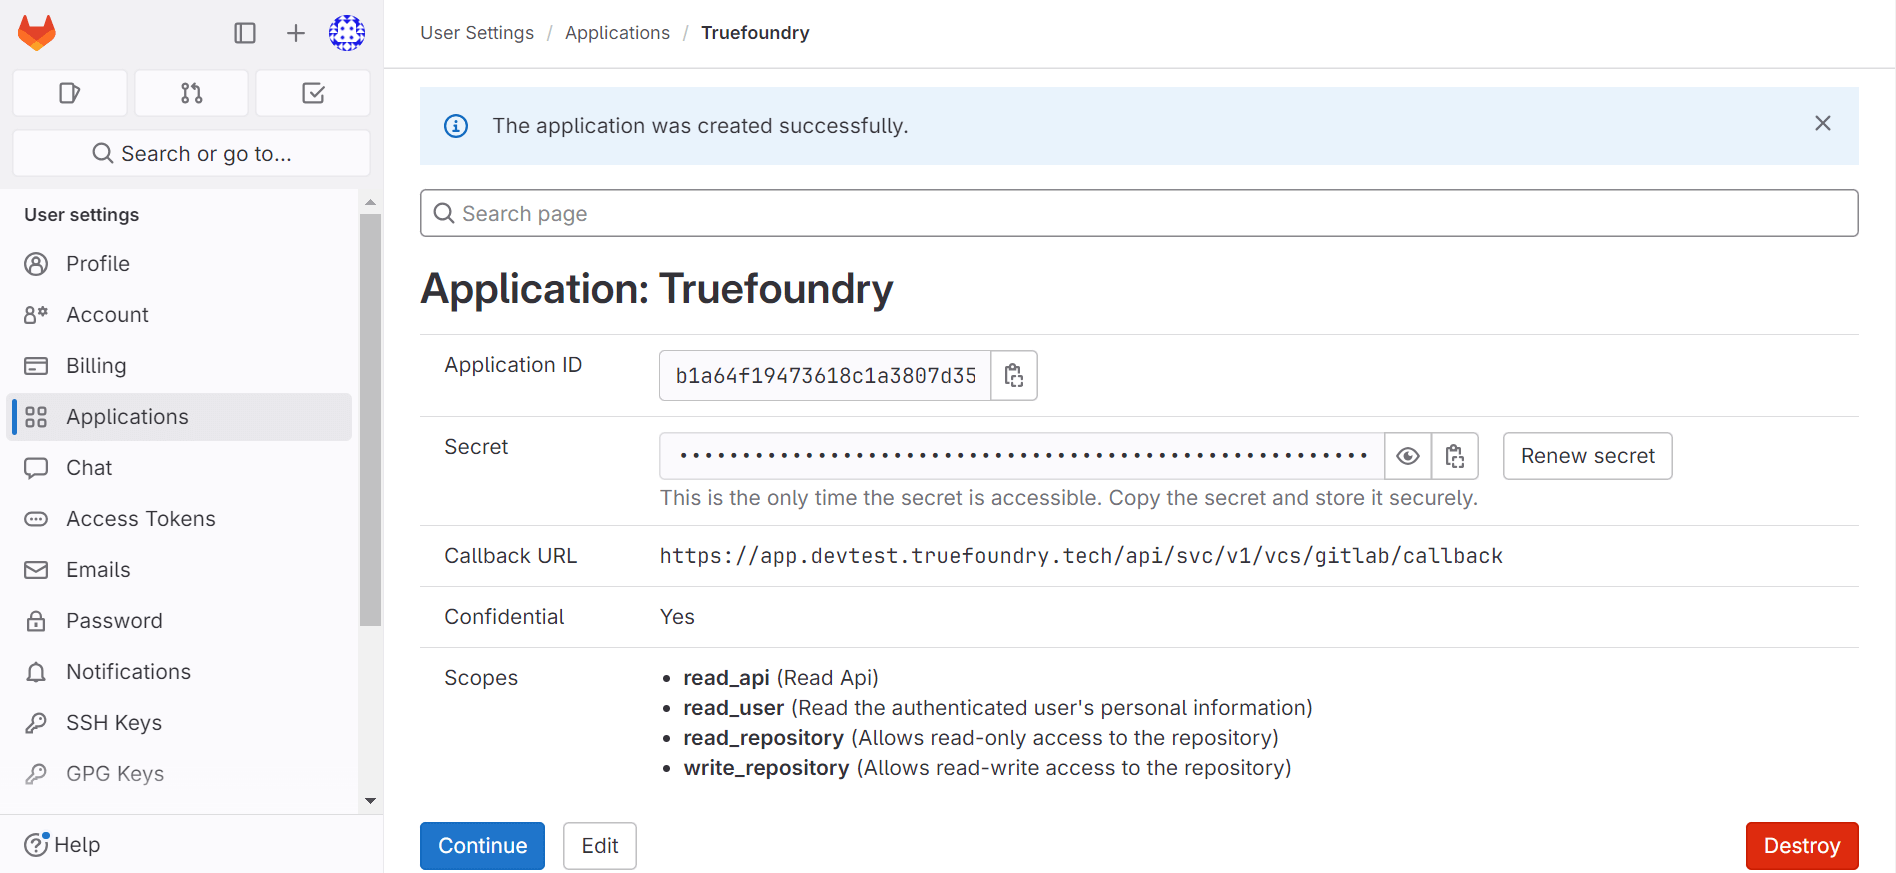
- Select Save application.
- You should now see an Application ID and Secret.
List of connected repositories
- Set environment variables in servicefoundry server :
Azure Repos
This guide walks you through the process of enabling Azure Repo integration with TrueFoundry by creating an app registration in Microsoft Entra ID (formerly Azure AD) and providing the necessary client environment variables to TrueFoundry. This allows the TrueFoundry Control Plane to authenticate and interact with Azure Repos on behalf of the registered app.Prerequisites
Ensure you have:- Access to the Azure portal with the necessary permissions to create an app registration.
- Administrator or sufficient privileges in your Azure DevOps organization.
- The ability to configure environment variables in TrueFoundry.
- The control plane URL of your TrueFoundry deployment.
Step 1: Create an App Registration in Microsoft Entra ID
-
Log in to the Azure Portal:
- Go to Azure Portal and sign in with your Microsoft account.
-
Navigate to Microsoft Entra ID (Azure Active Directory):
- From the left-hand navigation pane, select Microsoft Entra ID (formerly Azure Active Directory).
-
Register a New Application:
- Under Manage, select App registrations and click on New registration.
- Name: Provide a name for the application (e.g.,
TrueFoundry Integration). - Supported account types: Choose Accounts in this organizational directory only (Single tenant) if your Azure DevOps organisation is linked to the current tenant. Otherwise, choose multi-tenant option.
- Redirect URI: Under Redirect URI (optional), select Web from the dropdown and enter the following URL:
Replace
<control-plane-url>with the control plane URL of your TrueFoundry deployment. It will be something likehttps://org.truefoundry.cloudand is typically used to access the TrueFoundry Dashboard. - Click Register to create the app.
-
Configure API Permissions:
- After registration, you’ll be redirected to the app’s overview page.
- Under Manage, select API permissions.
-
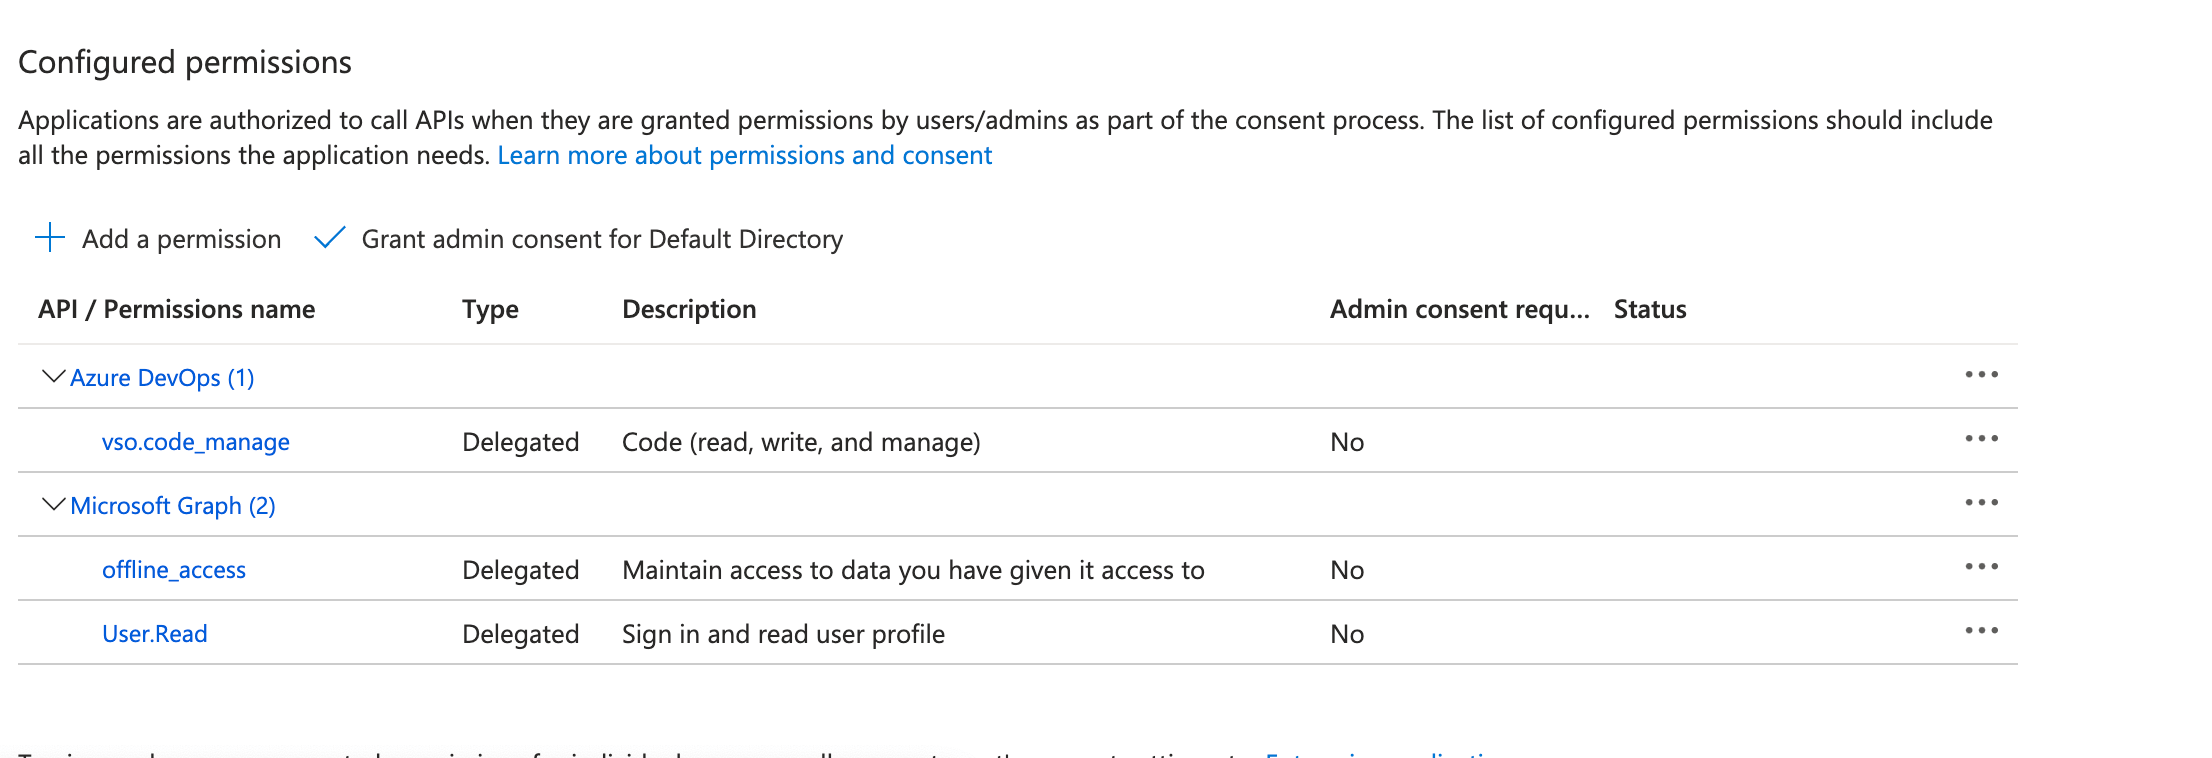
Click on Add a permission.
a. Azure DevOps:
- Select APIs my organization uses.
- Search for Azure DevOps and select it.
- Choose Delegated permissions.
- Select the permission
vso.code_manageto allow management of code repositories. - Click Add permissions.
- Click Add a permission again.
- Select Microsoft Graph.
- Choose Delegated permissions.
- Select the permissions
offline_accessandUser.Read. - Click Add permissions.
- Click on Grant admin consent for your organization to ensure the permissions are active and granted.
-
Generate a Client Secret:
- Under Manage, select Certificates & secrets.
- Under Client secrets, click New client secret.
- Provide a description (e.g.,
TrueFoundry Secret) and choose an expiry duration. - Click Add.
- Copy the Value of the client secret immediately. You won’t be able to retrieve it later.
-
Gather Required Information:
- Navigate back to the Overview section of the app registration.
- Note down the Application (client) ID.
Step 2: Provide Environment Variables to TrueFoundry
In TrueFoundry, you need to configure the following environment variables using the details from the Microsoft Entra ID app registration. Edit the Helm deployment oftruefoundry and add the following variables in the env section under servicefoundry-server
- AZURE_CLIENT_ID: The Application (client) ID of your app registration.
- AZURE_CLIENT_SECRET: The Client Secret generated in the previous step.
Integrations > Git > Azure Repos on the TrueFoundry Dashboard.