via Python SDK
What you'll learn
- How to Deploy your Machine Learning Service using the Truefoundry Python SDK.
- How to Enable Autoscaling to ensure optimal service scalability.
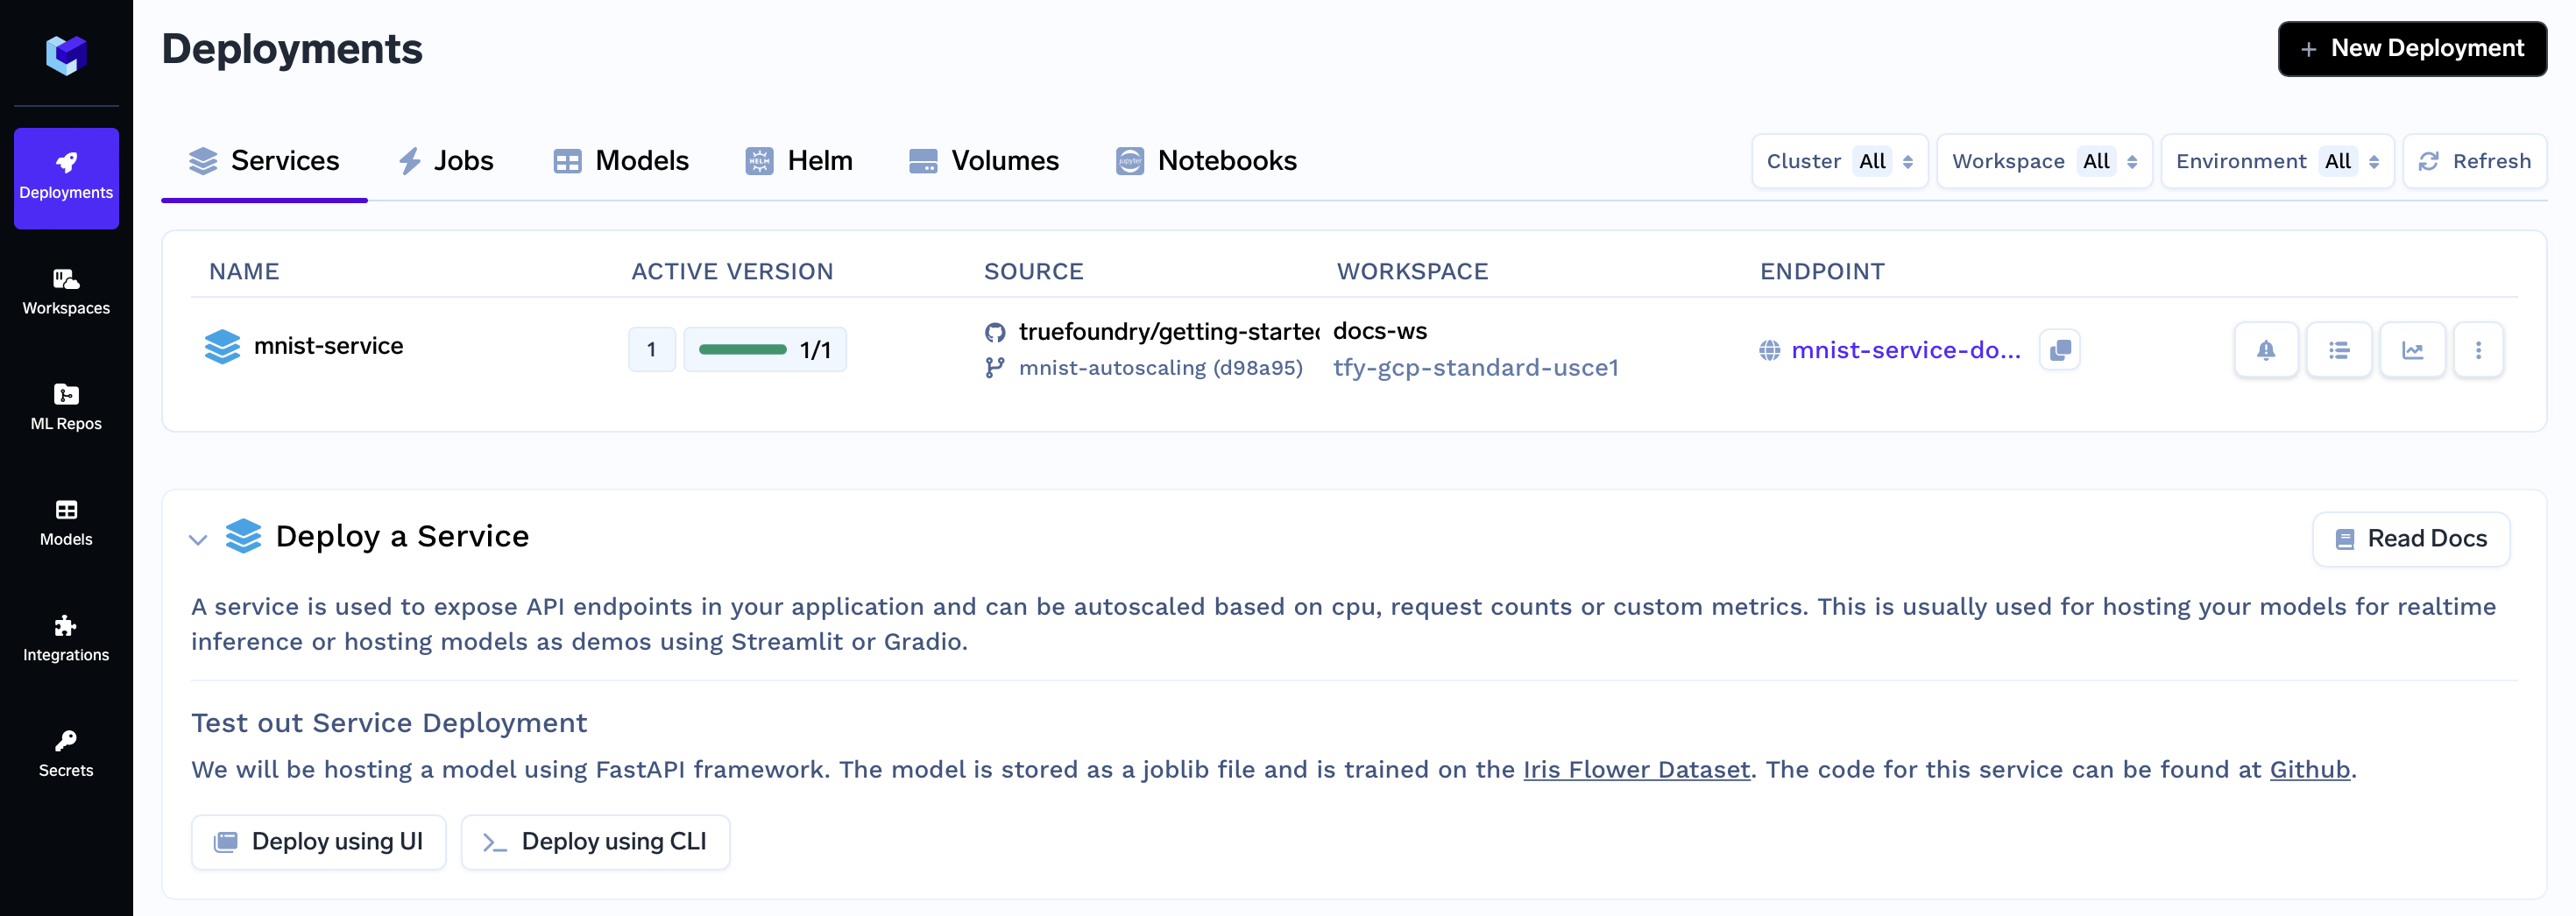
Upon completion of this guide, you will have successfully deployed a machine learning service to tackle the MNIST problem. Your service's deployment dashboard will resemble the following:
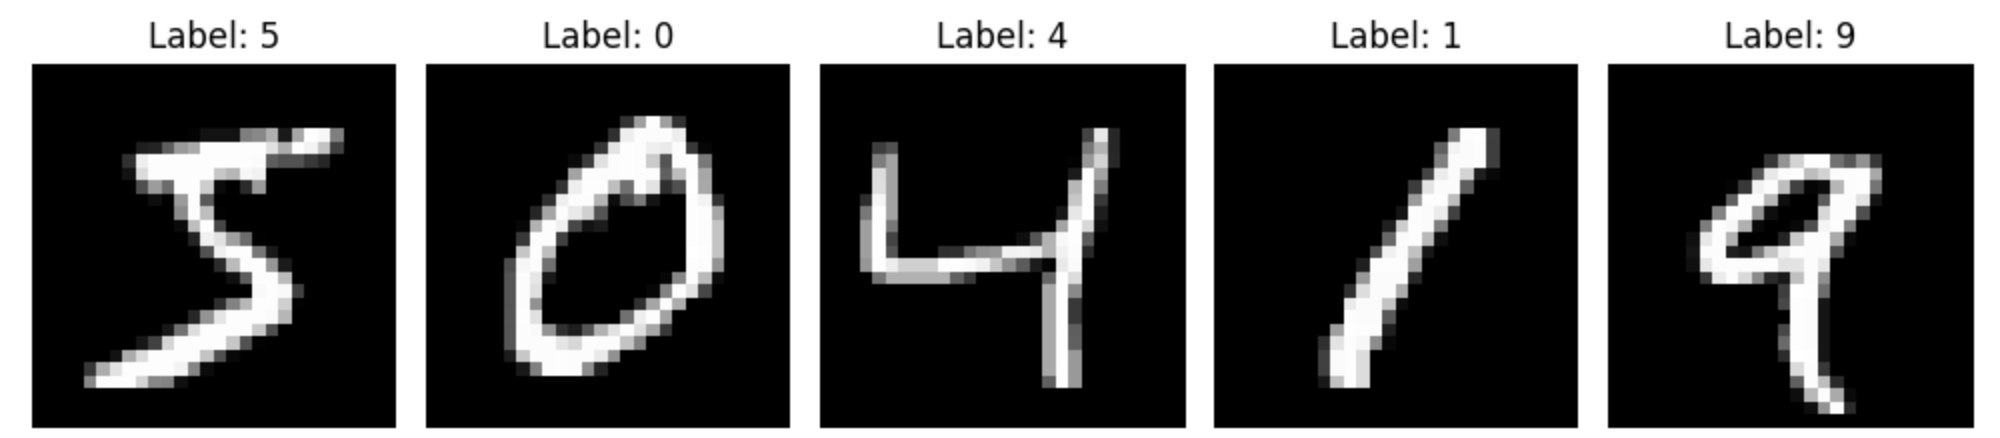
Problem Statement: MNIST Challenge
The MNIST Challenge involves recognizing handwritten digits from images. In this guide, we will use the MNIST dataset, which consists of a large number of labeled handwritten digit images. Our goal is to train a machine learning model that can accurately classify these digits.
To deploy a machine learning service using the Python SDK and follow this guide, let's start by spinning up a Jupyter Lab instance on Truefoundry via the UI. Then, open the mnist-service notebook from the getting started folder in the Jupyter Lab directory navigation and follow along with that notebook.
Starting the Mnist Service Deployment Notebook on TrueFoundry
Step 1: Initiating Deployment via UI
- On the left panel of the TrueFoundry user interface, locate and click on the "Deployments" tab. From here, navigate to the "Services" tab located in the top bar.
- Click on the "New Deployment" button, and a form will appear with various deployment options. Click on the "Service" button to select service deployment (will be pre-selected)
- In the same form there will be a field "Where would you like to deploy?" option. Click on the "Search Workspace" bar, and select the desired workspace for your deployment.
Note:
If you don't have any workspace right now, you can create a new workspace by clicking the Create New Workspace link and following along this Documentation or contact your cluster admin in case of some issues
- Once selected click on the "Next Step" button to continue with the deployment.
Step 2: Configure the Deployment
Once you initiate the deployment, a form will appear with the configurations for your Jupyter Lab instance. Follow these steps to configure your deployment:
- In the deployment form, you will need to provide a name for your notebook.
- Leave the other configurations as the defaults.
- Click on the "Submit" button.
This action will initiate the process of bringing up your JupyterLab instance. After waiting for a few seconds, your notebook should become available.
Step 3: Open the Notebook in JupyterLab
- With the notebook successfully launched, you'll see the endpoint URL for accessing your JupyterLab instance. Click on the endpoint URL.
- This action will open the JupyterLab interface in your browser.
- In the JupyterLab navigation, locate the "getting-started" folder, then go to the "mnist-service" subfolder.
- Inside the "mnist-service" subfolder, find and click on the notebook named "python-sdk-mnist.ipynb".
Follow along with the notebook to continue with the deployment process using the Truefoundry Python SDK.
Updated 11 months ago