Deploy via UI
What you'll learn
- How to Deploy your Async Service using the Truefoundry User Interface.
Upon completing this guide, you will have successfully deployed an Async Service. Your Async Service deployment dashboard will resemble the following:

Deploying your Async Service
Prerequisites
To follow along with this guide, you'll need the following:
- HTTP Service:
We've already prepared the FastAPI HTTP Service for you. You can find the code for this service on GitHub at https://github.com/truefoundry/getting-started-examples.git. This is the service we'll be deploying.
import os
import joblib
import pandas as pd
from fastapi import FastAPI

model = joblib.load("iris_classifier.joblib")

app = FastAPI(docs_url="/", root_path=os.getenv("TFY_SERVICE_ROOT_PATH", "/"))

@app.post("/predict")
def predict(
    sepal_length: float, sepal_width: float, petal_length: float, petal_width: float
):
    data = dict(
        sepal_length=sepal_length,
        sepal_width=sepal_width,
        petal_length=petal_length,
        petal_width=petal_width,
    )
    prediction = int(model.predict(pd.DataFrame([data]))[0])
    return {"prediction": prediction}
- A Queue:
You will need to create an AWS SQS Queue to follow along with this guide. To learn how to create an AWS SQS Queue, you can refer to the AWS SQS guide.
Code Structure
You will be deploying an Async Service, and the code for this service can be found in the following GitHub repository: Link to the GitHub Repository
Now, let's take a closer look at the structure of the code you'll be deploying:
.
|_ app.py: Contains the Async Service code used to process tasks asynchronously.
|_ requirements.txt: Dependency file listing required packages.
Step 1: Initiating Deployment via UI
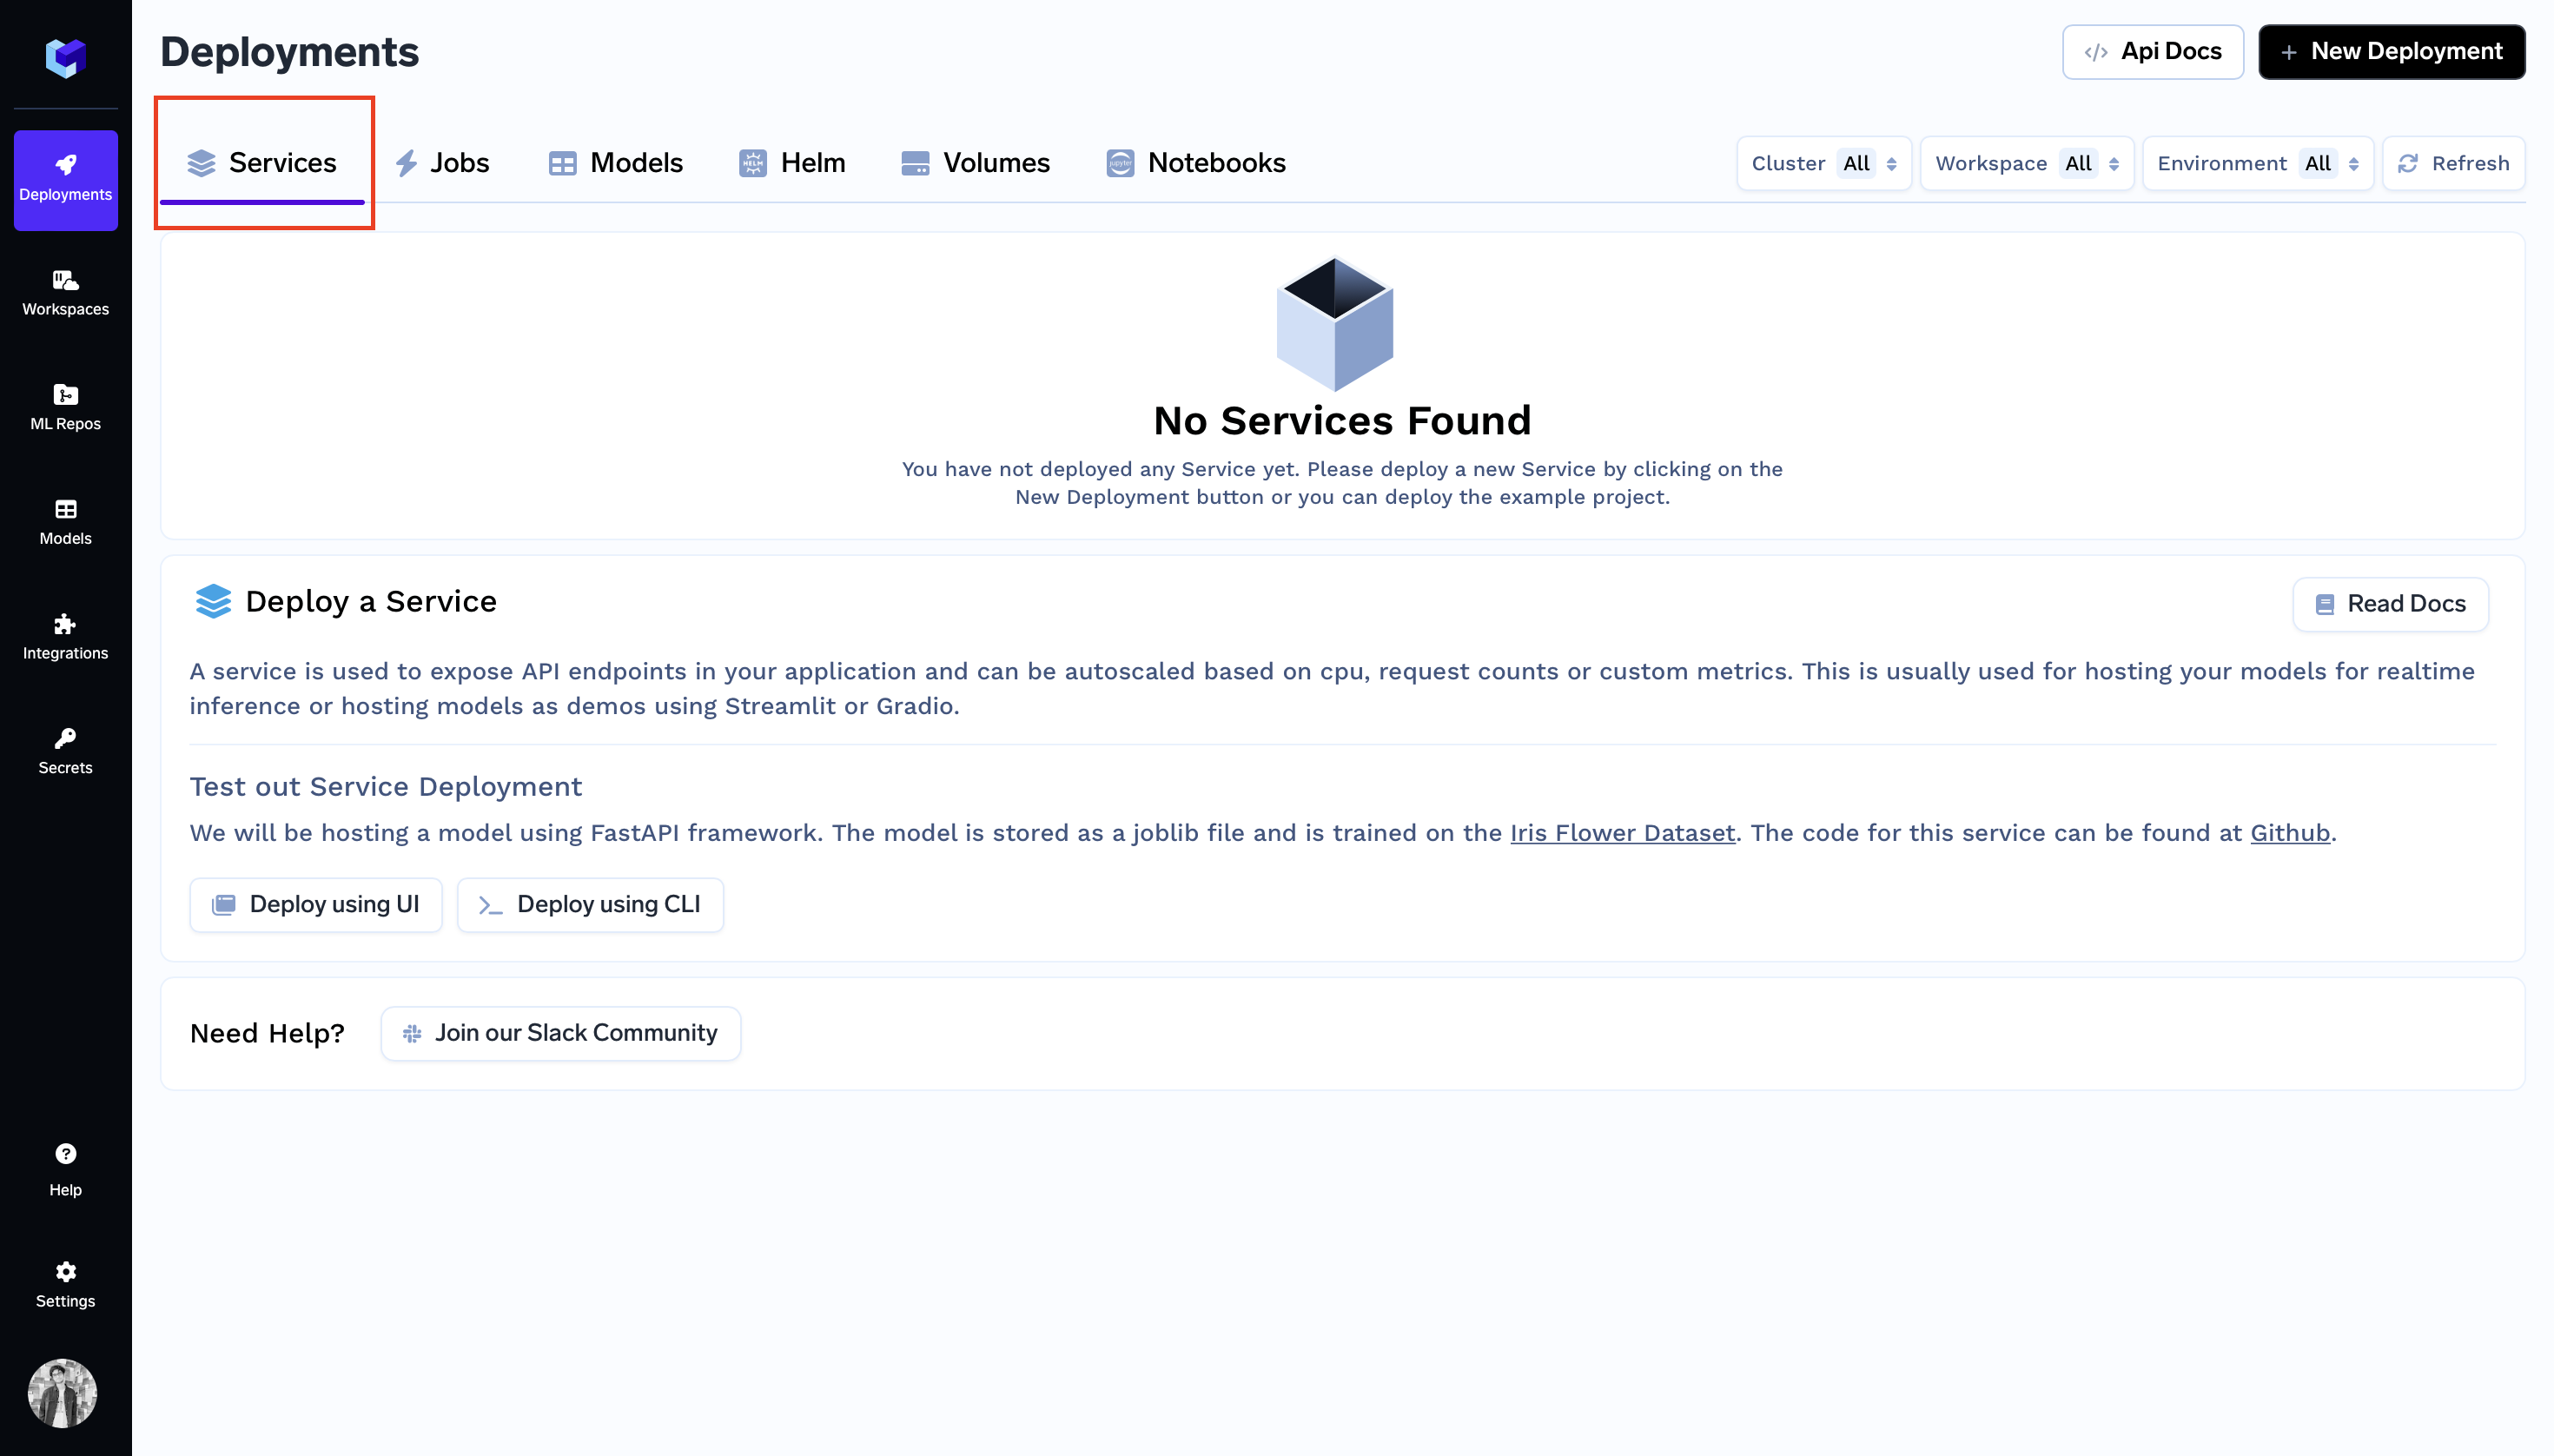
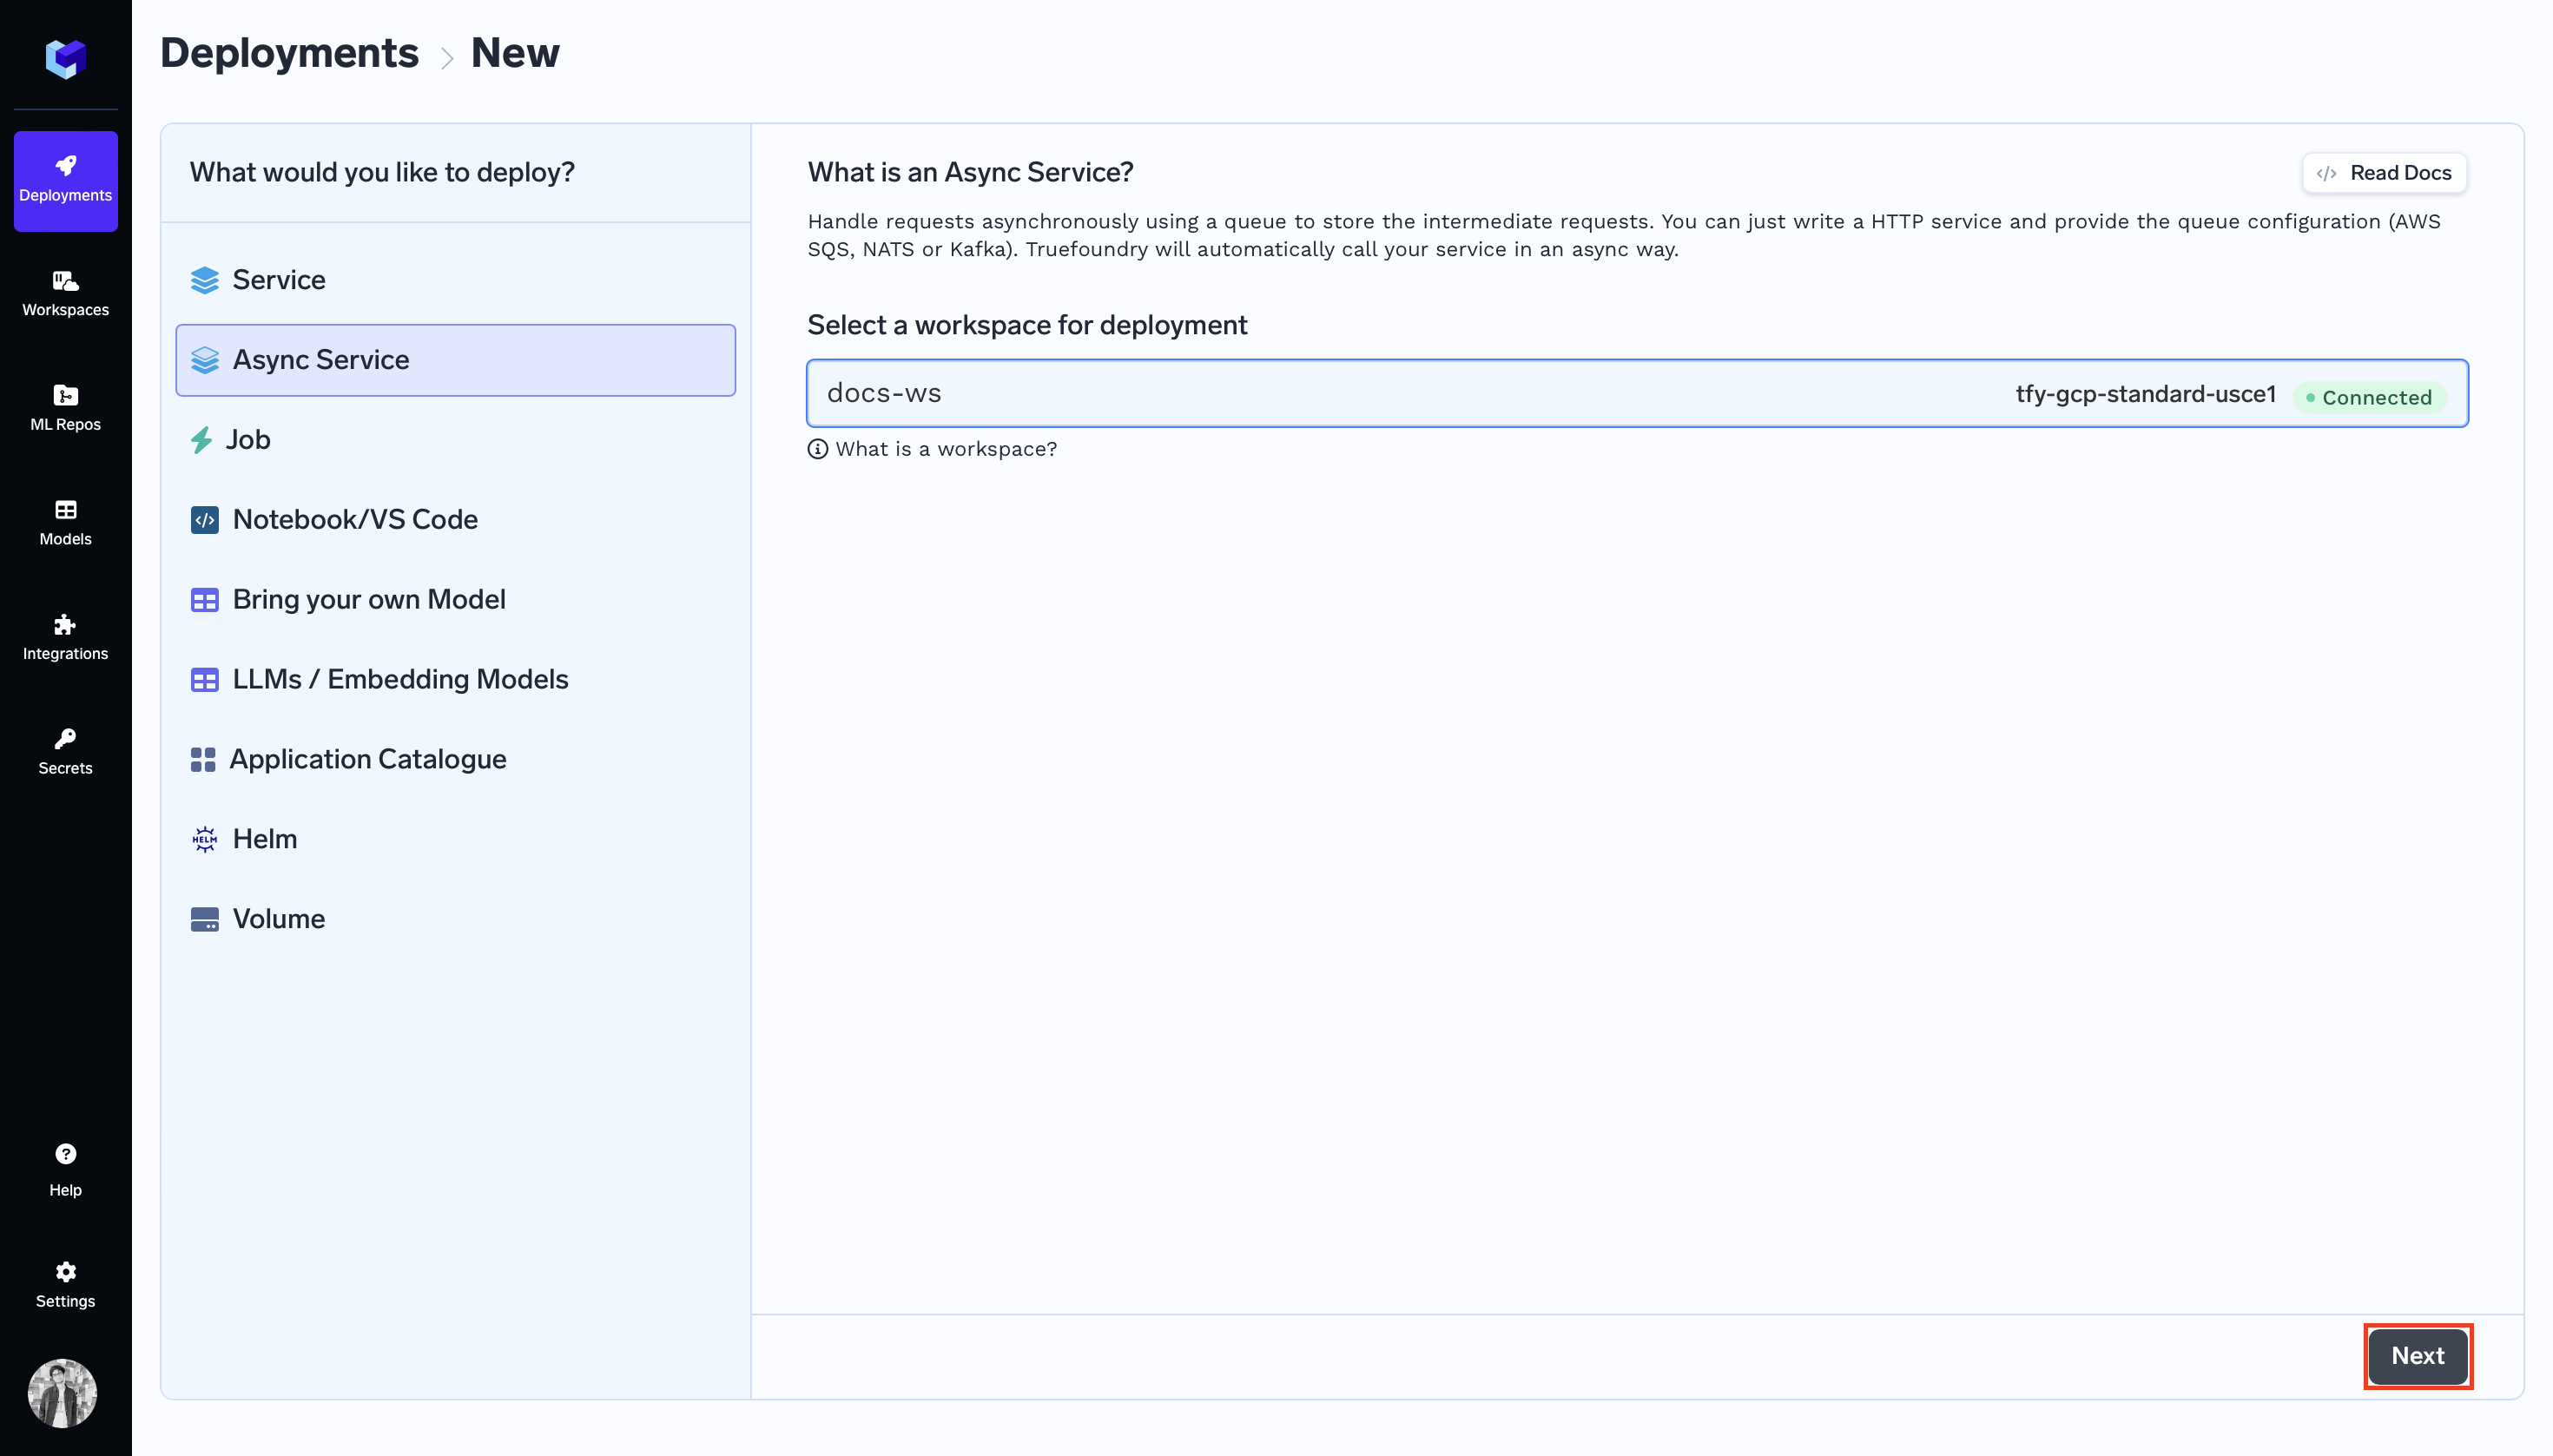
- Go to the
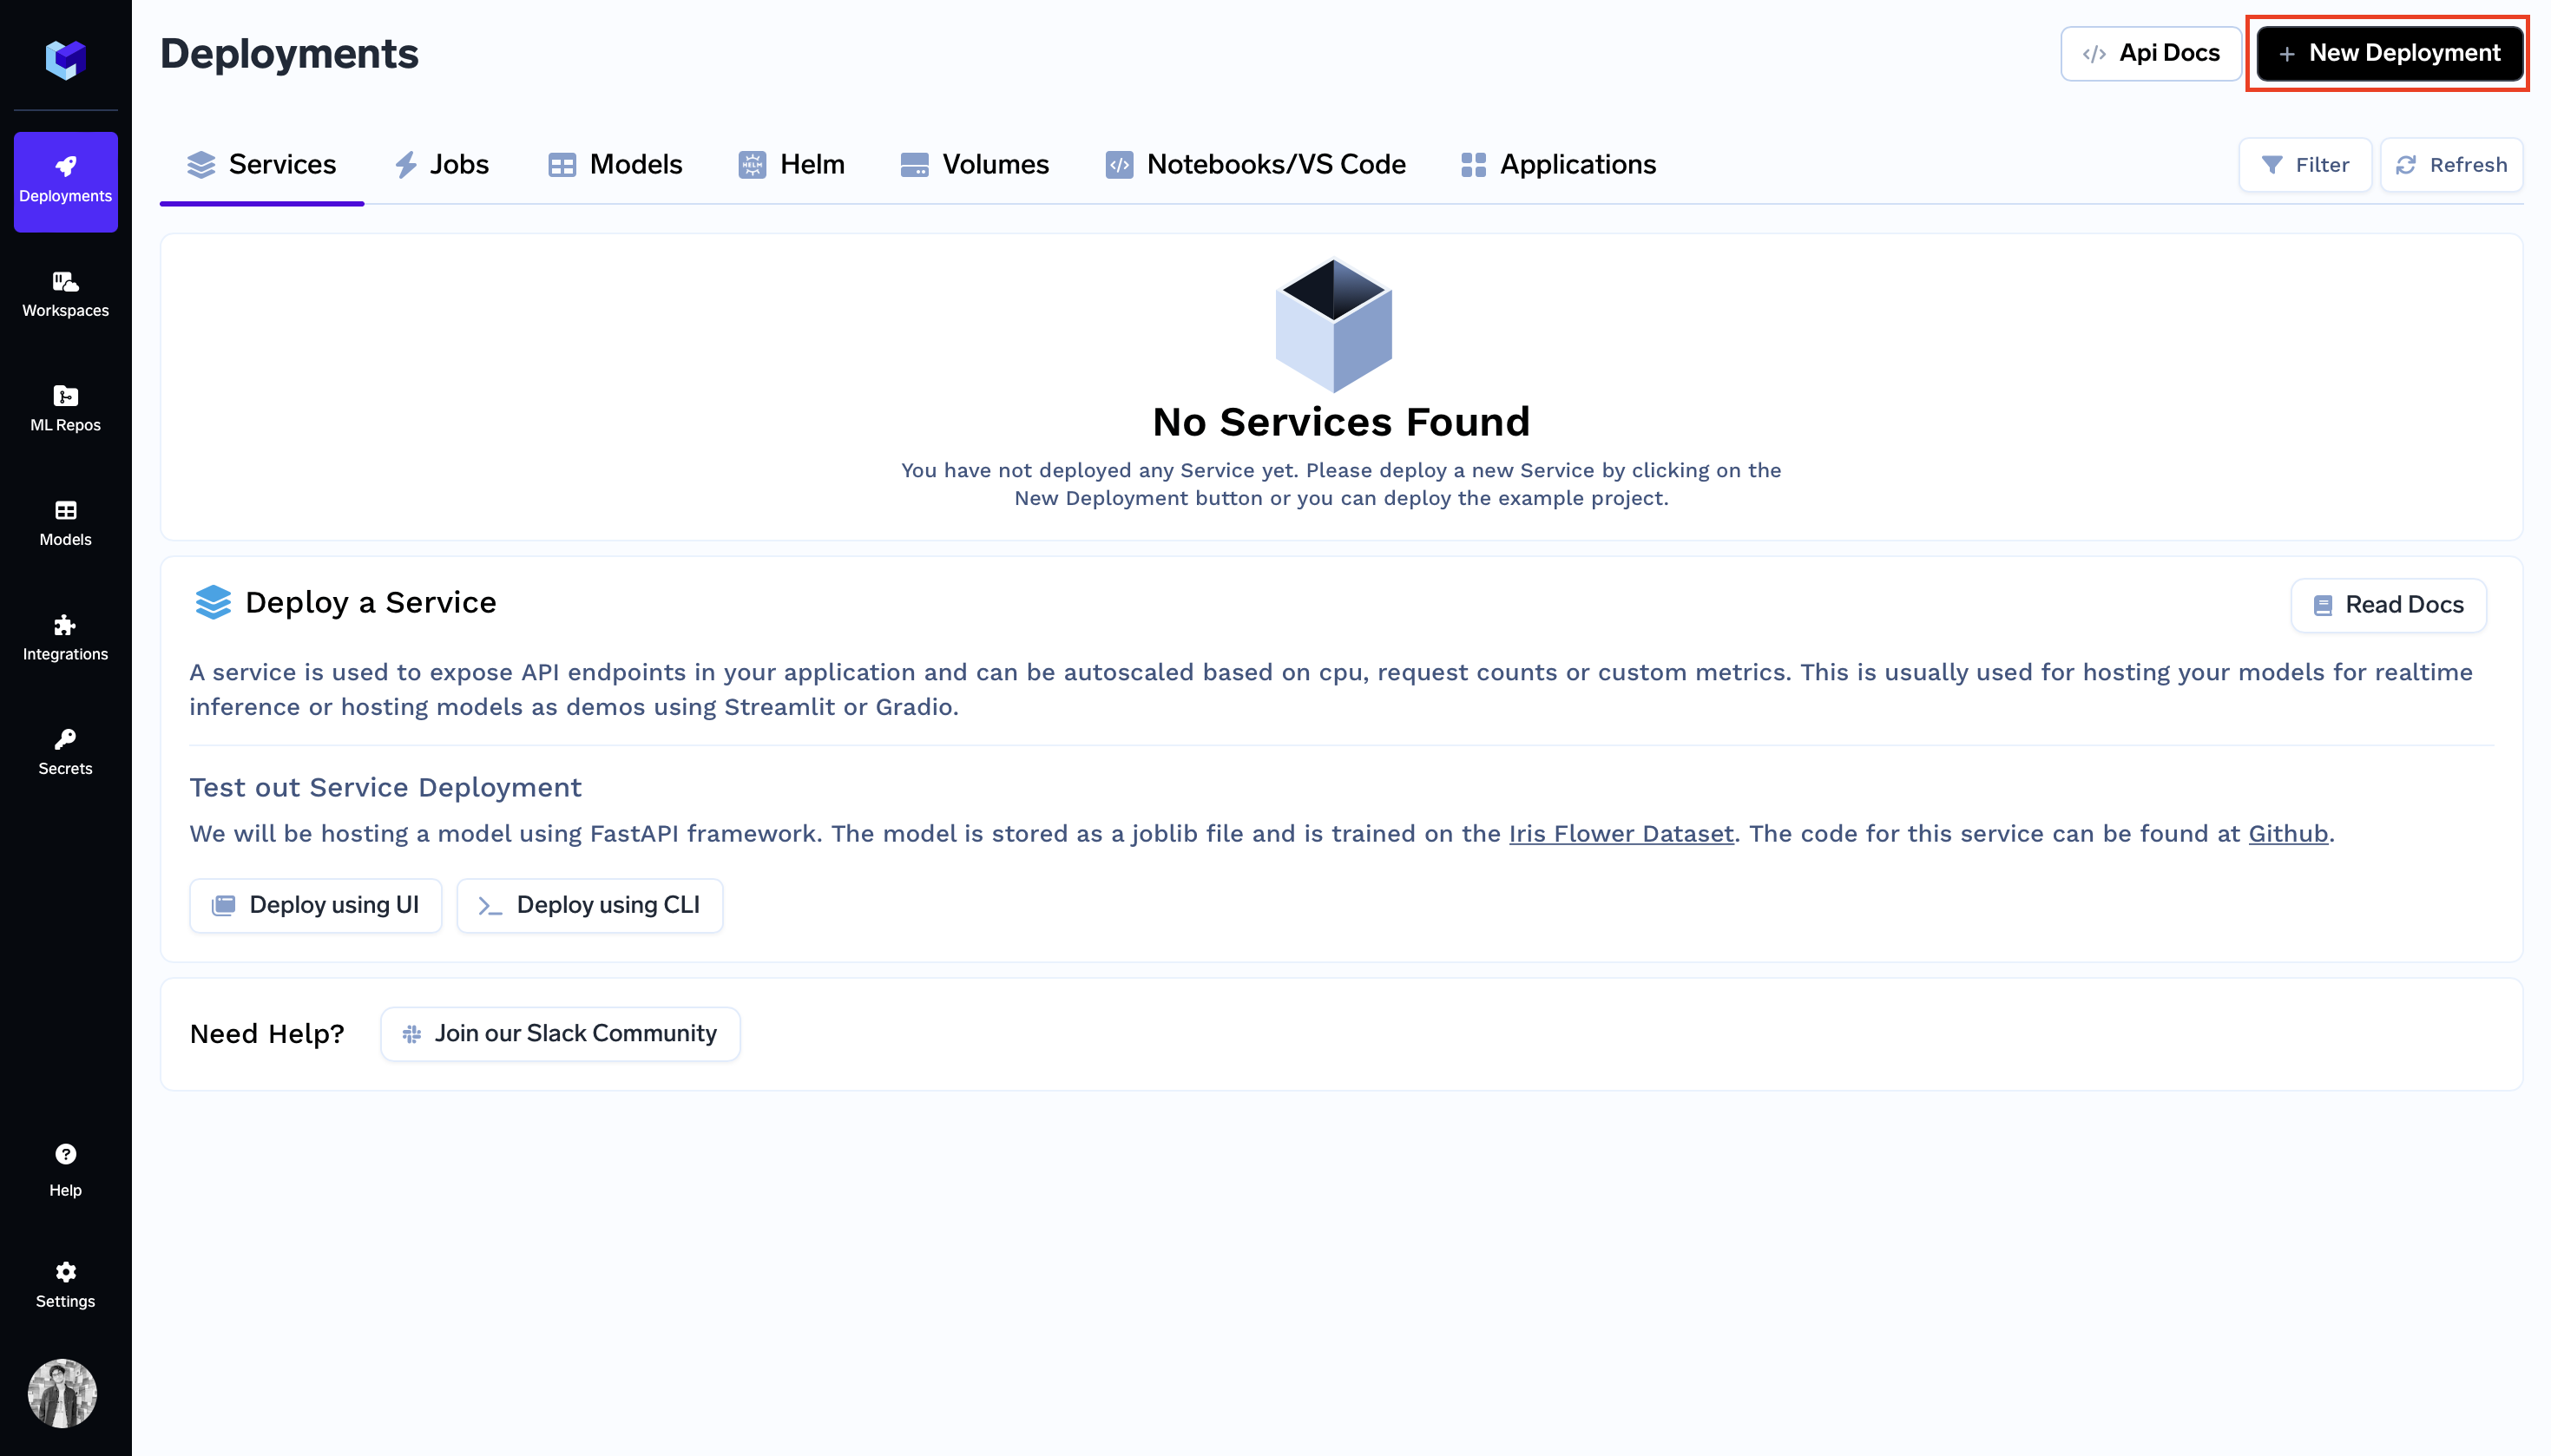
Servicesection on the Deployments Dashboard. - Click
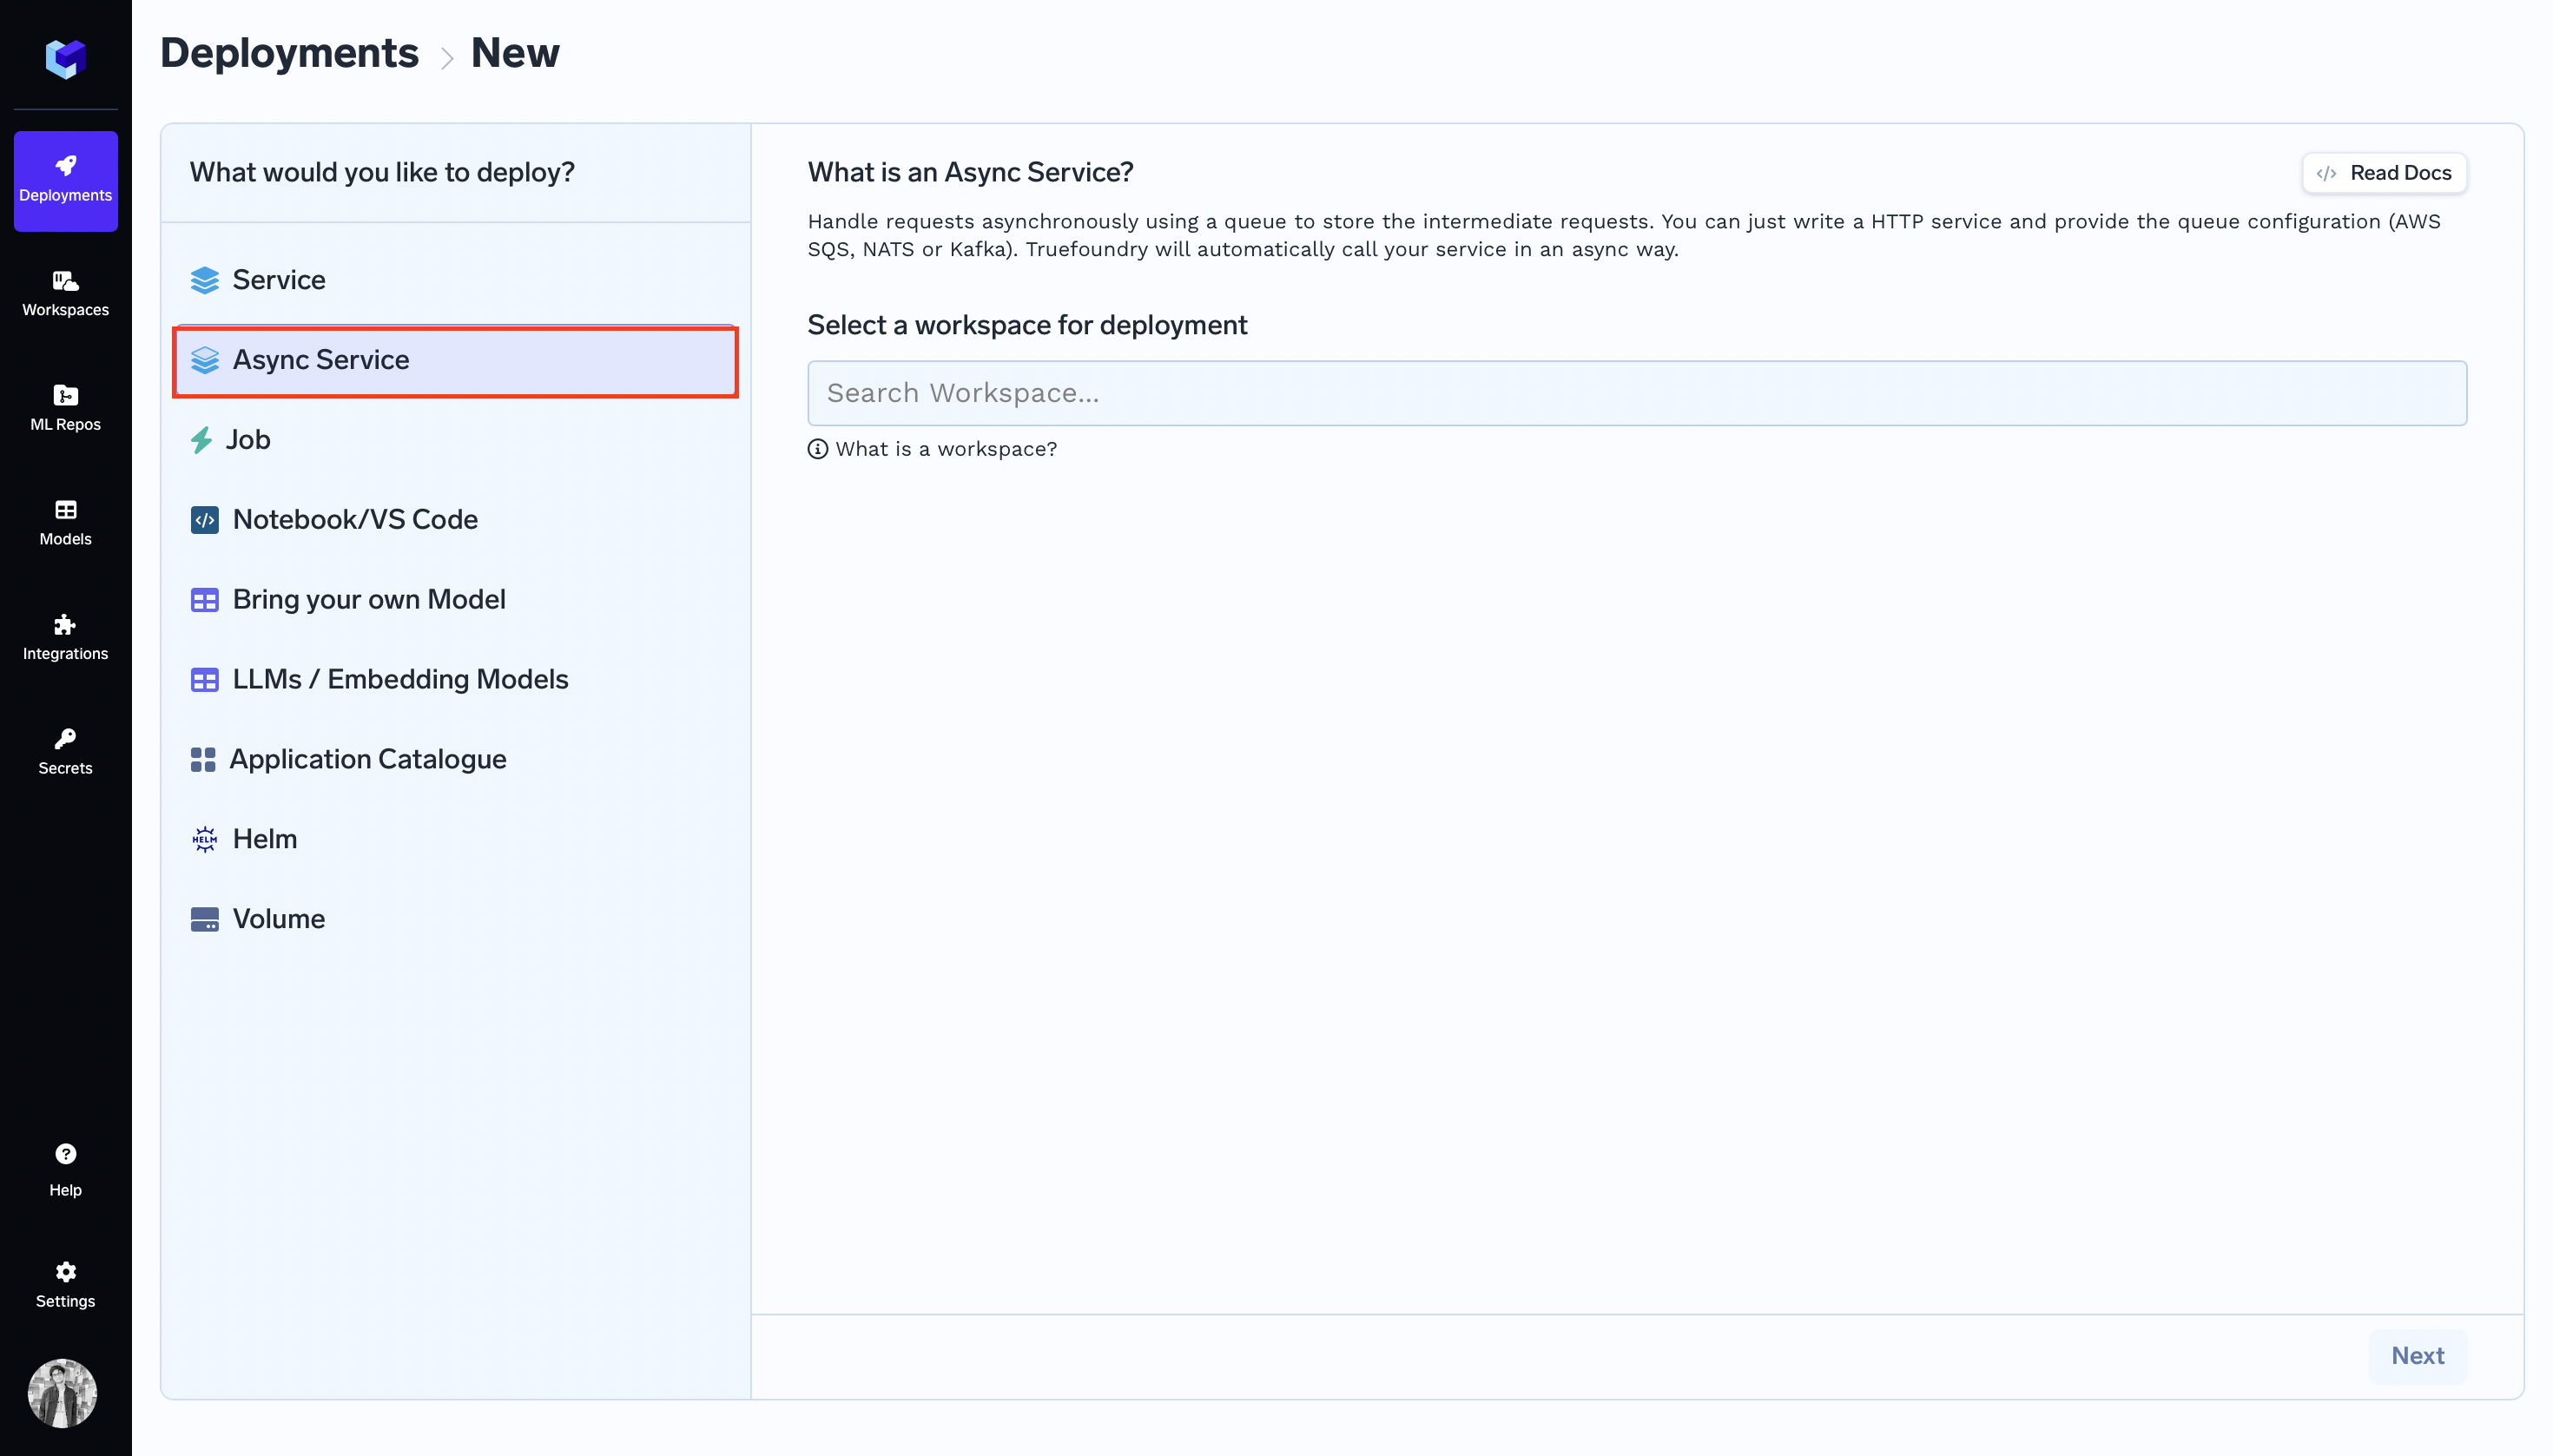
+ New Deployment. - In the
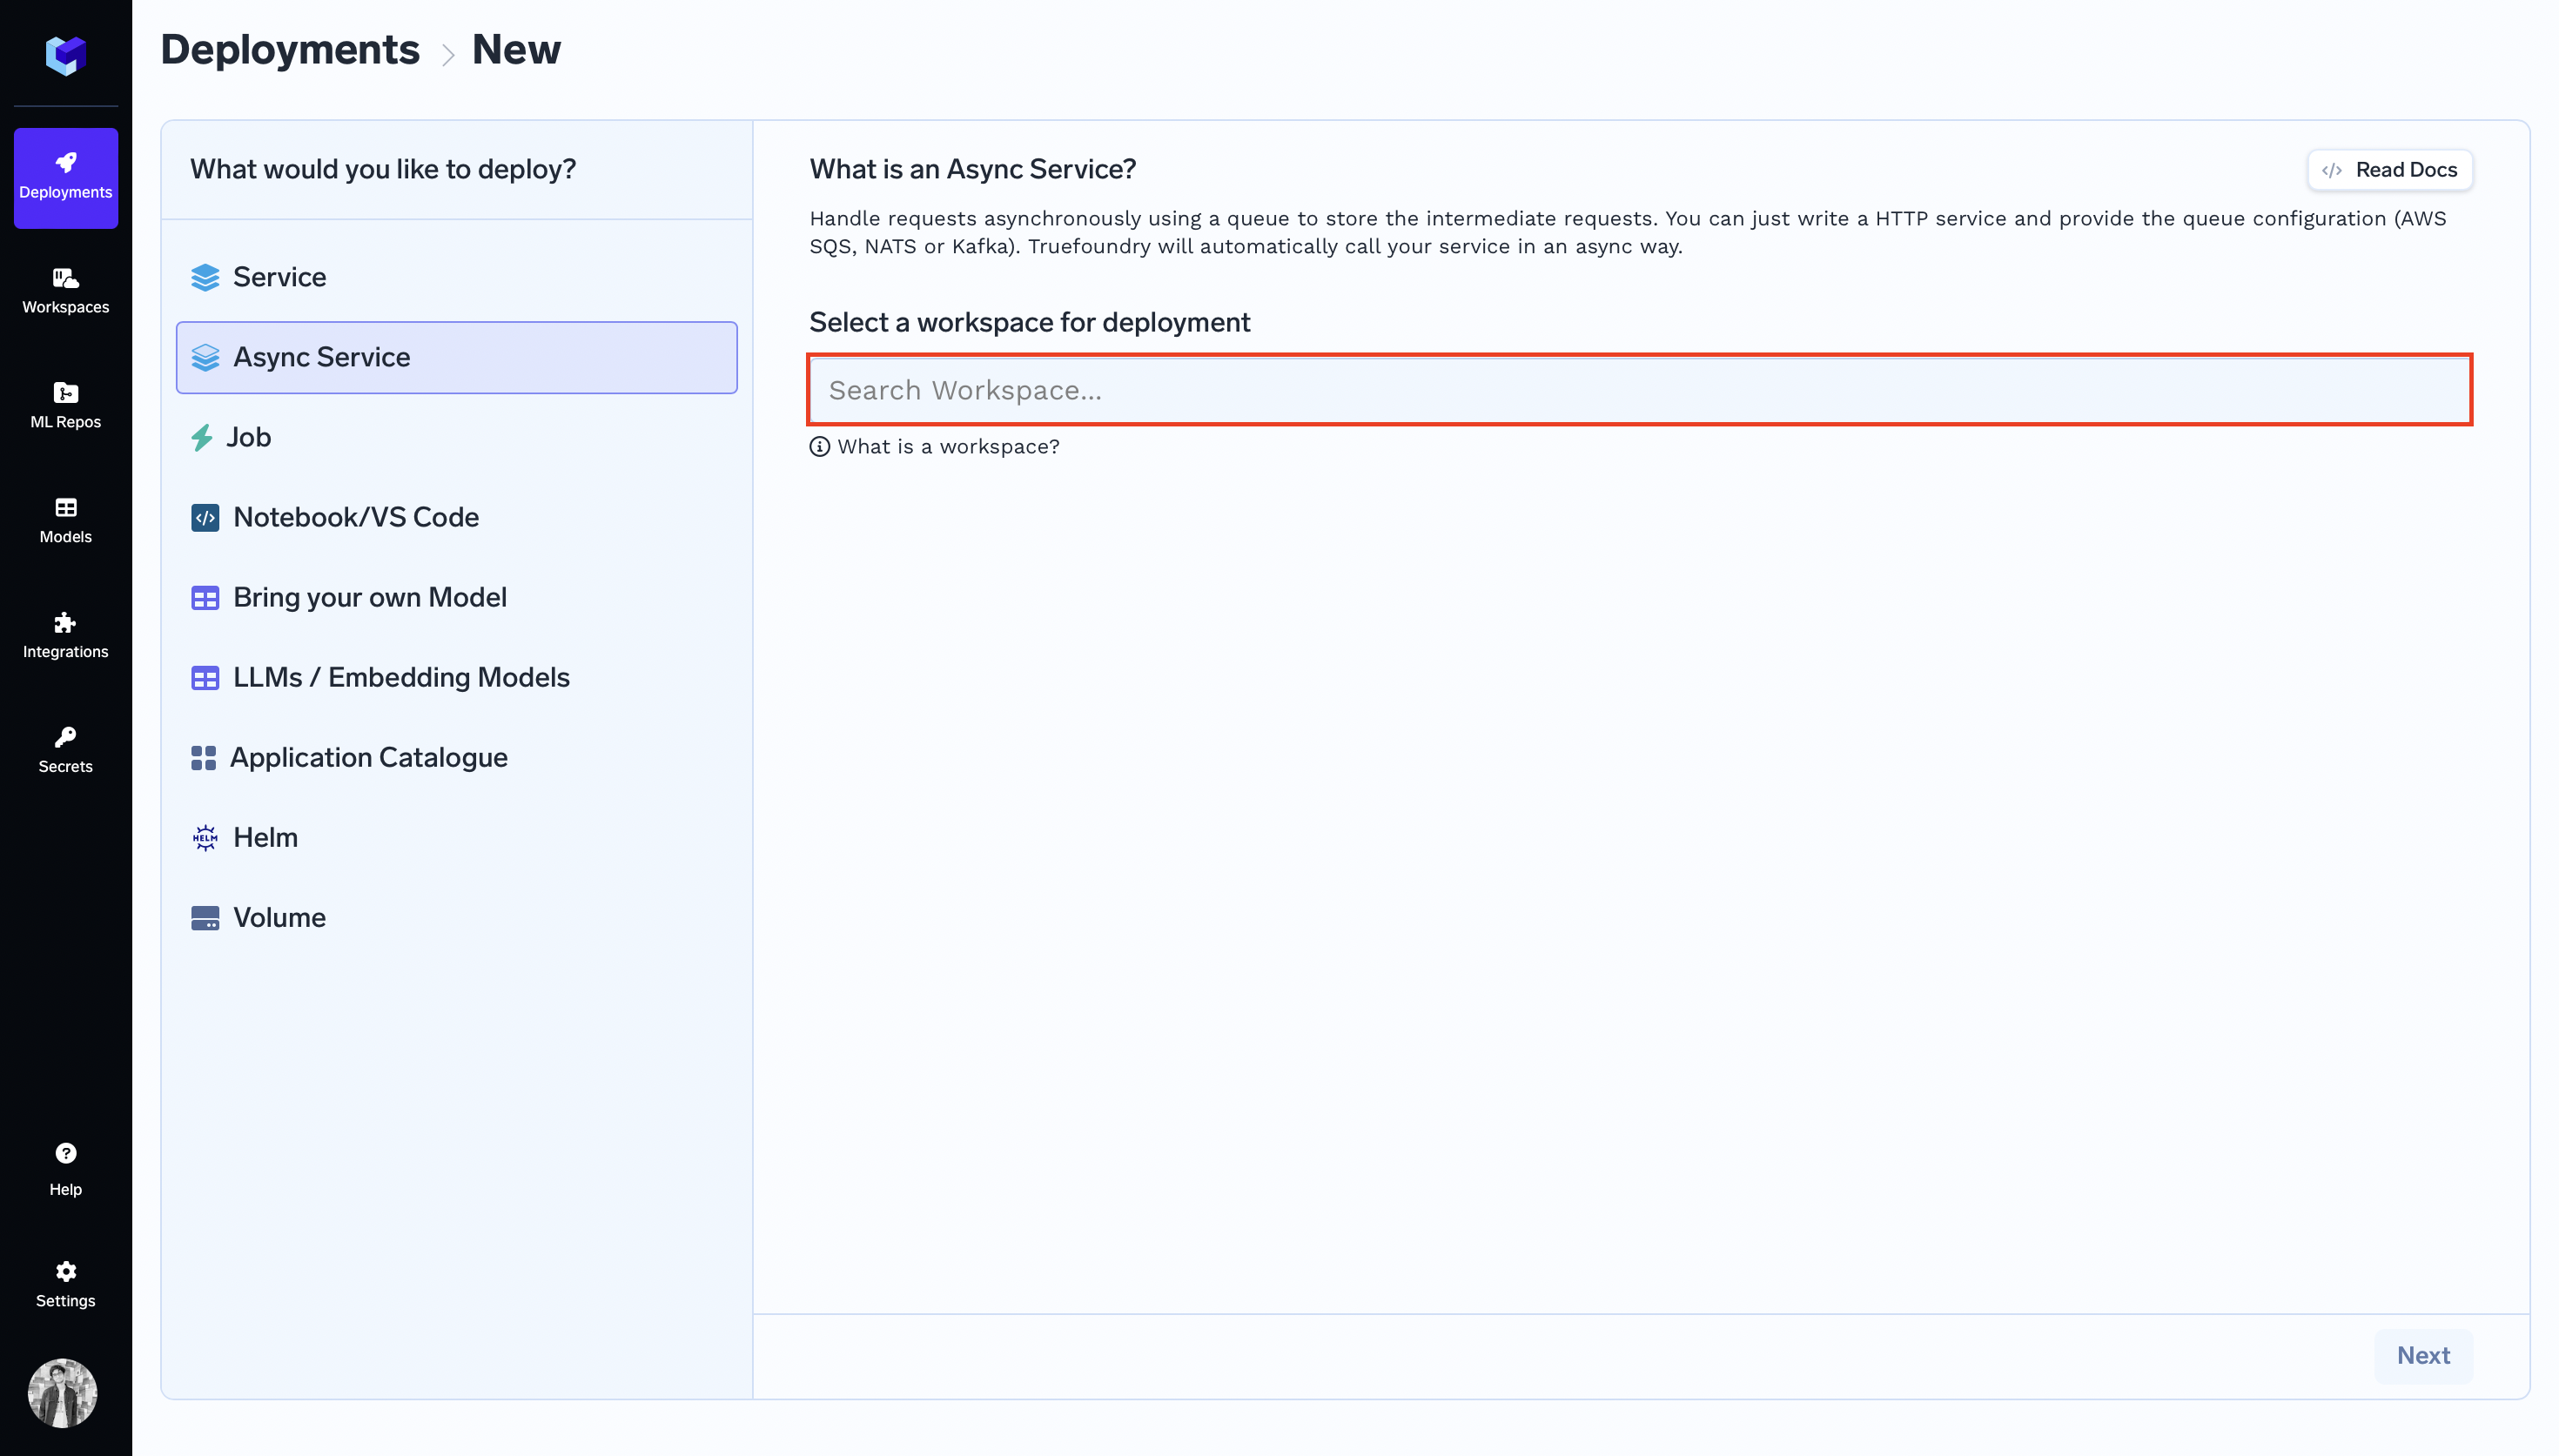
What would you like to deploy?column selectAsync Service. Select a workspace for deploymentby clickingSearch Workspacesearch bar. Read more about Cluster and Workspace.
Note:
If you don't have a workspace, create one by clicking
Create New Workspaceand then follow along this guide or consult your cluster admin for assistance.
- Click
Nextto proceed. - Deployment form should come up.
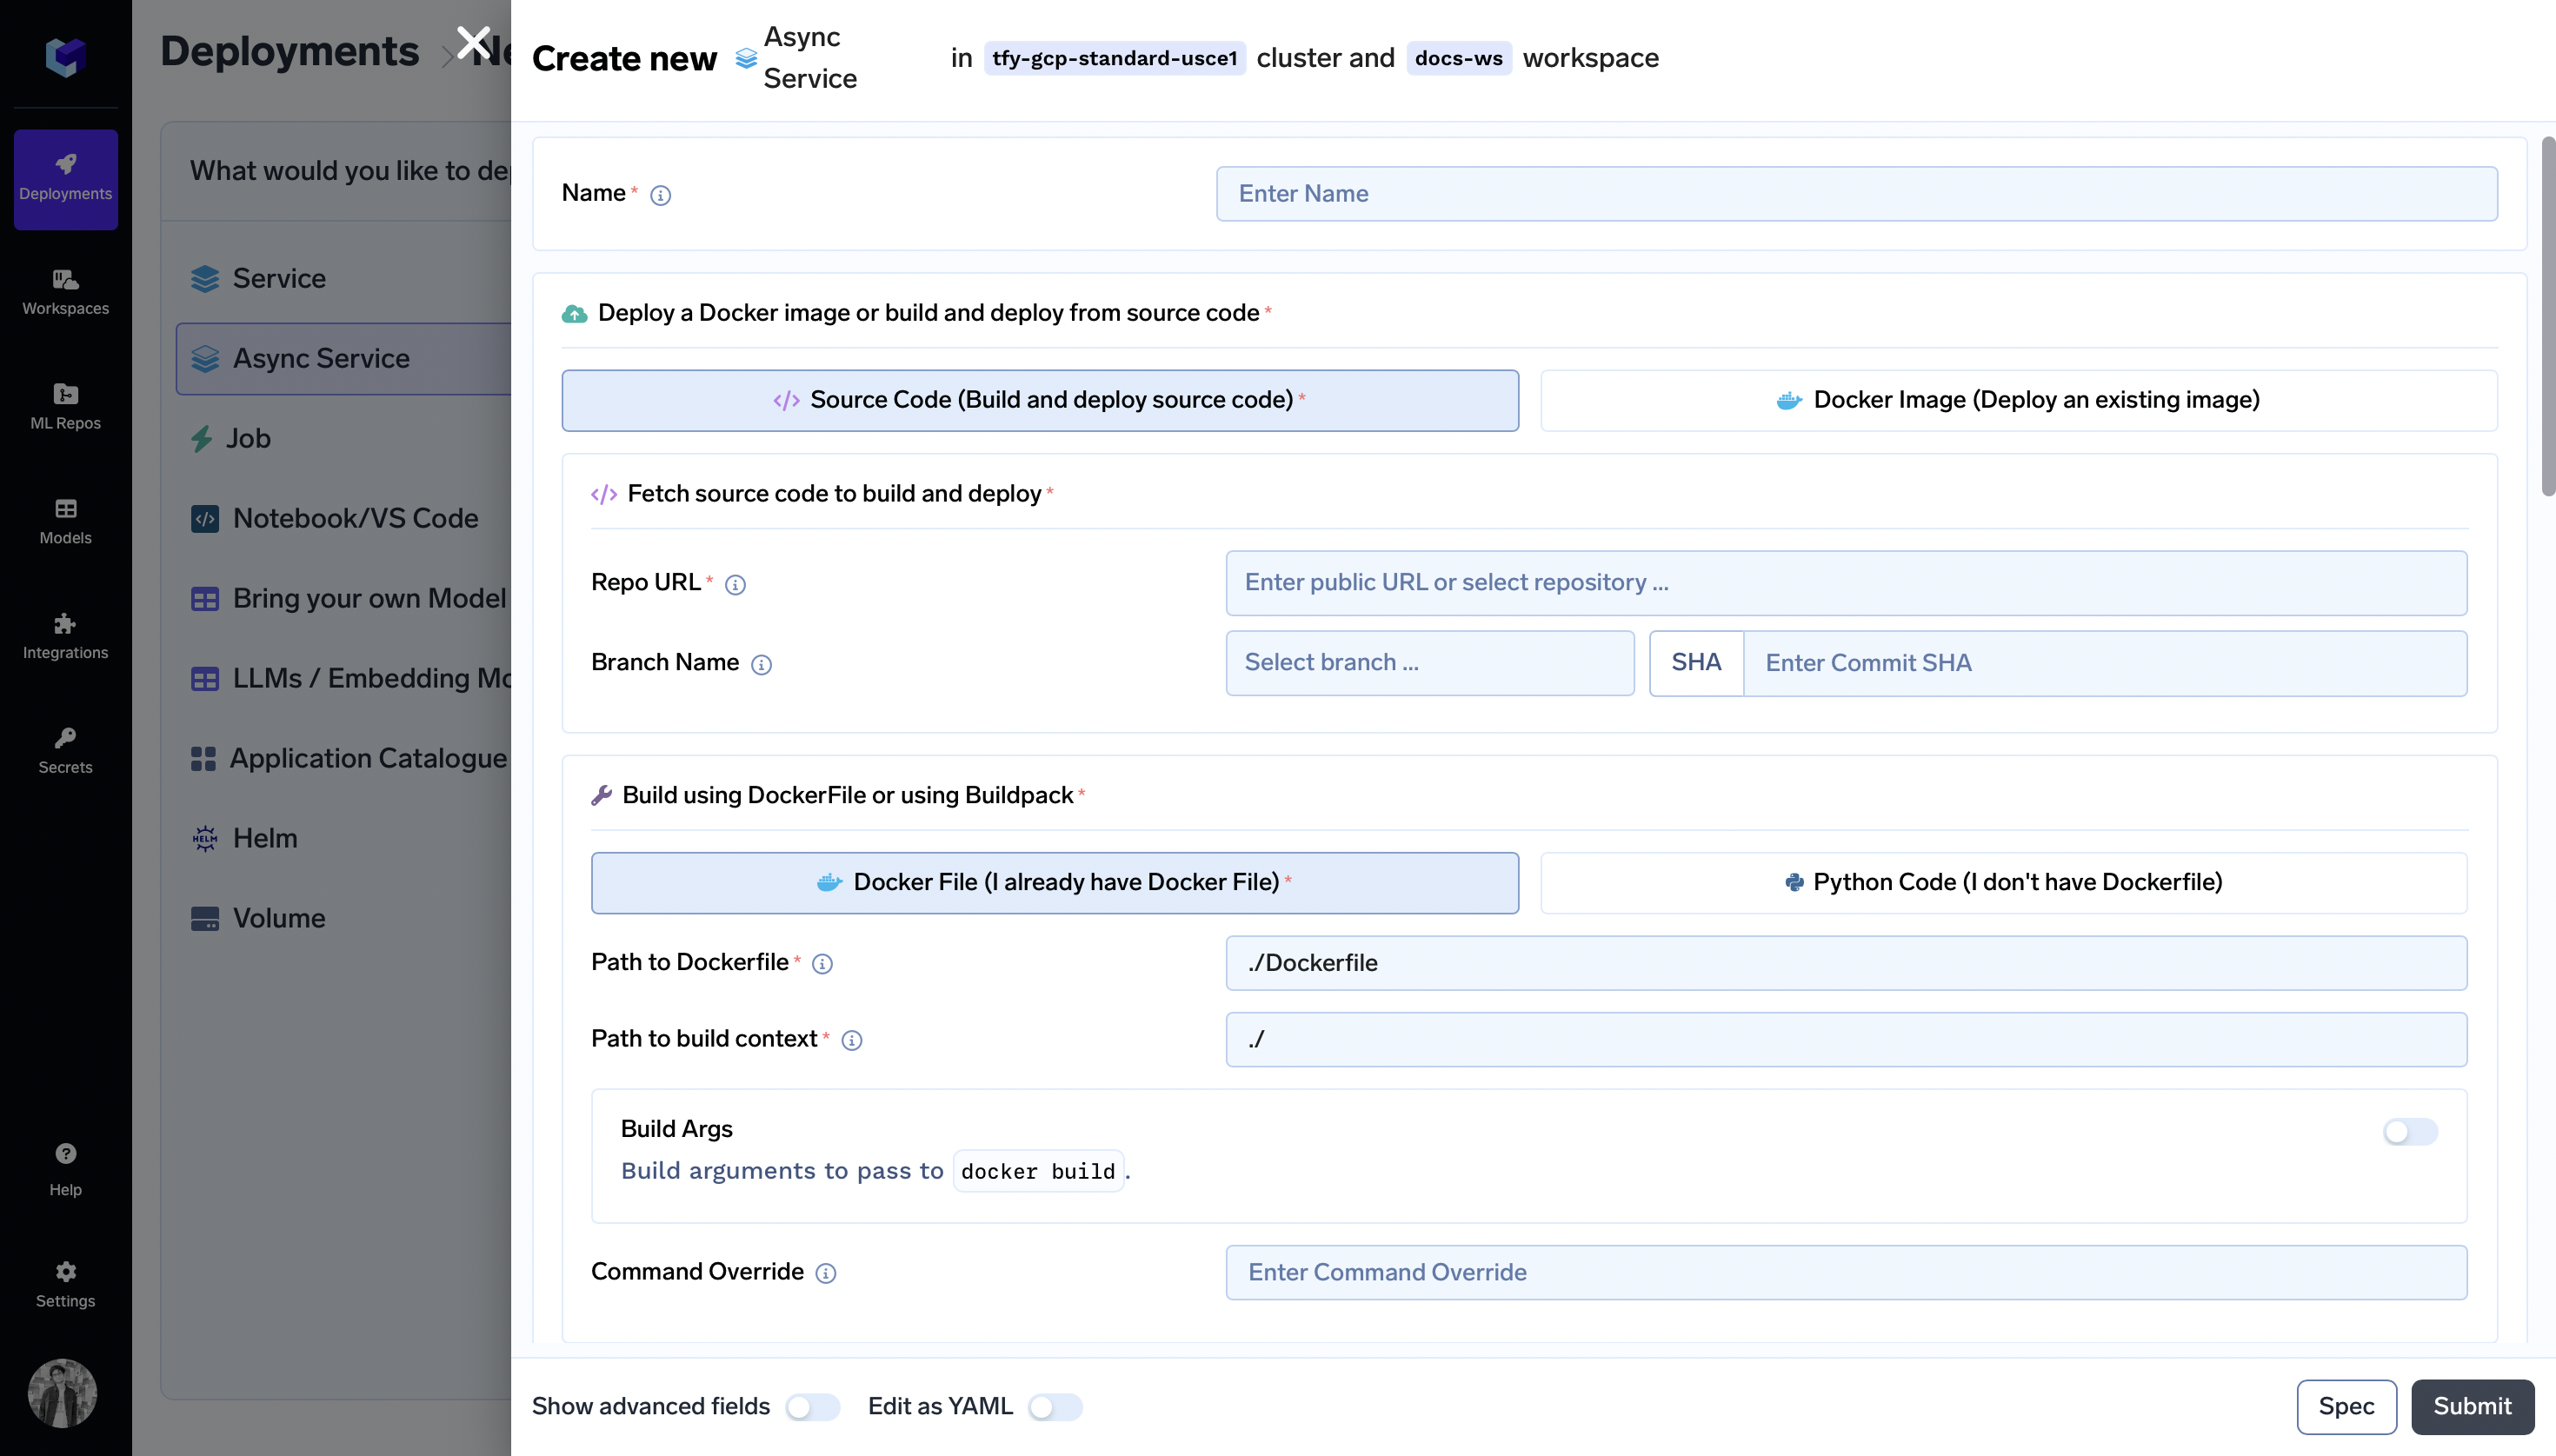
Step 2: Configure Deployment
Now, let's configure your deployment using the deployment form.
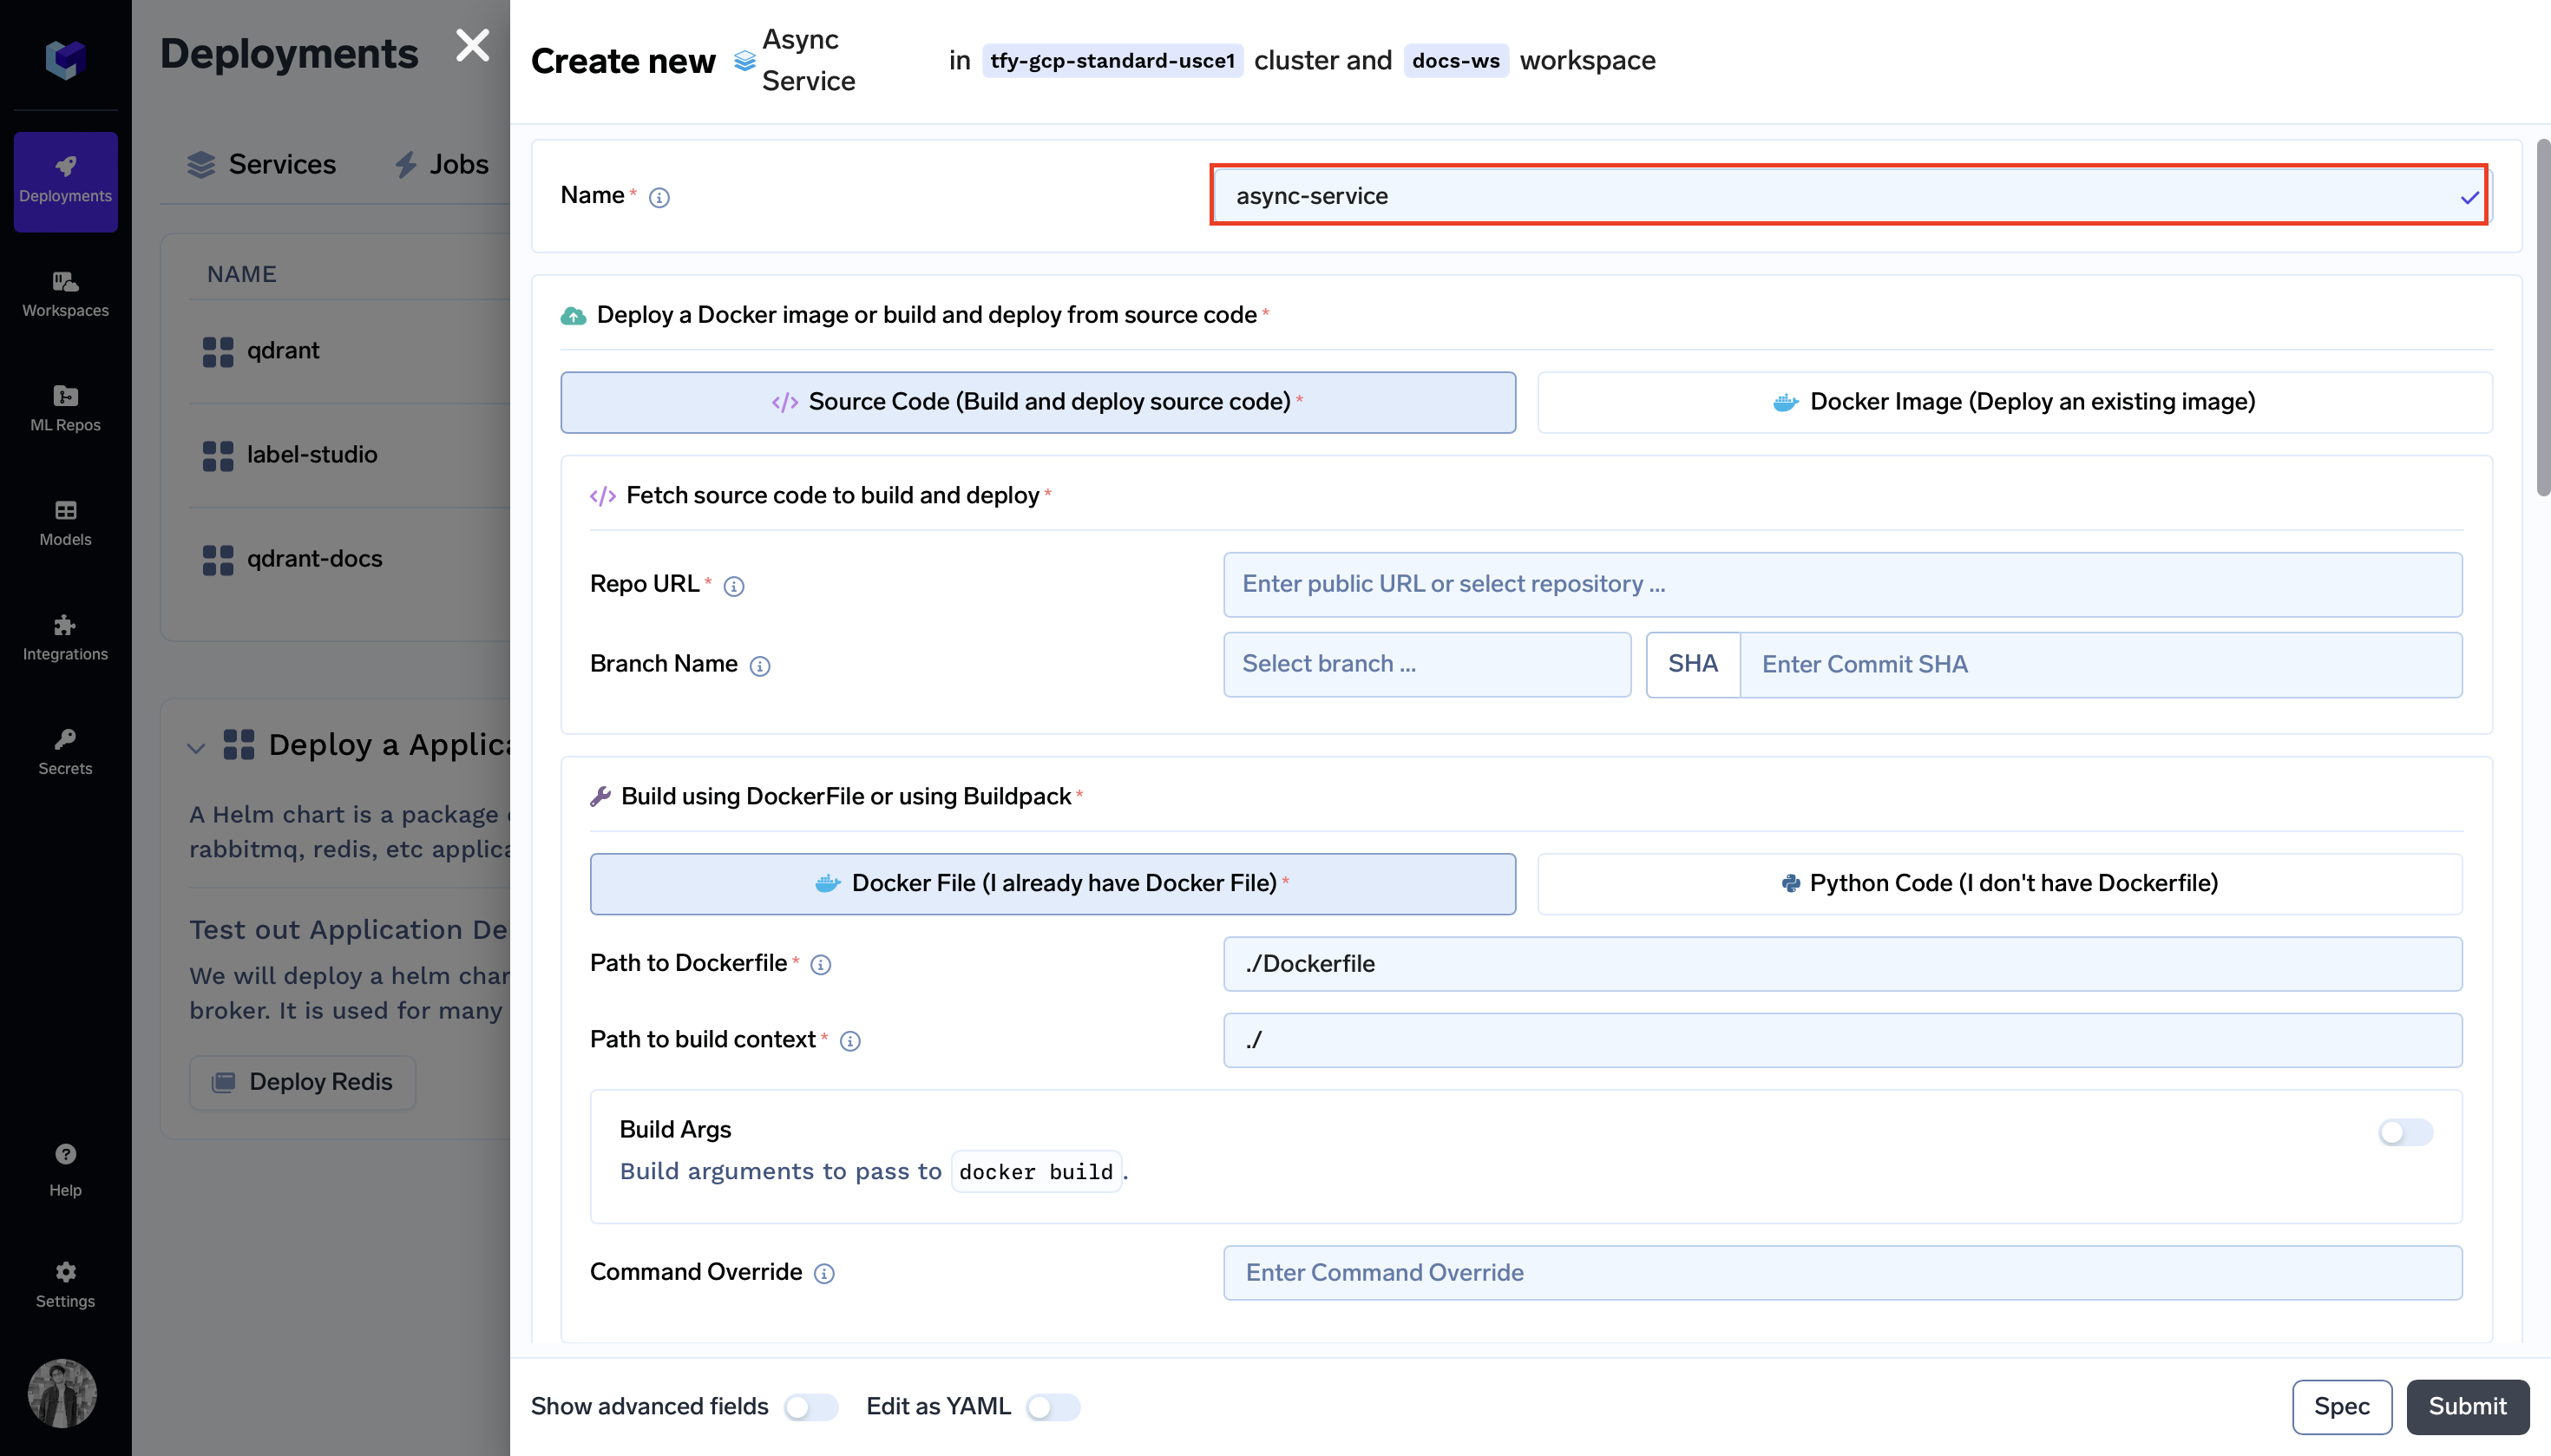
-
Name:
Name:async-service -
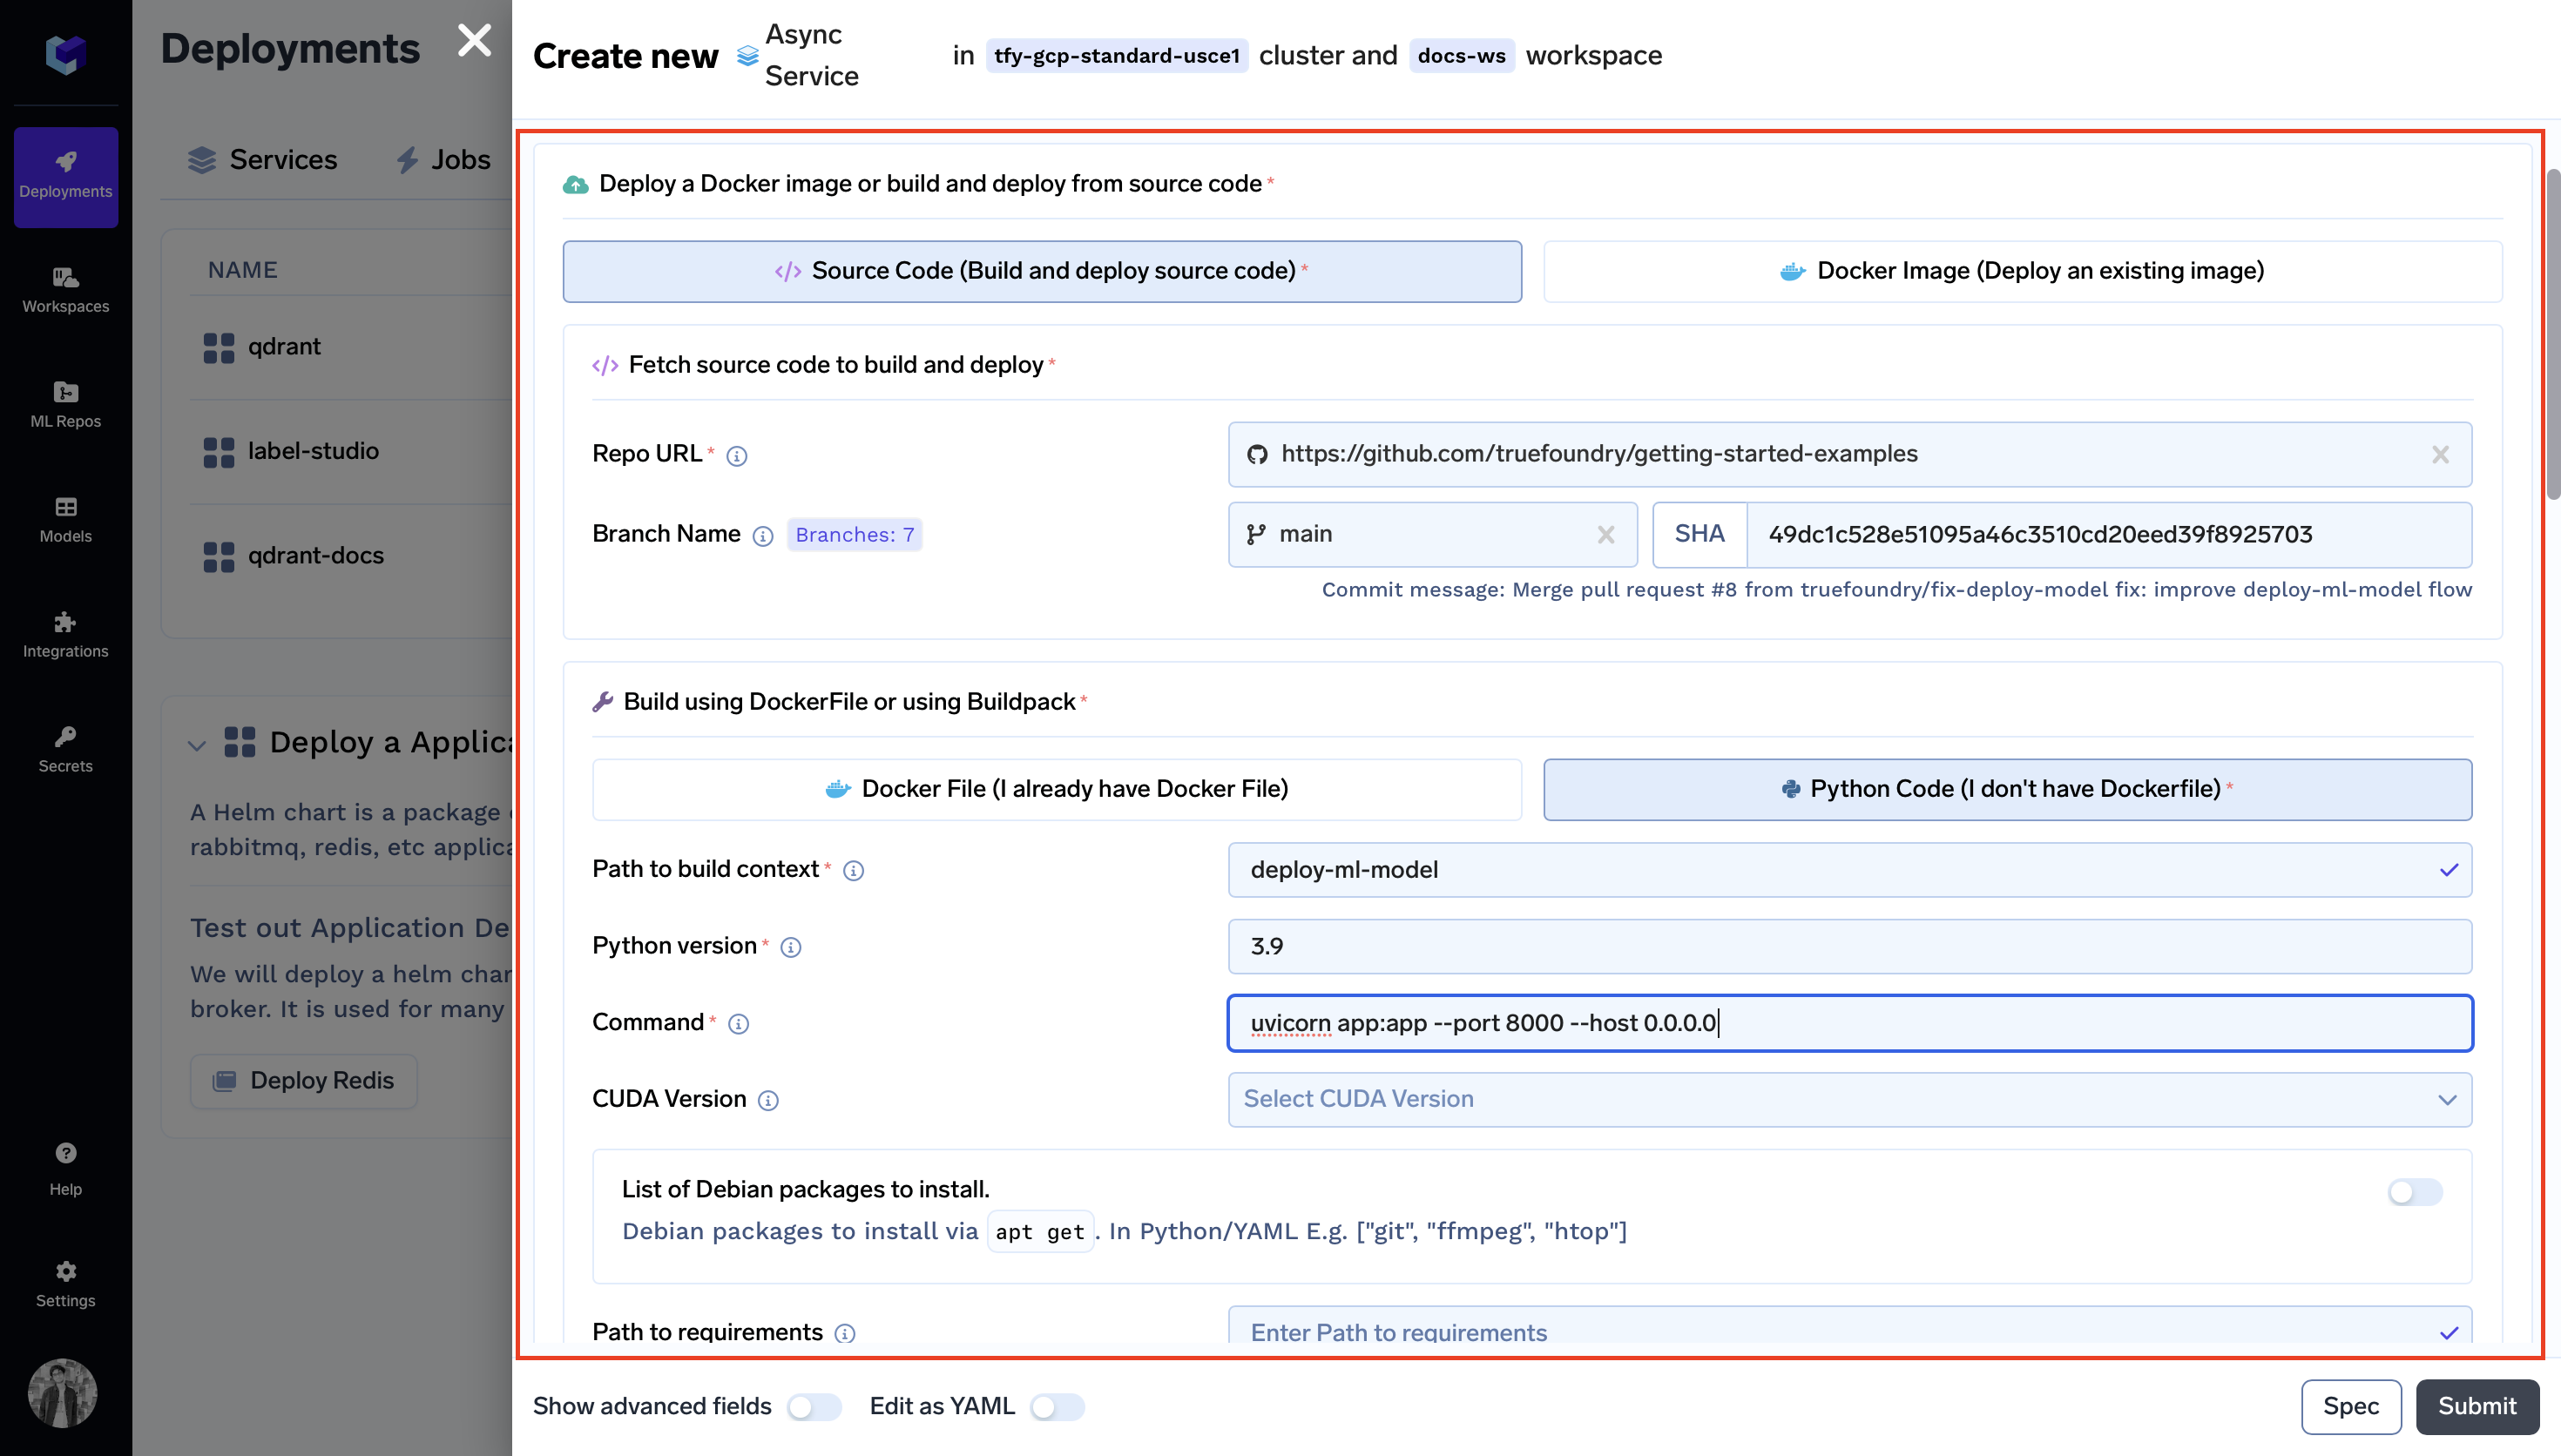
Specifying Docker Image Build Instructions:
- Choose
Source Code: - Repo URL:
https://github.com/truefoundry/getting-started-examples - Choose
Python Code (I don't have Dockerfile) - Path to build context:
./deploy-ml-model/ - Command:
gunicorn app:app --workers 1 --worker-class uvicorn.workers.UvicornWorker --bind 127.0.0.1:8000
- Choose
-
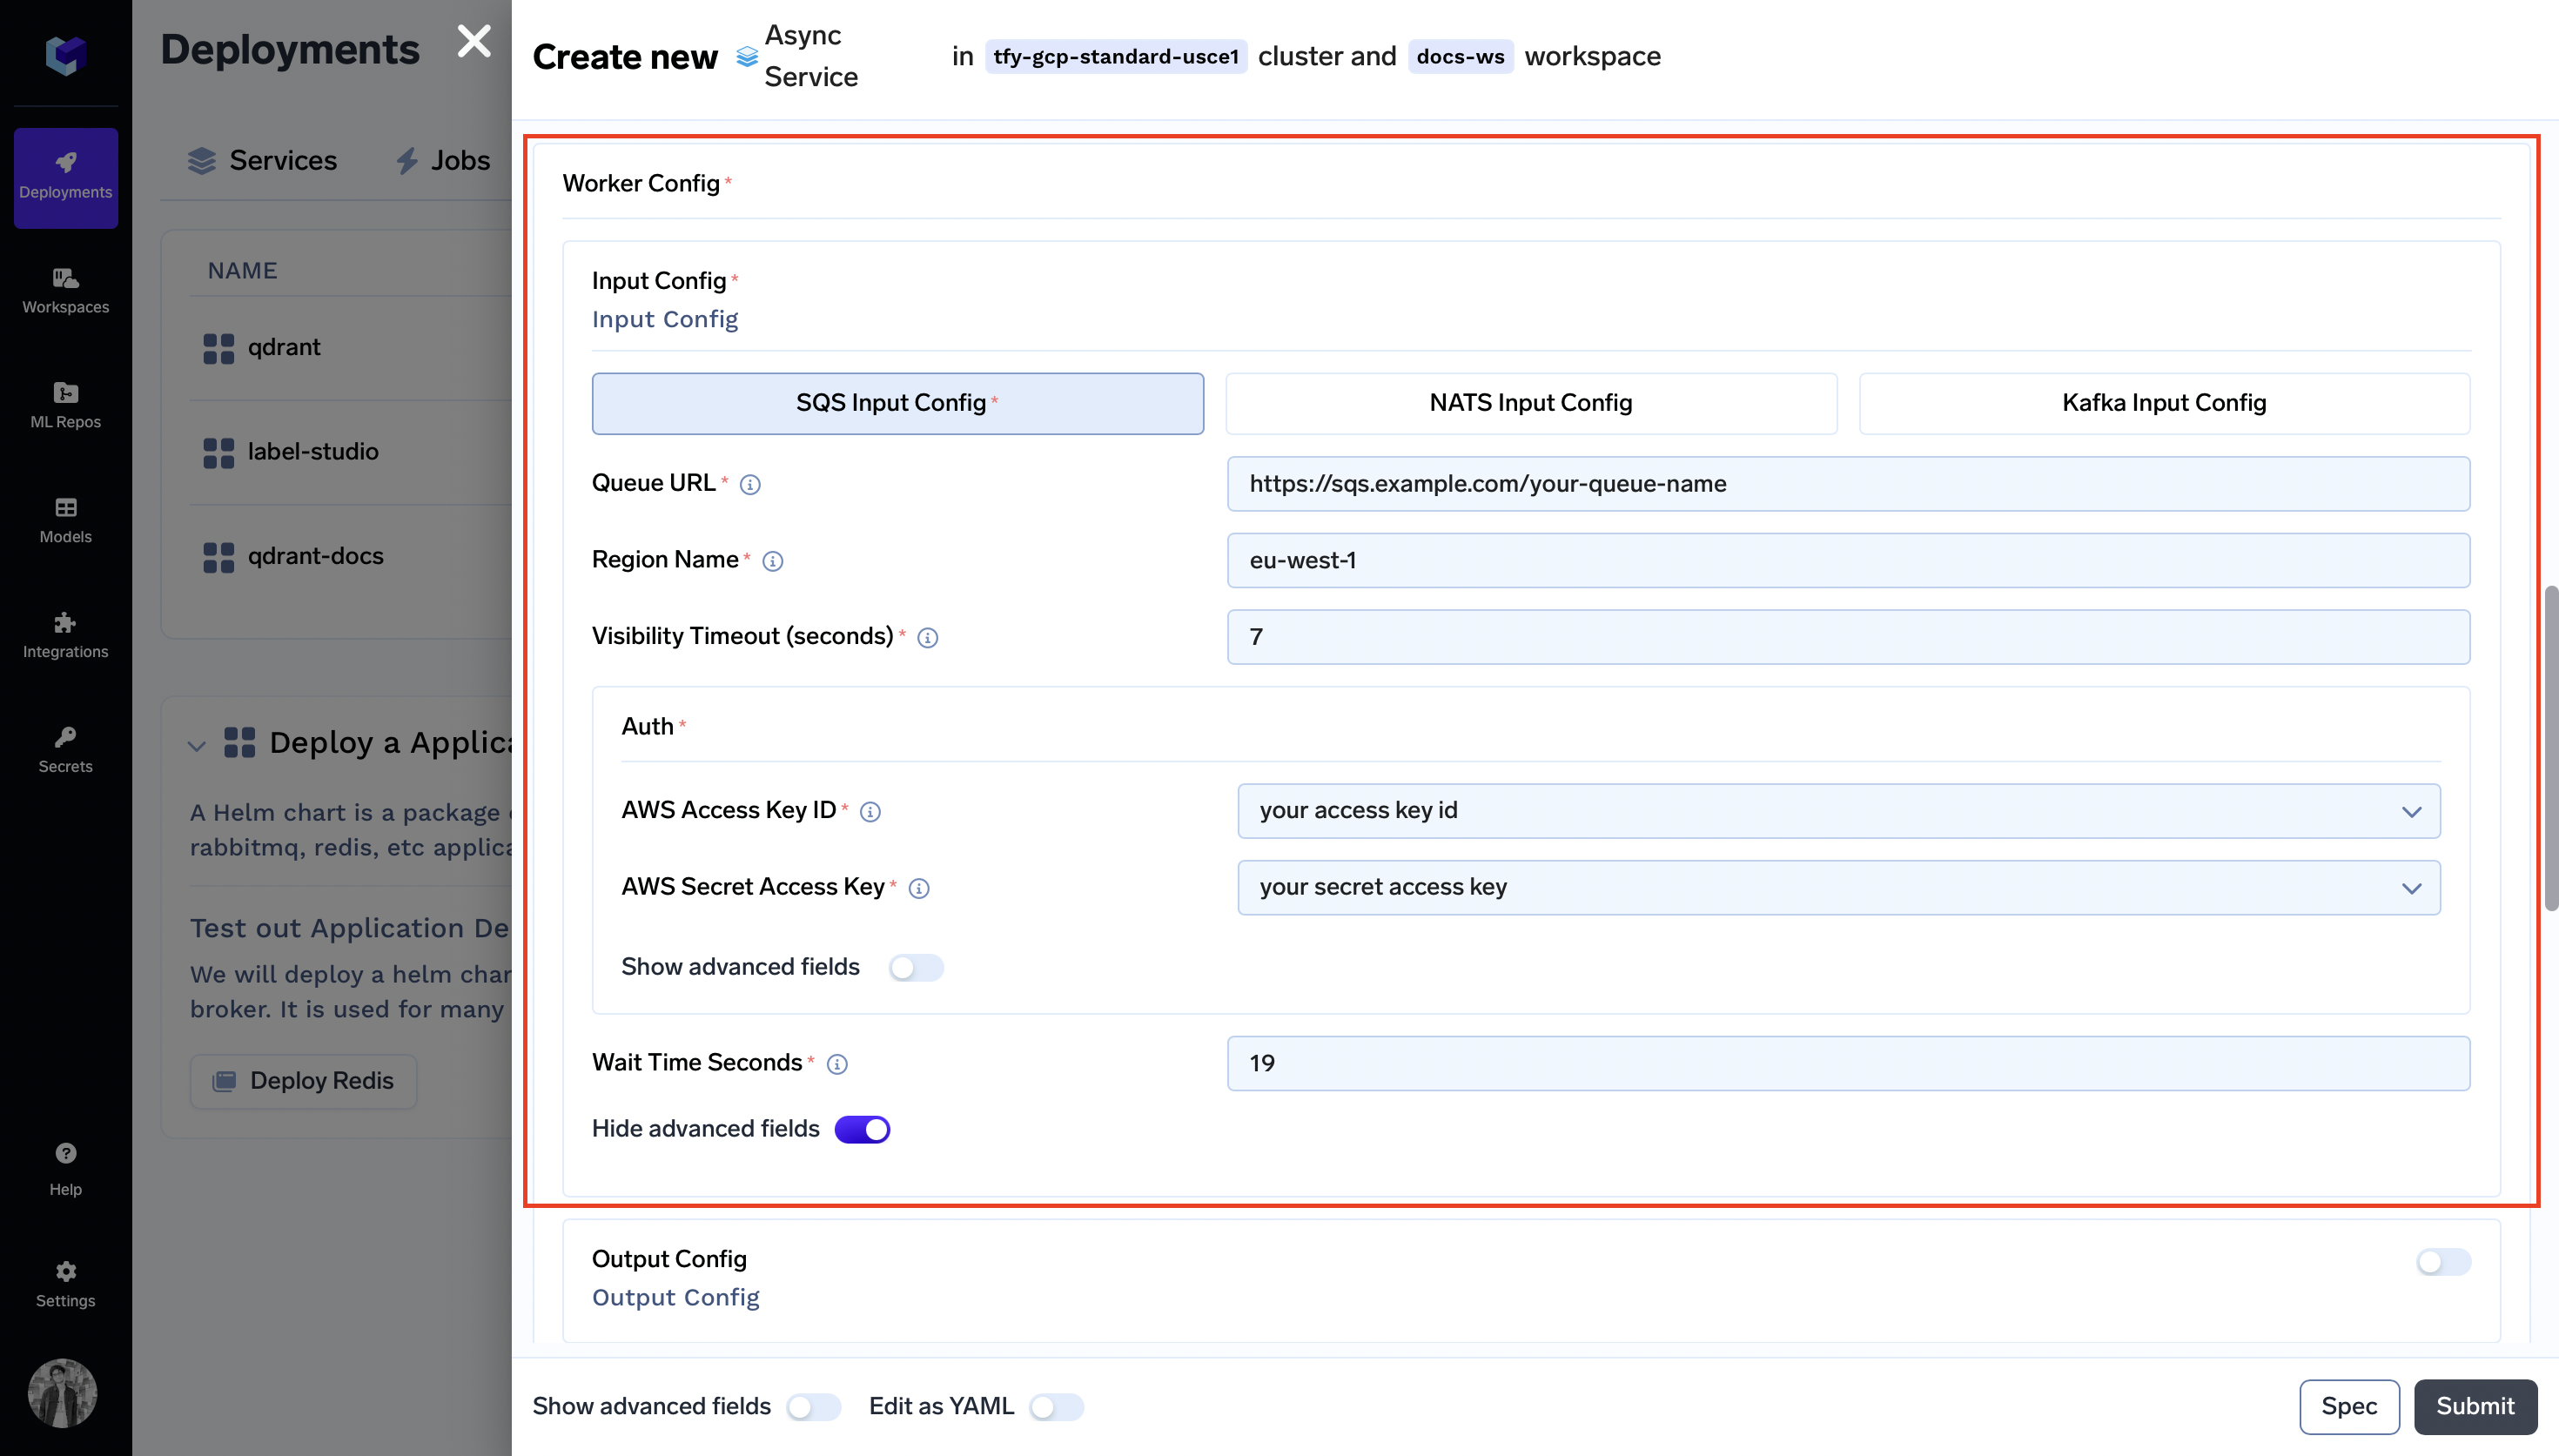
Worker Config -> Input Config:
Specify Input Config as stated in the following documentation AWS SQS -
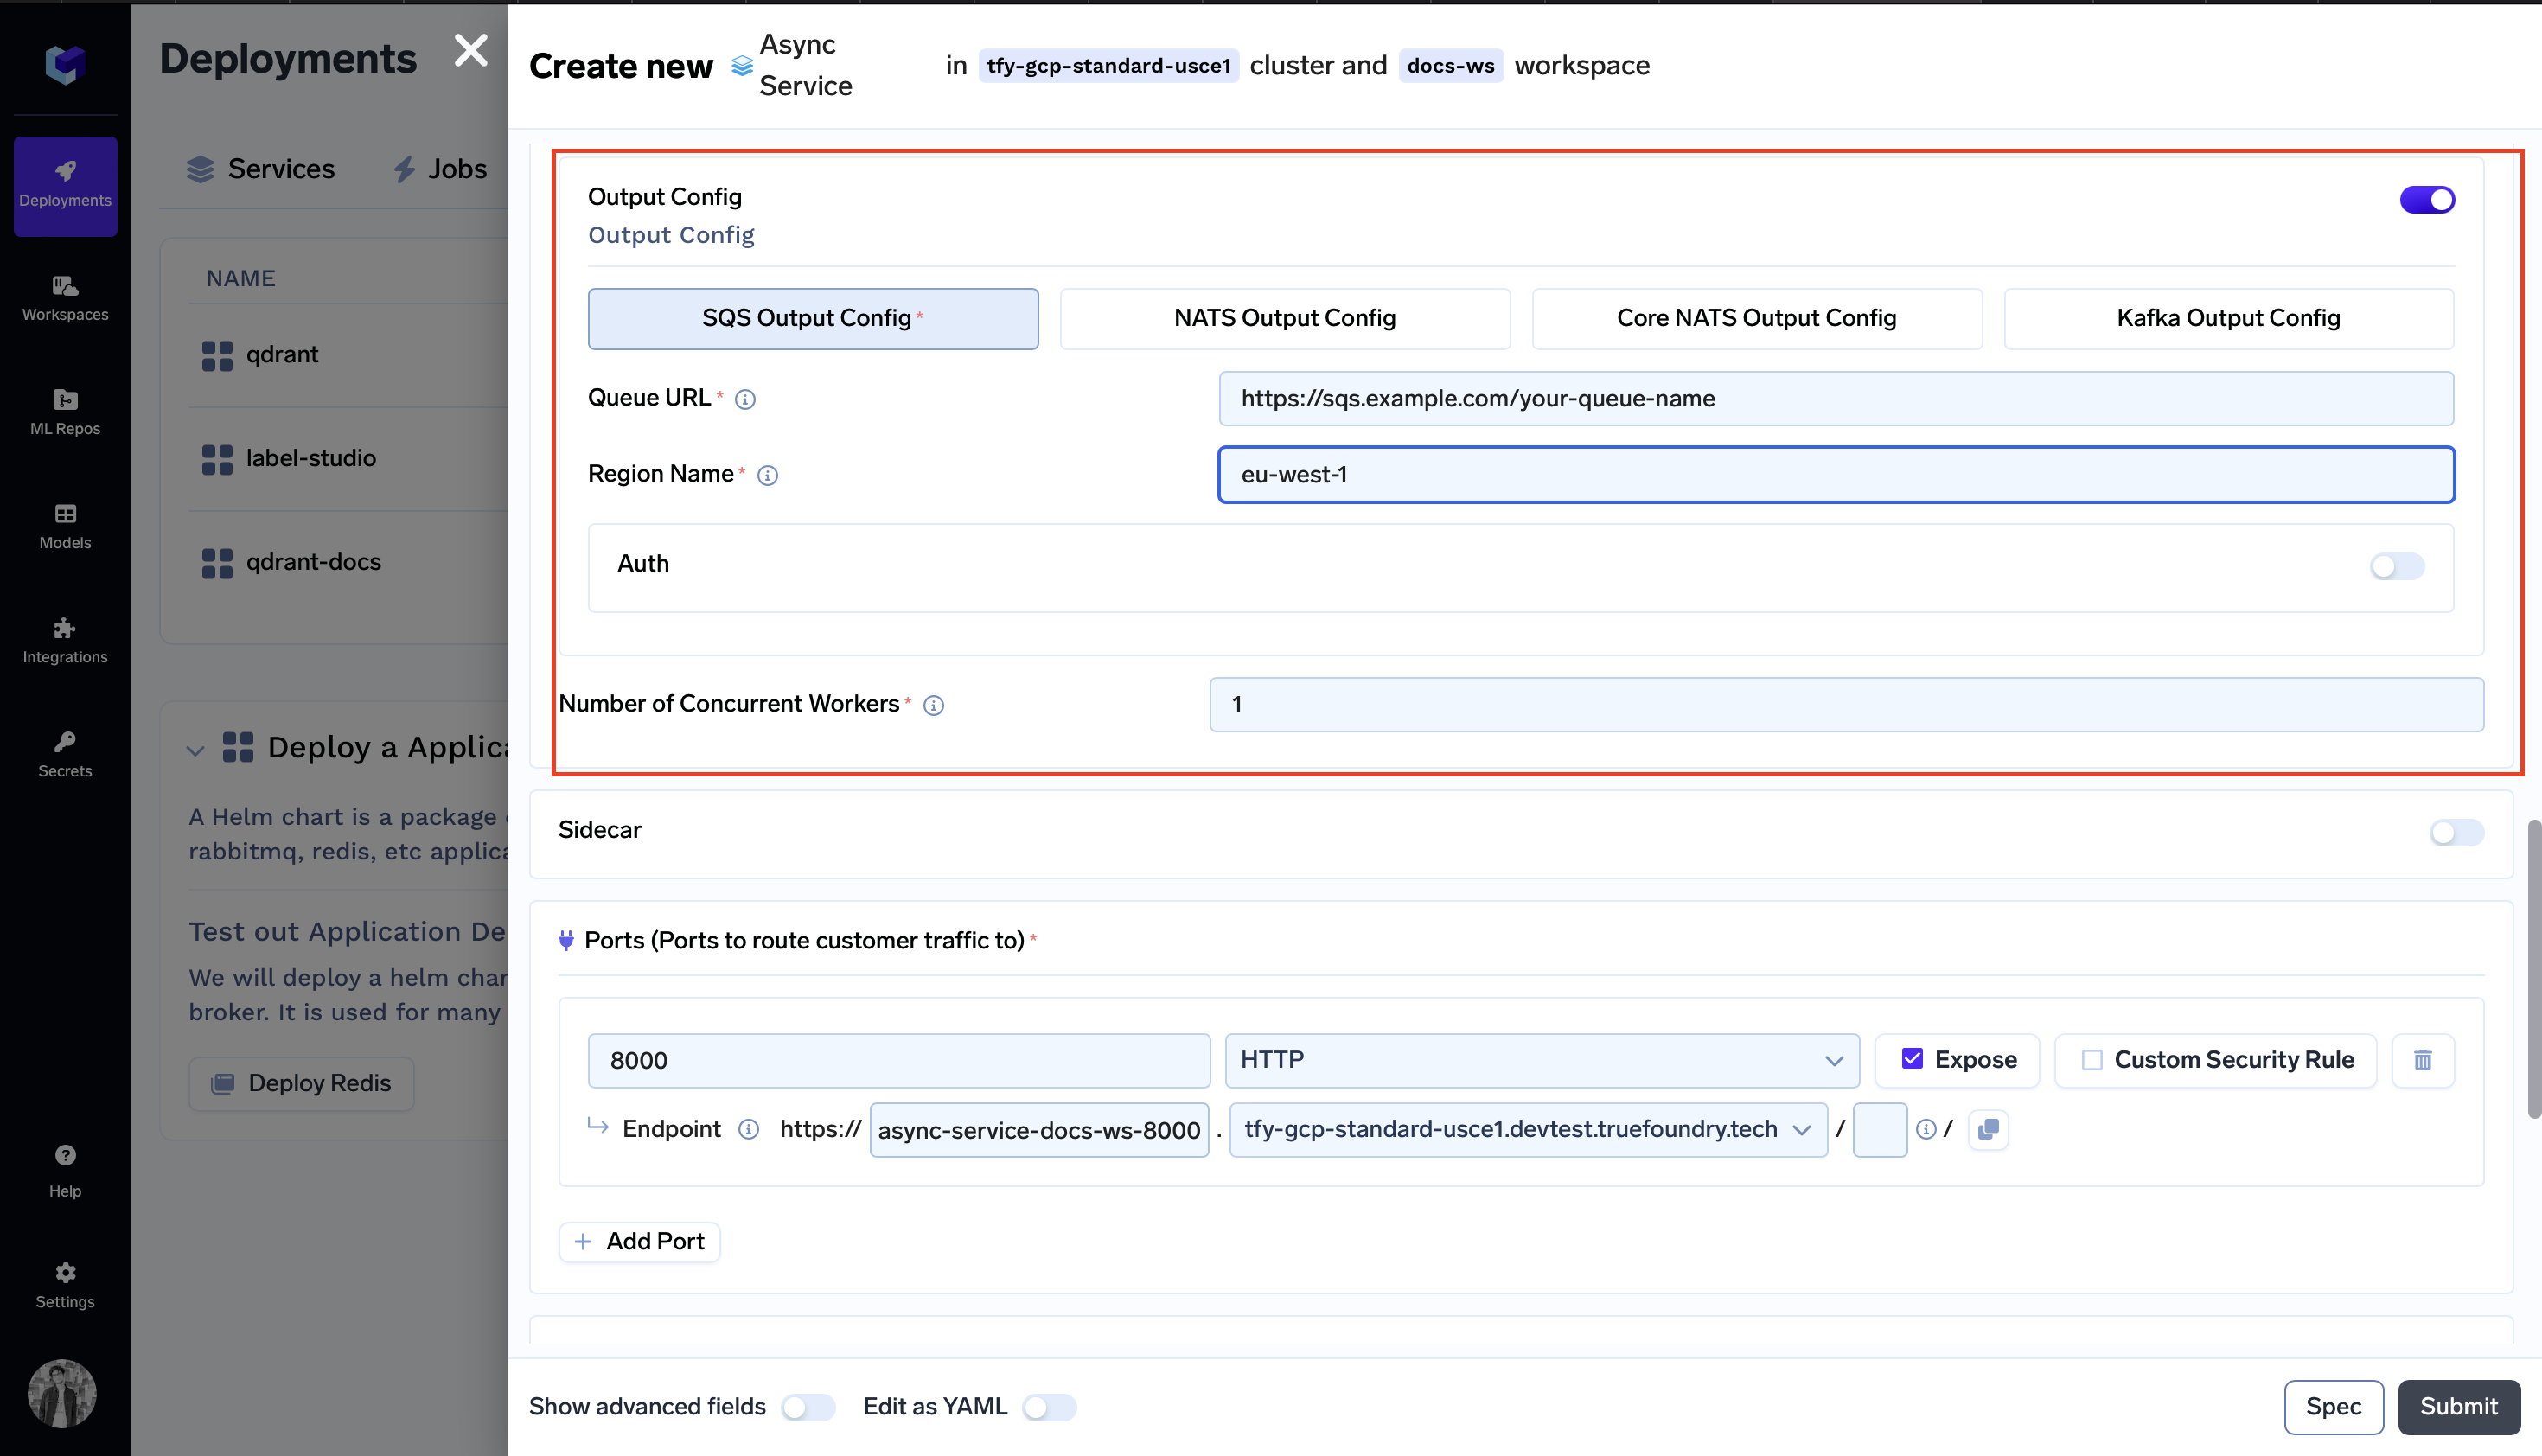
Worker Config -> Output Config:
Specify Output Config as stated in the following documentation AWS SQS
Note:
Input Config and Output Config can have different message queue types; for instance, you can configure Input Config to use Kafka and Output Config to use AWS SQS.
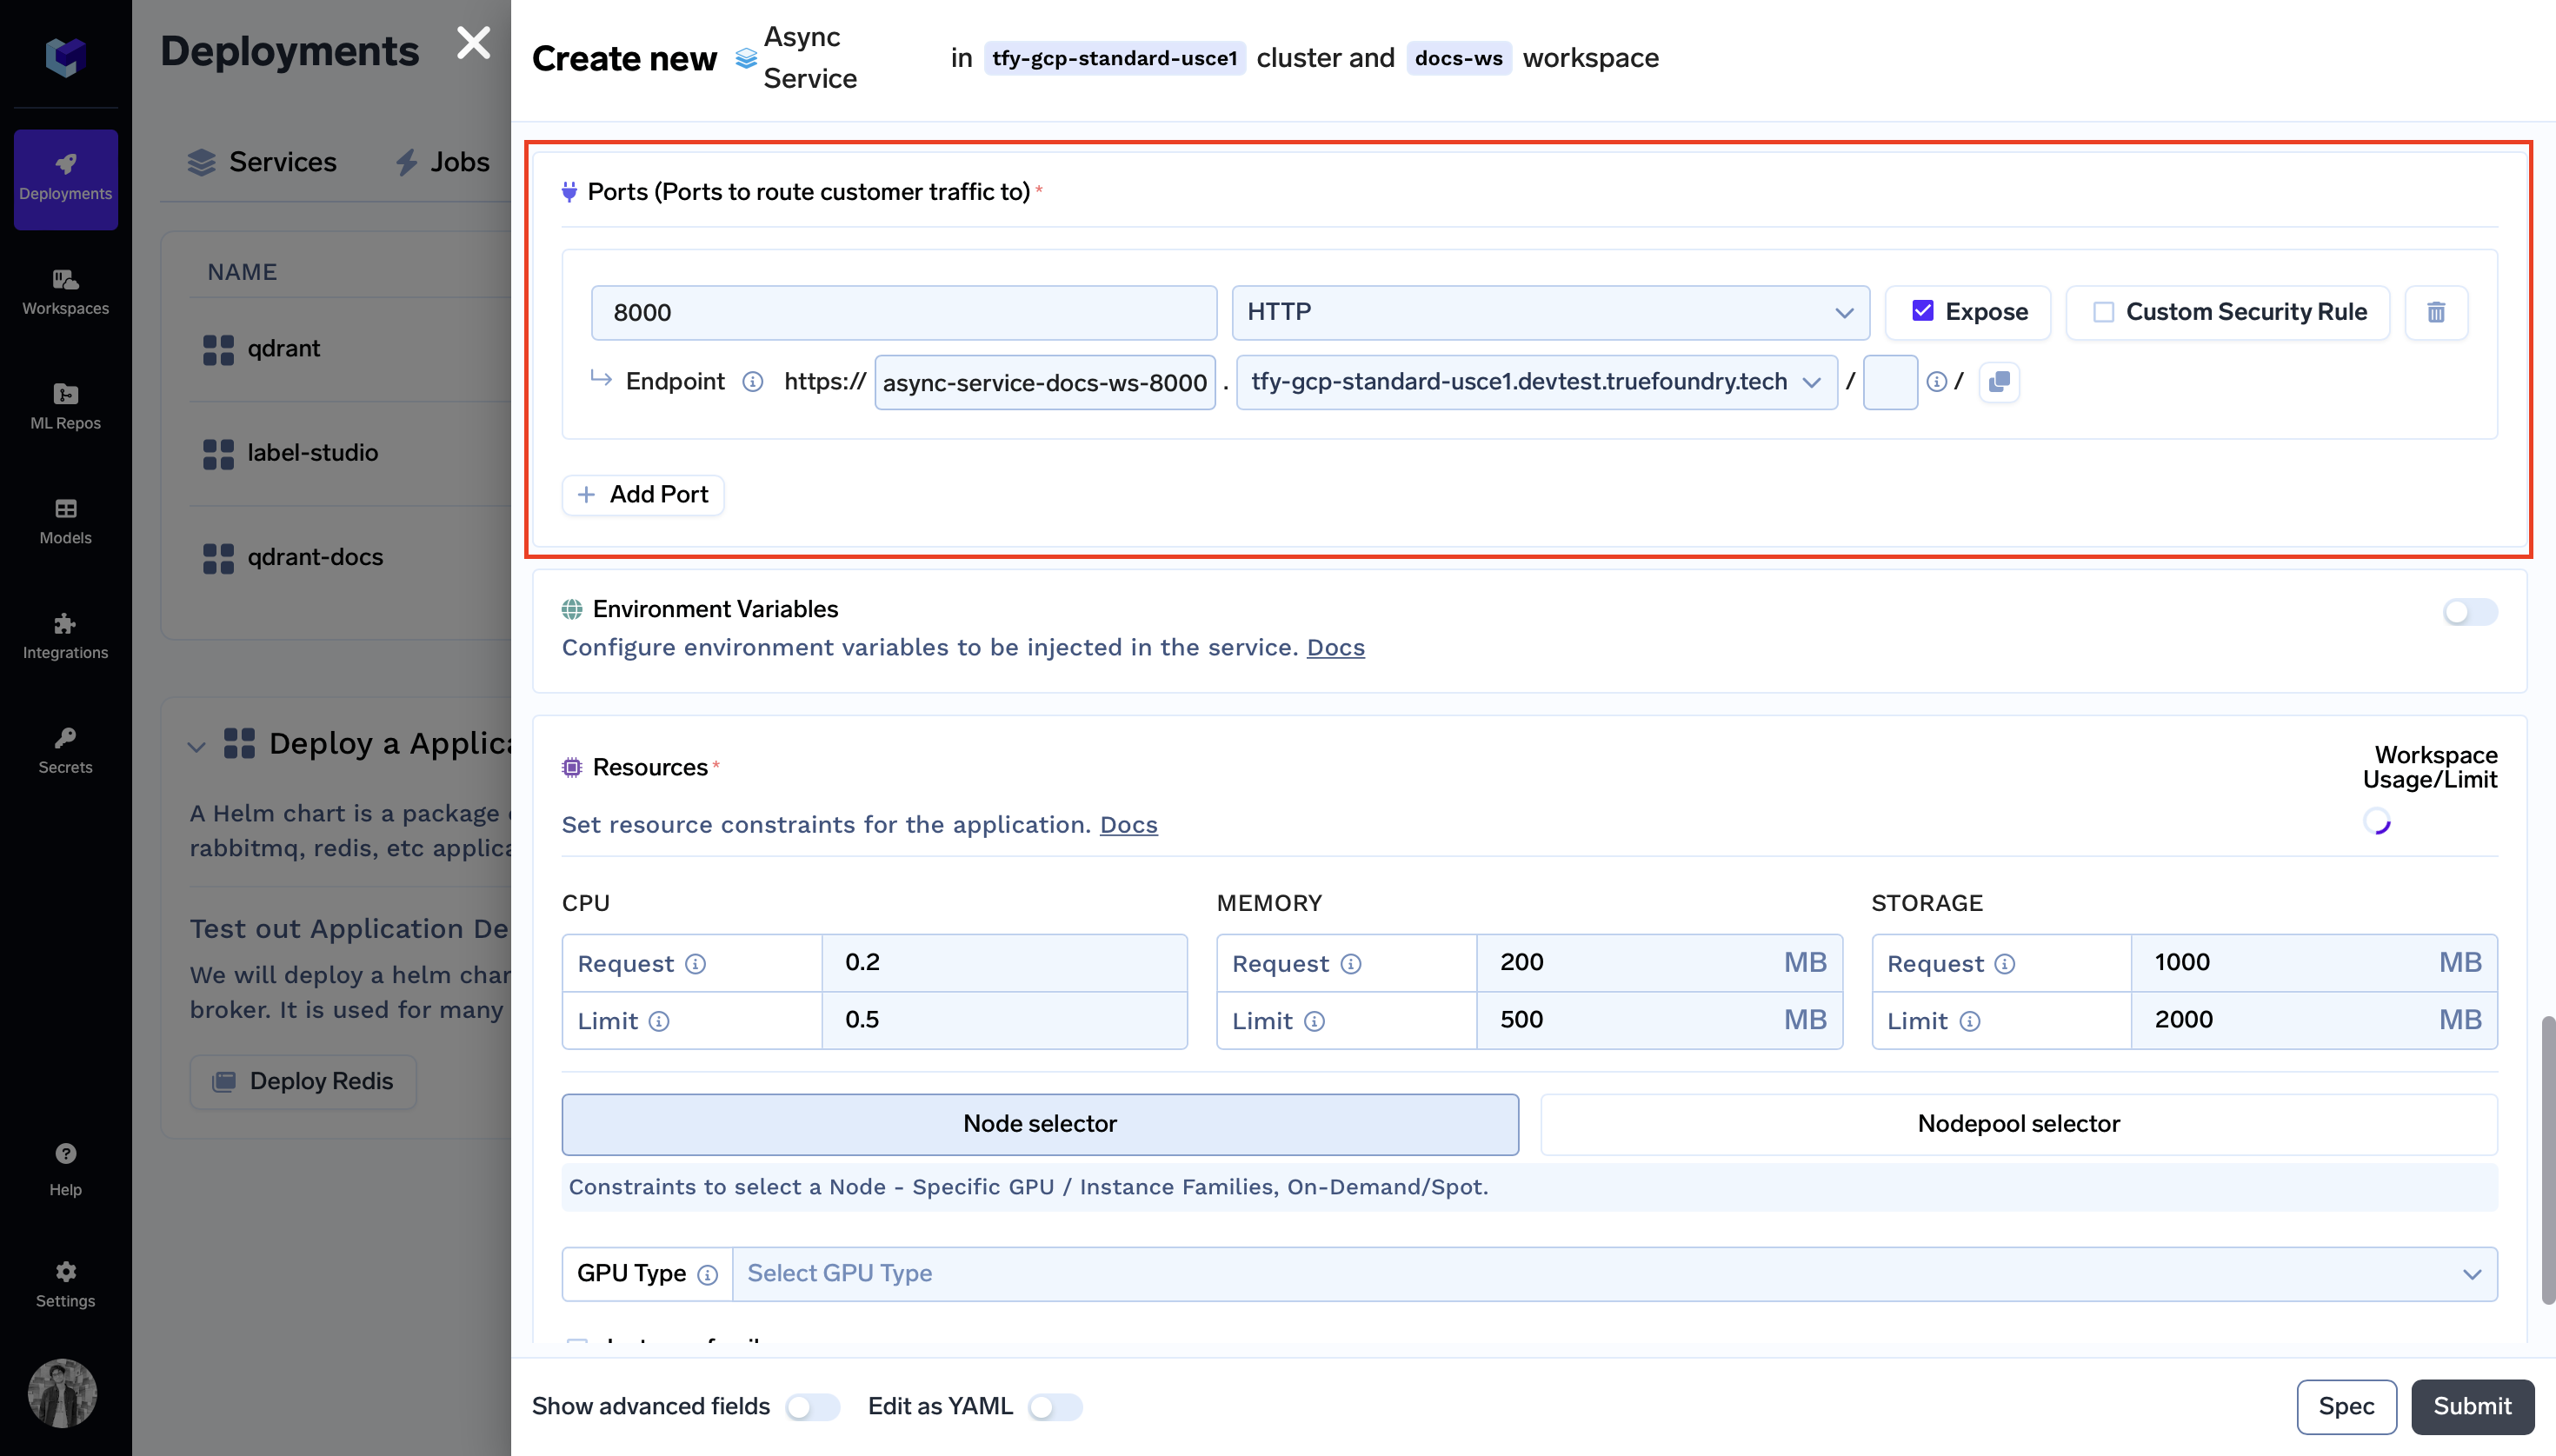
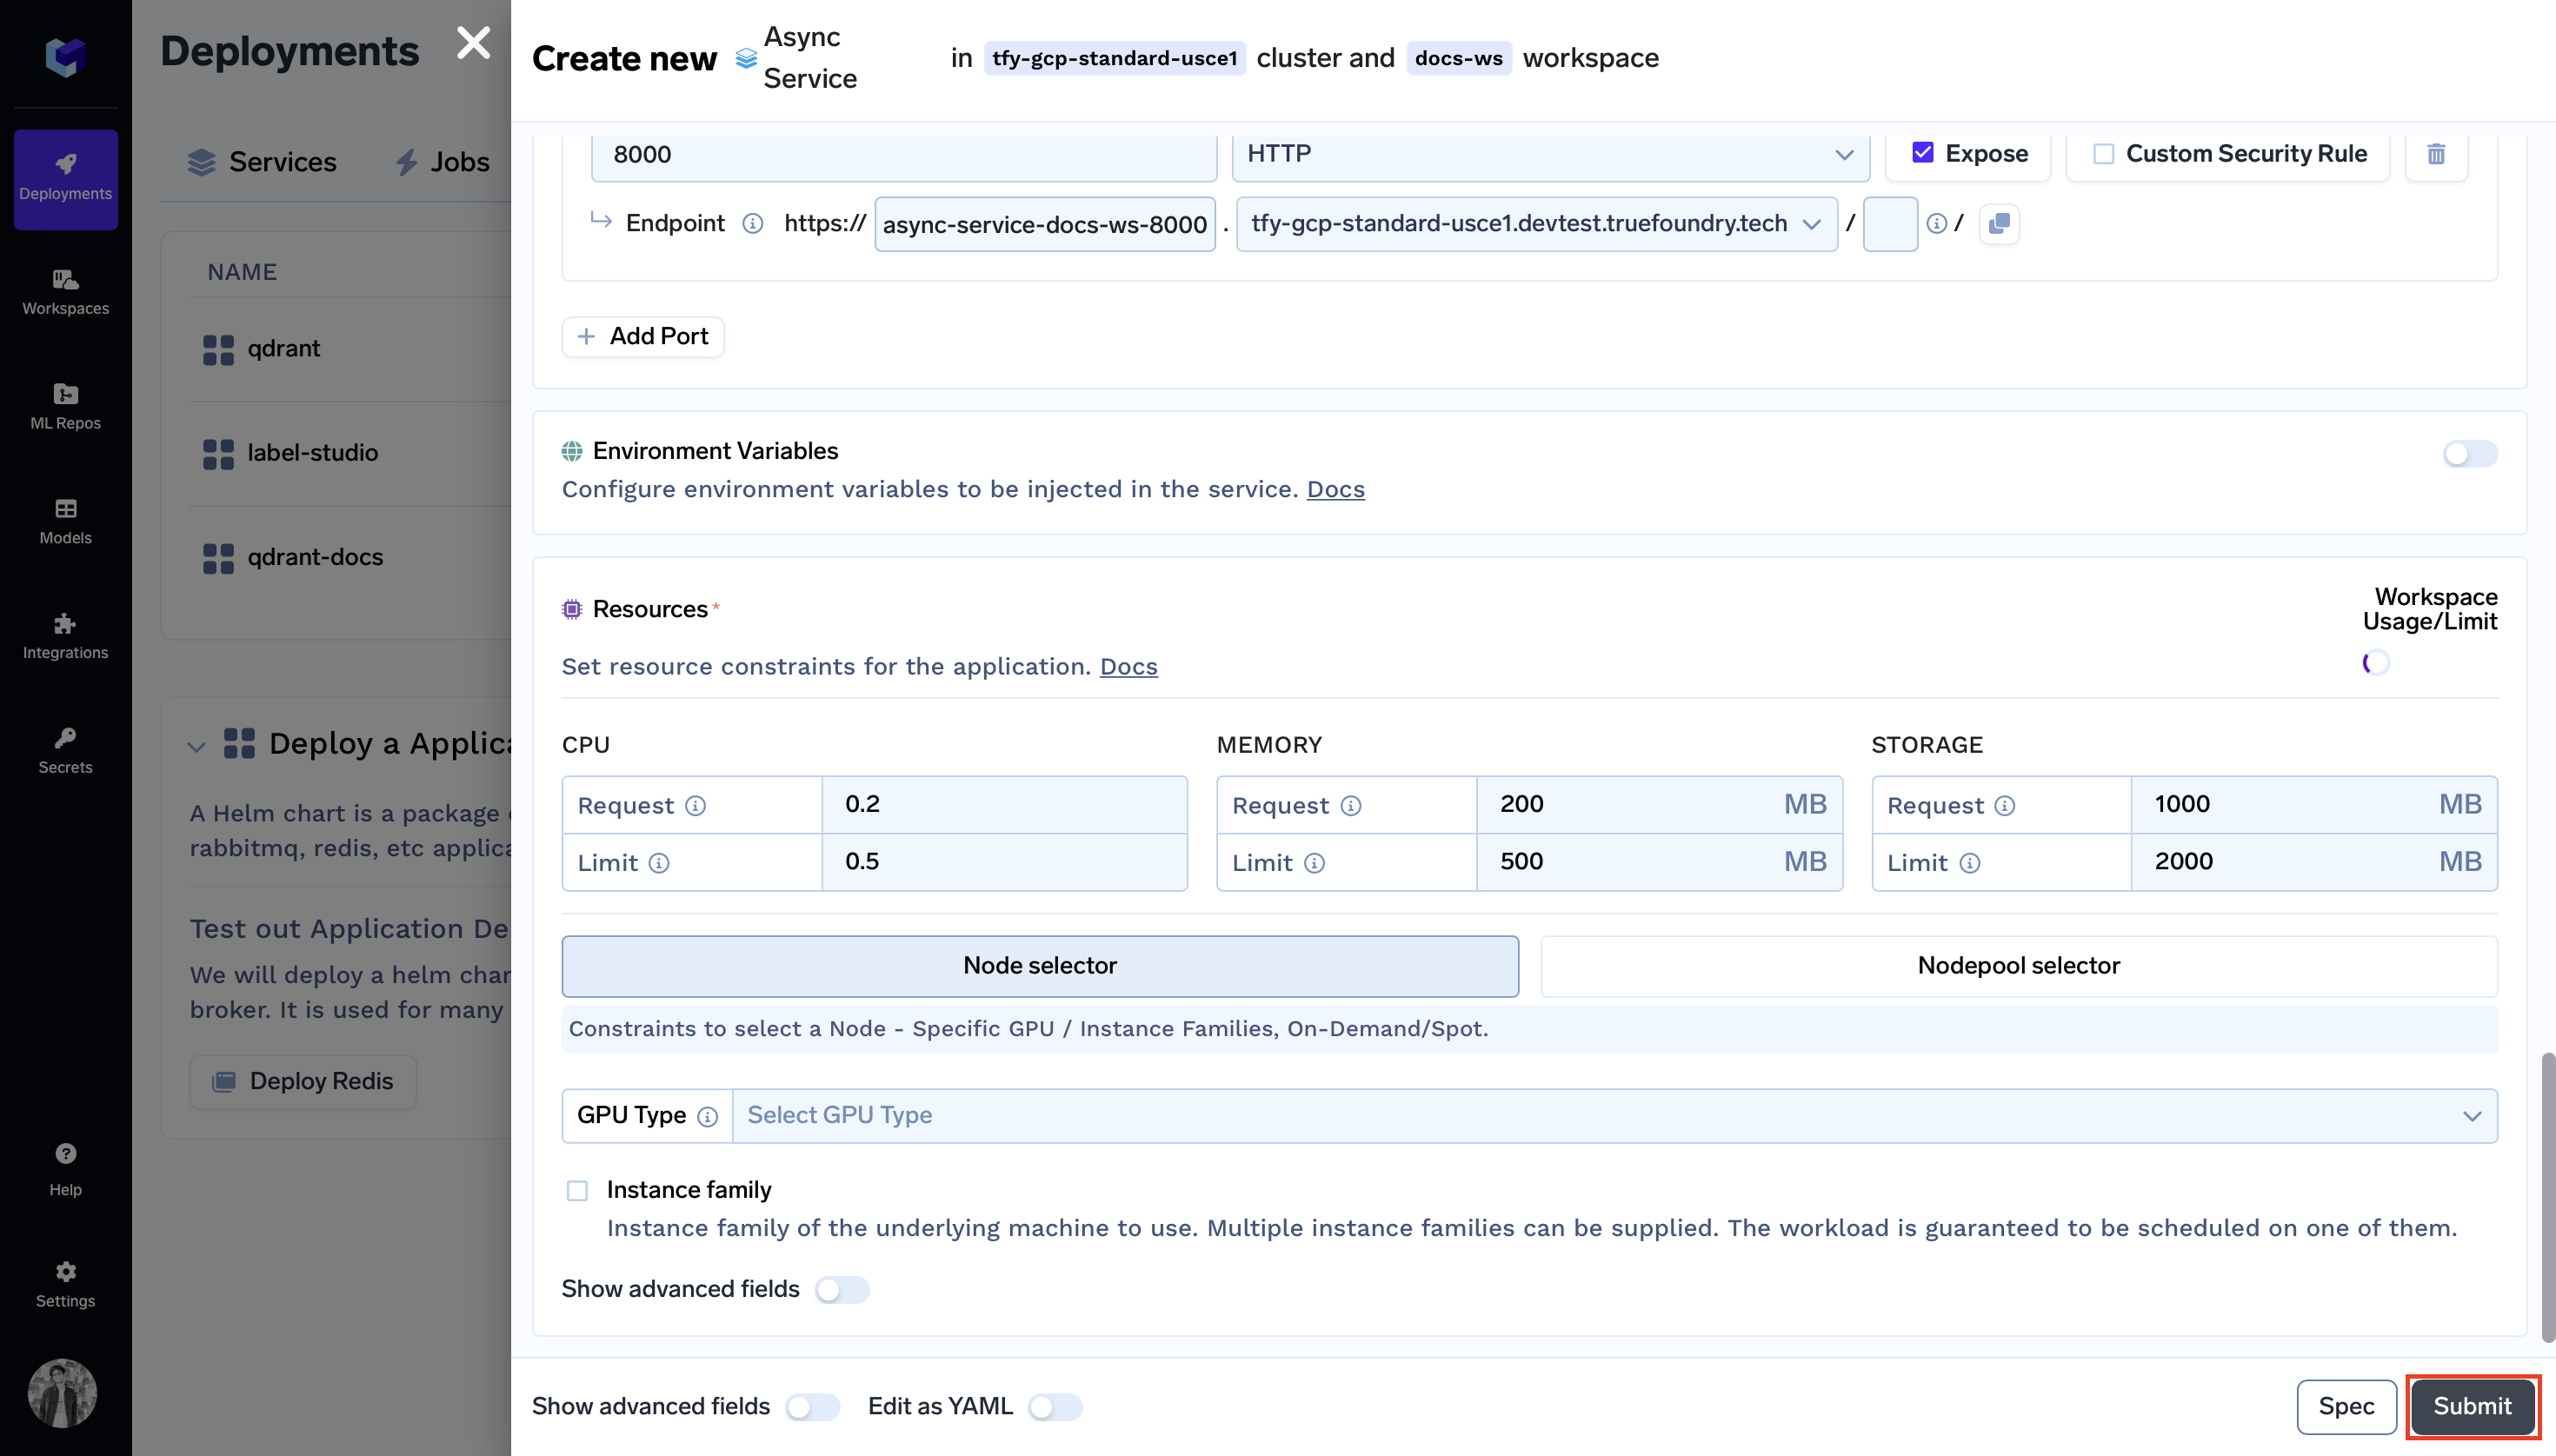
- Ports (Ports to route customer traffic to):
- In the
Portfield, enter8000as specified in the gunicorn command. - The
Endpointfield will be prefilled automatically based on your configured domain.
- In the
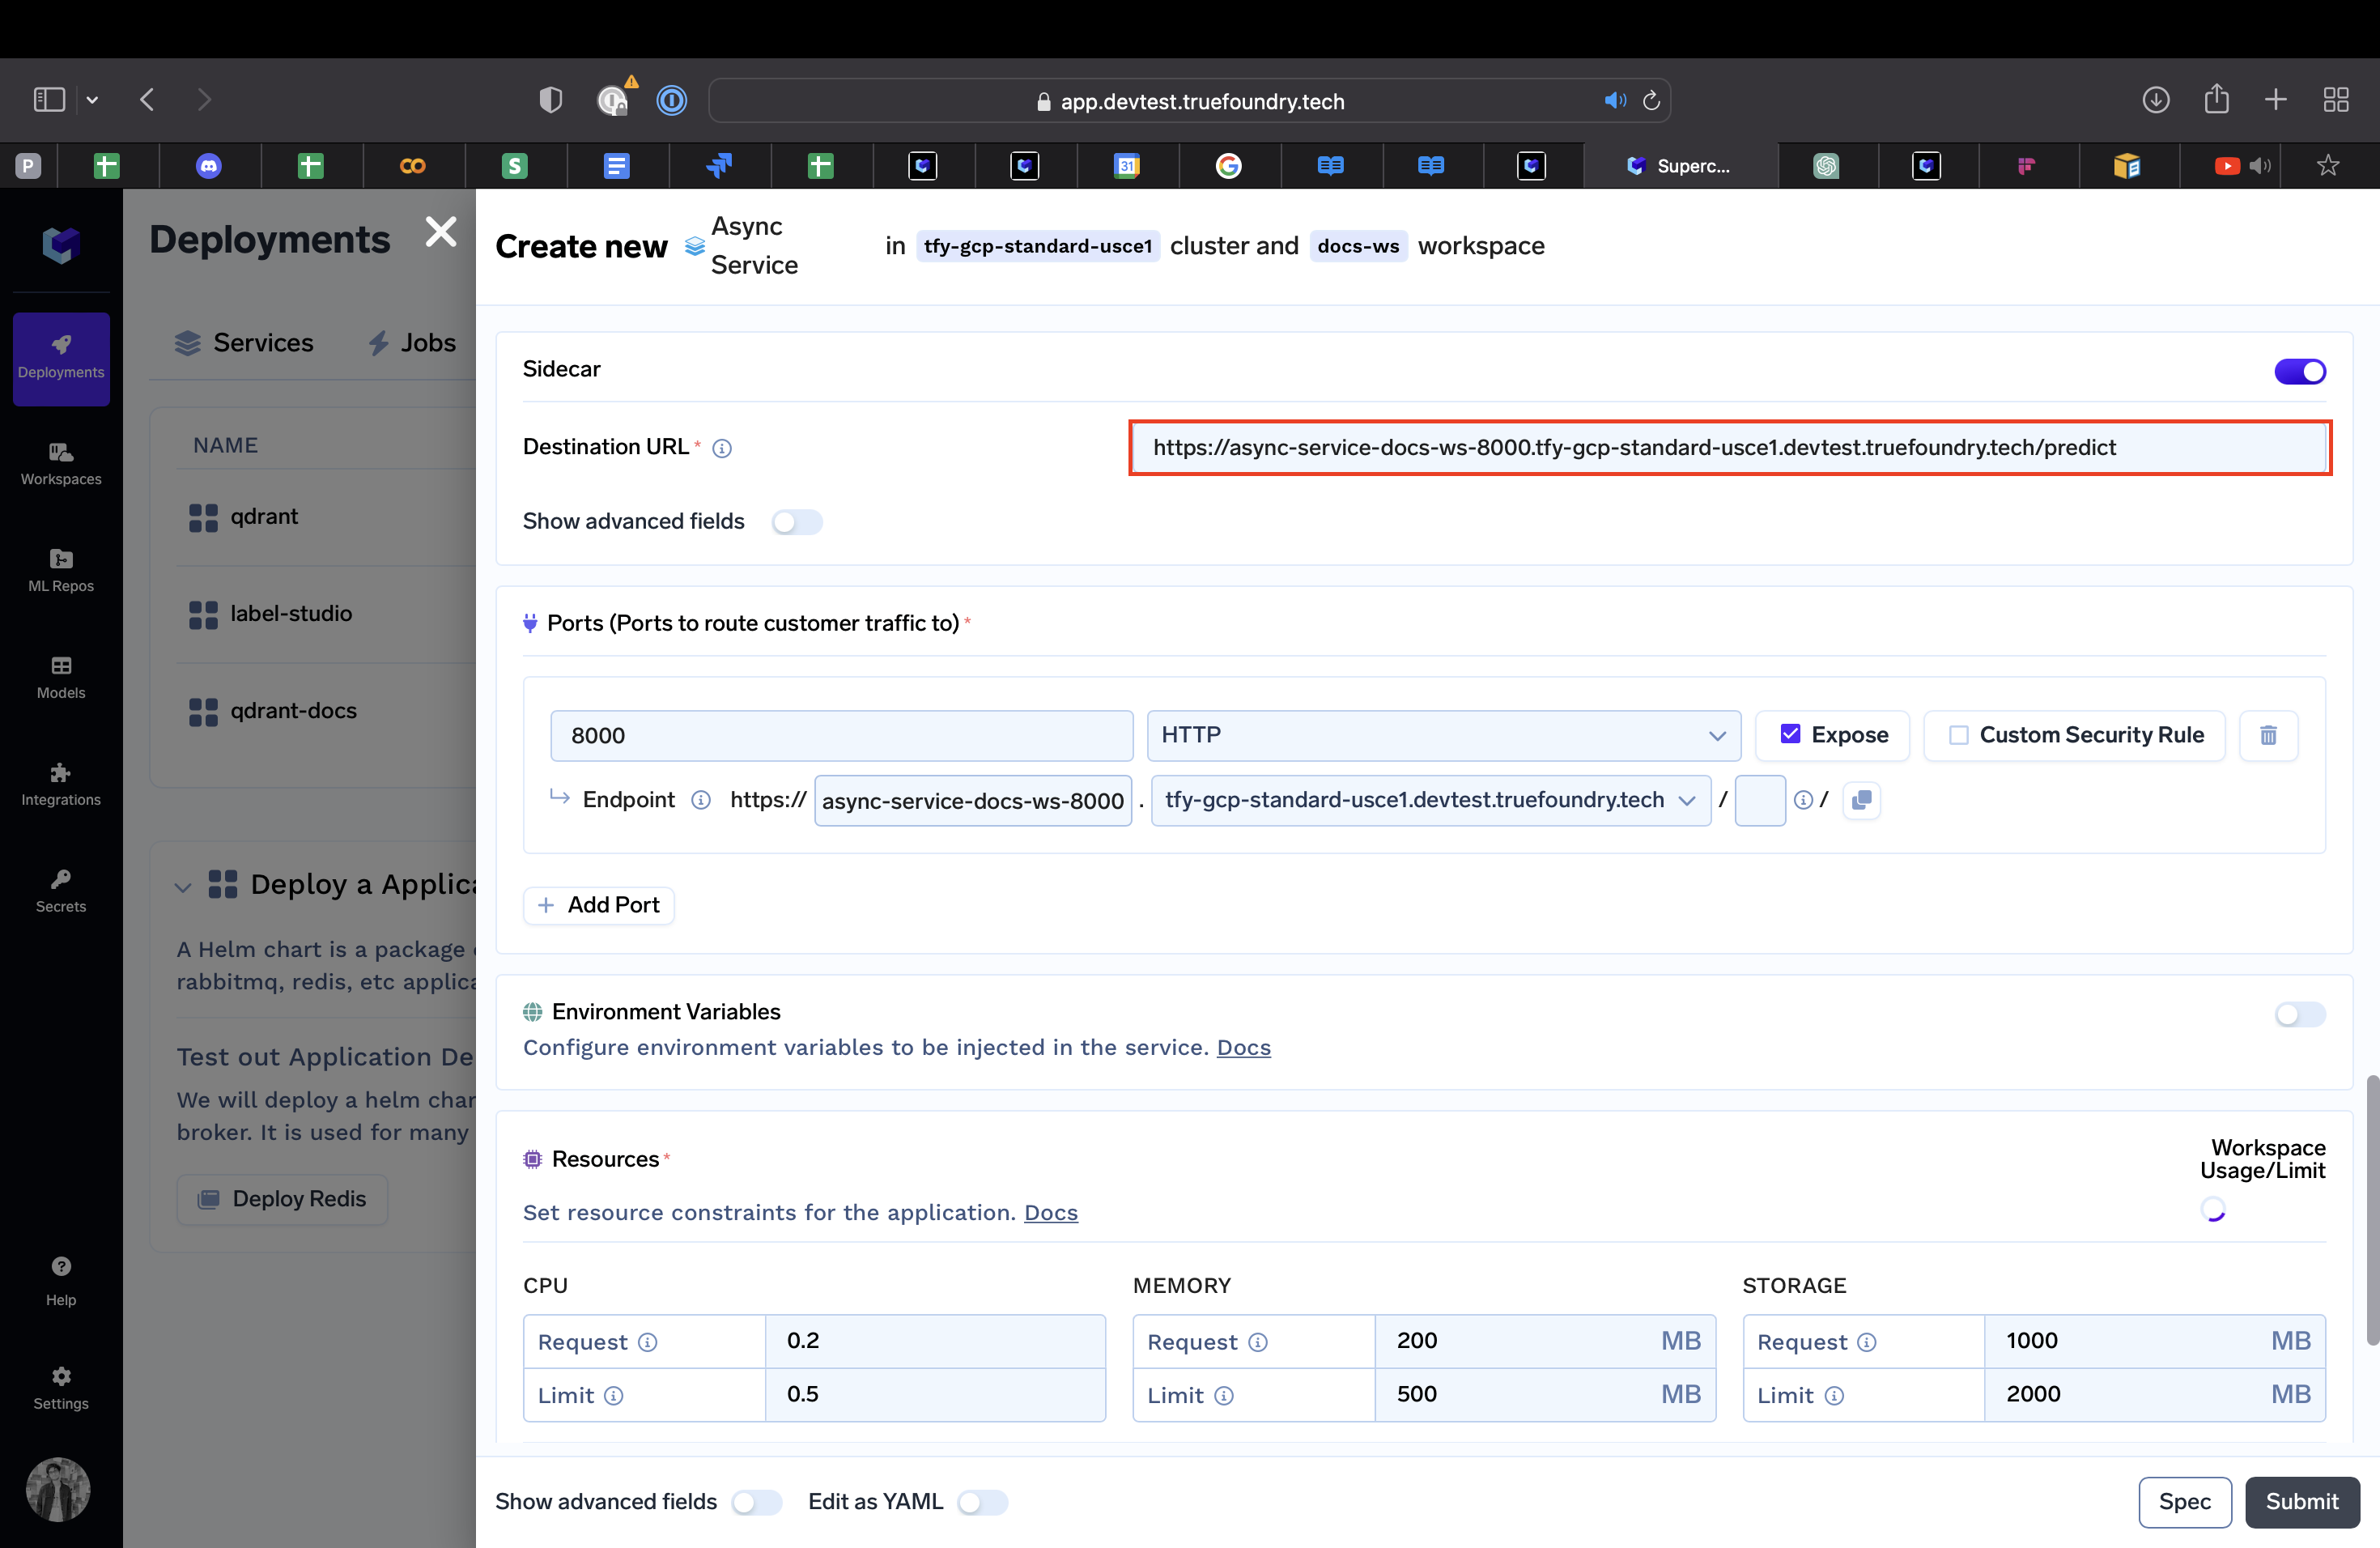
- Sidecar:
- Enable the
Sidecartoggle - Destination:
https://async-service-docs-ws-8000.tfy-gcp-standard-usce1.devtest.truefoundry.tech/predict
- Enable the
Step 3: Submit the form
Now that all the deployment options are filled, click the Create button. This will initiate your deployment process. After clicking Create your Service Dashboard will resemble the following:

While your deployment is in progress, you can hover over the spinner icon to check the deployment status. After a brief moment, the deployment should become active, and your Service Dashboard will transform to appear as follows:

Interacting with the Application
With the deployment now active, you can click on your specific service. Doing so will open up the dashboard dedicated to your service, allowing you to access various details.
Here, you can see the Endpoint of your service at the top right corner. You can click on the Endpoint to open your application.

Now you can click on one of the Images from the two options and see what predictions your model gives:
Congratulations! You have successfully deployed the async service using Truefoundry.
Sending requests
The request body for sending a synchronous or an asynchronous process request is the same.
Send a synchronous process request
Note:
Enter the endpoint of your application below.
curl '<yourendpoint>/process' -H 'Content-Type: application/json' -d '{"request_id": "abc", "body": {"x": 1, "y": 2}}'
Output:
❯ curl '<yourendpoint>/process' -H 'Content-Type: application/json' -d '{"request_id": "abc", "body": {"x": 1, "y": 2}}'
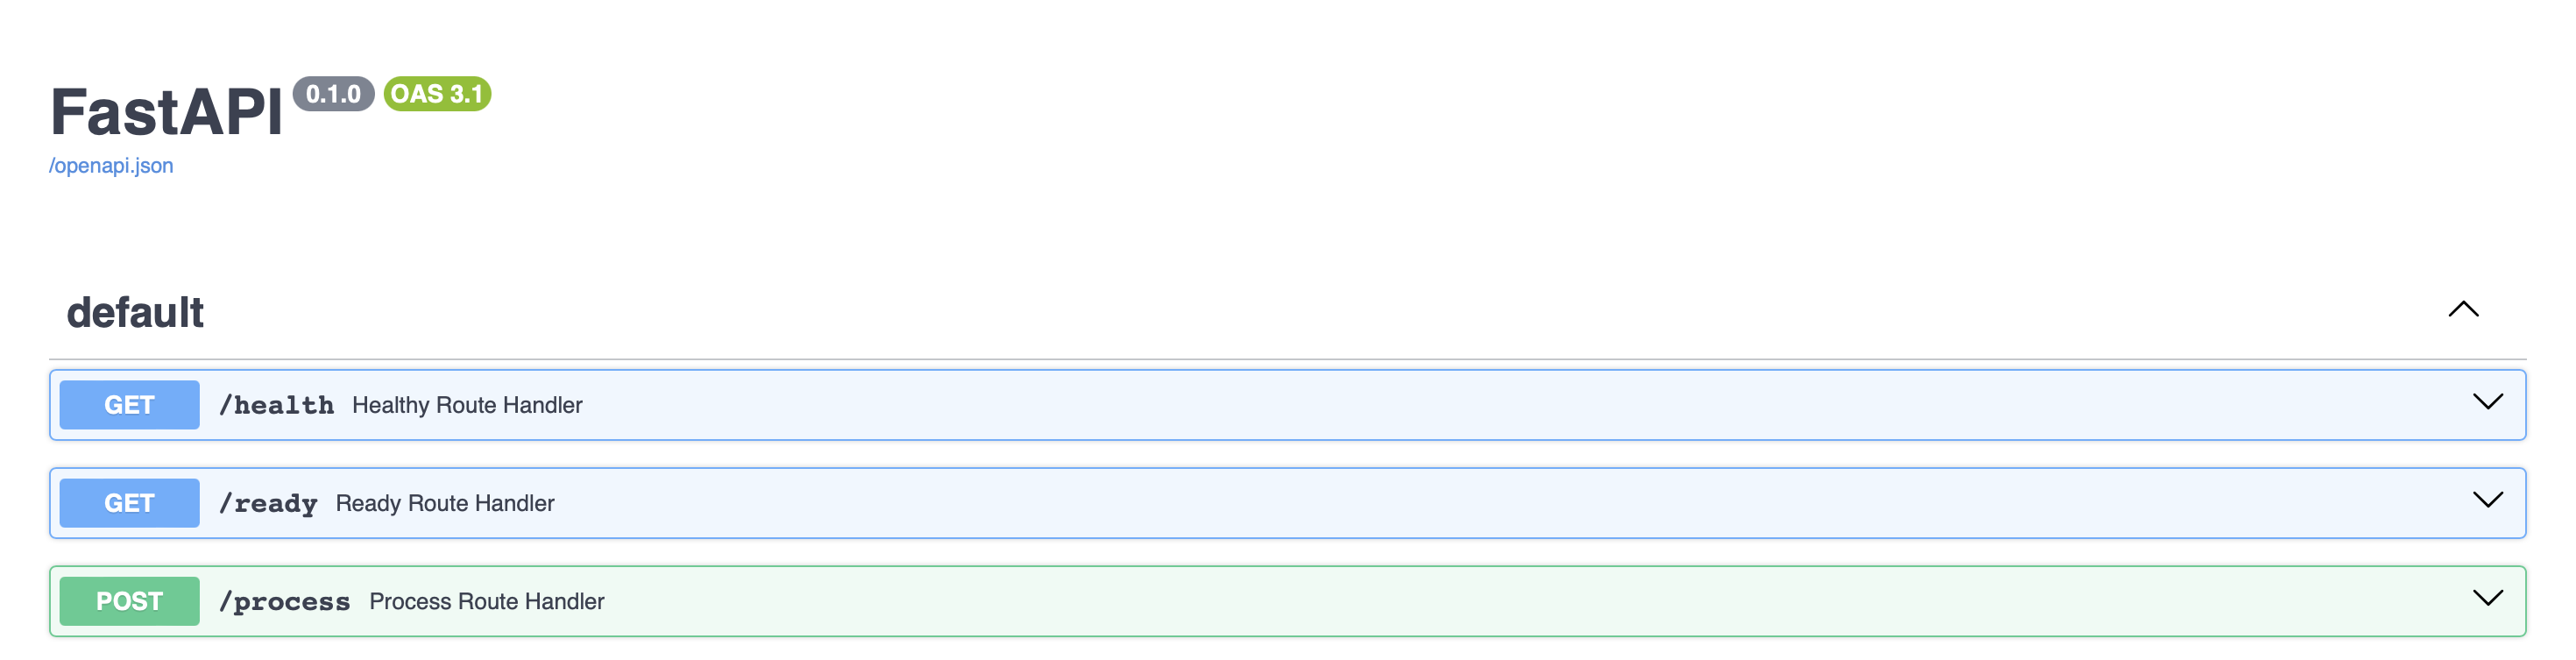
{"request_id":"abc","status":"SUCCESS","body":2,"error":null}
- A FastAPI documentation dashboard will be available on your endpoint
Send an asynchronous process request
send_async_request.py
import json
import uuid
import boto3

def send_request(input_sqs_url: str, output_sqs_url: str):
    sqs = boto3.client("sqs")
    request_id = str(uuid.uuid4())

    sqs.send_message(
        QueueUrl=input_sqs_url,
        MessageBody=json.dumps({"request_id": request_id, "body": {"x": 1, "y": 2}})
    )

    while True:
        response = sqs.receive_message(
            QueueUrl=output_sqs_url, MaxNumberOfMessages=1, WaitTimeSeconds=19
        )
        if "Messages" not in response:
            continue
        msg = response["Messages"][0]
        response = json.loads(msg["Body"])

        if response.get("status") != "SUCCESS":
            raise Exception(f"Processing failed: {response.get('error')}")
        print(response)
        break

if __name__ == "__main__":
    send_request(input_sqs_url="YOUR_INPUT_SQS_URL", output_sqs_url="YOUR_OUTPUT_SQS_URL")
Run the above Python script.
python send_async_request.py
Output:
❯ python send_async_request.py
request_id='46a4ebc6-afdb-46a0-8587-ba29abf0f0d4' status='SUCCESS' body=2 error=None
Updated 11 months ago