Deploy a Dockerized Job
What you'll learn
- Creating a Docker file for our training code.
- Deploying our training code as a job using a Dockerfile via servicefoundry
This is a guide to deploy training code as a job using Dockerfile via servicefoundry
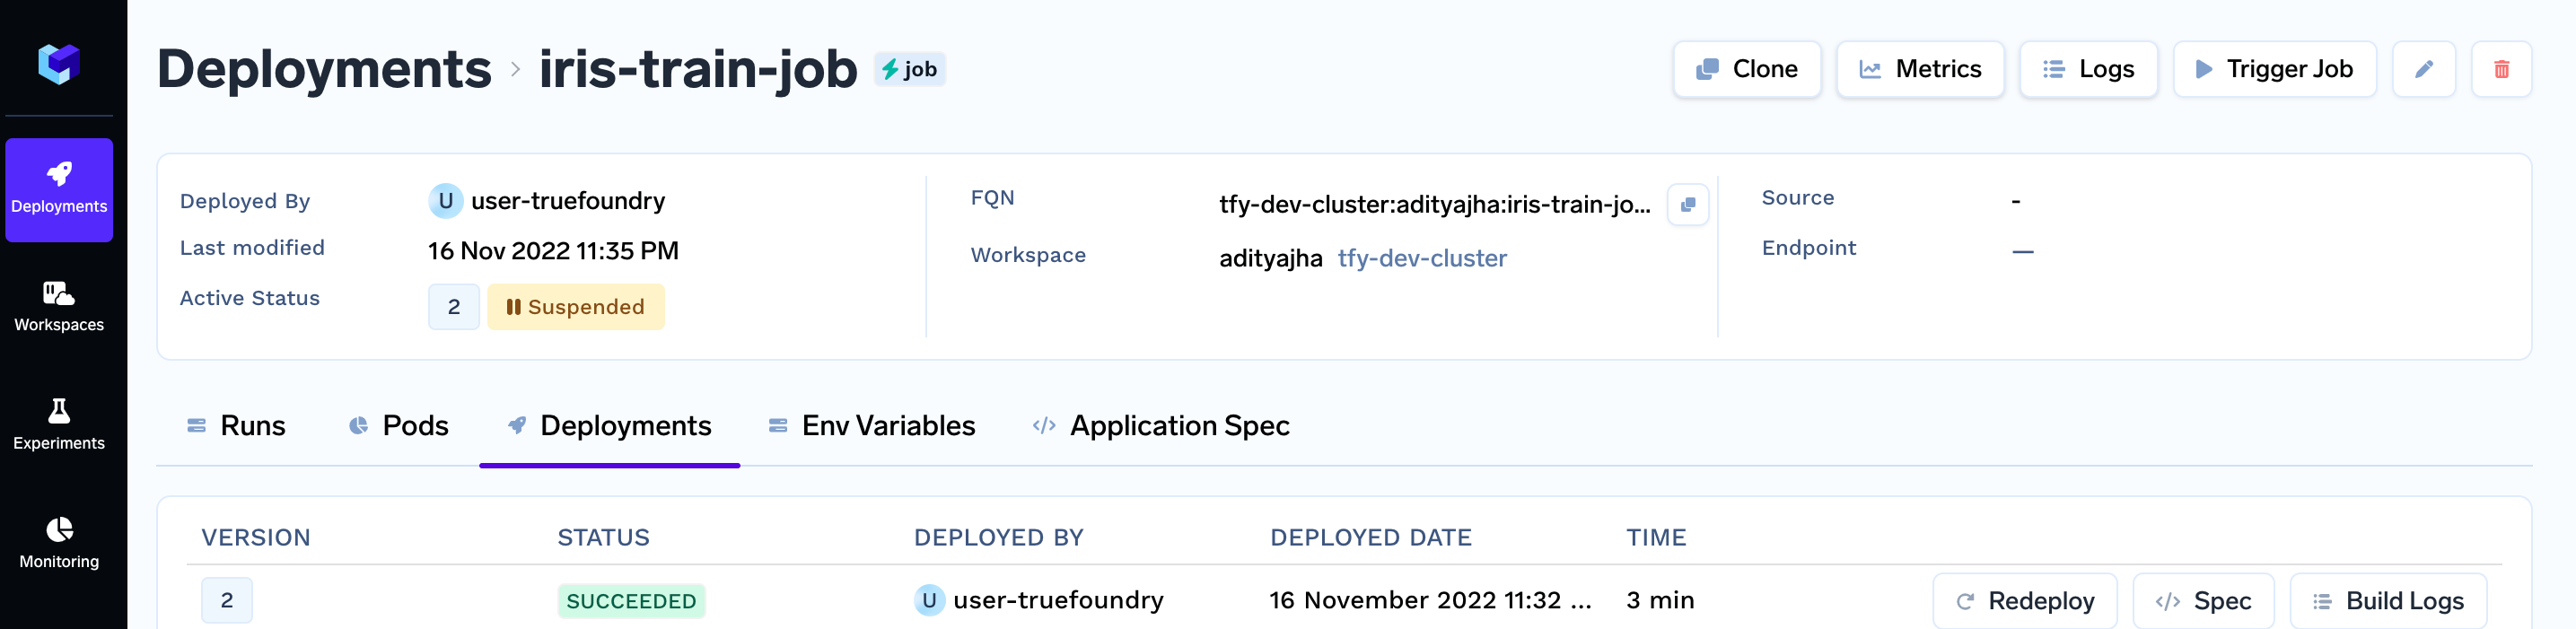
After you complete the guide, you will have a successful deployed job. Your jobs deployment dashboard will look like this:
Project structure
To complete this guide, you are going to create the following files:
train.py: contains our training codeDockerfile: contains our docker image build instructionsdeploy.py/deploy.yaml: contains our deployment code / deployment configuration. (Depending on whether you choose to use our python SDK or create a YAML file)requirements.txt: contains our dependencies.
Your final file structure is going to look like this:
.
├── train.py
├── Dockerfile
├── deploy.py / deploy.yaml
└── requirements.txt
As you can see, all the following files are created in the same folder/directory.
Step 1: Implement the training code
The first step is to create a job that trains a scikit learn model on iris dataset
We start with a train.py containing our training code and requirements.txt with our dependencies.
.
├── train.py
└── requirements.txt
train.py
train.pyfrom sklearn.datasets import load_iris
from sklearn.model_selection import train_test_split
from sklearn.linear_model import LogisticRegression
from sklearn.metrics import classification_report
X, y = load_iris(as_frame=True, return_X_y=True)
X = X.rename(columns={
"sepal length (cm)": "sepal_length",
"sepal width (cm)": "sepal_width",
"petal length (cm)": "petal_length",
"petal width (cm)": "petal_width",
})
# NOTE:- You can pass these configurations via command line
# arguments, config file, environment variables.
X_train, X_test, y_train, y_test = train_test_split(
X, y, test_size=0.2, random_state=42, stratify=y
)
# Initialize the model
clf = LogisticRegression(solver="liblinear")
# Fit the model
clf.fit(X_train, y_train)
preds = clf.predict(X_test)
print(classification_report(y_true=y_test, y_pred=preds))
Click on the Open Recipe below to understand the train.py:
requirements.txt
requirements.txtpandas
numpy
scikit-learn
# for deploying our job deployments
servicefoundry
Step 2: Dockerize the training code
Now we will create the Dockerfile for the training code.
.
├── train.py
├── Dockerfile
└── requirements.txt
Dockerfile
DockerfileThe Dockerfile contains instructions to build the image.
FROM --platform=linux/amd64 python:3.9.14-slim
WORKDIR /job
COPY requirements.txt /tmp/
RUN pip install -U pip && pip install --no-cache-dir -r /tmp/requirements.txt
COPY . /job/
CMD python /job/train.py
Click on the Open Recipe below to understand the Dockerfile:
Step 3: Deploying as a job
You can deploy services on TrueFoundry programmatically either using our Python SDK, or via a YAML file.
So now you can choose between either creating a deploy.py file, which will use our Python SDK.
Or you can choose to create a deploy.yaml configuration file and then use the servicefoundry deploy command
Via python SDK
File Structure
.
├── train.py
├── deploy.py
└── requirements.txt
deploy.py
deploy.pyIn the code below, ensure to replace "YOUR_WORKSPACE_FQN" in the last line with your WORKSPACE_FQN
import argparse
import logging
from servicefoundry import Build, Job, DockerFileBuild

logging.basicConfig(level=logging.INFO)

parser = argparse.ArgumentParser()
parser.add_argument("--workspace_fqn", required=True, type=str)
args = parser.parse_args()

# First we define how to build our code into a Docker image
image = Build(
    build_spec=DockerFileBuild()
)

job = Job(
    name="iris-train-job",
    image=image
)
job.deploy(workspace_fqn=args.workspace_fqn)
Follow the recipe below to understand the deploy.py file :-
To deploy the job using Python API use:
python deploy.py --workspace_fqn <YOUR WORKSPACE FQN HERE>
Via YAML file
File Structure
.
├── train.py
├── deploy.yaml
└── requirements.txt
deploy.yaml
deploy.yamlname: iris-train-job
type: job
image:
type: build
build_source:
type: local
build_spec:
type: dockerfile
Follow the recipe below to understand the deploy.yaml file :-
To deploy the job using Python API use:
servicefoundry deploy --workspace-fqn YOUR_WORKSPACE_FQN --file deploy.yaml
Run the above command from the same directory containing the
train.pyandrequirements.txtfiles.
.tfyignore files
If there are any files you don't want to be copied to the workspace, like a data file, or any redundant files. You can use .tfyignore files in that case.
End result
On successful deployment, the Job will be created and run immediately.
We can now visit our Applications page to check Build status, Build Logs, Runs History and monitor progress of runs.
See Monitoring and Debugging guide for more details.
See Also
Updated 11 months ago