Finetuning LLM
What you'll learn
- Creating a ML Repo
- How to Deploy a Fine-Tuning Job
Step 1: Preparing Training Data
Your data must be a JSON Lines (.jsonl) file, where each line is a prompt and completion pair corresponding to a training example. Following is an example of prompt-completion pairs:
{"prompt": "What is 2 + 2?", "completion": "The answer to 2 + 2 is 4"}
{"prompt": "Flip a coin", "completion": "I flipped a coin and the result is heads!"}
{"prompt": "<prompt text>", "completion": "<ideal generated text>"}
...
Optionally, you can also prepare evaluation data in a similar format to assess the model's performance during and after training.
If you want to instructionally fine-tune your model, you can format the prompt to include the instruction and the remaining text.
Step 2: Setting up ML Repo
Step 2.1: Creating a ML Repo (From Dashboard)
Firstly, We need to Create ML Repo via UI
Step 2.2: Providing ML Repo Access to Workspace
The workspace which was created in Step 2.1 will also need access to ML Repo. To give access to this ML Repo, click on Workspaces tab and then search for the workspace used in Step 2.1
Once the workspace is found, click on the  edit button, and you will see something like this:
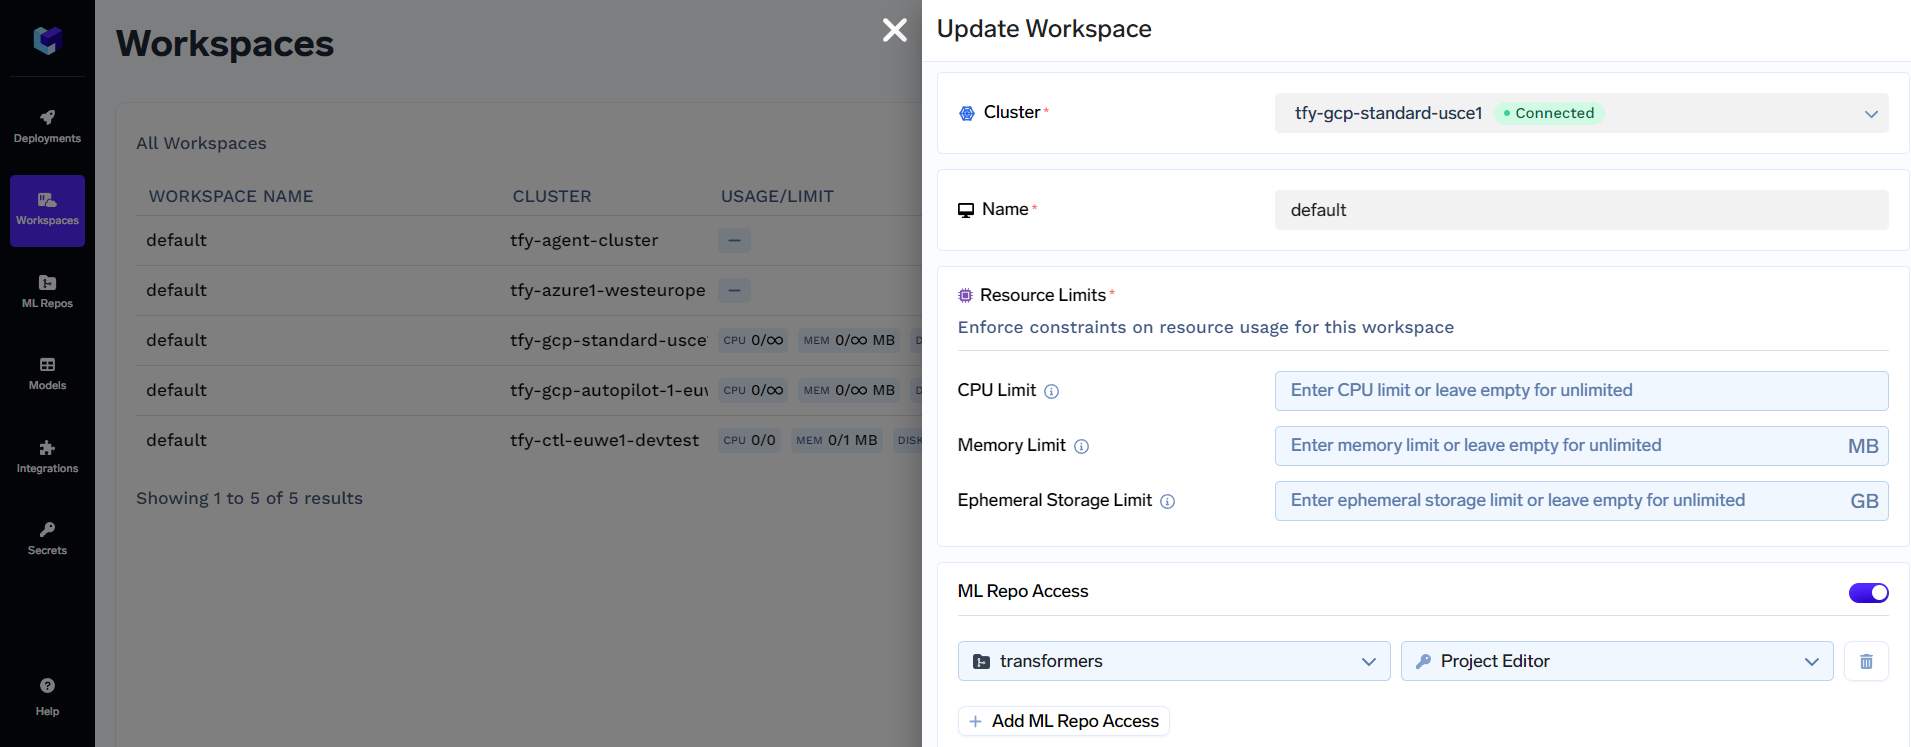
Now you can add the ML Repo created in Step 2.1 under ML Repo Access. Be sure to give at least a Project Editor level access. Click on Update to finish updating the workspace.
Step 3: Deploying Fine-Tuning Job from Model Catalogue
TrueFoundry's Model Catalogue can be found under the Models tab.
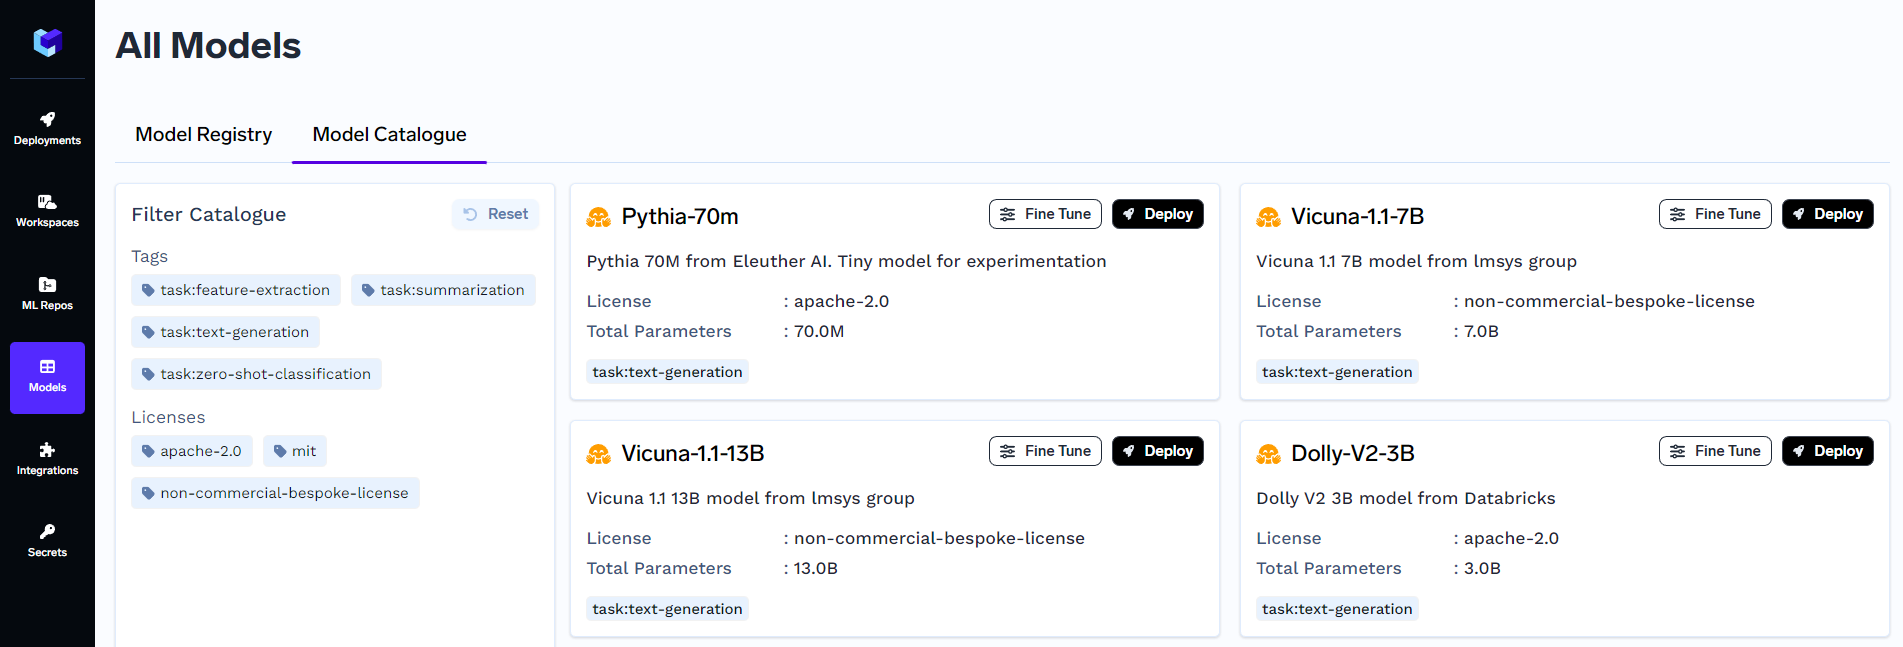
Here, you may choose any model that you want to fine-tune. Click on the Finetune button to configure the deployment of the fine-tuning job.
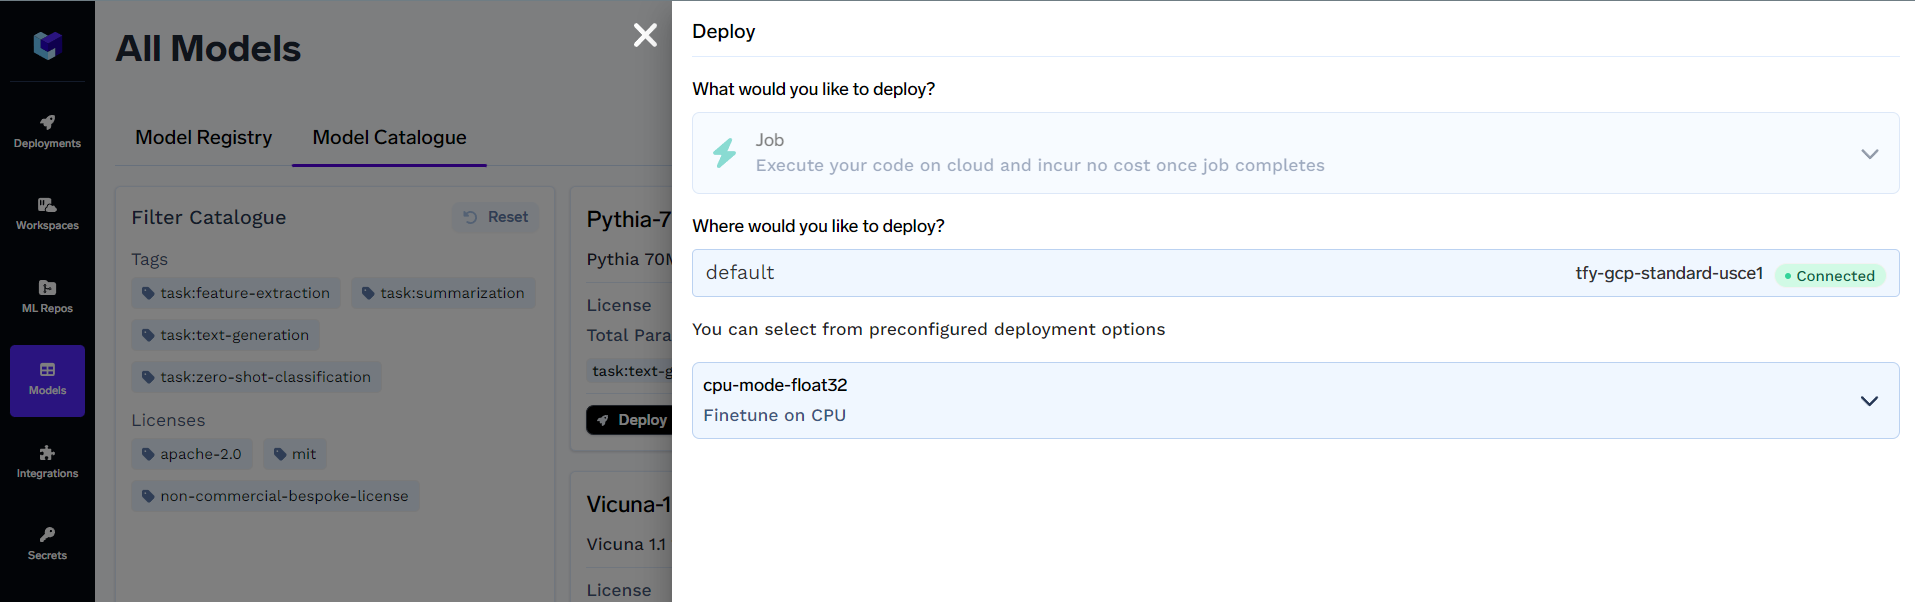
Where would you like to deploy?: Enter the workspace name where you would like to deploy the job
Preconfig Deployment Options: Here, you will find different deployment options using GPUs and only CPUs. The name of the configuration gives an idea about any GPU used (if any).
Click on Next Step when done configuring the workspace and deployment options. You will see something like this:
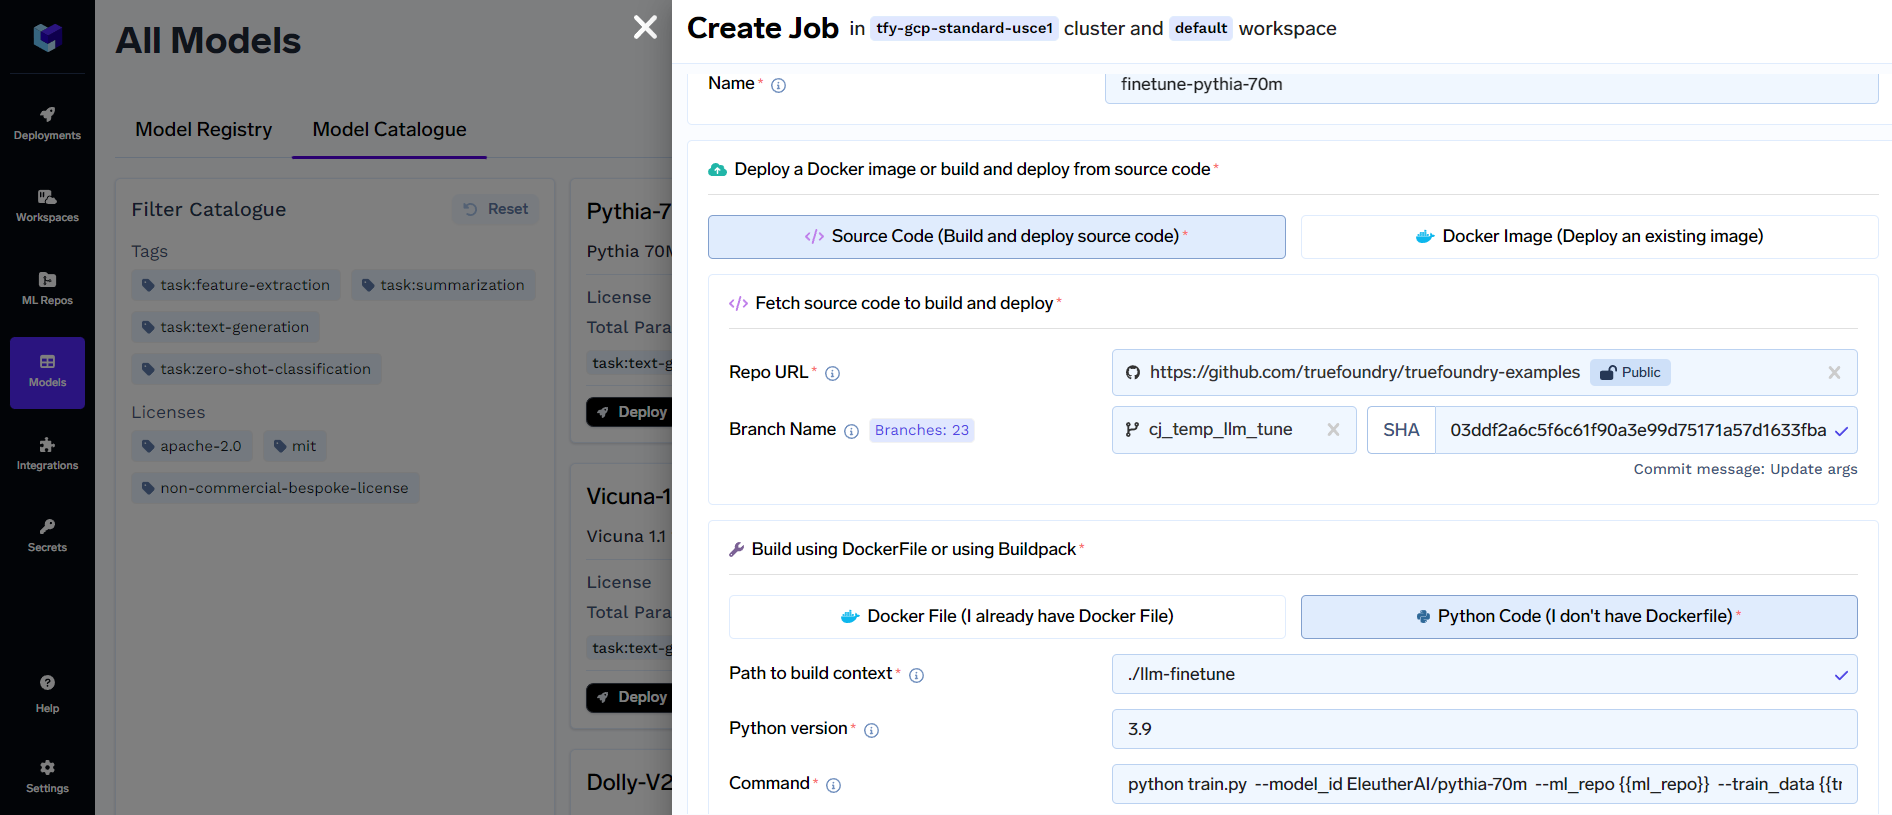
In this view, you will see options like Endpoints, ENVs, GPU, CPU, Memory, and Storage resources pre-populated based on workspace and deployment options.
Click on Submit to complete deploying the fine-tuning job.
Note:
For some fine-tuning jobs, you also have the option of LoRA (Low-Rank Adaptation) mode of training. LoRA is a specialized training technique that offers several benefits including faster convergence, improved training stability, and reduced memory requirements.

Step 4: Upload Training Data
In this step, you will upload your training data to prepare for the fine-tuning process. There are two options available:
Option 1: Upload by Generating Pre-Signed URL
Generating a pre-signed URL can be done via a Python snippet or CLI:
-
CLI
If your training data is not already in S3 Bucket, then you can upload it using the following command:
aws s3 cp "path-to-training-data-file-locally" s3://bucket-name/dir-to-store-fileTo generate a pre-signed URL of an S3 Object, use the following command:
aws s3 presign s3://bucket-name/path-to-training-data-file-in-s3
Similarly, you can also upload to AZURE BLOB and GCP GCS.
The output of uploading the training file to AWS S3, alongside the pre-signed URL:

Option 2: Uploading as an Artifact
If you prefer to upload your training data directly to TrueFoundry as an artifact, gollow the Add Artifacts via UI, and Upload your .jsonl training data file.
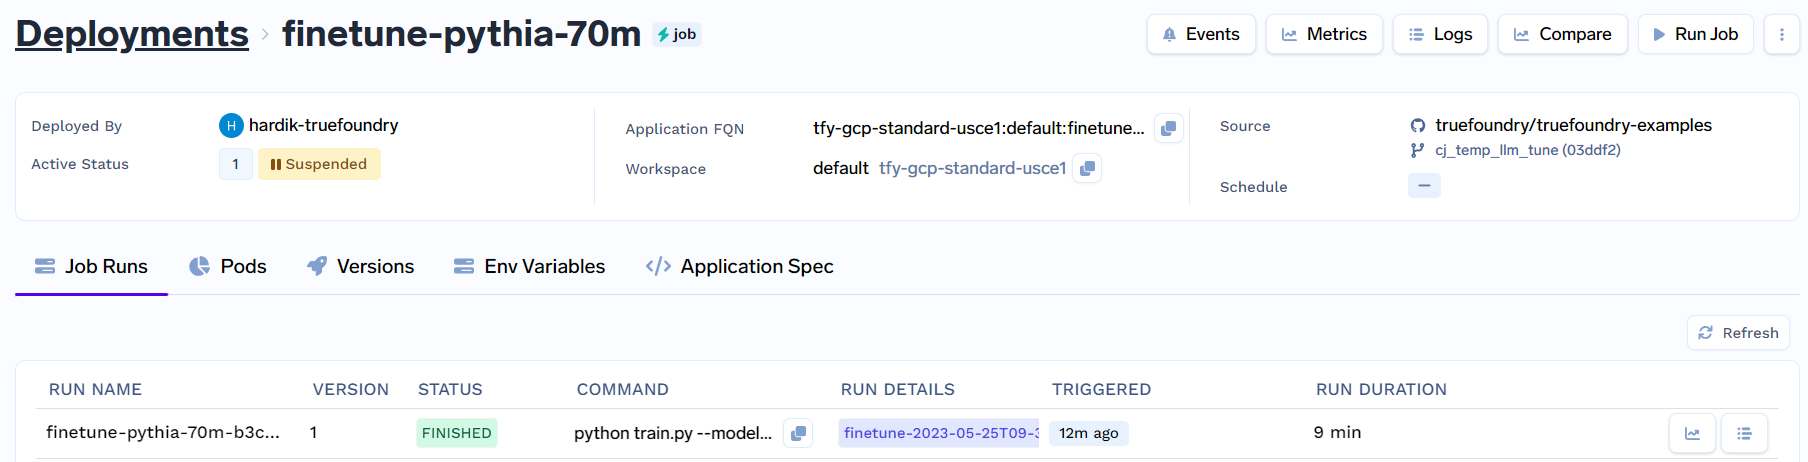
Step 5: Trigger Fine-Tuning Job
To trigger the fine-tuning job deployed in Step 2, click on Deployments and under Jobs to find your deployed job (like finetune-pythia-70m). You will see something like this:

Click on Run Job to configure the job before triggering it. You will see something like this:
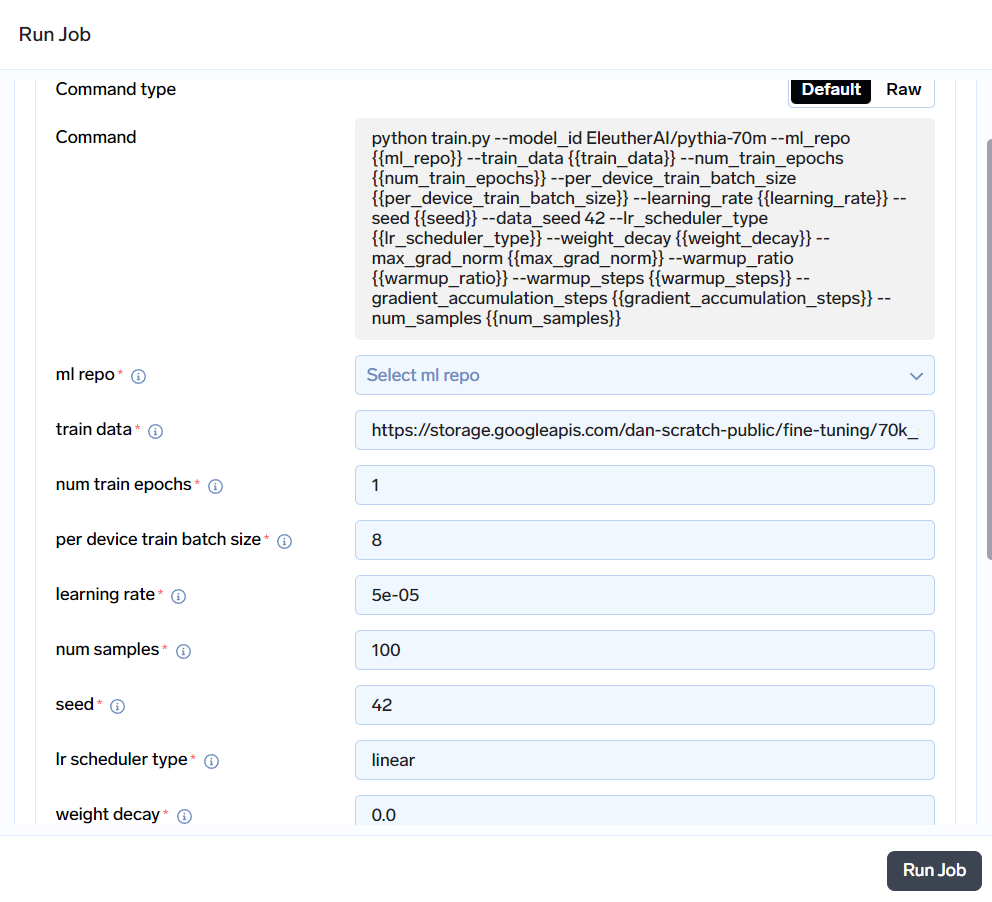
- ml repo: Choose the ML Repo created in Step 2.1.
- train data: Enter the Pre-Signed URL or Artifact FQN of the training data generated in Step 4.
- eval data or eval size (Optional):
- eval data: Enter the Pre-Signed URL or Artifact FQN of the evaluation data (Can be generated similar to train data
- eval size: Specify the evaluation size if you are using a portion of the training data for evaluation.
Fill in other input variables according to your requirements. After configuring inputs to the job, click on Run Job to trigger the job.
Step 6: Monitoring Fine-Tuning
After the job is triggered and it has successfully completed, it should look this:
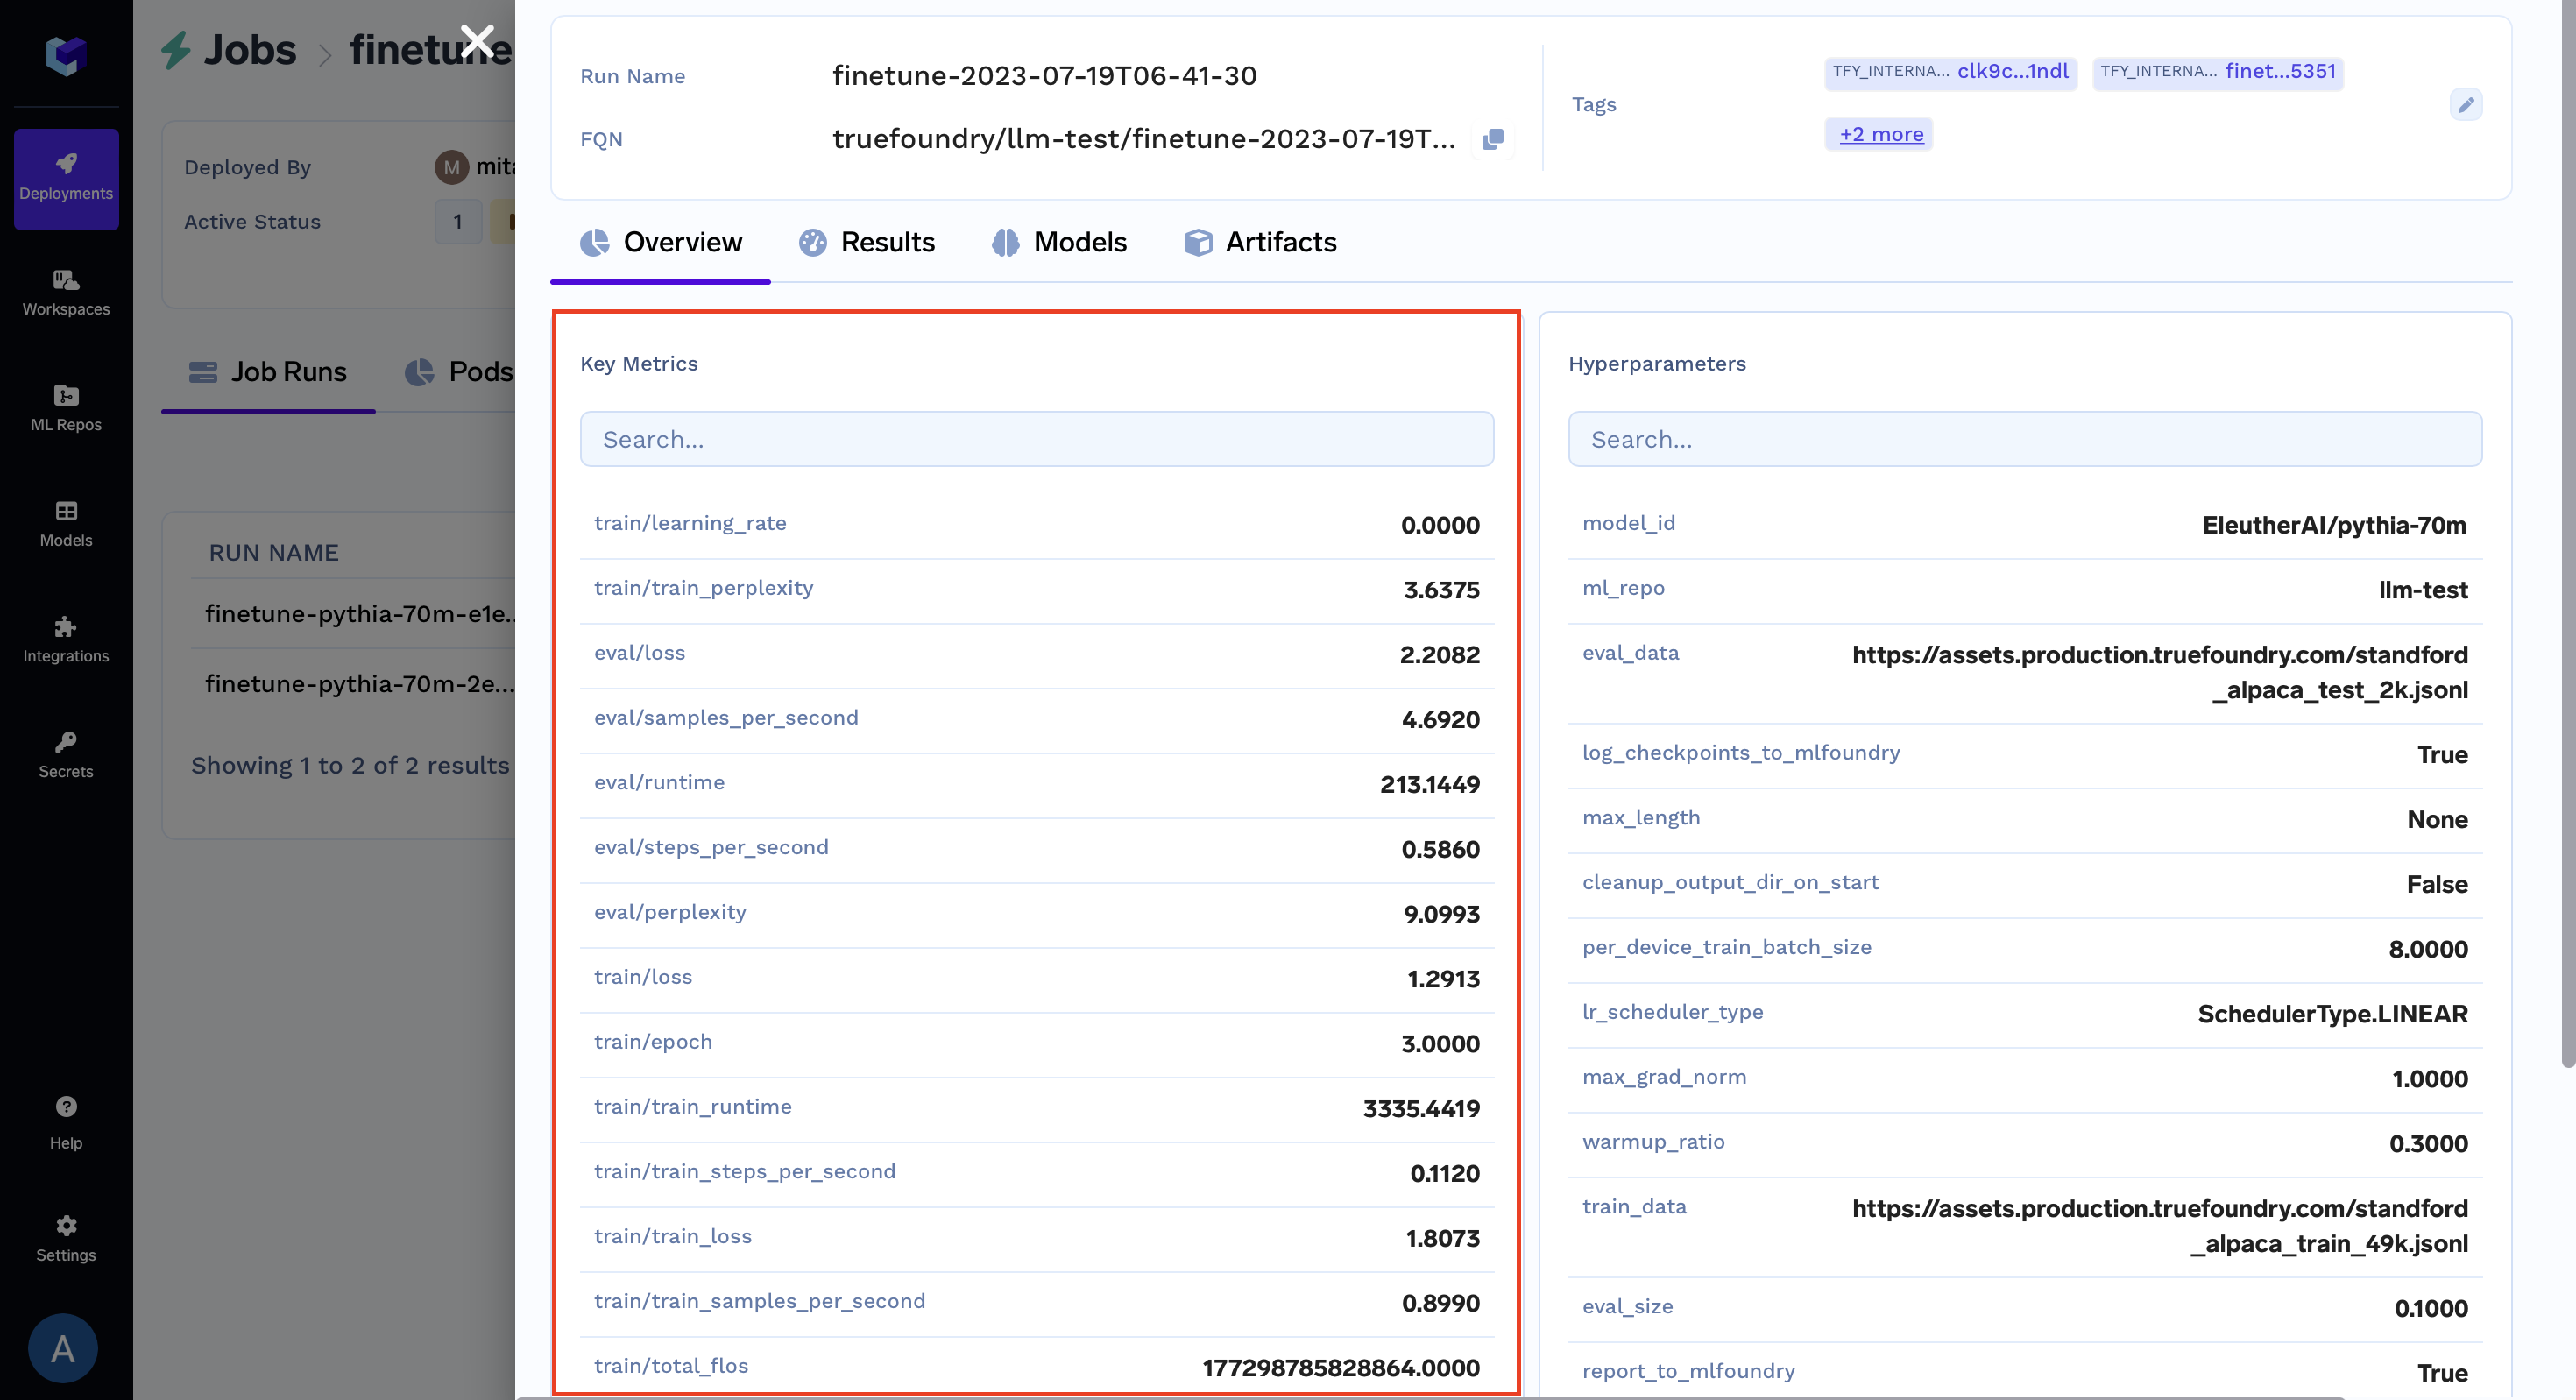
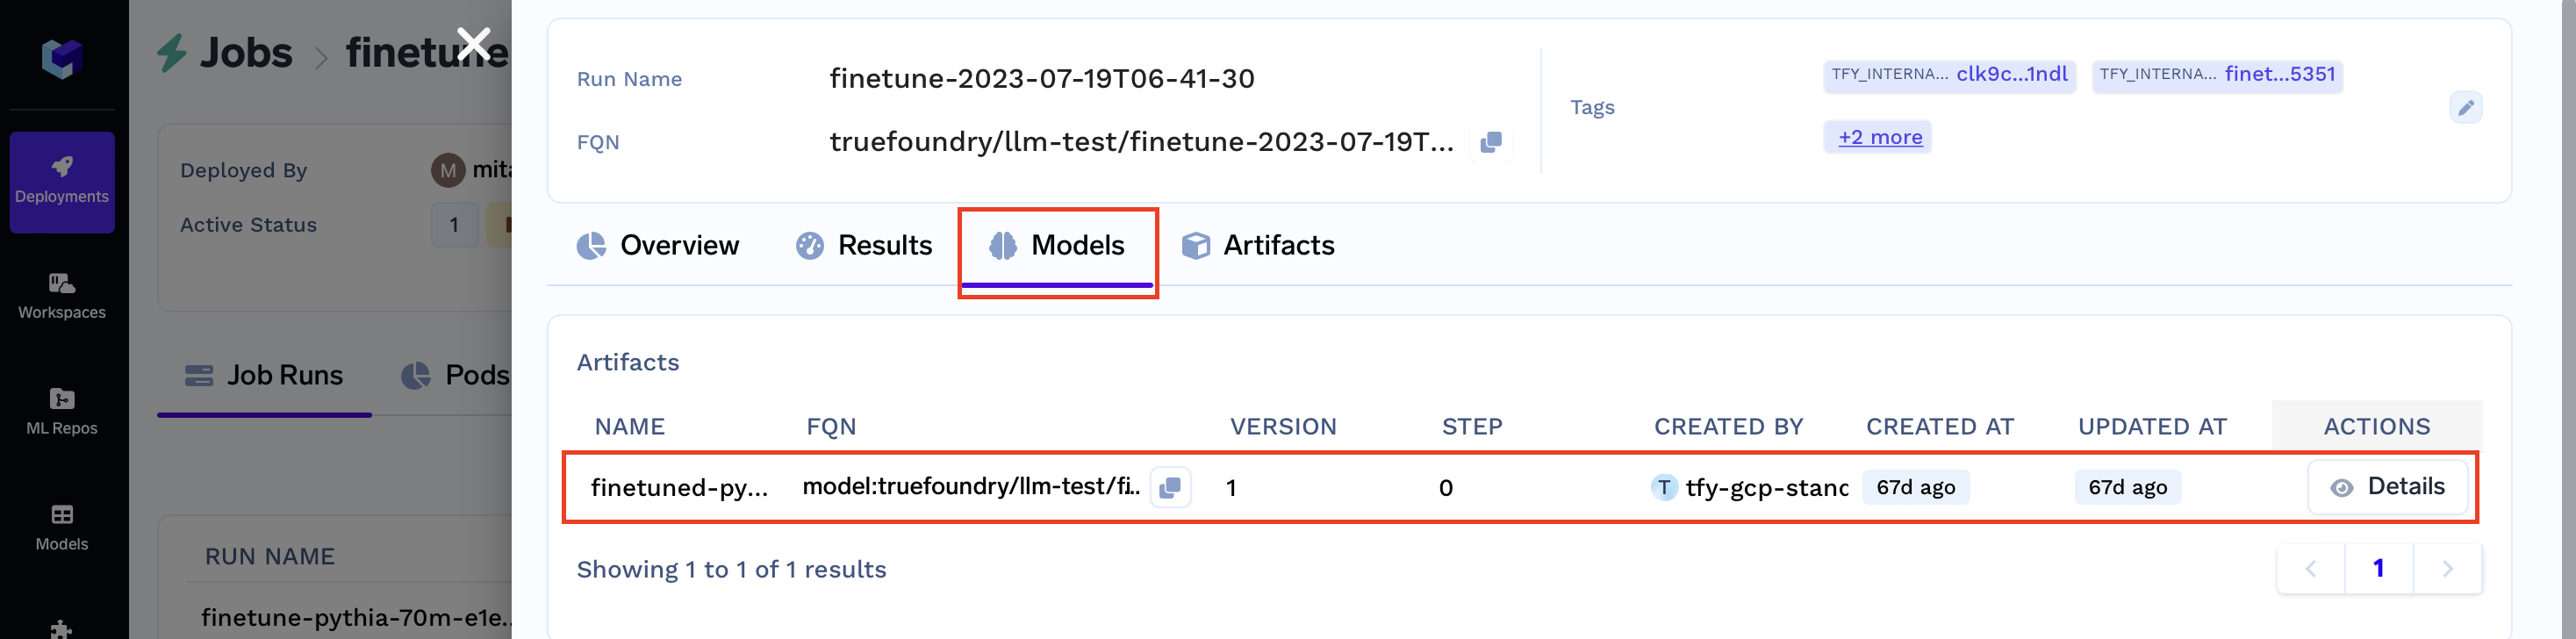
Here, click on finetune-2023-05-25T09-36-29 (= Run Name) under Run Details to check the results of the completed job.
Now you will be able to view the:
- Metrics:
- Checkpoints (artifacts):
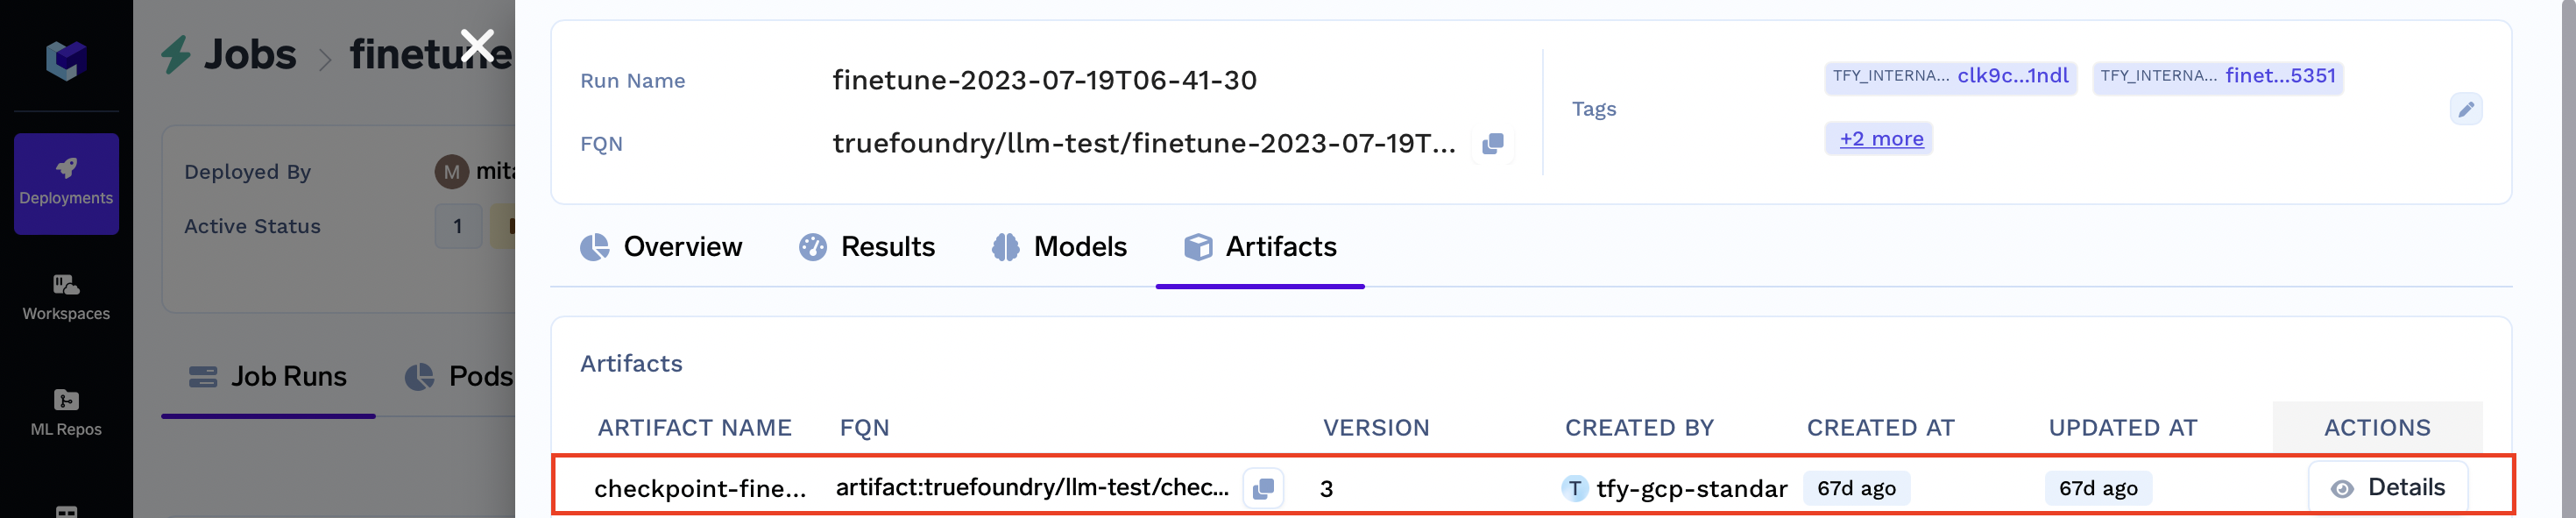
- Model (final model):
Optional: Using a volume for storing large checkpoints
This step is only needed if there is not a lot of ephemeral storage available.
To use a Volume for storing large checkpoints at Step 3 when you are configuring the fine-tuning job, you can:
To use a Volume for storage of large checkpoints, while configuring your fine-tuning job in Step 3, follow these steps:
- Create a Volume and Attach Volume to
/datato cache the large checkpoints
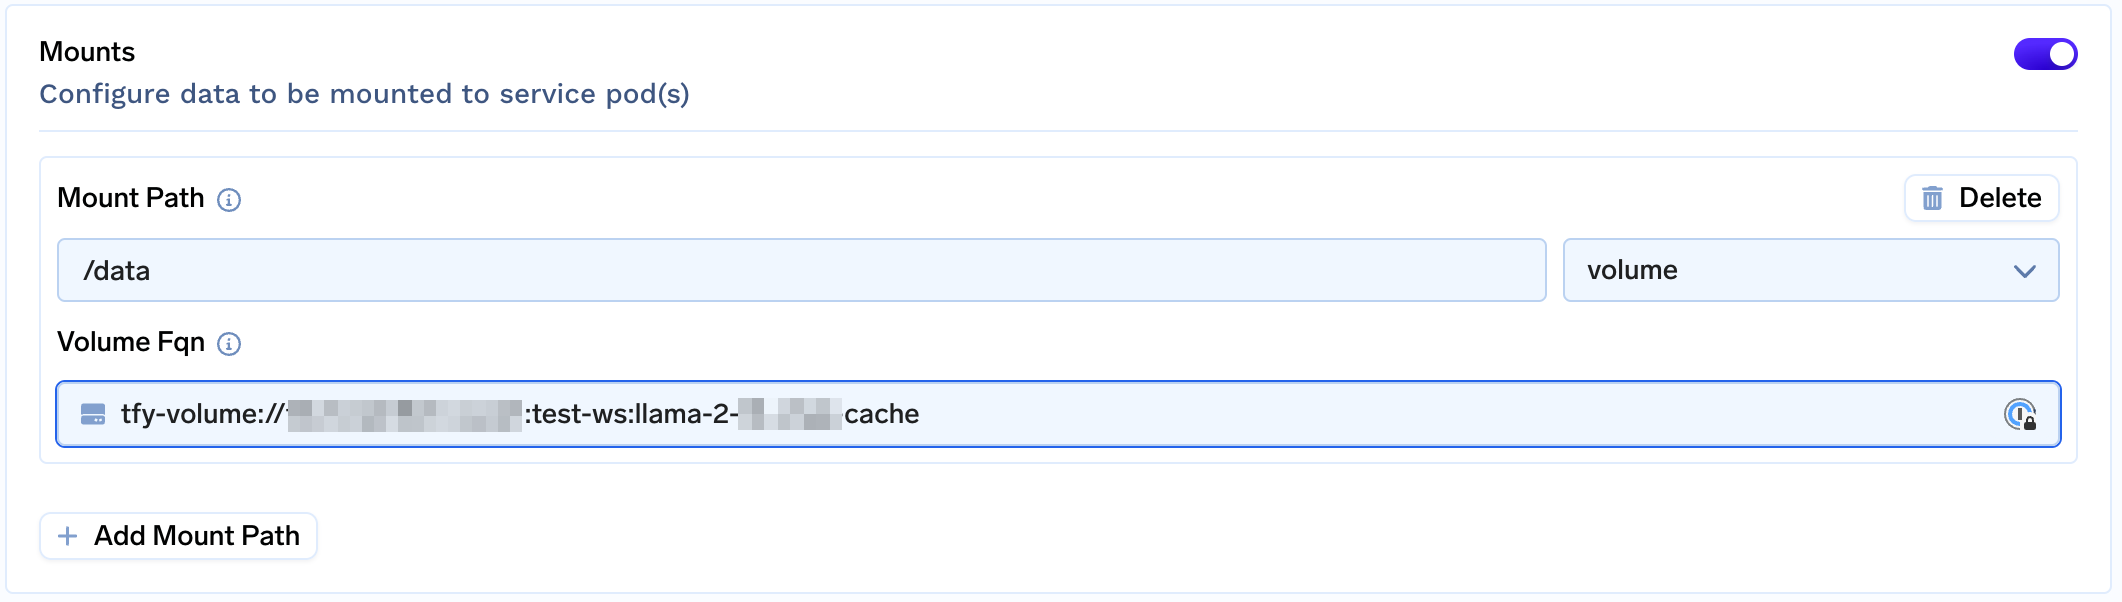
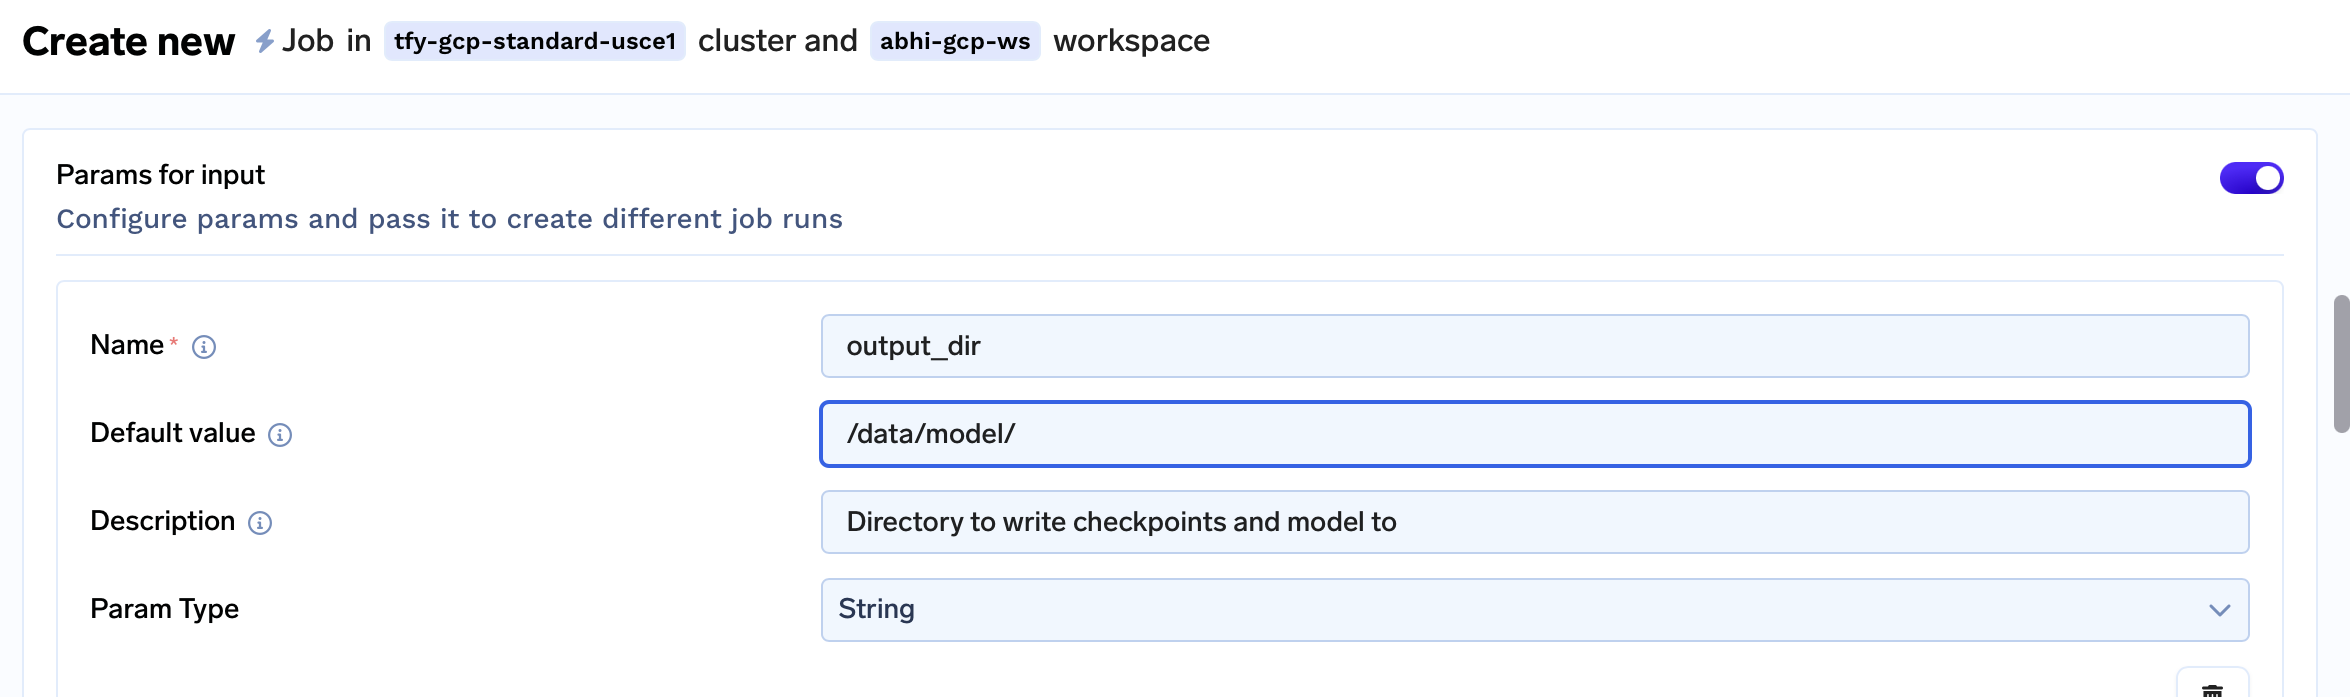
- Change the
output_dirparam to/data/model
Updated 9 months ago