Setting up CI/CD using TrueFoundry
There are a few different ways in which you can configure CI/CD for your applications deployed using TrueFoundry. Let’s consider three different cases
- Building your Docker image yourself in your CI/CD pipeline: In this case, you use CI/CD pipeline to build your Docker image yourself using docker/build-and-push or any external tool and then trigger a deployment on TrueFoundry by passing on the built image.
- Building your Docker image via TrueFoundry in your CI/CD pipeline: In this case, you use TrueFoundry to build your Docker image locally in CI/CD pipeline and then trigger a deployment on TrueFoundry by passing on the built image.
- Building your code on TrueFoundry: In this case, you use TrueFoundry to build, push, and deploy your code with just one single step.
Let’s explore all these cases with examples of GitHub Actions. If you want to set up CI/CD in other pipeline tools, reach out to us at Slack.
You can now find pre-rendered GitHub Actions for all cases in our dashboard itself.

Building your Docker image yourself in your CI/CD pipeline
- (Prerequisite) You need to add your Docker Registry to TrueFoundry. Follow the guide here to add the registry to TrueFoundry.
- Now let’s make a deployment from the registry to TrueFoundry through the TrueFoundry UI. From the TrueFoundry dashboard, click on
New Deployment, chooseServiceand choose a workspace. - Choose to deploy a Docker Image, provide the image URI, and choose the registry you just added.
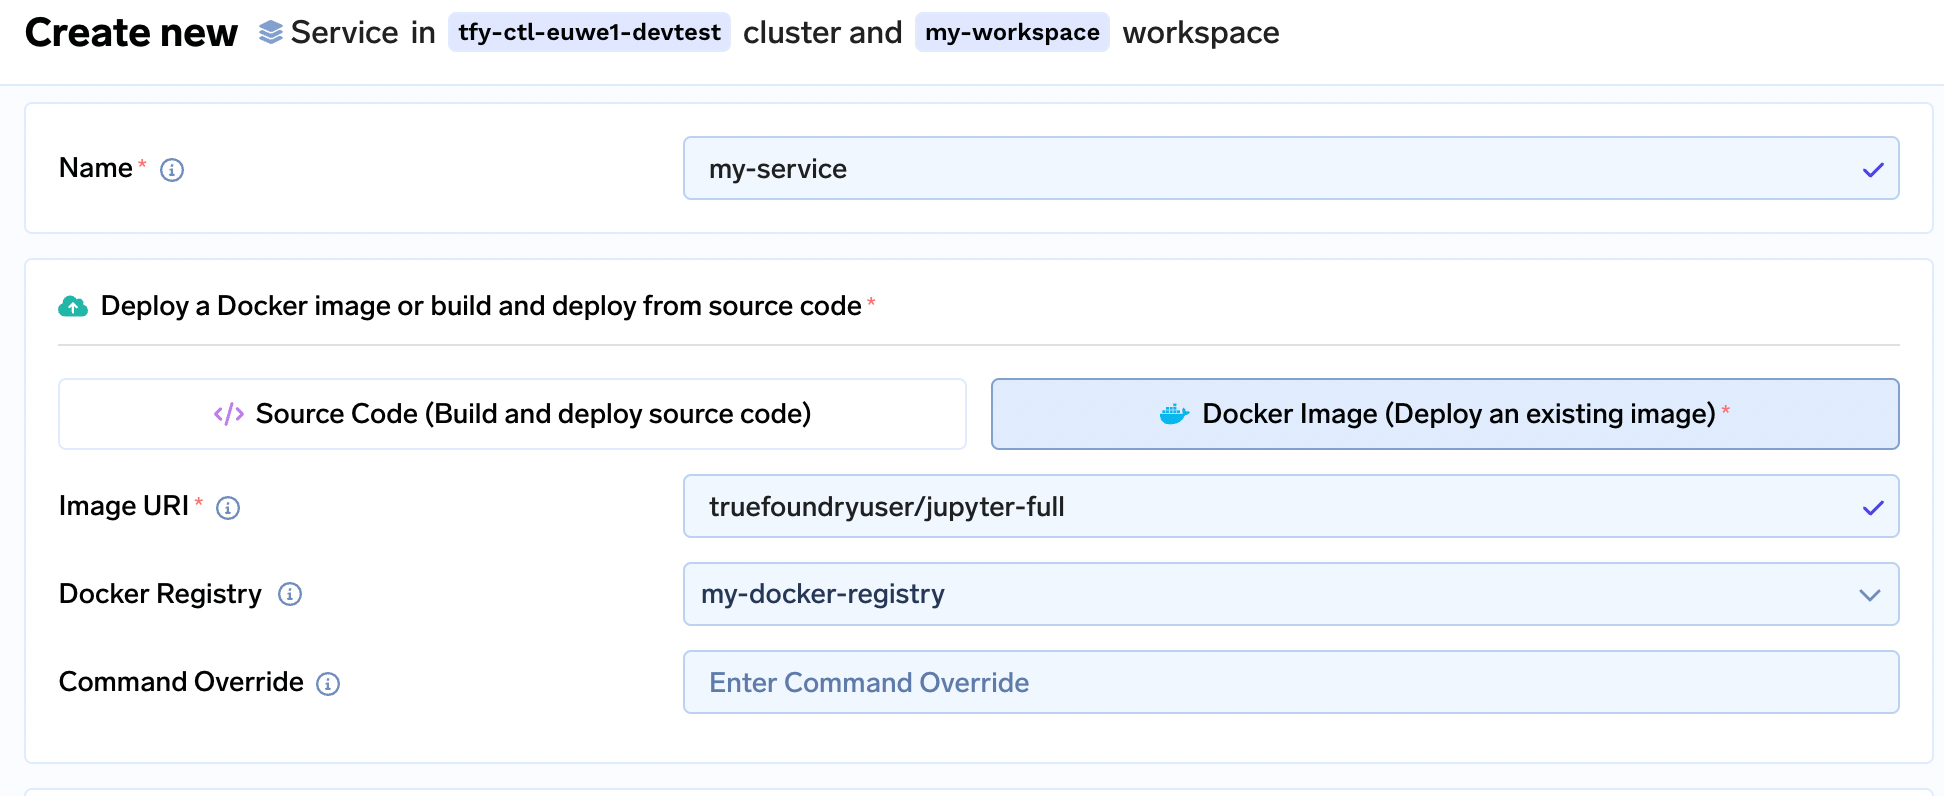
- Now fill out the rest of the form with your deployment configurations and hit
Submitto deploy version 1 of your application. - Now go to the deployed application and click on
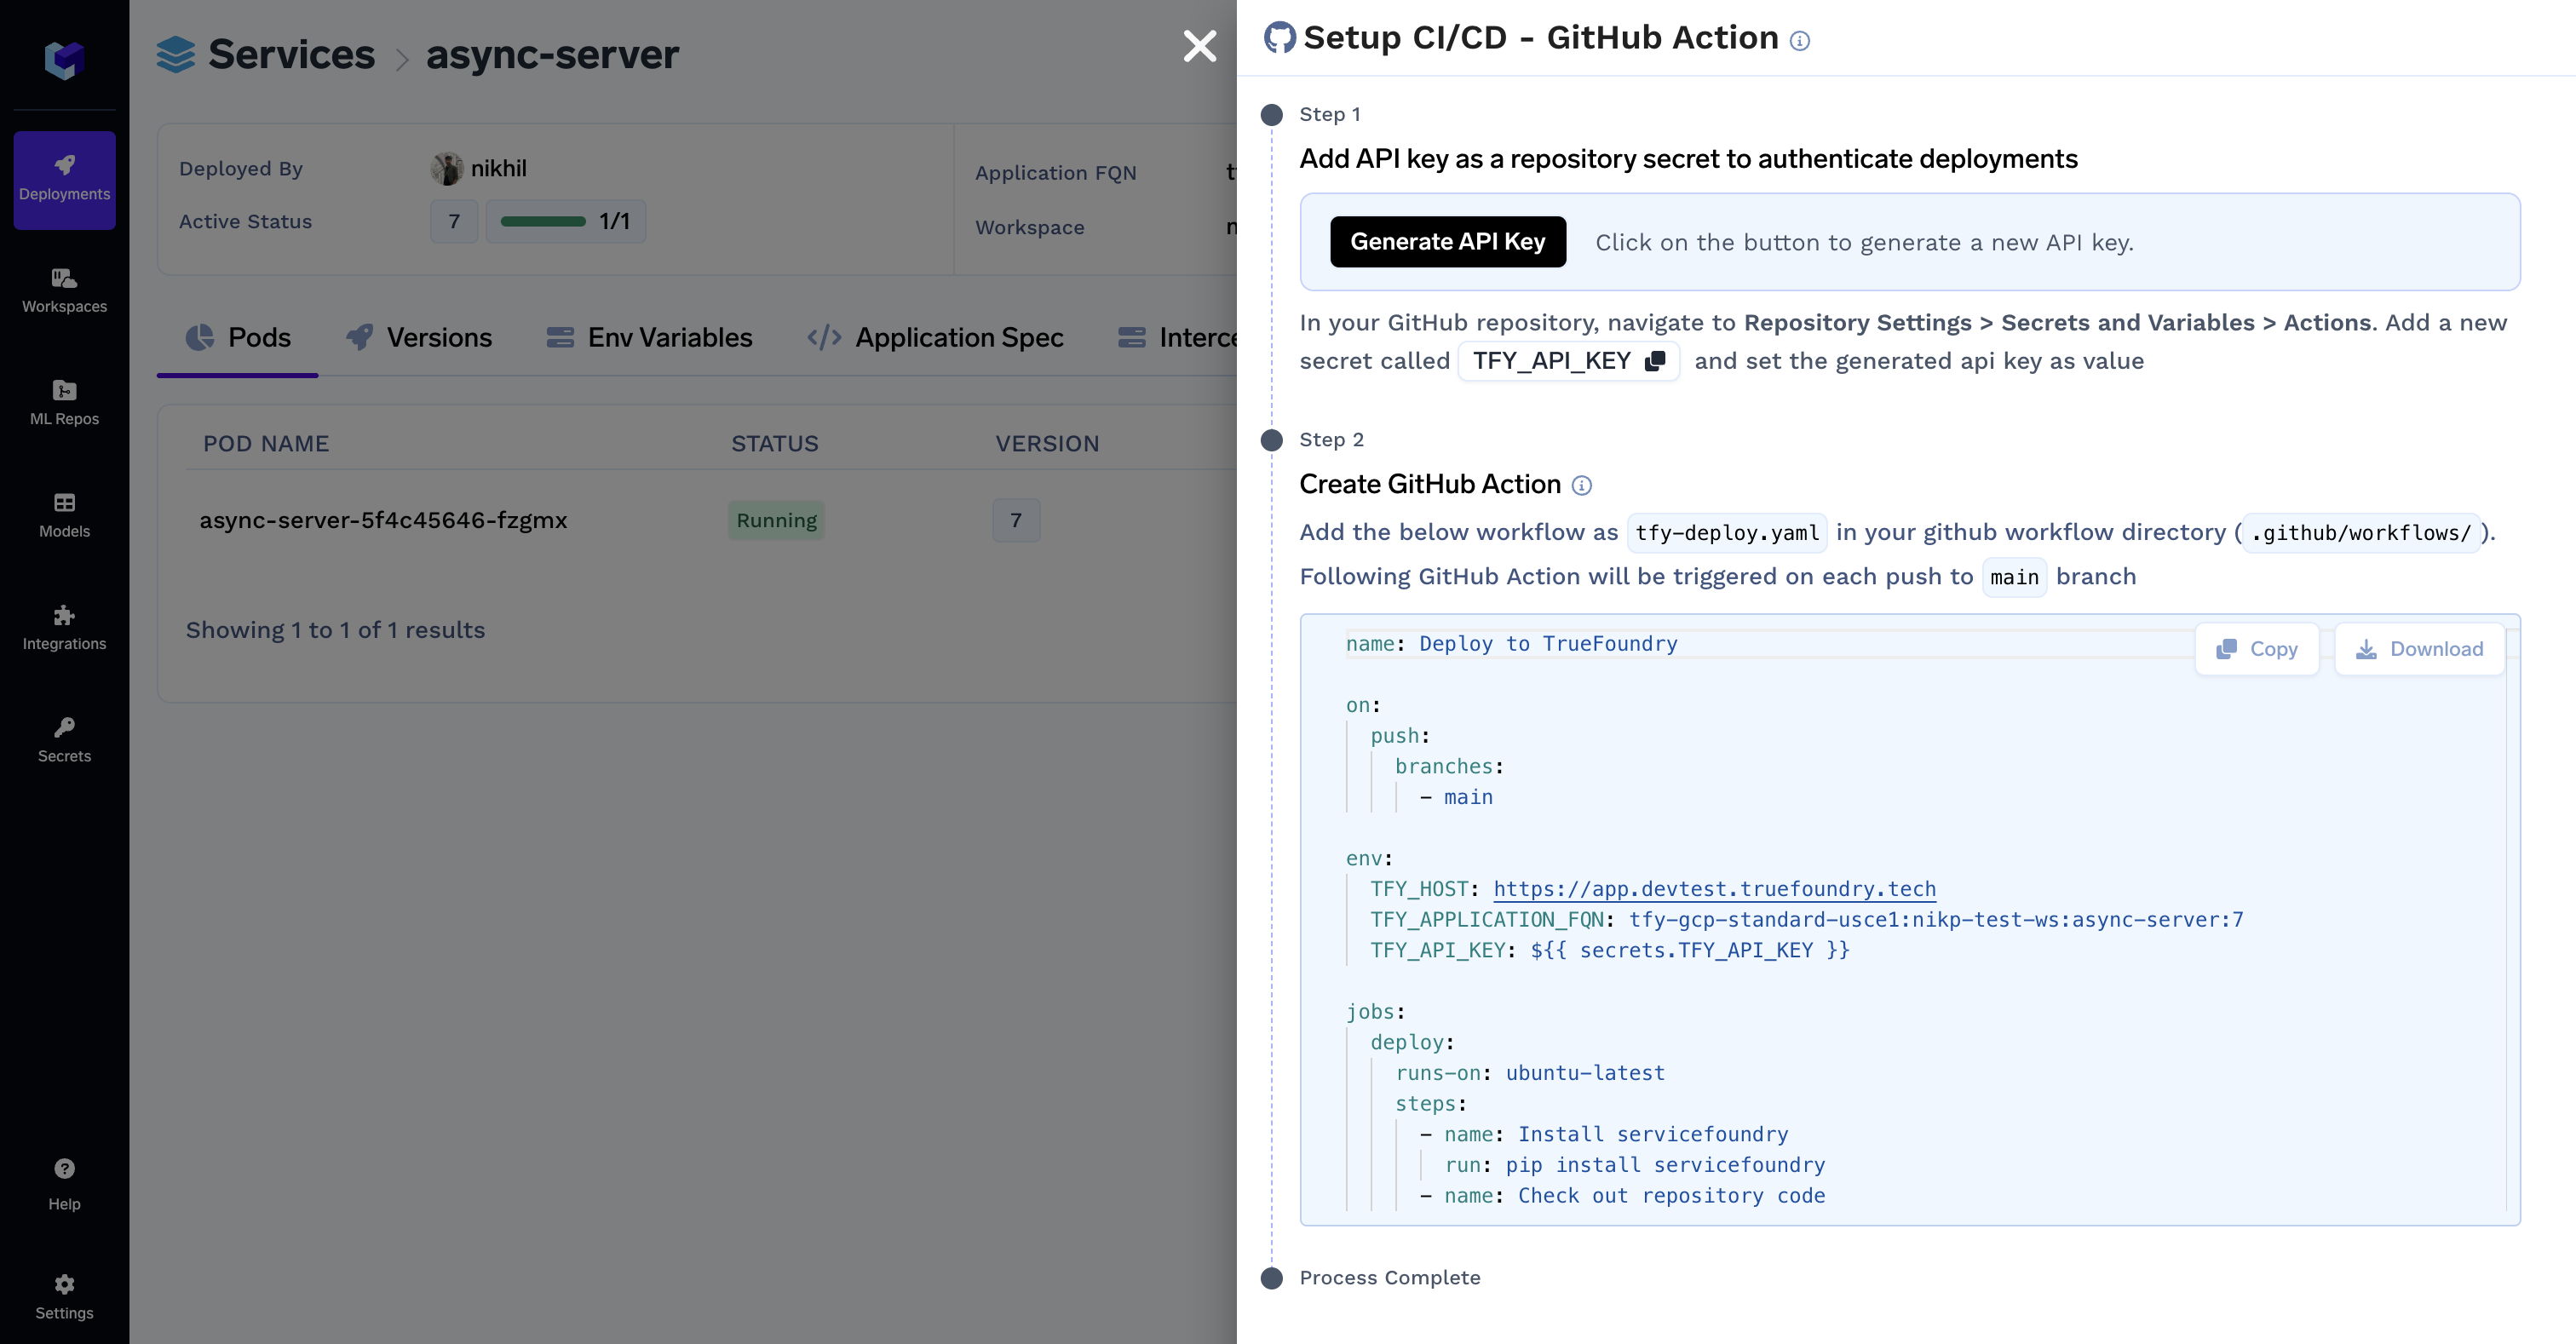
Actions > Setup CI/CD. This will open up a drawer with the documentation and pre-rendered GitHub action workflow for your application.

- To authenticate the pipeline, you need a TrueFoundry API Key. Either click on
Generate API Keyin the drawer or check how to generate aAPI Keyhere. You need to make this secret available as an environment variable in your pipeline where you deploy to TrueFoundry. For GitHub Actions, you need to add it as a Secret against the repository. - In your build pipeline, check and add these two env vars.
TFY_APPLICATION_FQN: Set the value to the Application FQN you want to set up CI/CD on.TFY_HOST: Set this value to the URL of TrueFoundry control plane. This is the URL to your TrueFoundry dashboard. This is usually of the form .truefoundry.cloud or .truefoundry.com or something similar.
- In your CI/CD pipeline, you need to add the following steps to push the latest image to TrueFoundry. First, install
servicefoundrylibrary in the pipeline by runningpip install servicefoundry - To deploy the new image you can now use CI/CD, simply replace the
<YOUR_APPLICATION_FQN>and<YOUR_TFY_HOST>with their corresponding values. Add your custom steps to Build and Push your docker image. - This GitHub Action by default is configured to run on each merge to
mainbranch of your GitHub repository. To learn other ways to trigger the GitHub Action refer here.
Here’s a sample Github Actions workflow file for deploying a new image during CI/CD:
name: Deploy to TrueFoundry

on:
  push:
    branches:
      - main

env:
  TFY_HOST: <YOUR_TFY_HOST>
  TFY_APPLICATION_FQN: <YOUR_APPLICATION_FQN>
  TFY_API_KEY: ${{ secrets.TFY_API_KEY }}

jobs:
  deploy:
    runs-on: ubuntu-latest
    steps:
      // Add your steps to provide the `IMAGE_URI` to be deployed as env
    	...
      - name: Get image URI
        run: echo "IMAGE_URI={value}" >> "$GITHUB_ENV"
      - name: Install servicefoundry
        run: pip install servicefoundry
      - name: Deploy with patch
        run: sfy patch-application --application_fqn=${{ env.TFY_APPLICATION_FQN }} --patch='{"image": {"image_uri": "${{ env.IMAGE_URI }}"}}'
Building your Docker image via TrueFoundry in your CI/CD pipeline
- (Prerequisite) You need to add your Docker Registry to TrueFoundry. Follow the guide here to add the registry to TrueFoundry.
- Now let’s deploy first version of your service using either of the deployment flows:
Python SDK,ConsoleorCLI. - Now go to the deployed application and click on
Actions > Setup CI/CD. This will open up a drawer with the documentation and pre-rendered GitHub action workflow for your application.

- To authenticate the pipeline, you need a TrueFoundry API Key. Either click on
Generate API Keyin the drawer or check how to generate aAPI Keyhere. You need to make this secret available as an environment variable in your pipeline where you deploy to TrueFoundry. For GitHub Actions, you need to add it as a Secret against the repository. - In your build pipeline, check and add these two env vars.
TFY_APPLICATION_FQN: Set the value to the Application FQN you want to set up CI/CD on.TFY_HOST: Set this value to the URL of TrueFoundry control plane. This is the URL to your TrueFoundry dashboard. This is usually of the form .truefoundry.cloud or .truefoundry.com or something similar.
- In your CI/CD pipeline, you need to add the following steps to push the latest image to TrueFoundry. First, install
servicefoundrylibrary in the pipeline by runningpip install servicefoundry - To deploy the new image you can now use CI/CD, simply replace the
<YOUR_APPLICATION_FQN>and<YOUR_TFY_HOST>with their corresponding values. You can also configure yourbuild sourceandbuild config. - This GitHub Action by default is configured to run on each merge to
mainbranch of your GitHub repository. To learn other ways to trigger the GitHub Action refer here.
Here’s a sample Github Actions workflow file for deploying a locally built image during CI/CD:
name: Deploy to TrueFoundry

on:
  push:
    branches:
      - main

env:
  TFY_HOST: <YOUR_TFY_HOST>
  TFY_APPLICATION_FQN: <YOUR_APPLICATION_FQN>
  TFY_API_KEY: ${{ secrets.TFY_API_KEY }}

jobs:
  deploy:
    runs-on: ubuntu-latest
    steps:
      - name: Install servicefoundry
        run: pip install servicefoundry
      - name: Check out repository code
        uses: actions/checkout@v3
      - name: Deploy
        run: |
          sfy patch-application --application_fqn=${{ env.TFY_APPLICATION_FQN }} --patch='{"image": {"type": "build", "build_source": {"type": "remote", "project_root_path": "", "local_build": "" }, "build_spec": {"type": "tfy-python-buildpack", "dockerfile_path": "", "build_context_path": "./", "command": "uvicorn --host 0.0.0.0 --port 8000 main:app"}}}'
Set up GitHub Action to build and deploy on TrueFoundry
To set up CI/CD while building using TrueFoundry, you can create an application by deploying from GitHub and then following instructions on the UI.
- (Prerequisite) You must have your GitHub integrated with TrueFoundry, if not follow Integrate your GitHub
- Now let’s make a deployment using GitHub source to TrueFoundry through the TrueFoundry UI. From the dashboard, click on
New Deployment, chooseService, provide a workspace. - Choose to deploy using Source Code and fill the form with your Git repo and the branch you wish to deploy.
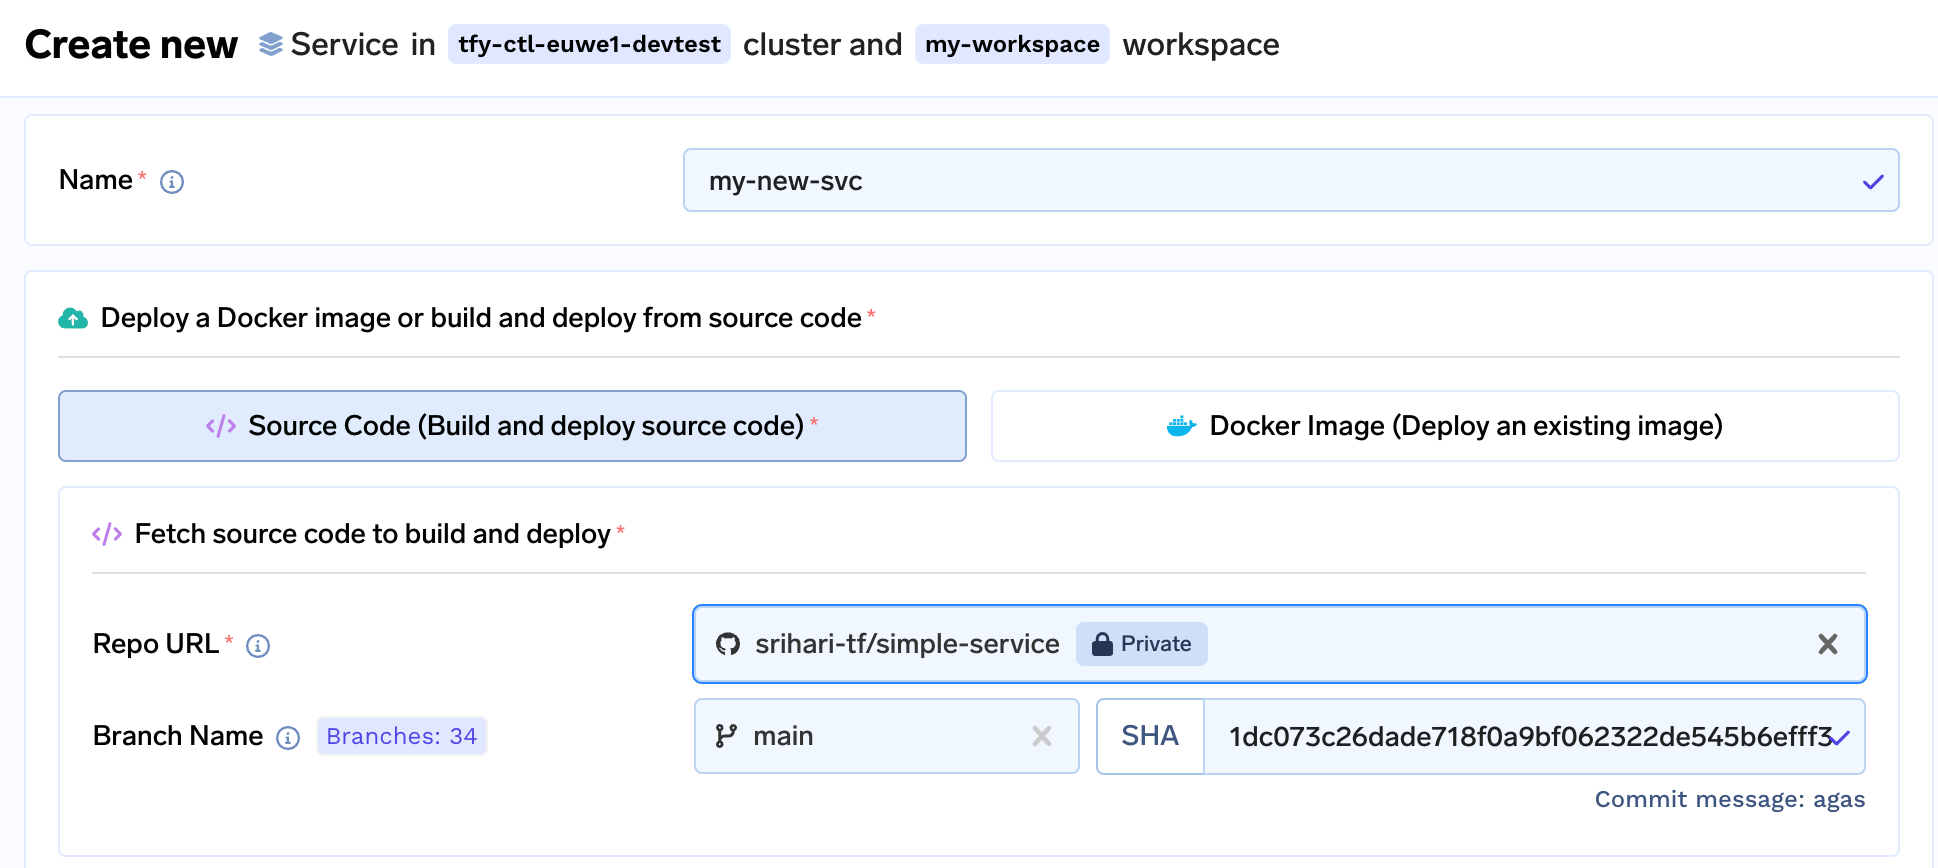
- Now fill out the rest of the form with your deployment configurations and hit
Submitto deploy version 1 of your application. - Now go to the deployed application and click on
Actions > Setup CI/CD

- Follow the instructions in the drawer that pops up to create a GitHub Action that will deploy every time there is a new commit on your deployed branch
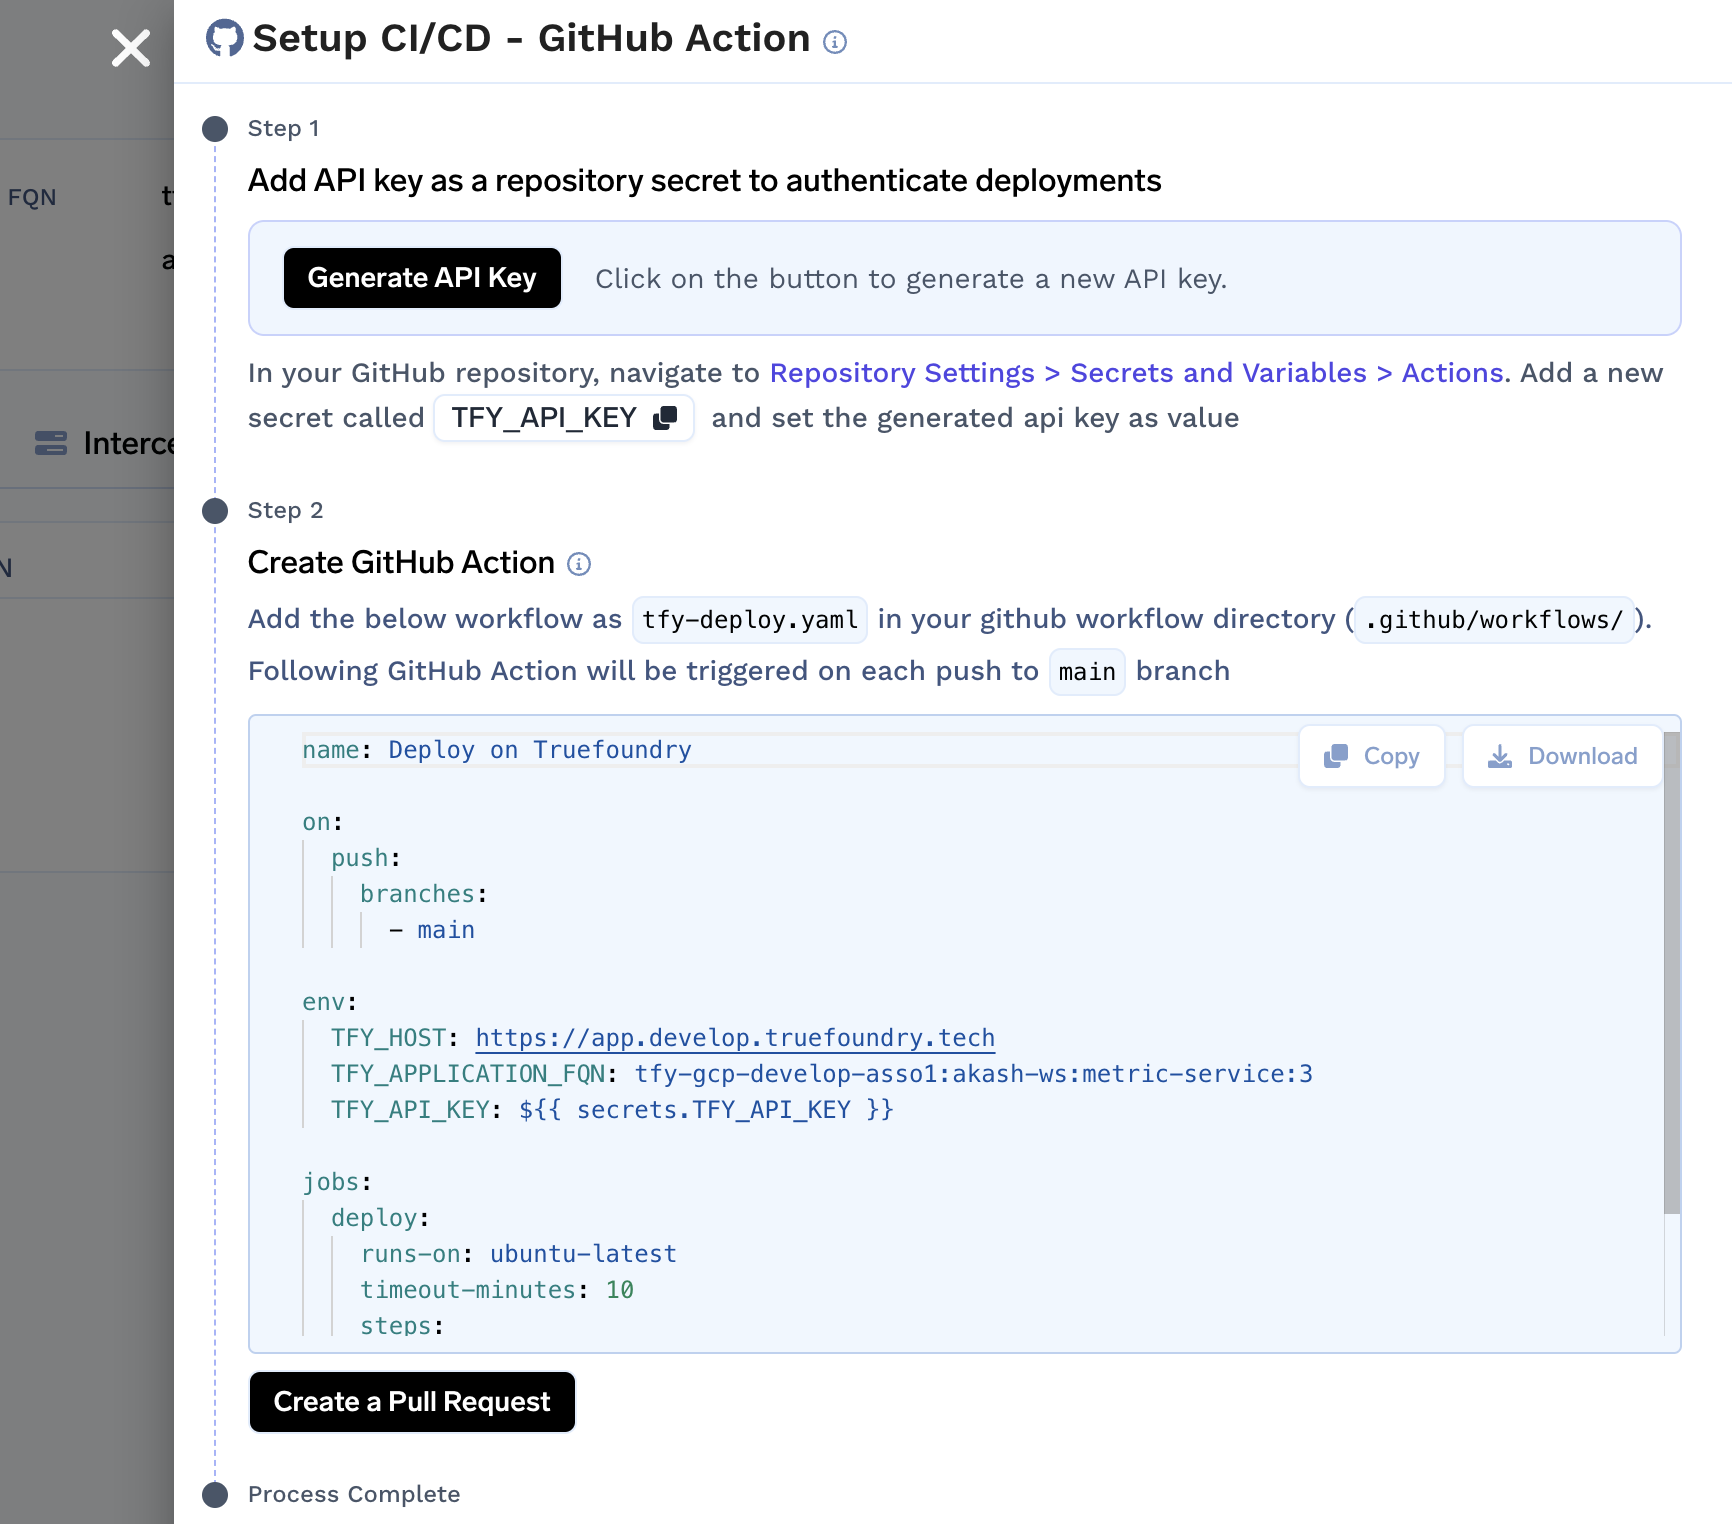
Click on the
Create a Pull Requestbutton to automatically create a pull request on your integrated GitHub repository.
Updated 9 months ago