Deploy from TrueFoundry Registry
What you'll learn
- Logging a scikit-learn model via
mlfoundry- Deploying our logged model via
servicefoundryandModelDeployment
This is a guide to deploy a scikit-learn model via Model Deployment without writing any service code.
After you complete the guide, you will have a successfully deployed model. You deployed service will look like this:
We have divided this guide into two sections:
- Train and log your model.
- Deploy your model.
Note
We have added sample training code for completeness' sake. If you already have a trained model skip to the deployment part
Train and log your Model
To use Model Deployment and deploy your model without writing any service code, first you need to have your model logged into We first need to log our model to Truefoundry's Model Registry. For this we are going to be using mlfoundry.
For this guide we will be training our model in our local environment, but we can also use Truefoundry Jobs to train this model in the cloud
Project structure
To complete this section of the guide, you are going to create the following files:
requirements.txt: contains the list of dependencies we would need.train.py: contains our training code.
Your final file structure is going to look like this:
.
├── requirements.txt
└── train.py
Step 1: Install all dependencies.
First we will create the requirements.txt file.
requirements.txt
requirements.txtscikit-learn
# For logging the trained model
mlfoundry
# For deploying it as a Service
servicefoundry
Now, we can install these dependecies in a Python environment using pip install -r requirements.txt.
This is necessary so that we can run our training script locally.
Step 2: Training and log our model.
Next, let's create our train.py file, which will first train our model, and then log the model to the Truefoundry's Model Registry.
train.py
train.pyimport mlfoundry
from sklearn.datasets import load_iris
from sklearn.model_selection import train_test_split
from sklearn.pipeline import Pipeline
from sklearn.preprocessing import StandardScaler
from sklearn.svm import SVC
X, y = load_iris(as_frame=True, return_X_y=True)
X = X.rename(columns={
"sepal length (cm)": "sepal_length",
"sepal width (cm)": "sepal_width",
"petal length (cm)": "petal_length",
"petal width (cm)": "petal_width",
})
X_train, X_test, y_train, y_test = train_test_split(X, y, test_size=0.2, random_state=42, stratify=y)
pipe = Pipeline([("scaler", StandardScaler()), ("svc", SVC(probability=True))])
pipe.fit(X_train, y_train)
client = mlfoundry.get_client()
run = client.create_run(project_name="iris-clf", run_name="iris-svc")
# Optionally, we can log hyperparameters using run.log_params(...)
# Optionally, we can log metrics using run.log_metrics(...)
model_version = run.log_model(name="iris-svc", model=pipe, framework="sklearn", step=0)
print("Model Logged as:", model_version.fqn)
Now that we have implemented the training code, you can run this script via running the following command in your terminal.
python train.py
Step 3: Get our models FQN.
Once you run the above command, you will get the following output:
[mlfoundry] 2022-12-28T19:42:55+0530 INFO Logged in to 'https://app.truefoundry.com' as 'user-truefoundry' ([email protected])
Link to the dashboard for the run: https://app.truefoundry.com/mlfoundry/449/run/b44ee0c389a44fceba73cf449f57faf4/
[mlfoundry] 2022-12-28T19:43:00+0530 INFO Run 'truefoundry/user-truefoundry/iris-clf/iris-svc-12' has started.
[mlfoundry] 2022-12-28T19:43:00+0530 INFO Logging model and additional files, this might take a while ...
[mlfoundry] 2022-12-28T19:43:00+0530 INFO Serializing model files to model version contents
[mlfoundry] 2022-12-28T19:43:05+0530 INFO Packaging and uploading files to remote ...
[mlfoundry] 2022-12-28T19:43:16+0530 INFO Logged model successfully with fqn 'model:truefoundry/user-truefoundry/iris-clf/iris-svc:5'
Model Logged as: model:truefoundry/user-truefoundry/iris-clf/iris-svc:5
[mlfoundry] 2022-12-28T19:43:21+0530 INFO Setting run status of 'truefoundry/user-truefoundry/iris-clf/iris-svc-12' to 'FINISHED'
Finished run: 'truefoundry/user-truefoundry/iris-clf/iris-svc-12', Dashboard: https://app.truefoundry.com/mlfoundry/449/run/b44ee0c389a44fceba73cf449f57faf4/
In this output, you will find the model FQN at line 8:
Model Logged as: model:truefoundry/user-truefoundry/iris-clf/iris-svc:5
Copy the model:truefoundry/user-truefoundry/iris-clf/iris-svc:5 part.
Note
If you have already logged your model, You can do the following to get your models FQN:
- Go to the Experiments tab.
- Search for your Project's name, and click on it.
- Click on the Run which contains the model you want to deploy.
- Click on the Model tab.
- Copy the Model FQN.
Model Deployment
Now that we have trained and logged our model, we can deploy our logged model via servicefoundry and ModelDeployment
Project structure
To complete this section of the guide, you are going to create the following files:
deploy.py/deploy.yaml: contains our deployment code / deployment configuration file
Your final file structure is going to look like this:
.
└── deploy.py / deploy.yaml
Step 1: Deploy the model
You can deploy the model on TrueFoundry programmatically either using our Python SDK, or via a YAML file.
Via python SDK
File Structure
.
└── deploy.py
deploy.py
deploy.pyIn the code below, ensure to replace "<YOUR_WORKSPACE_FQN>" in the last line with your WORKSPACE_FQN.
Also replace "<YOUR_MODEL_VERSION_FQN>" with the model FQN you copied before.
import logging
from servicefoundry import ModelDeployment, TruefoundryModelRegistry, Resources, Endpoint

logging.basicConfig(level=logging.INFO, format=logging.BASIC_FORMAT)

# Replace these with your values
MODEL_VERSION_FQN = "<YOUR_MODEL_VERSION_FQN>" # E.g. model:truefoundry/user/iris-clf/iris-svc:1
WORKSPACE = "<YOUR_WORKSPACE_FQN>" # E.g. tfy-ctl-euwe1:model-deployment-test

model_deployment = ModelDeployment(
    name="iris-svc",
    model_source=TruefoundryModelRegistry(
        model_version_fqn=MODEL_VERSION_FQN
    ),
  	endpoint=Endpoint(
        host="<Provide a host value based on your configured domain>", # E.g. iris-svc-aditya-ws.tfy-ctl-euwe1-devtest.devtest.truefoundry.tech
        path="<Provide a path, not mandatory>" # E.g. /v1/api/ml/, Should begin and end with a forward slash (/).
    ),
    resources=Resources(cpu_request=0.2, cpu_limit=0.5, memory_request=500, memory_limit=1000)
)
deployment = model_deployment.deploy(workspace_fqn=WORKSPACE)
Picking a value for
hostProviding a host value depends on the base domain urls configured in the cluster settings.
For e.g. If your base domain url is
*.truefoundry.your-org.comthen a valid value can befastapi-your-workspace-8000.truefoundry.your-org.com.Alternatively if you have a non wildcard based domain url e.g.
truefoundry.your-org.com, then a valid value can betruefoundry.your-org.com/fastapi-your-workspace-8000
To deploy the job using Python API use:
python deploy.py
Via YAML file
File Structure
.
└── deploy.yaml
deploy.yaml
deploy.yamlIn the file below, ensure to replace "<YOUR_MODEL_VERSION_FQN>" with the model FQN you copied before.
name: iris-svc
type: model-deployment
model_source:
  type: tfy-model-registry
  model_version_fqn: <YOUR_MODEL_VERSION_FQN>
endpoint:
  host: <Provide a host value based on your configured domain>
  path: <Provide a path, not mandatory>
resources:
  cpu_request: 0.2
  cpu_limit: 0.5
  memory_request: 500
  memory_limit: 1000
To deploy the job using Python API use:
servicefoundry deploy --workspace-fqn YOUR_WORKSPACE_FQN --file deploy.yaml
Interact with the Service
After you run the command given above, you will get a link at the end of the output. The link will take you to your application's dashboard.
Once the build is complete you should get the endpoint for your service :

Endpoint URL is available on the Model Deployment Details Page
Copy the following endpoint url, we will need this to make the requests.
We will now send the following examples for prediction.
| sepal_length | sepal_width | petal_length | petal_width |
|---|---|---|---|
| 7.0 | 3.2 | 4.7 | 1.4 |
| 5.0 | 3.6 | 1.4 | 0.2 |
Here is an example Python code snippet to send a request with the above data.
Note
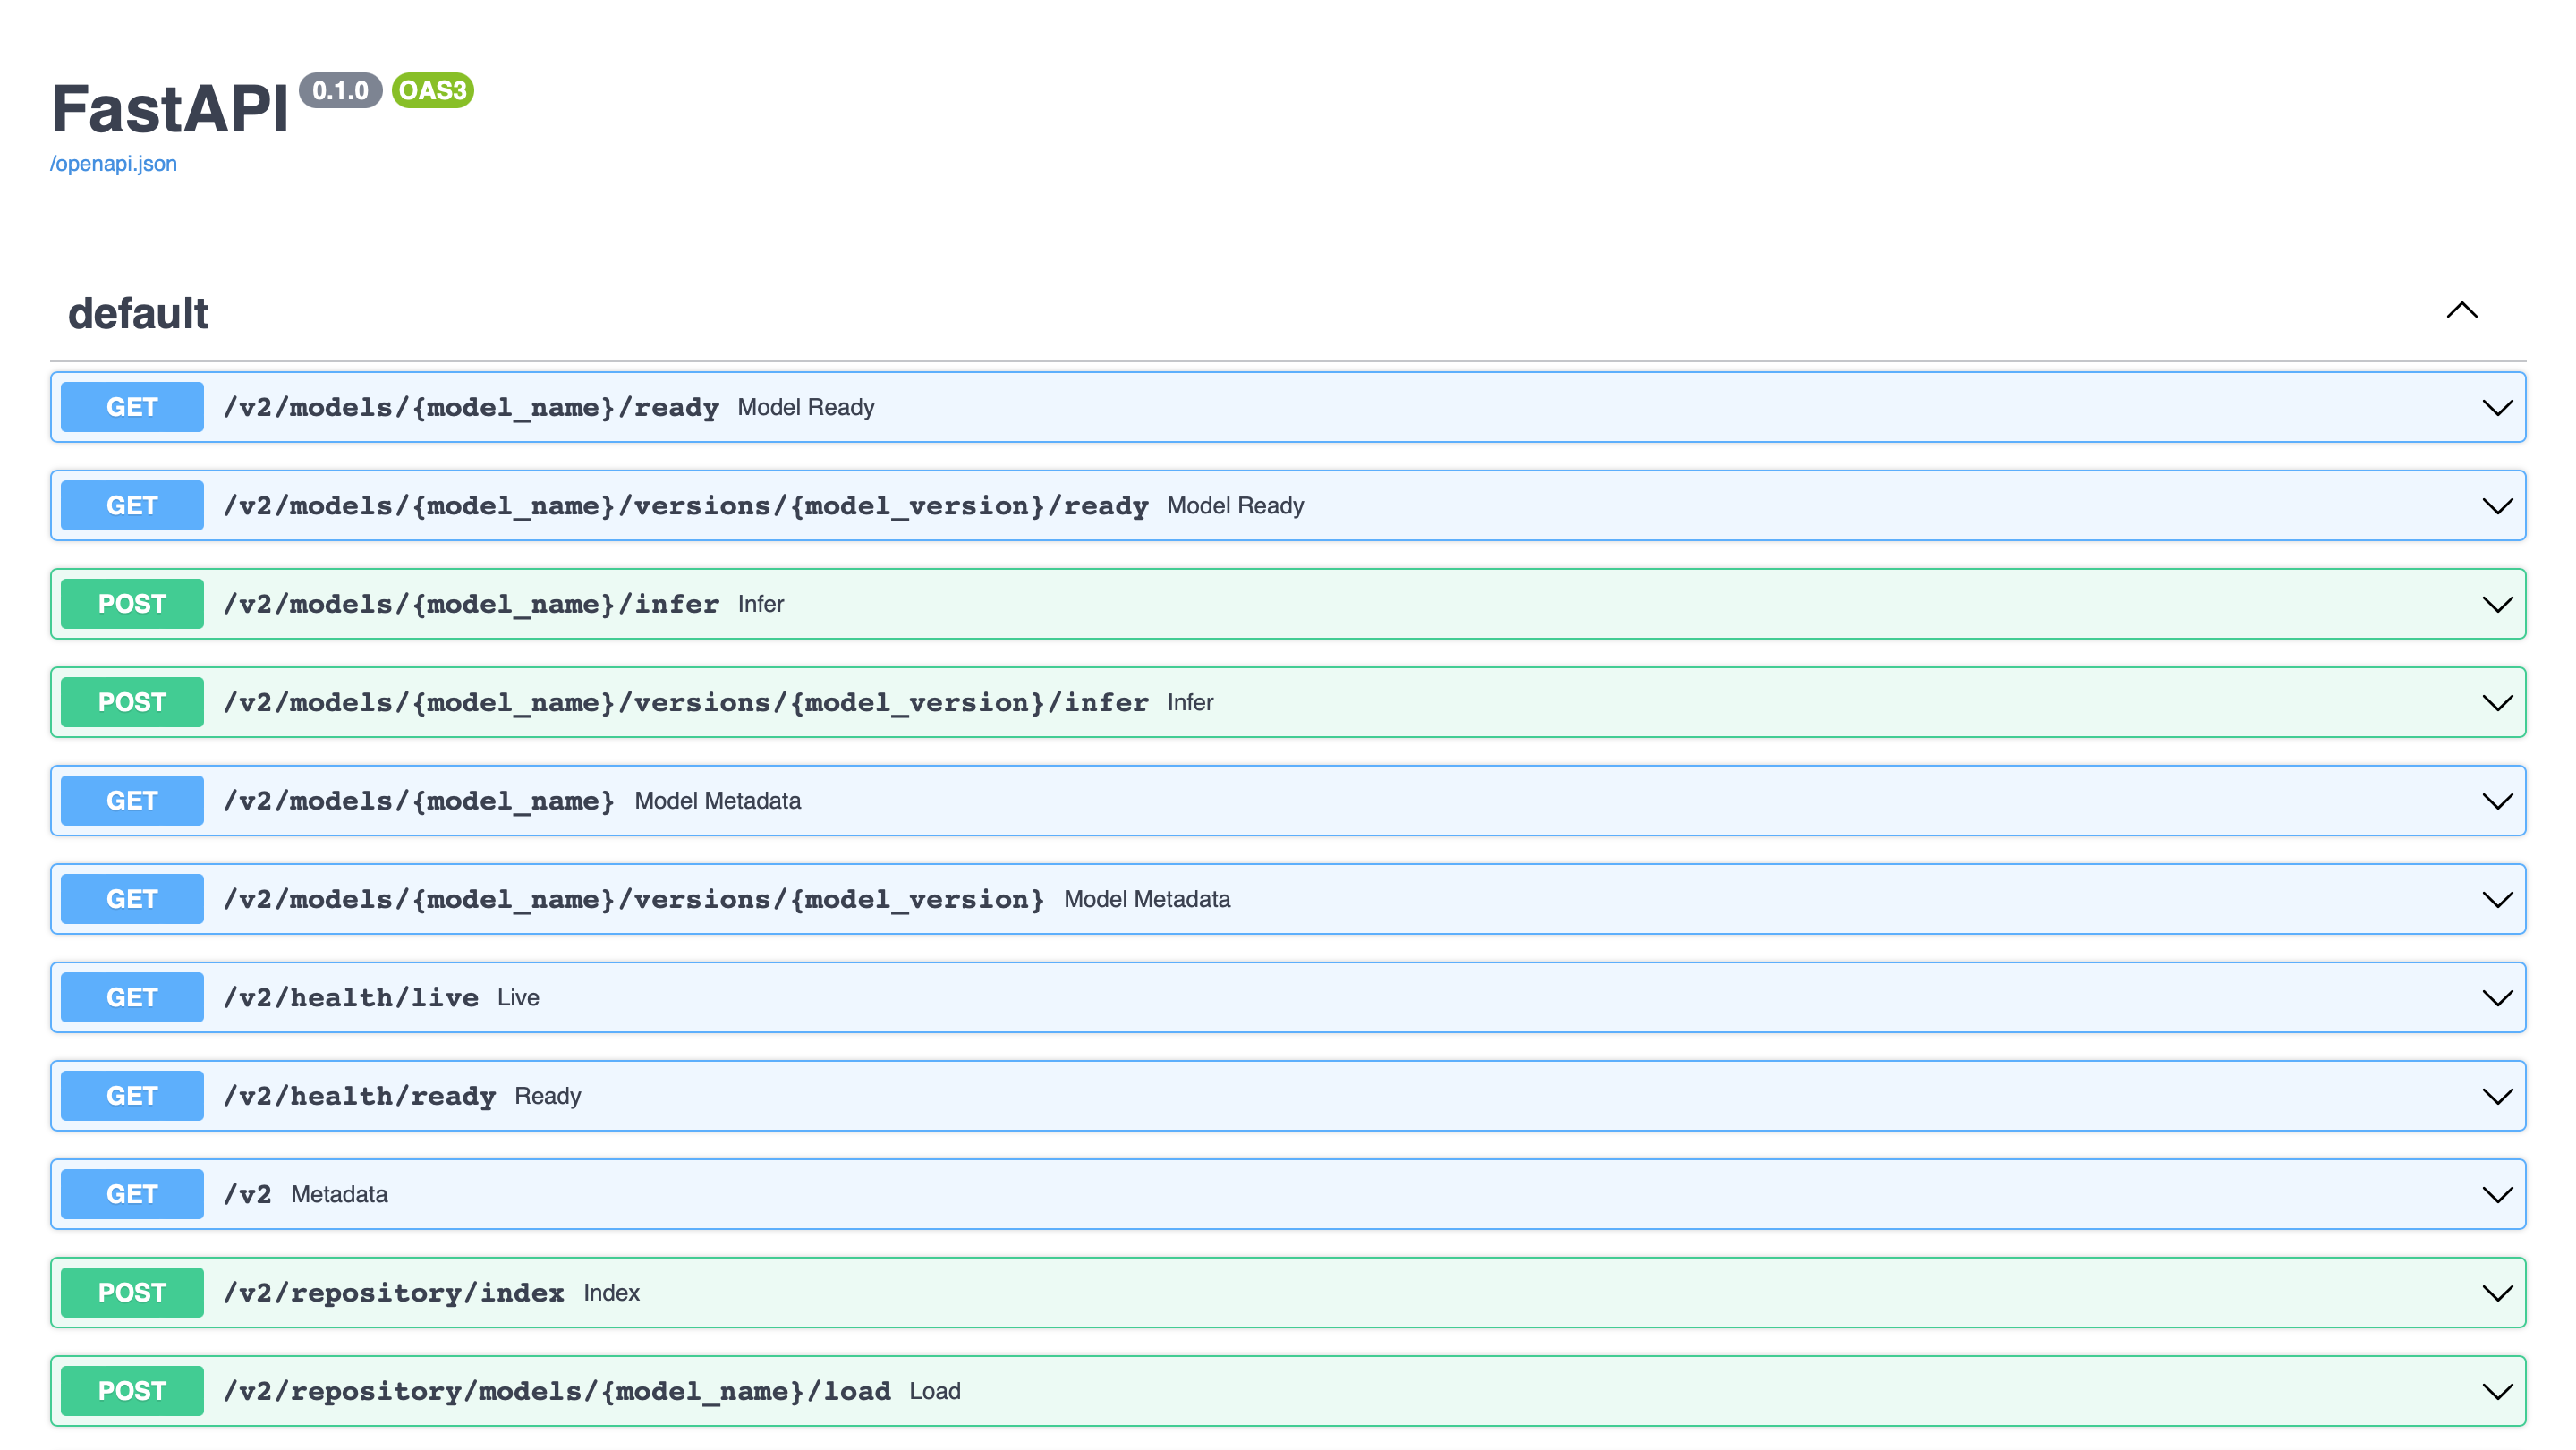
Behind the scenes, our model is being deployed using MLServer and Kserve's V2 Dataplane protocol
The general format of the Inference URL thus looks like
{endpoint_url}/v2/models/{model-name}/infer
In the file below, ensure to replace "<YOUR_ENDPOINT_URL>" with the Endpoint url you copied before.
import json
from urllib.parse import urljoin

import requests

# Replace this with the value of your endpoint
ENDPOINT_URL = "<YOUR_ENDPOINT_URL>" #like https://iris-svc-aditya-ws.tfy-ctl-euwe1-devtest.devtest.truefoundry.tech/v1/predict/
MODEL_NAME = "iris-svc"

response = requests.post(
    urljoin(ENDPOINT_URL, f'v2/models/{MODEL_NAME}/infer'),
    json={
        "inputs": [
            {"data": [7.0, 5.0], "datatype": "FP32", "name": "sepal_length", "shape": [2]},
            {"data": [3.2, 3.6], "datatype": "FP32", "name": "sepal_width", "shape": [2]},
            {"data": [4.7, 1.4], "datatype": "FP32", "name": "petal_length", "shape": [2]},
            {"data": [1.4, 0.2], "datatype": "FP32", "name": "petal_width", "shape": [2]}
        ],
        "parameters": {
            "content_type": "pd"
        }
    }
)

result = response.json()
print(json.dumps(result, indent=4))
print("Predicted Classes:", result["outputs"][0]["data"])
# Replace this with the values
ENDPOINT_URL="<YOUR_ENDPOINT_URL>"
MODEL_NAME="iris-svc"

curl -X POST \
     -H 'Content-Type: application/json' \
     -d '{"inputs":[{"data":[7,5],"datatype":"FP32","name":"sepal_length","shape":[2]},{"data":[3.2,3.6],"datatype":"FP32","name":"sepal_width","shape":[2]},{"data":[4.7,1.4],"datatype":"FP32","name":"petal_length","shape":[2]},{"data":[1.4,0.2],"datatype":"FP32","name":"petal_width","shape":[2]}],"parameters":{"content_type":"pd"}}' \
     "${ENDPOINT_URL}/v2/models/${MODEL_NAME}/infer"
This should return something like
{
    "model_name": "iris-svc",
    "model_version": "6",
    "id": "2de54f5f-4e24-40fd-b812-17917743f1a9",
    "parameters": {
        "content_type": null,
        "headers": null
    },
    "outputs": [
        {
            "name": "output-1",
            "shape": [
                2
            ],
            "datatype": "INT64",
            "parameters": null,
            "data": [
                1,
                0
            ]
        }
    ]
}
Predicted Classes: [1, 0]
Note on content_type
content_typeNotice in the request we have
{
    "inputs": ...,
    "parameters": {
        "content_type": "pd"
    }
}
We added this because when training the model we used pandas dataframe. As such our model expects a dataframe with correct feature names when calling predict.
Alternatively, if we had not used a dataframe and simply a numpy array or list during training, our request body would looks something like
{
  "inputs": [
    {
      "name": "input-0",
      "shape": [2, 4],
      "datatype": "FP32",
      "data": [
          [7.0, 3.2, 4.7, 1.4],
          [5.0, 3.6, 1.4, 0.2],
      ]
    }
  ]
}
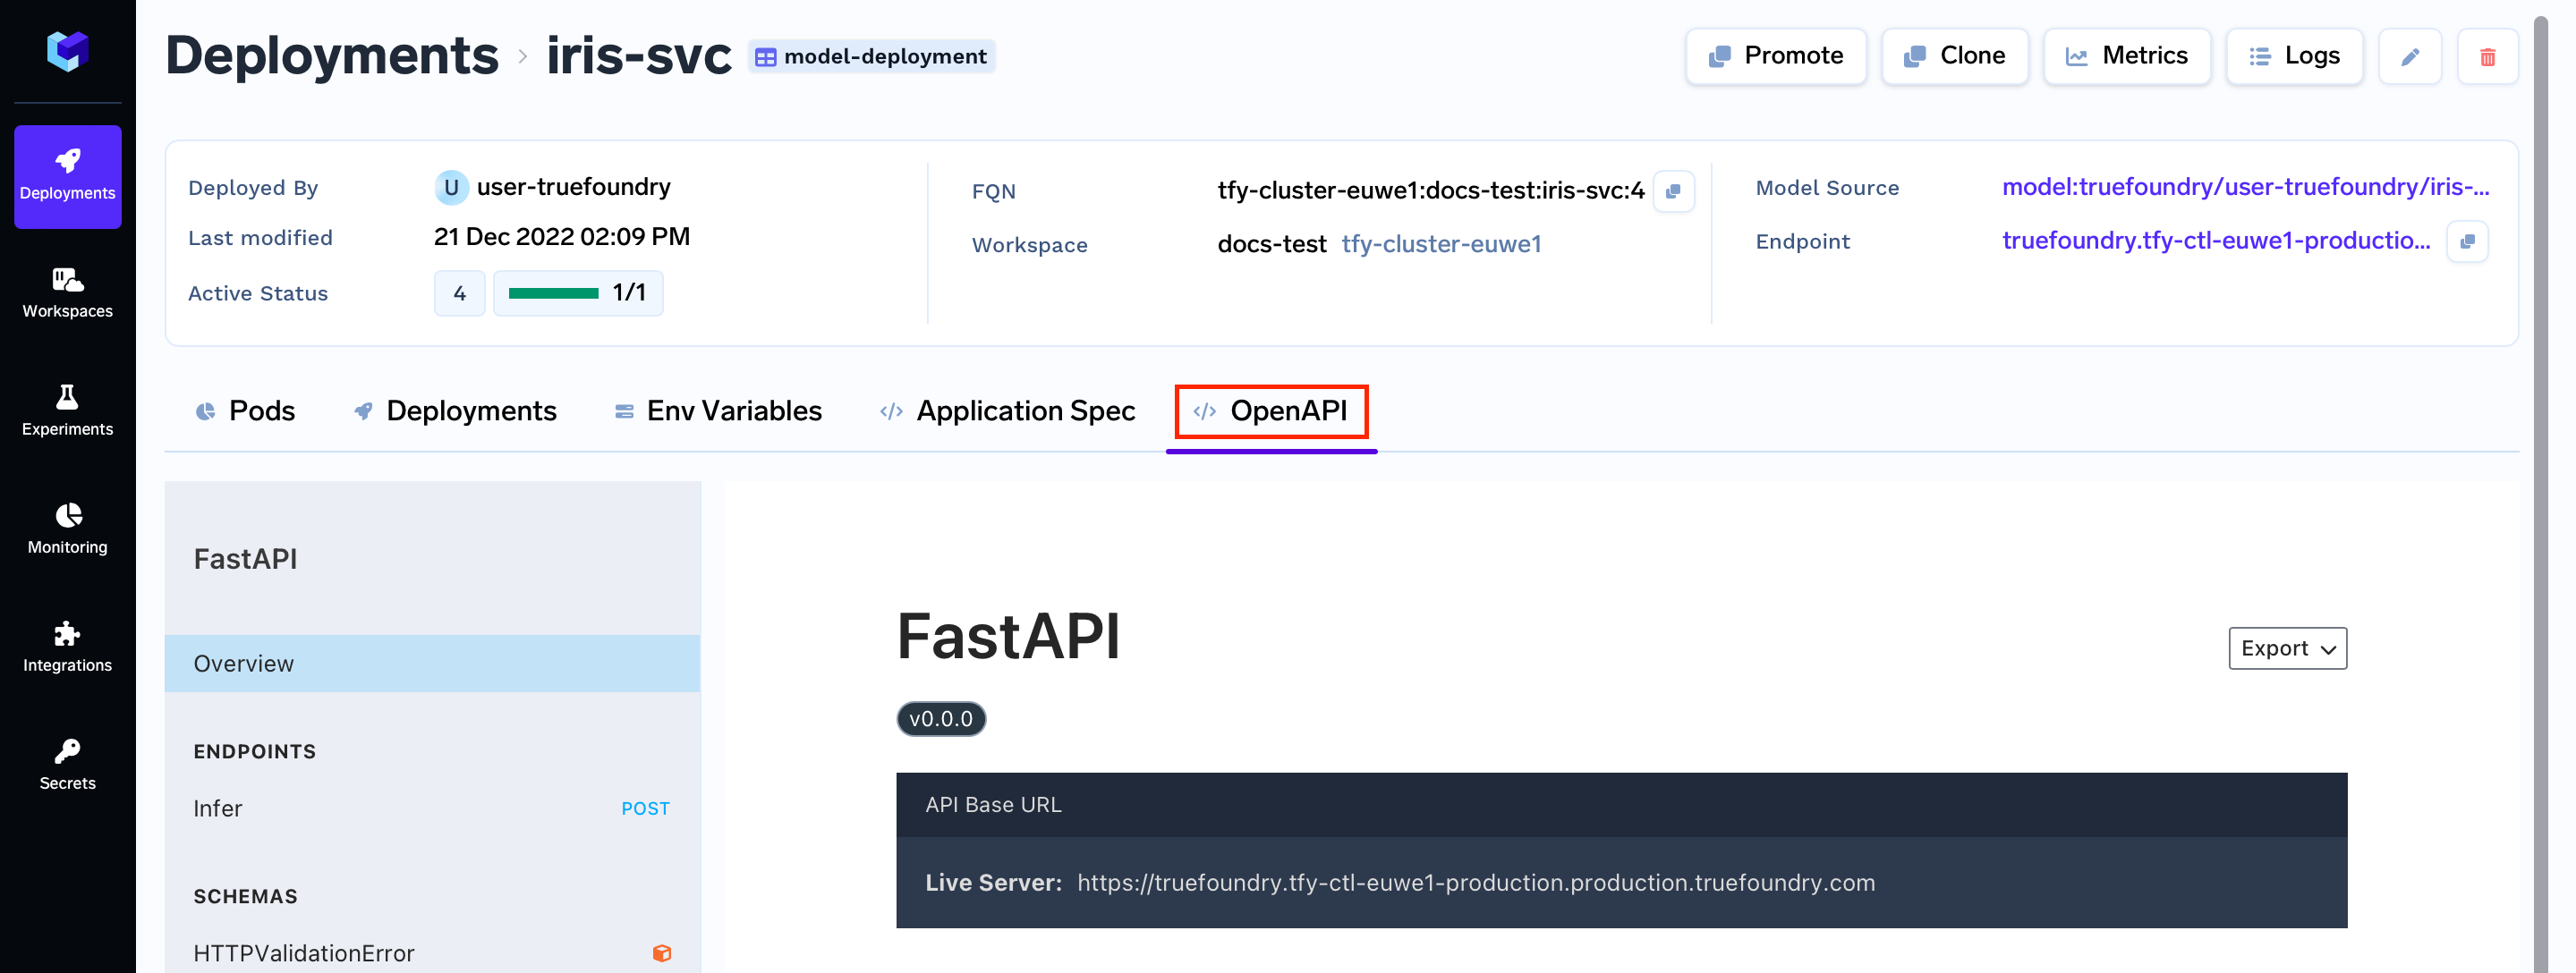
OpenAPI Spec
To make the process of making the requests easier you can go to the OpenAPI tab
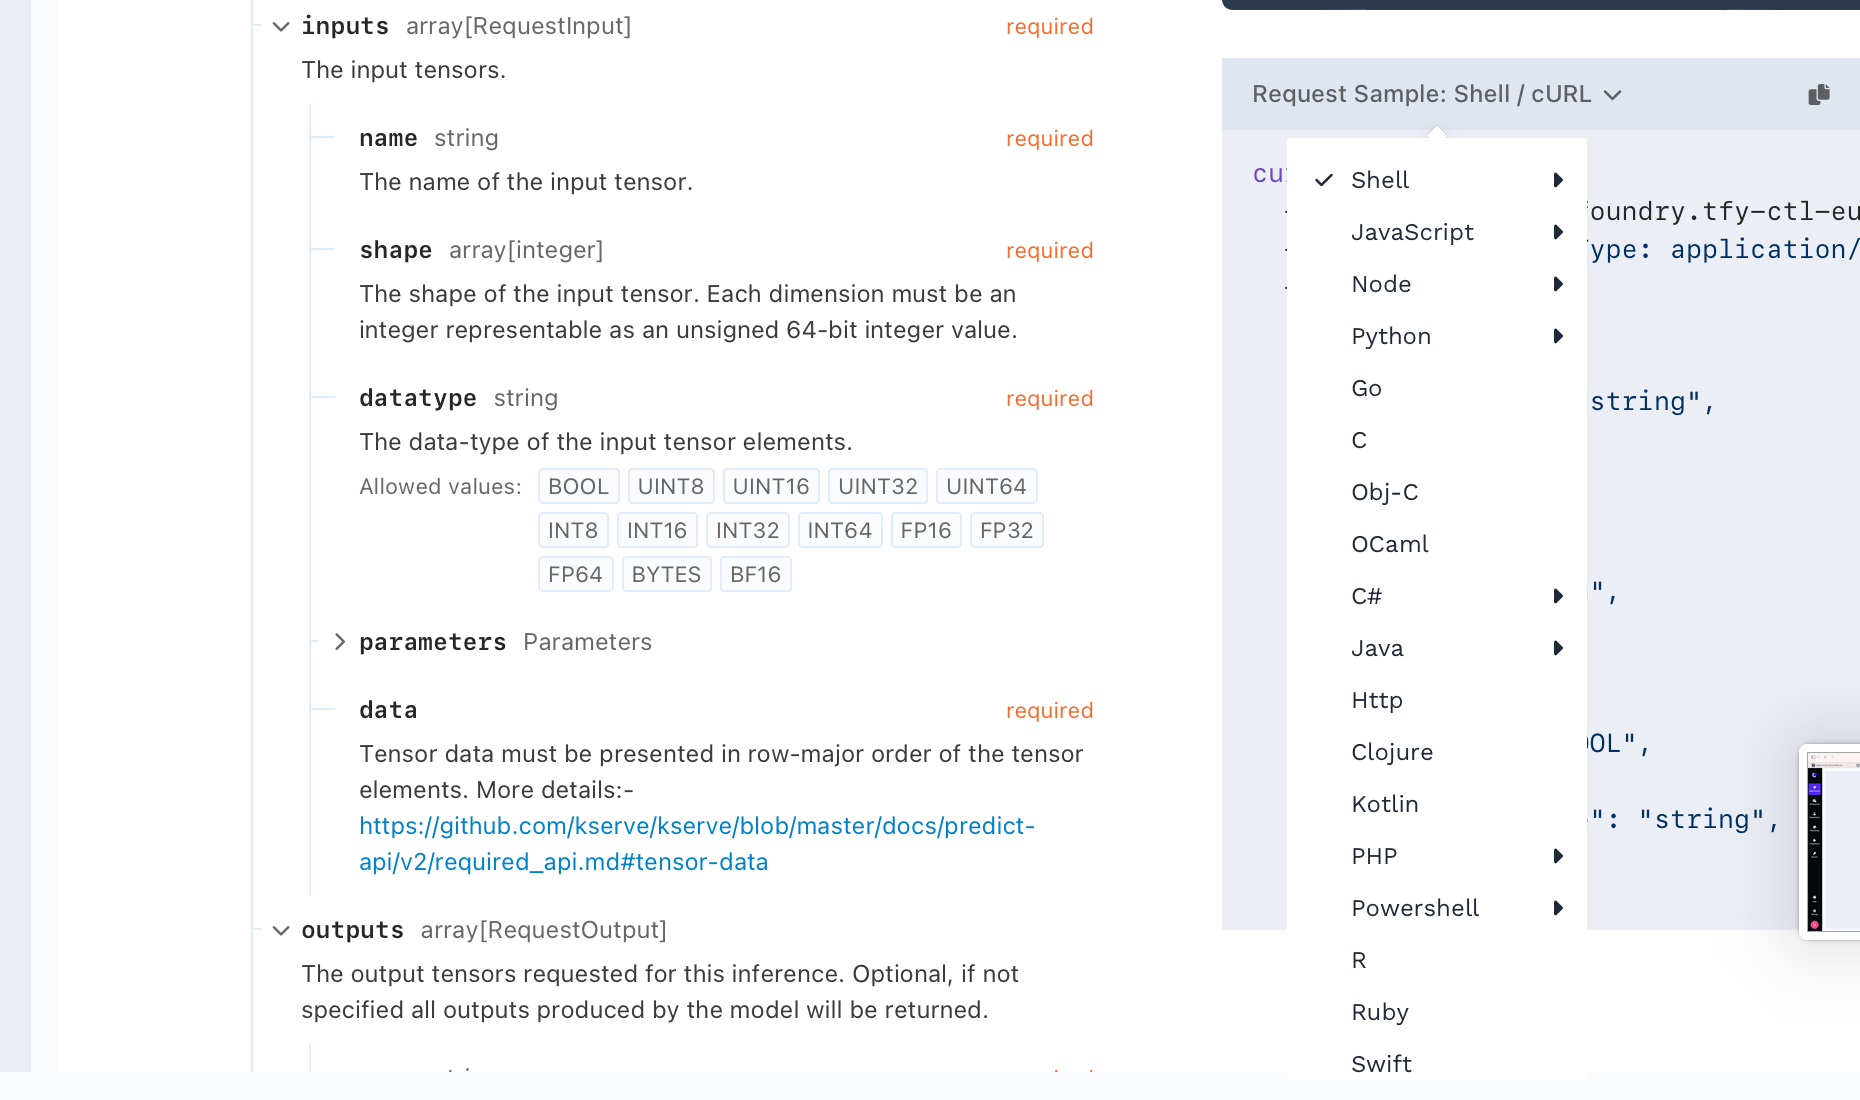
Now, we are going to click on the Infer tab.
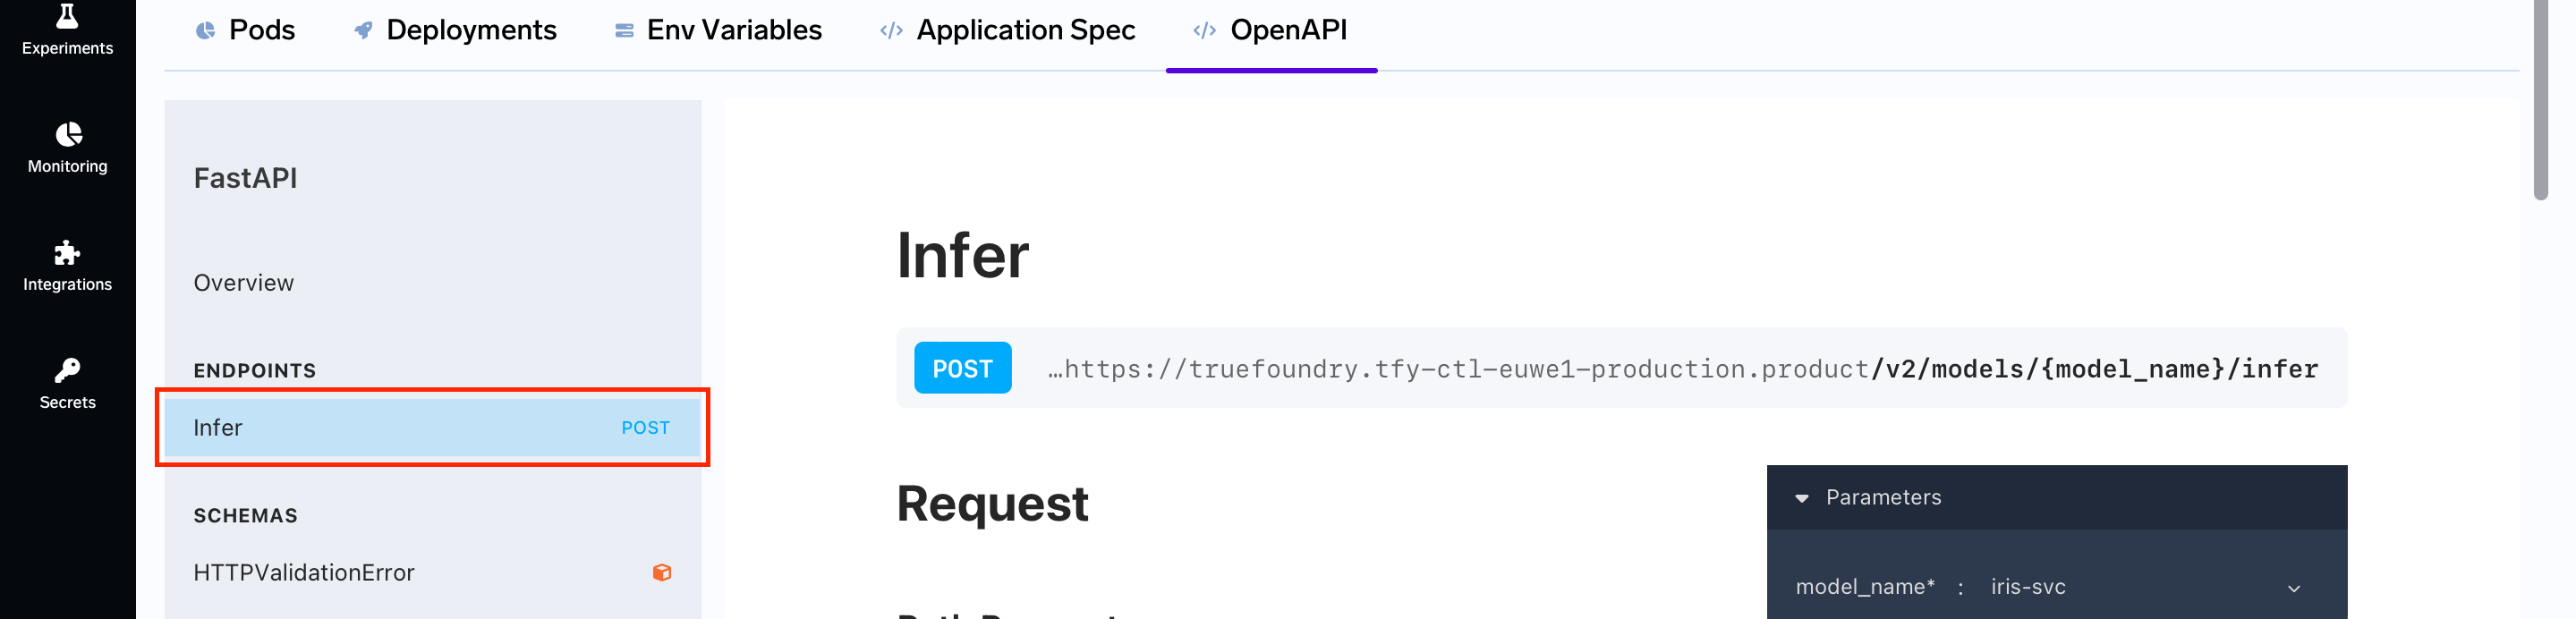
Scrolling down we will see the following card on the right.
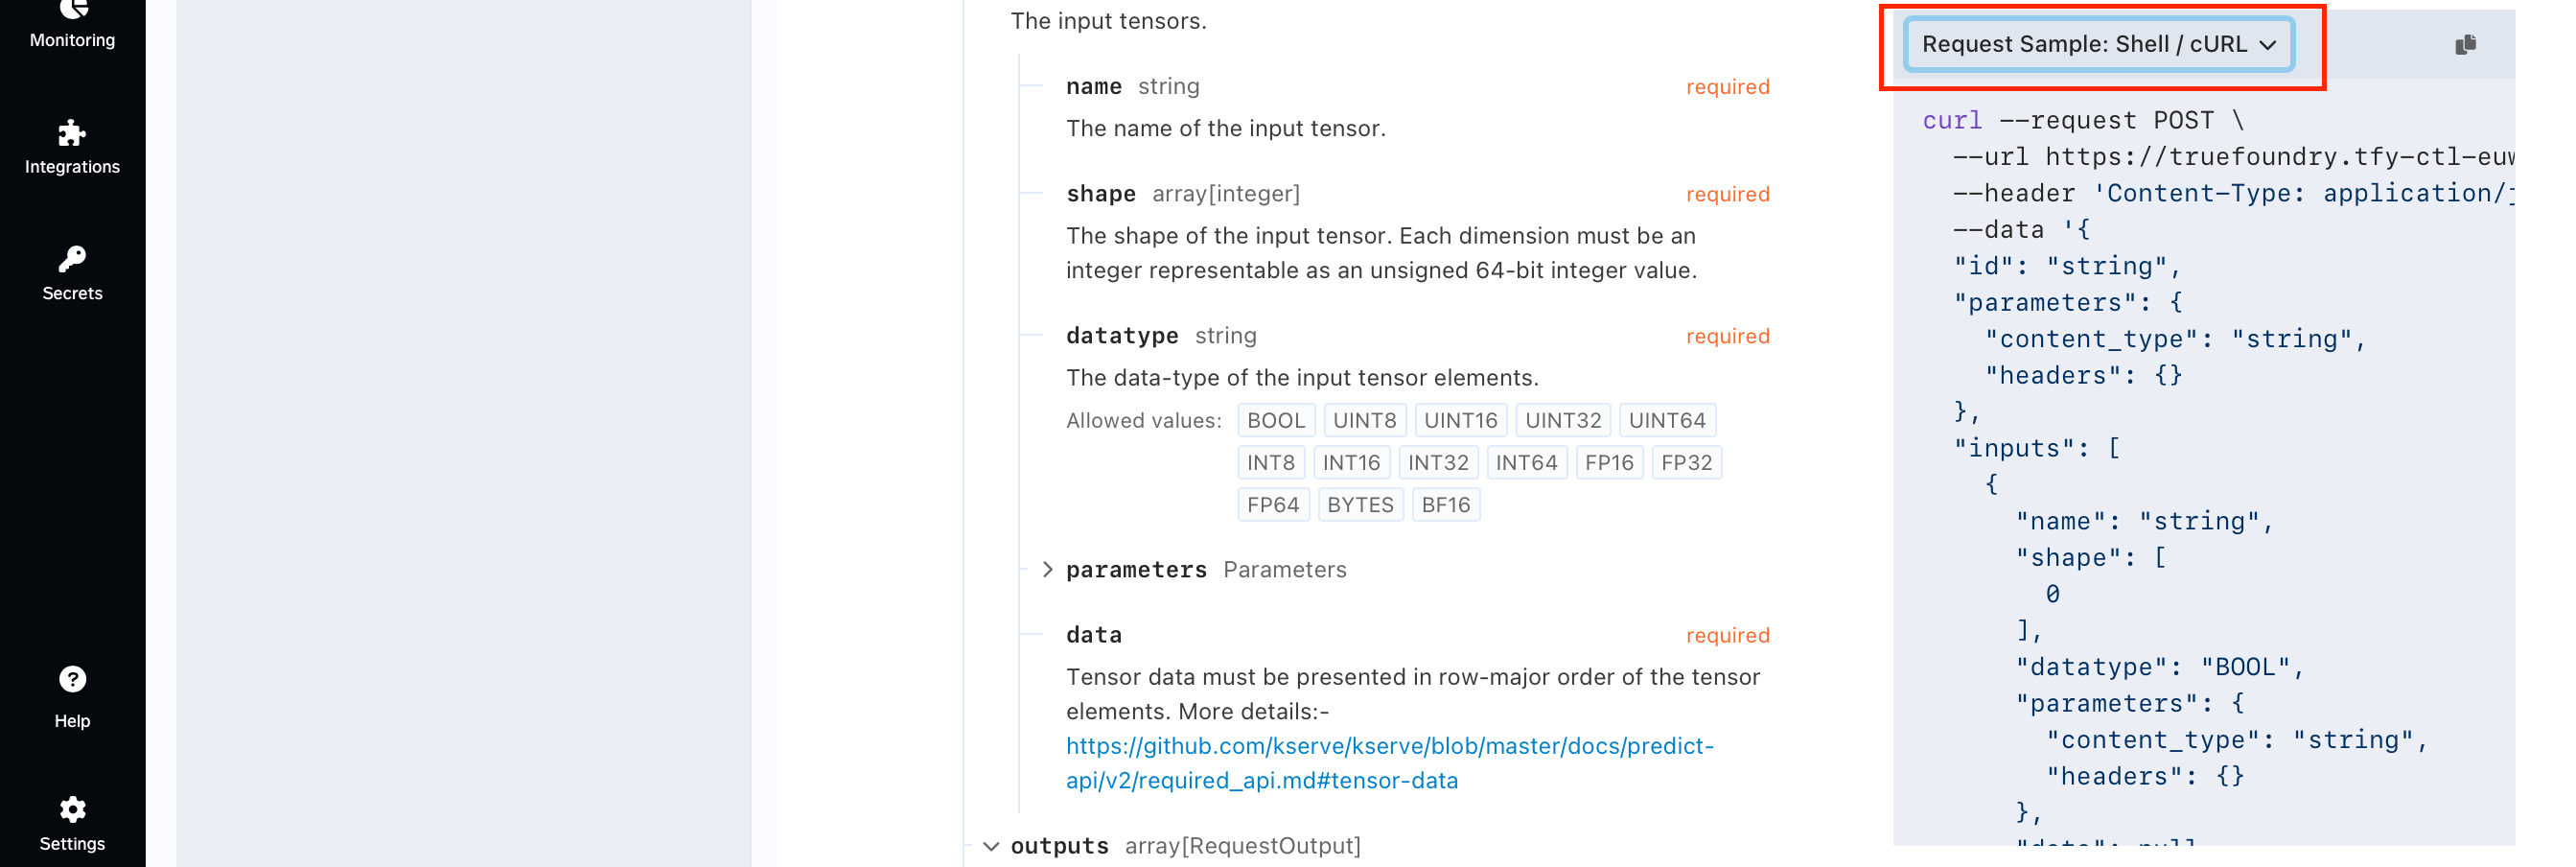
The card on the right gives you the format to give a request using a specific language or certain way.
You can click on the dropdown and you will get a list of ways request can be made:
Updated 8 months ago