Adding Models
This section explains the steps to add Cortex models and configure the required access controls.1
Navigate to Cortex Models in AI Gateway
From the TrueFoundry dashboard, navigate to 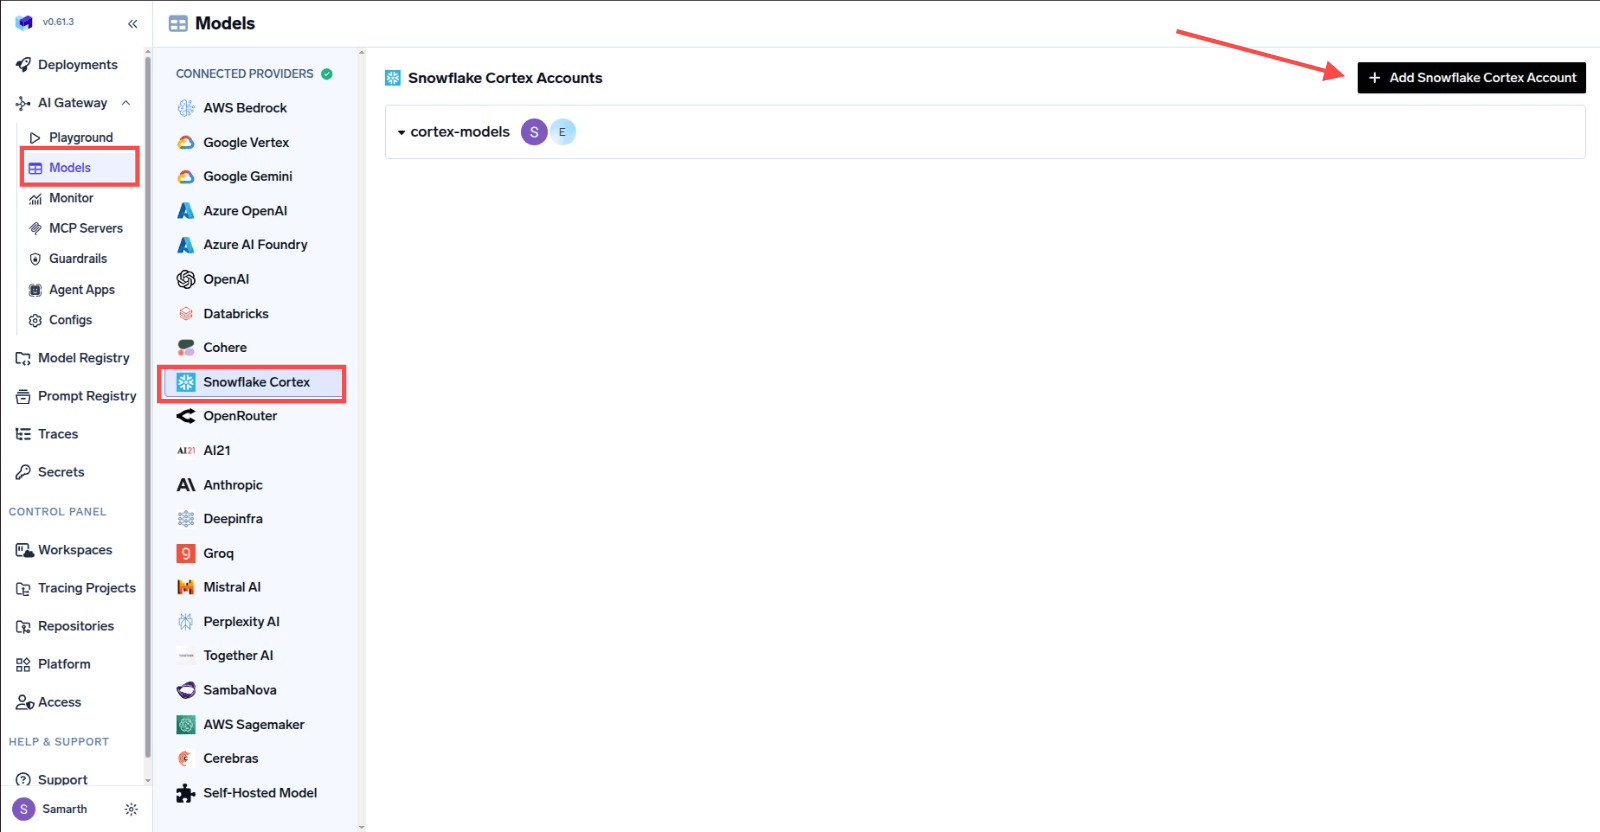
AI Gateway > Models and select Snowflake Cortex.Navigate to Snowflake Cortex Models
2
Add Snowflake Cortex Account Details
Click 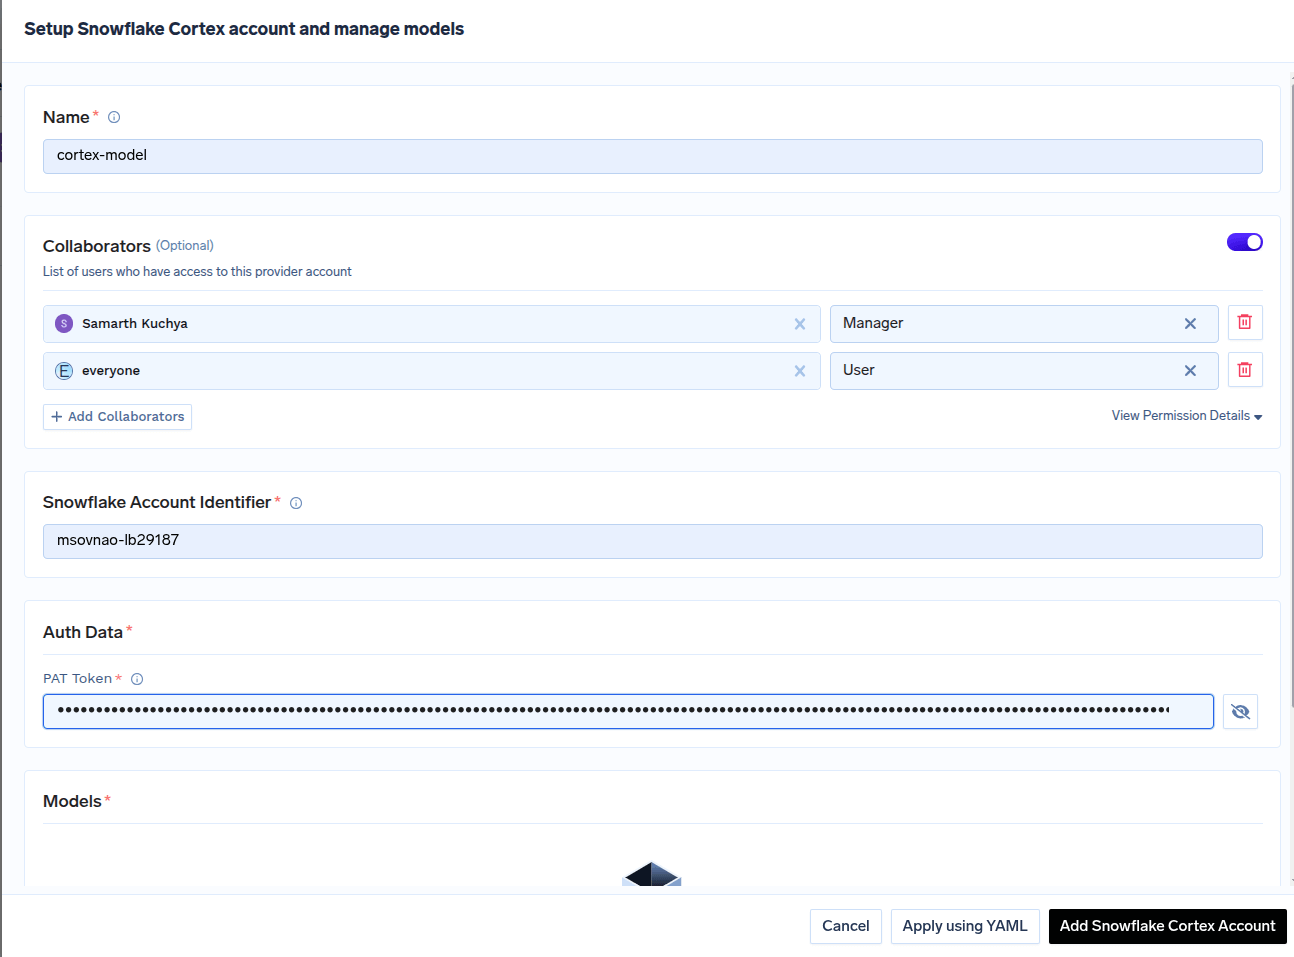
Add Snowflake Cortex Account. Give a unique name to your Snowflake cortex account and complete the form with your Snowflake cortex authentication details (PAT Token)
and account identifier for snowflake. For more details on account identifier check here.
Then add collaborators to your account. You can read more about access control here.Snowflake Cortex Account Form
3
Add Models by Model ID
Click on 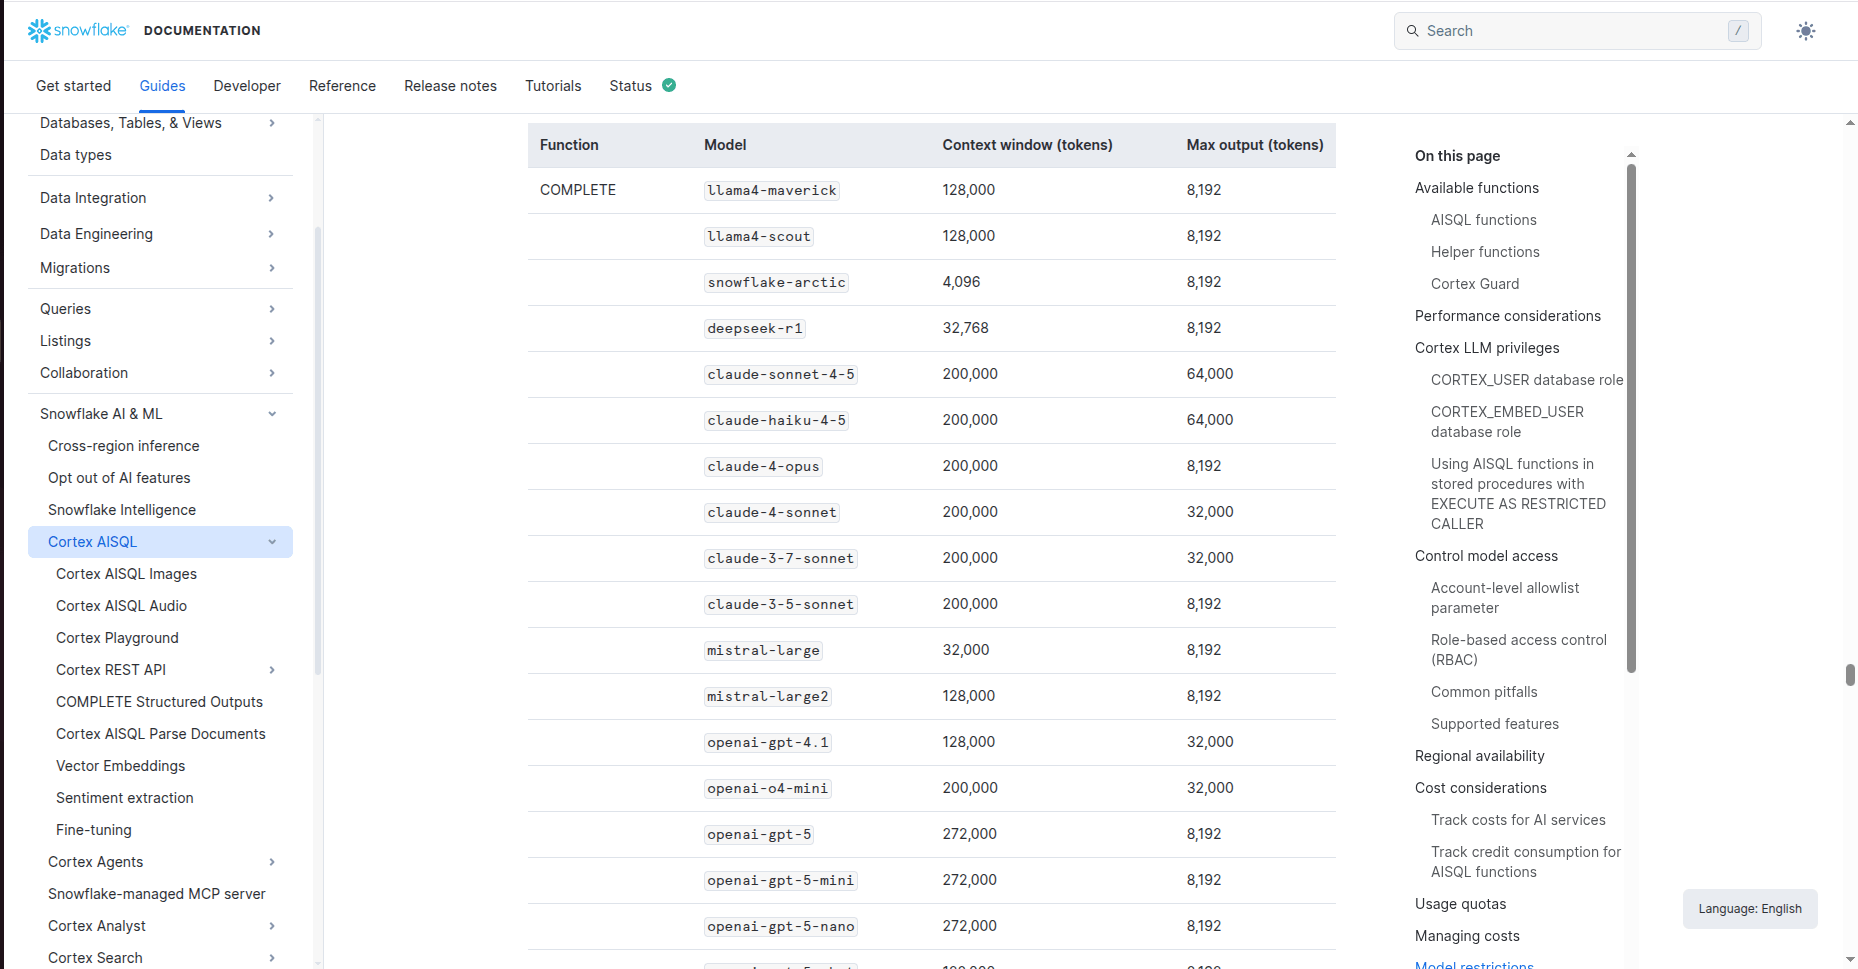
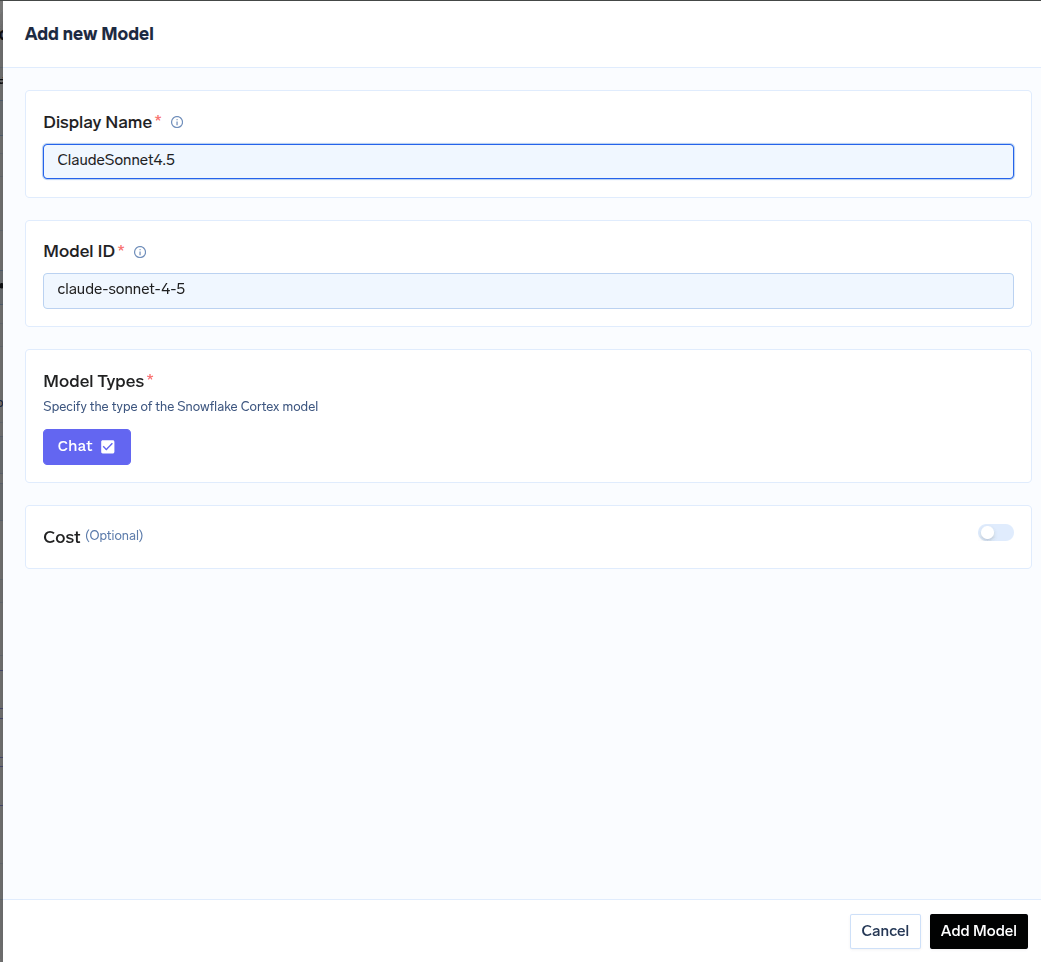
+ Add Model to open the form for adding a new model. For Snowflake cortex, you don’t select from a list. Instead, you need to get the Model ID from their docs page.Find Model ID in Snowflake Cortex Docs
Model ID when adding the model in TrueFoundry.Adding a Snowflake cortex model to TrueFoundry
Inference
After adding the models, you can perform inference using an OpenAI-compatible API via the Playground or by integrating with your own application.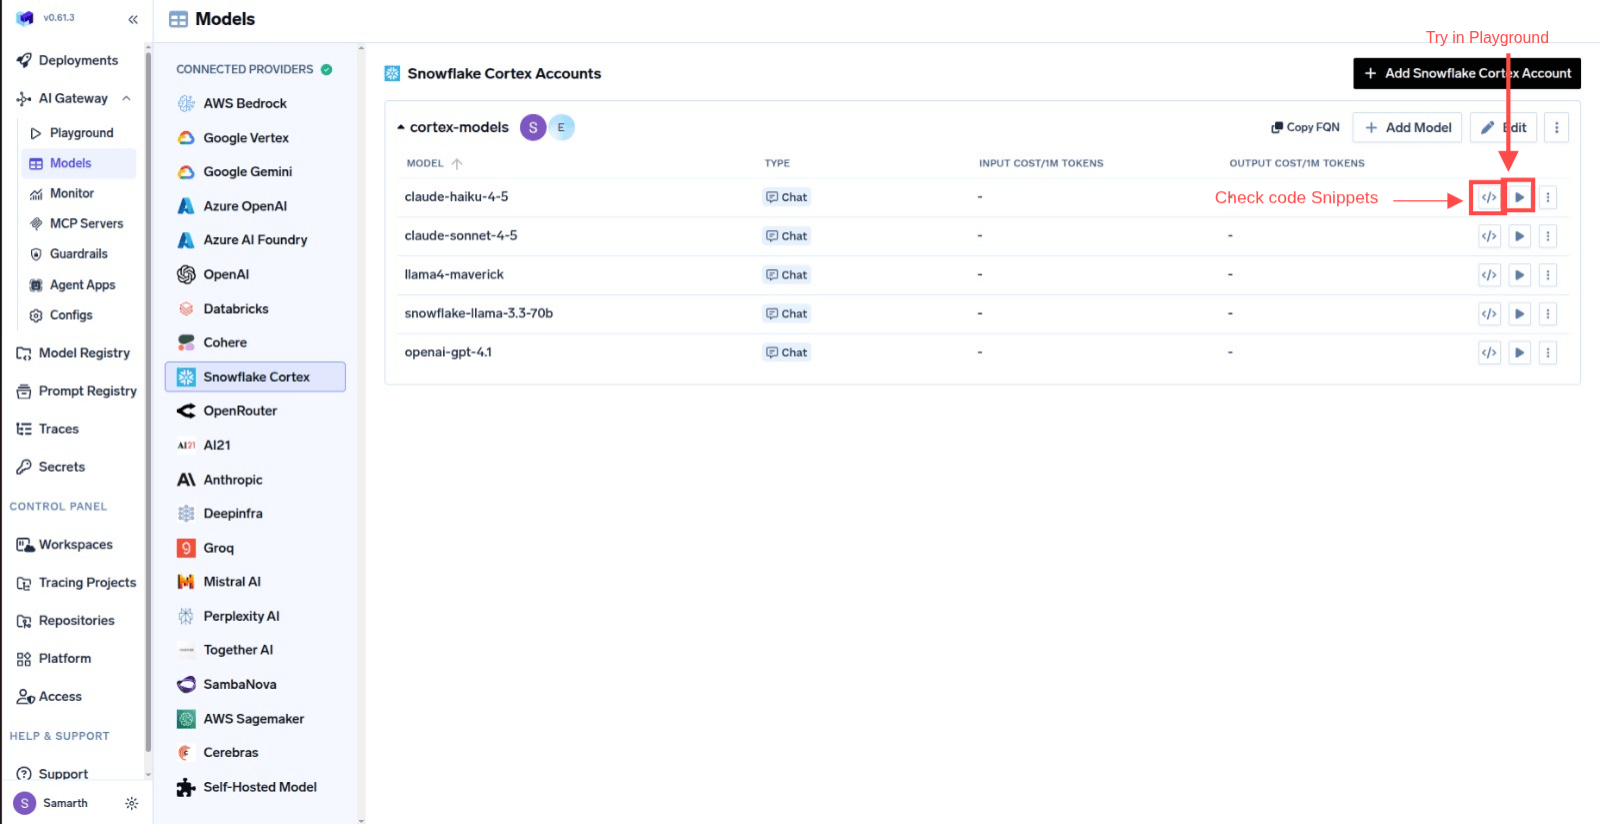
Infer Model in Playground or Get Code Snippet to integrate in your application