Setting Up Cost Tracking
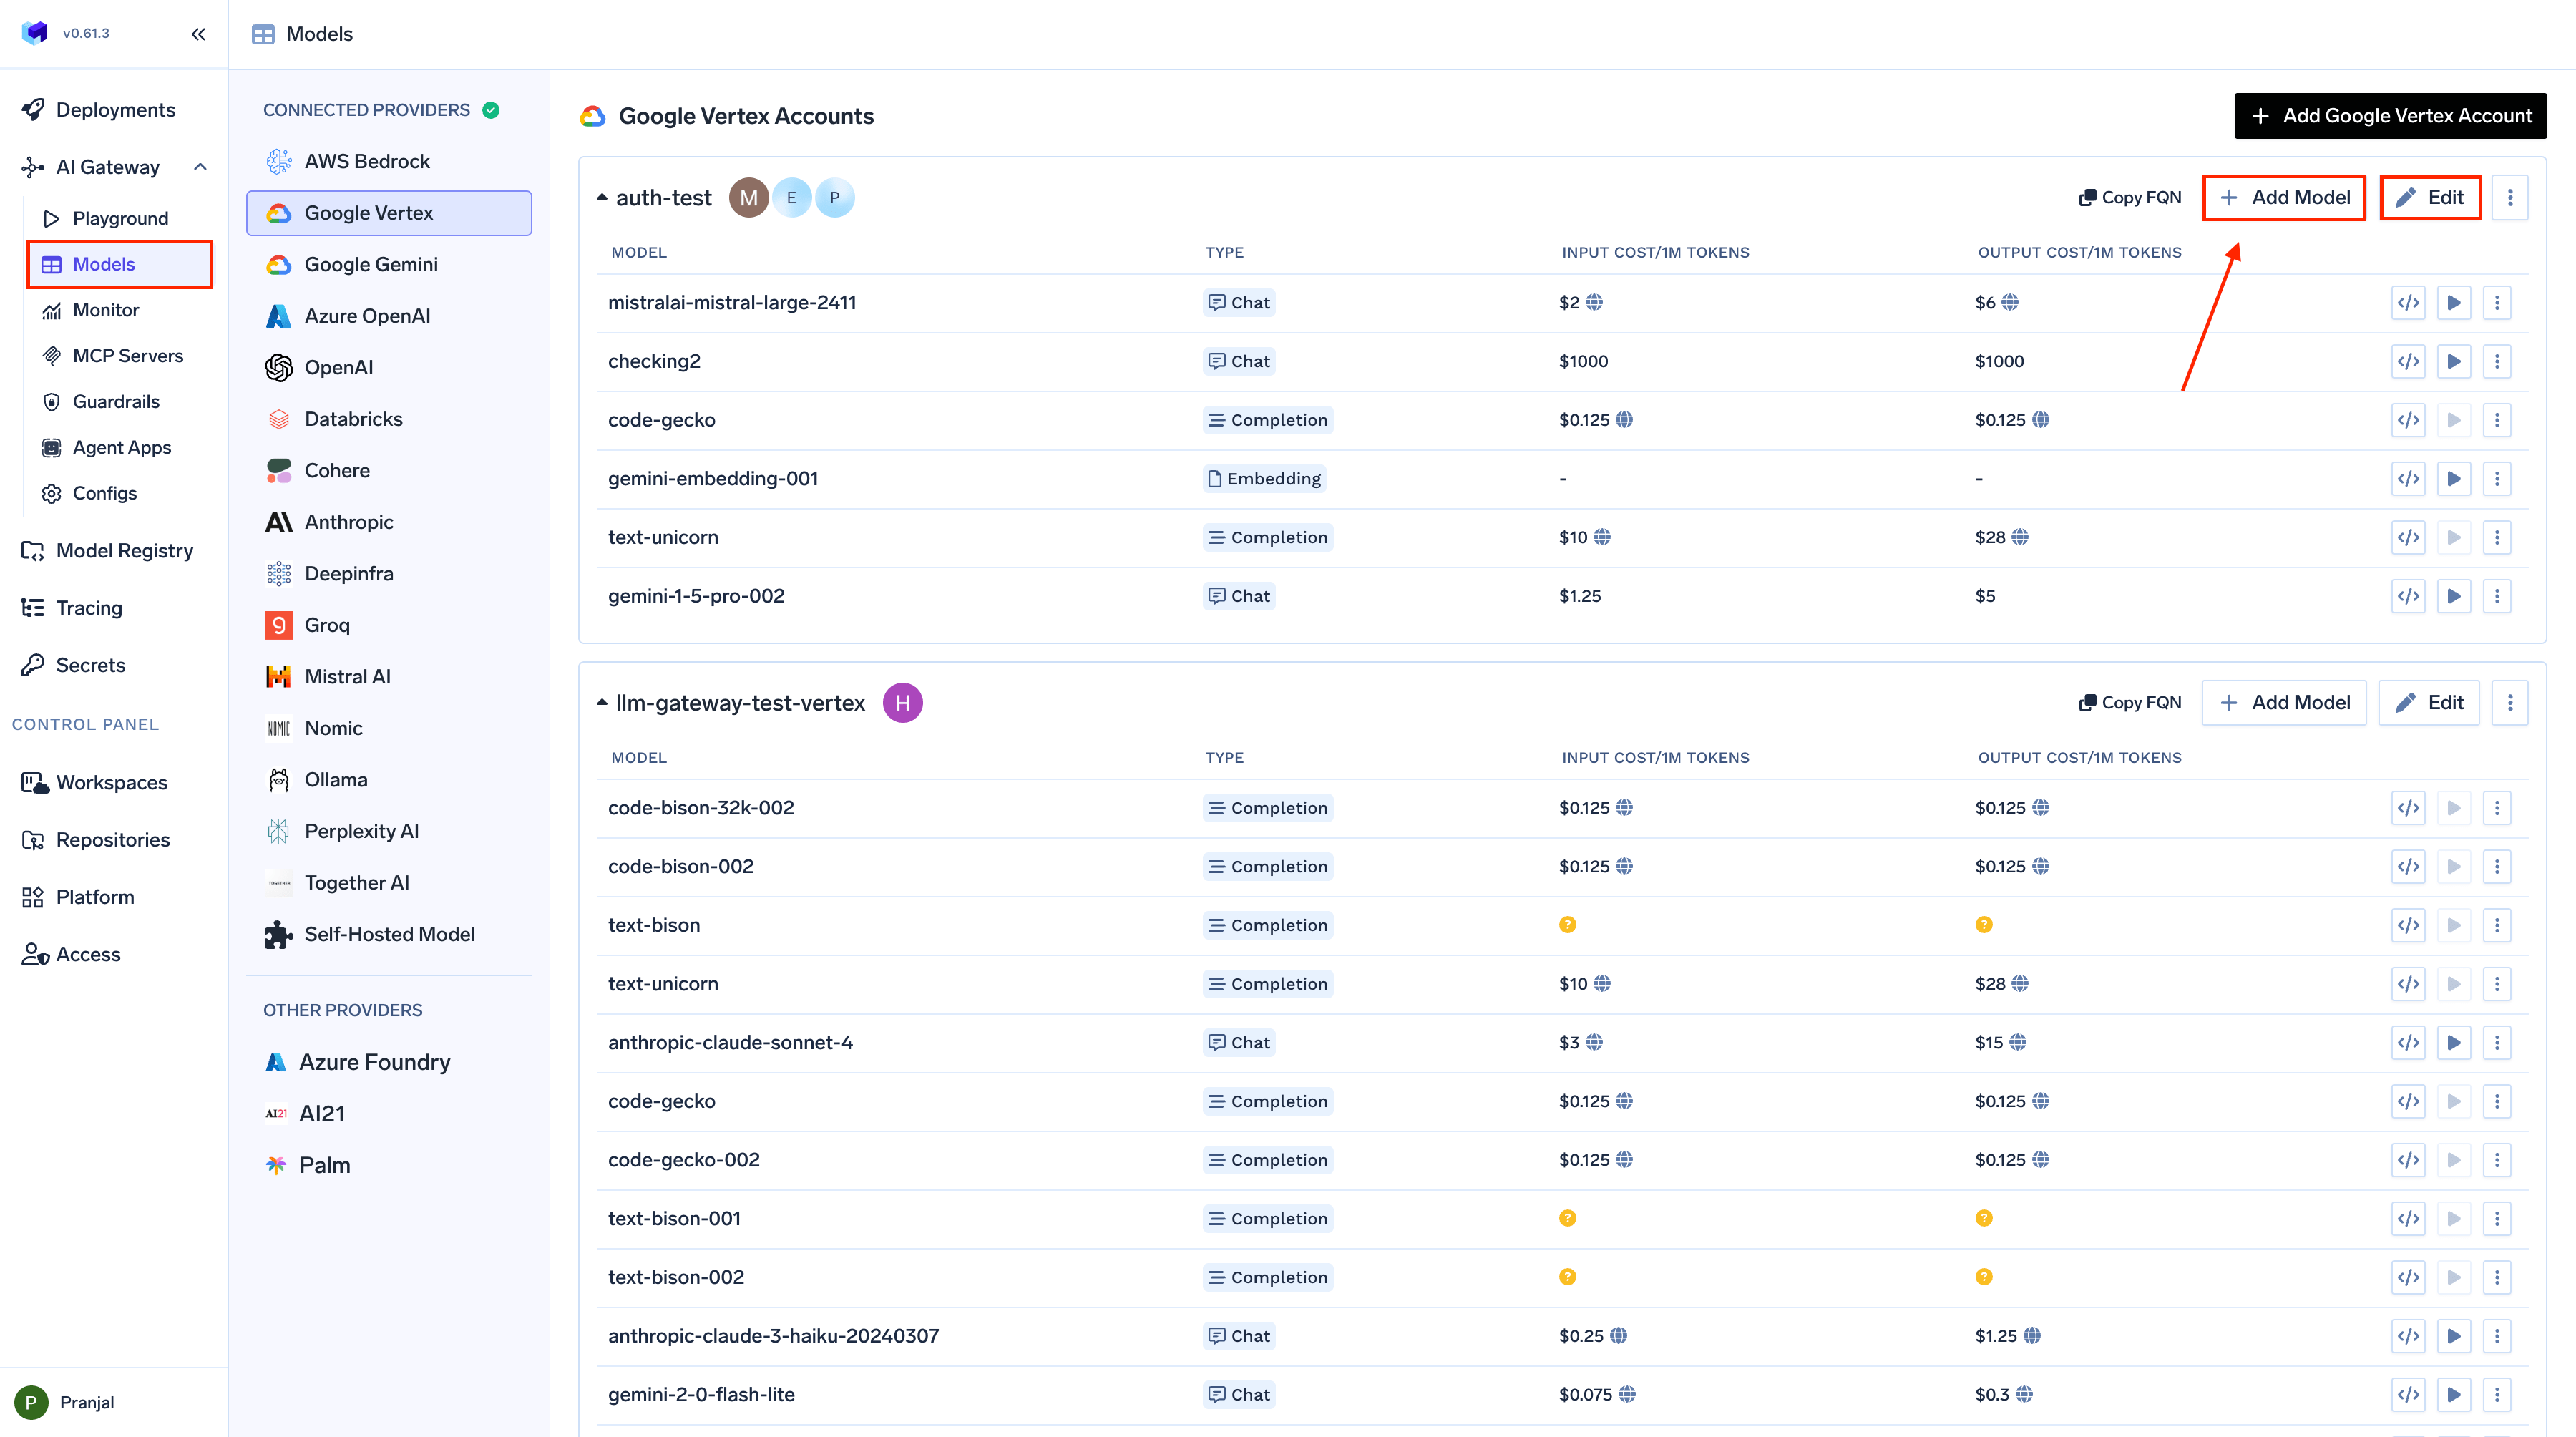
To set up cost tracking for your AI models:- From the TrueFoundry dashboard, navigate to
AI Gateway>Models - Select any Provider Account
- Click on the
Editbutton for an existing model or+ Add Modelto create a new one - In the model configuration screen, you’ll find cost options
Navigating to Model Cost Configuration Interface
1. Public Cost - Automatic Pricing
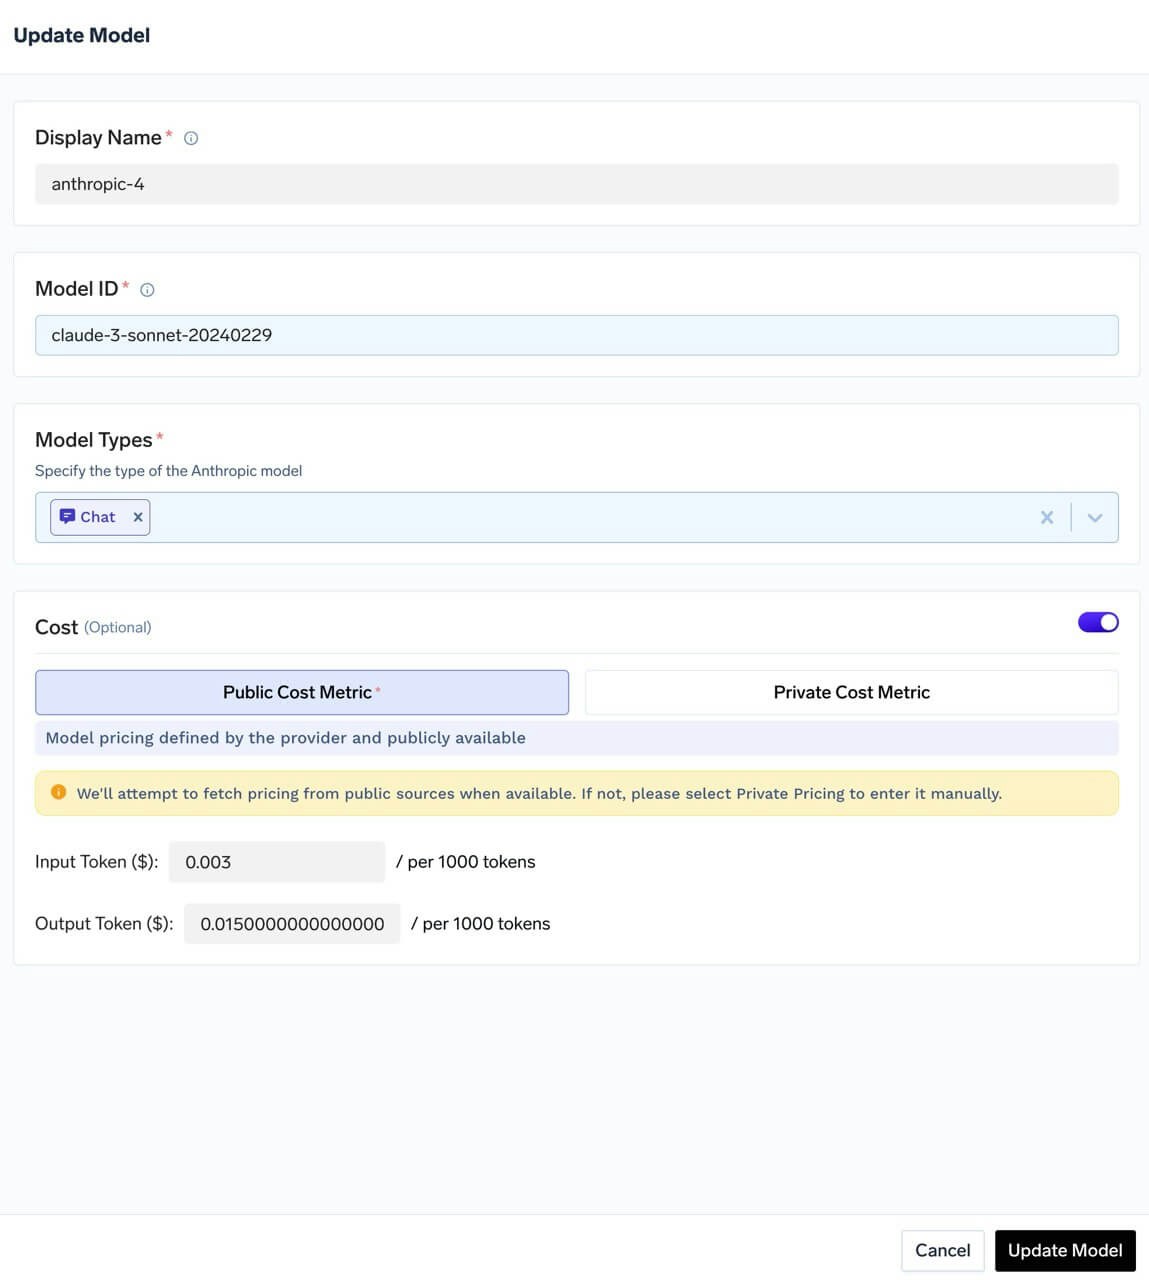
Setting up public cost
- Automatically populated cost per token
- Always up-to-date with official provider rates
- Available for most popular models
2. Private Cost - Custom Pricing
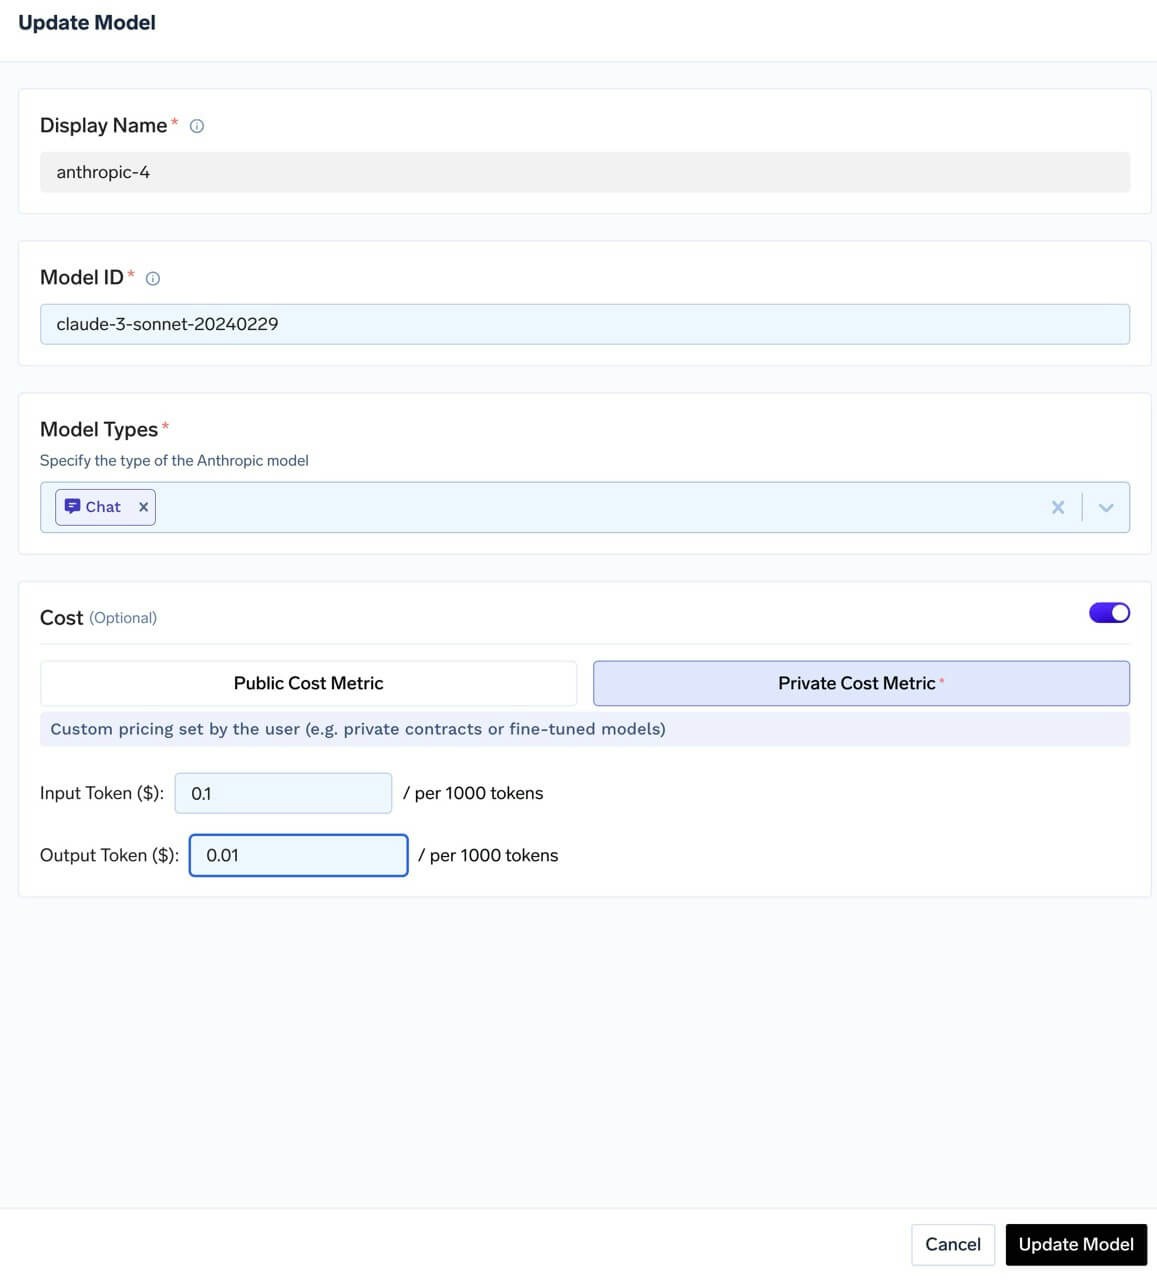
Setting up private cost
- Models without public pricing
- Custom pricing contracts
- Fine-tuned models
Viewing Your Costs
Once set up, you can easily view and analyze your costs in the Metrics section. Go toAI Gateway > Metrics.
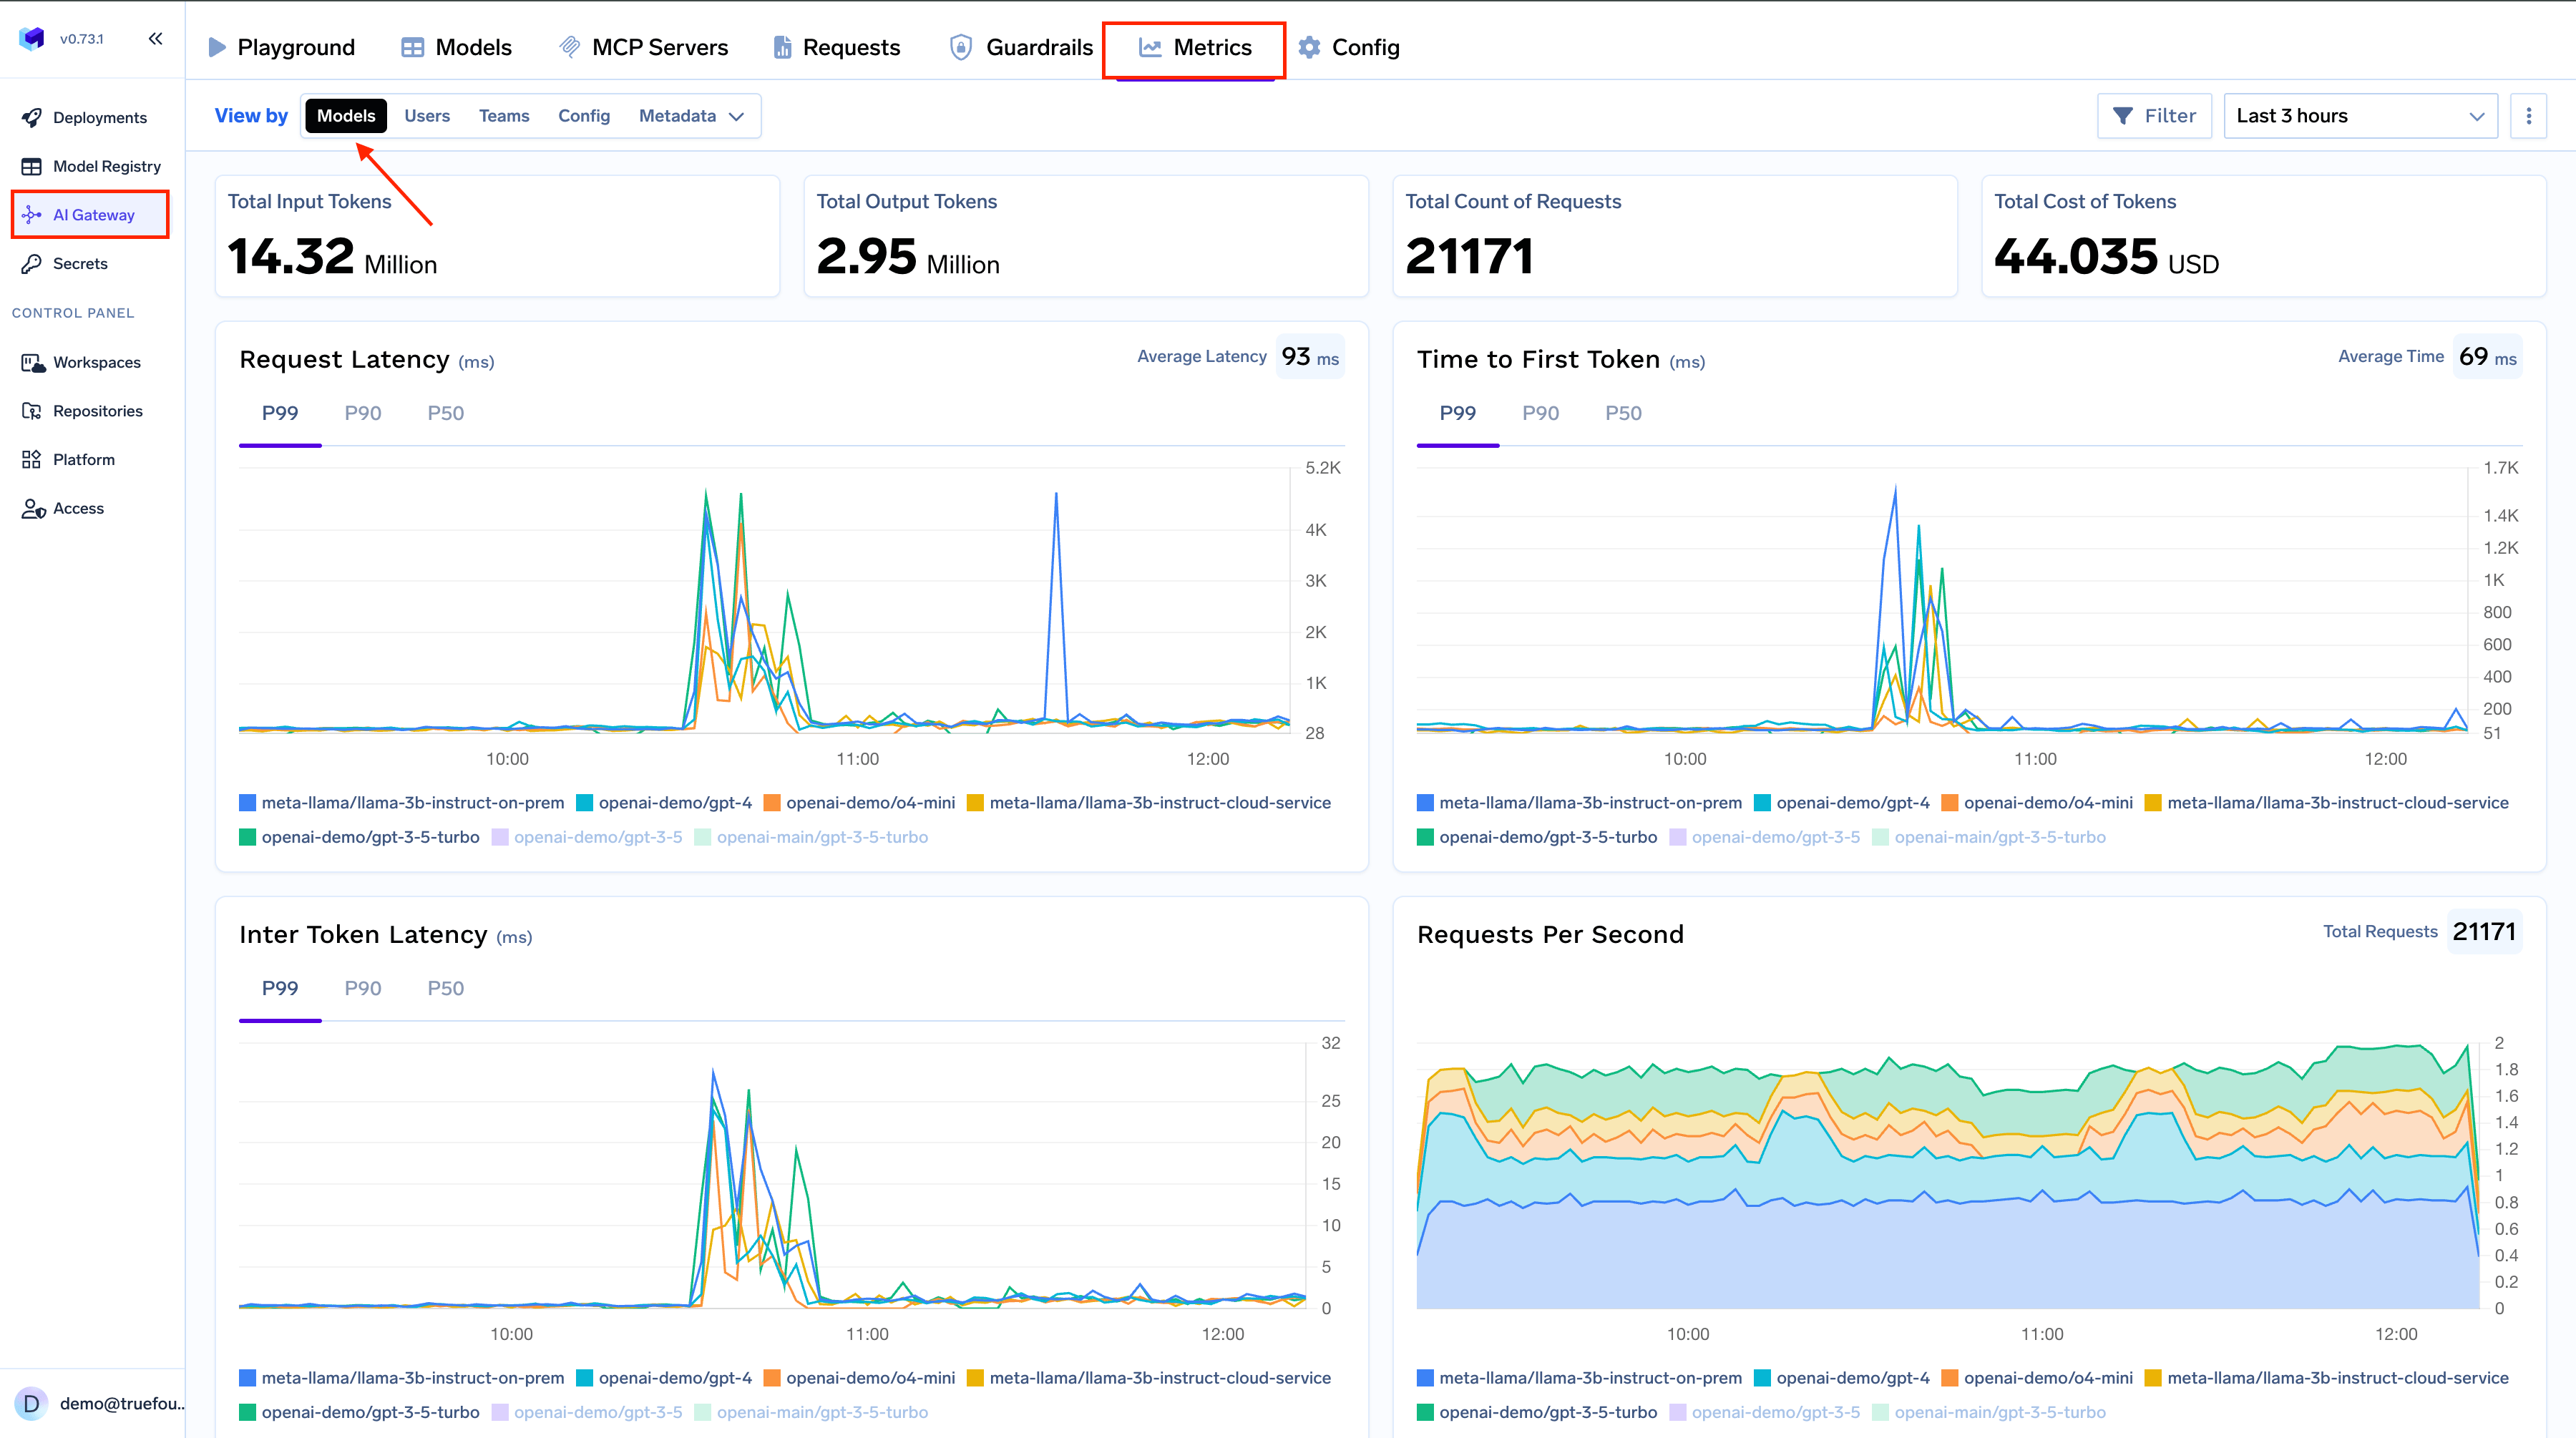
Metrics page overview
Cost Breakdowns
View your costs from different perspectives with a single click: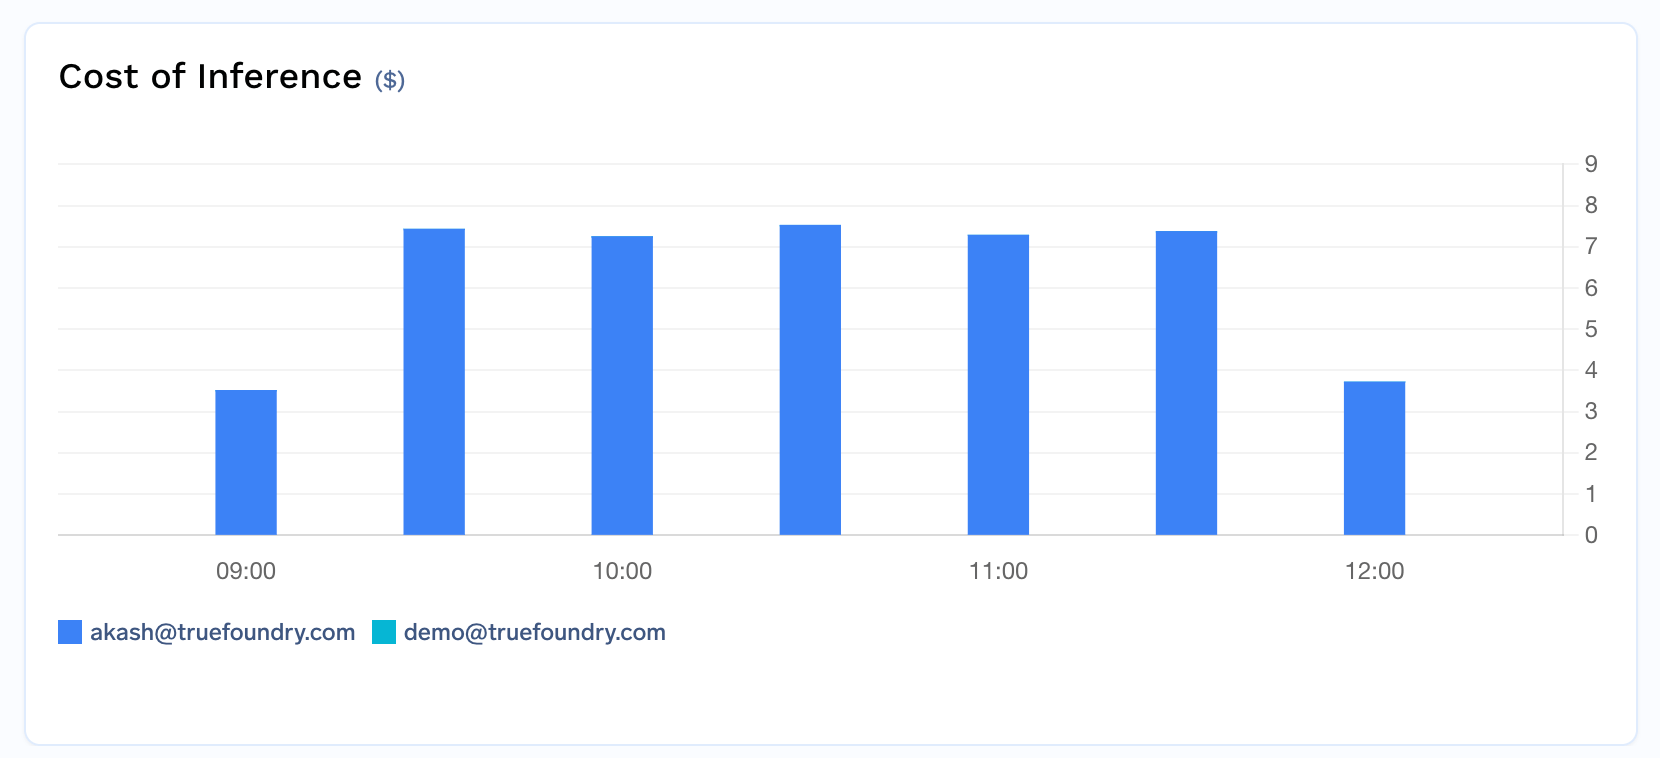
Cost by user
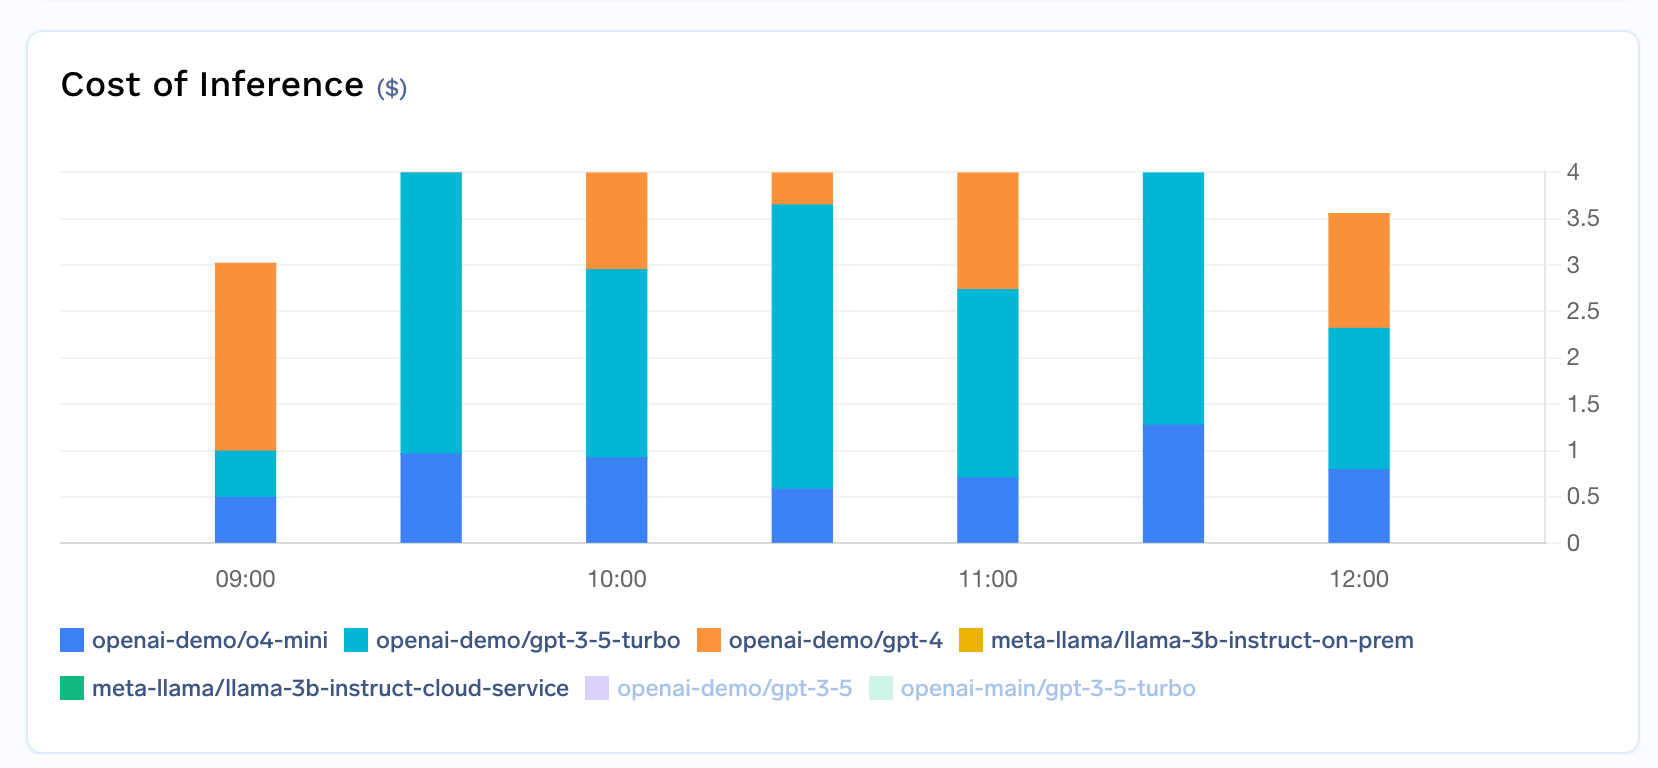
Cost by model
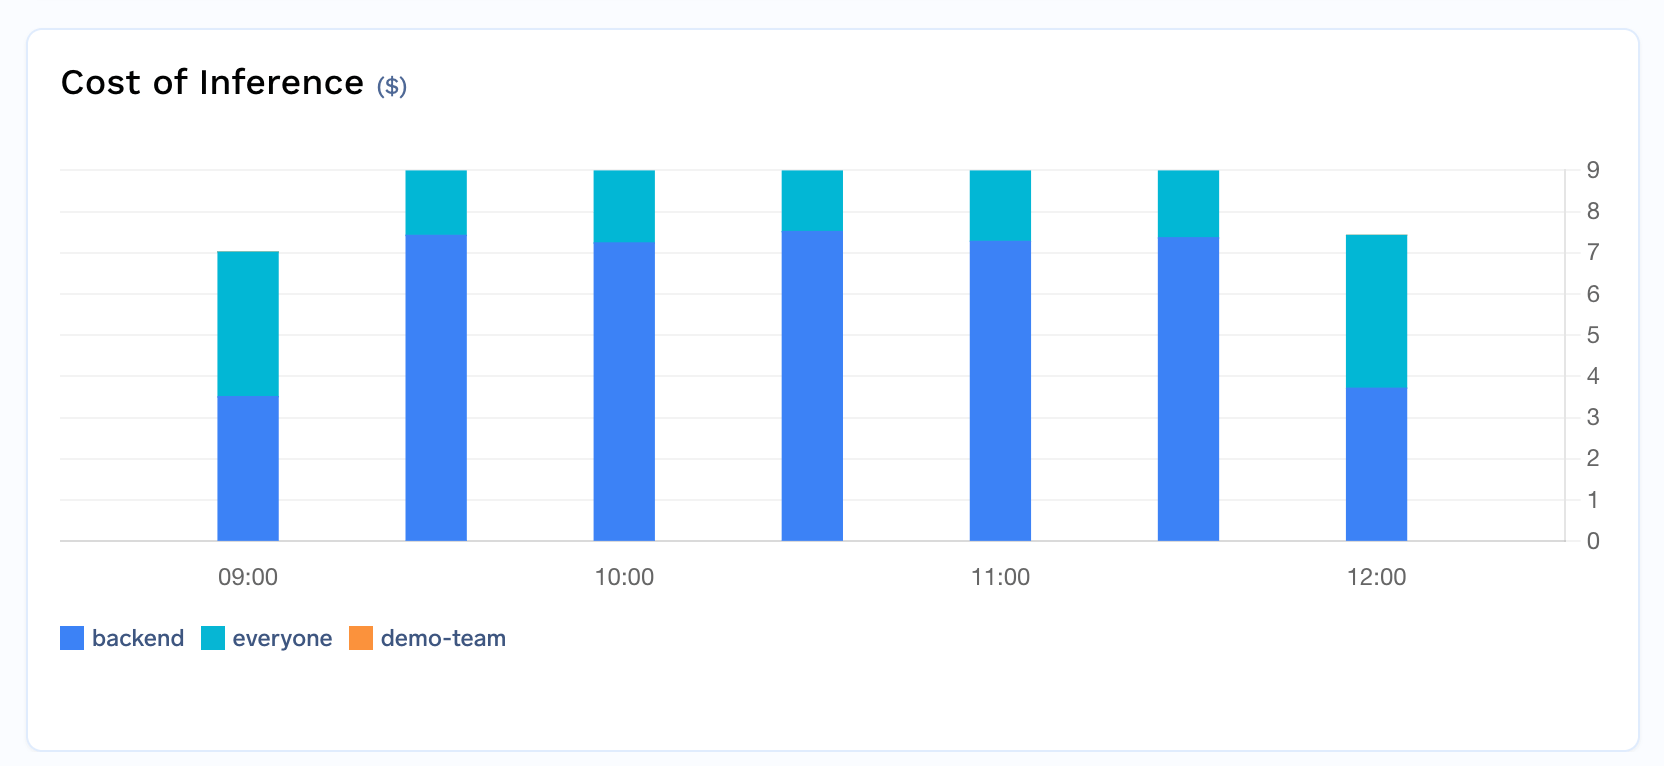
Cost by team
- User view: Identify high-usage individuals
- Model view: See which models cost the most
- Team view: Track department or project spending
Exporting Cost Data
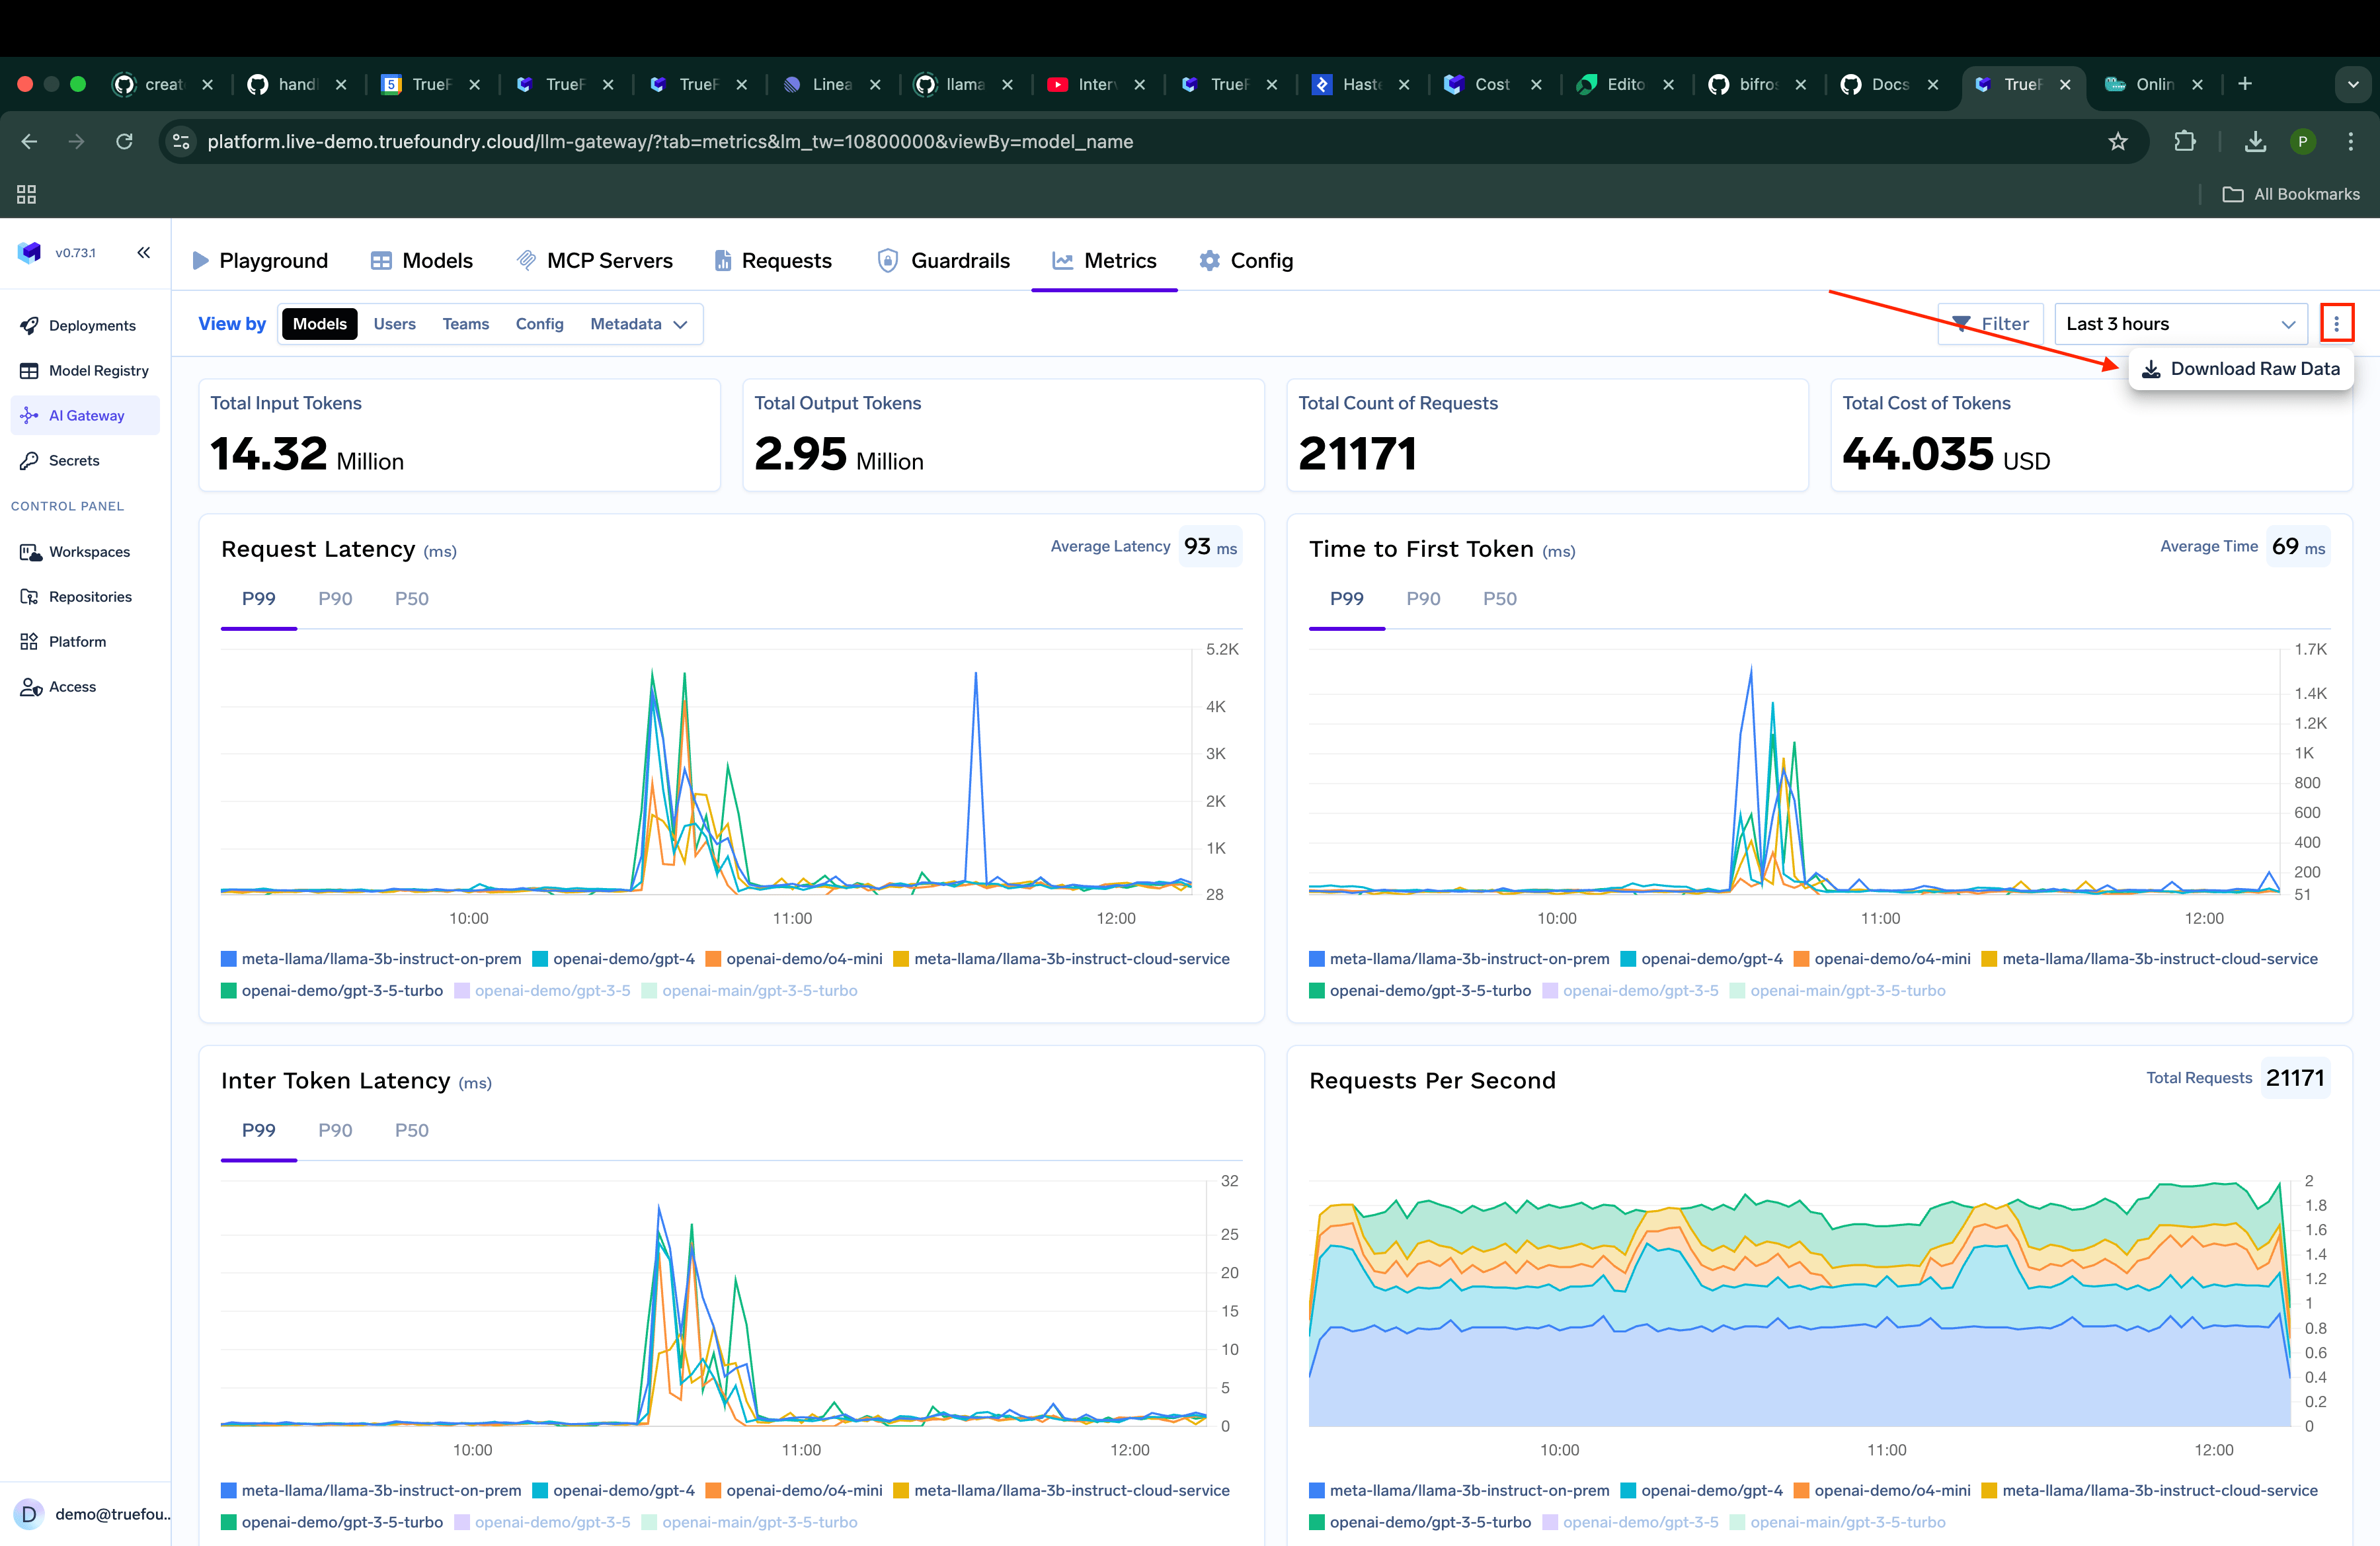
Downloading cost data
- Go to the
Metricssection - Click on the
3 dotsbutton and then click onDownload Raw Data - Choose the fields you want to
groupBythe data
Custom Grouping Options
You can customize how data is grouped in your exports. Simply select the fields you want to group by, such as username, model_name, or teams, to get exactly the data organization you need for your analysis.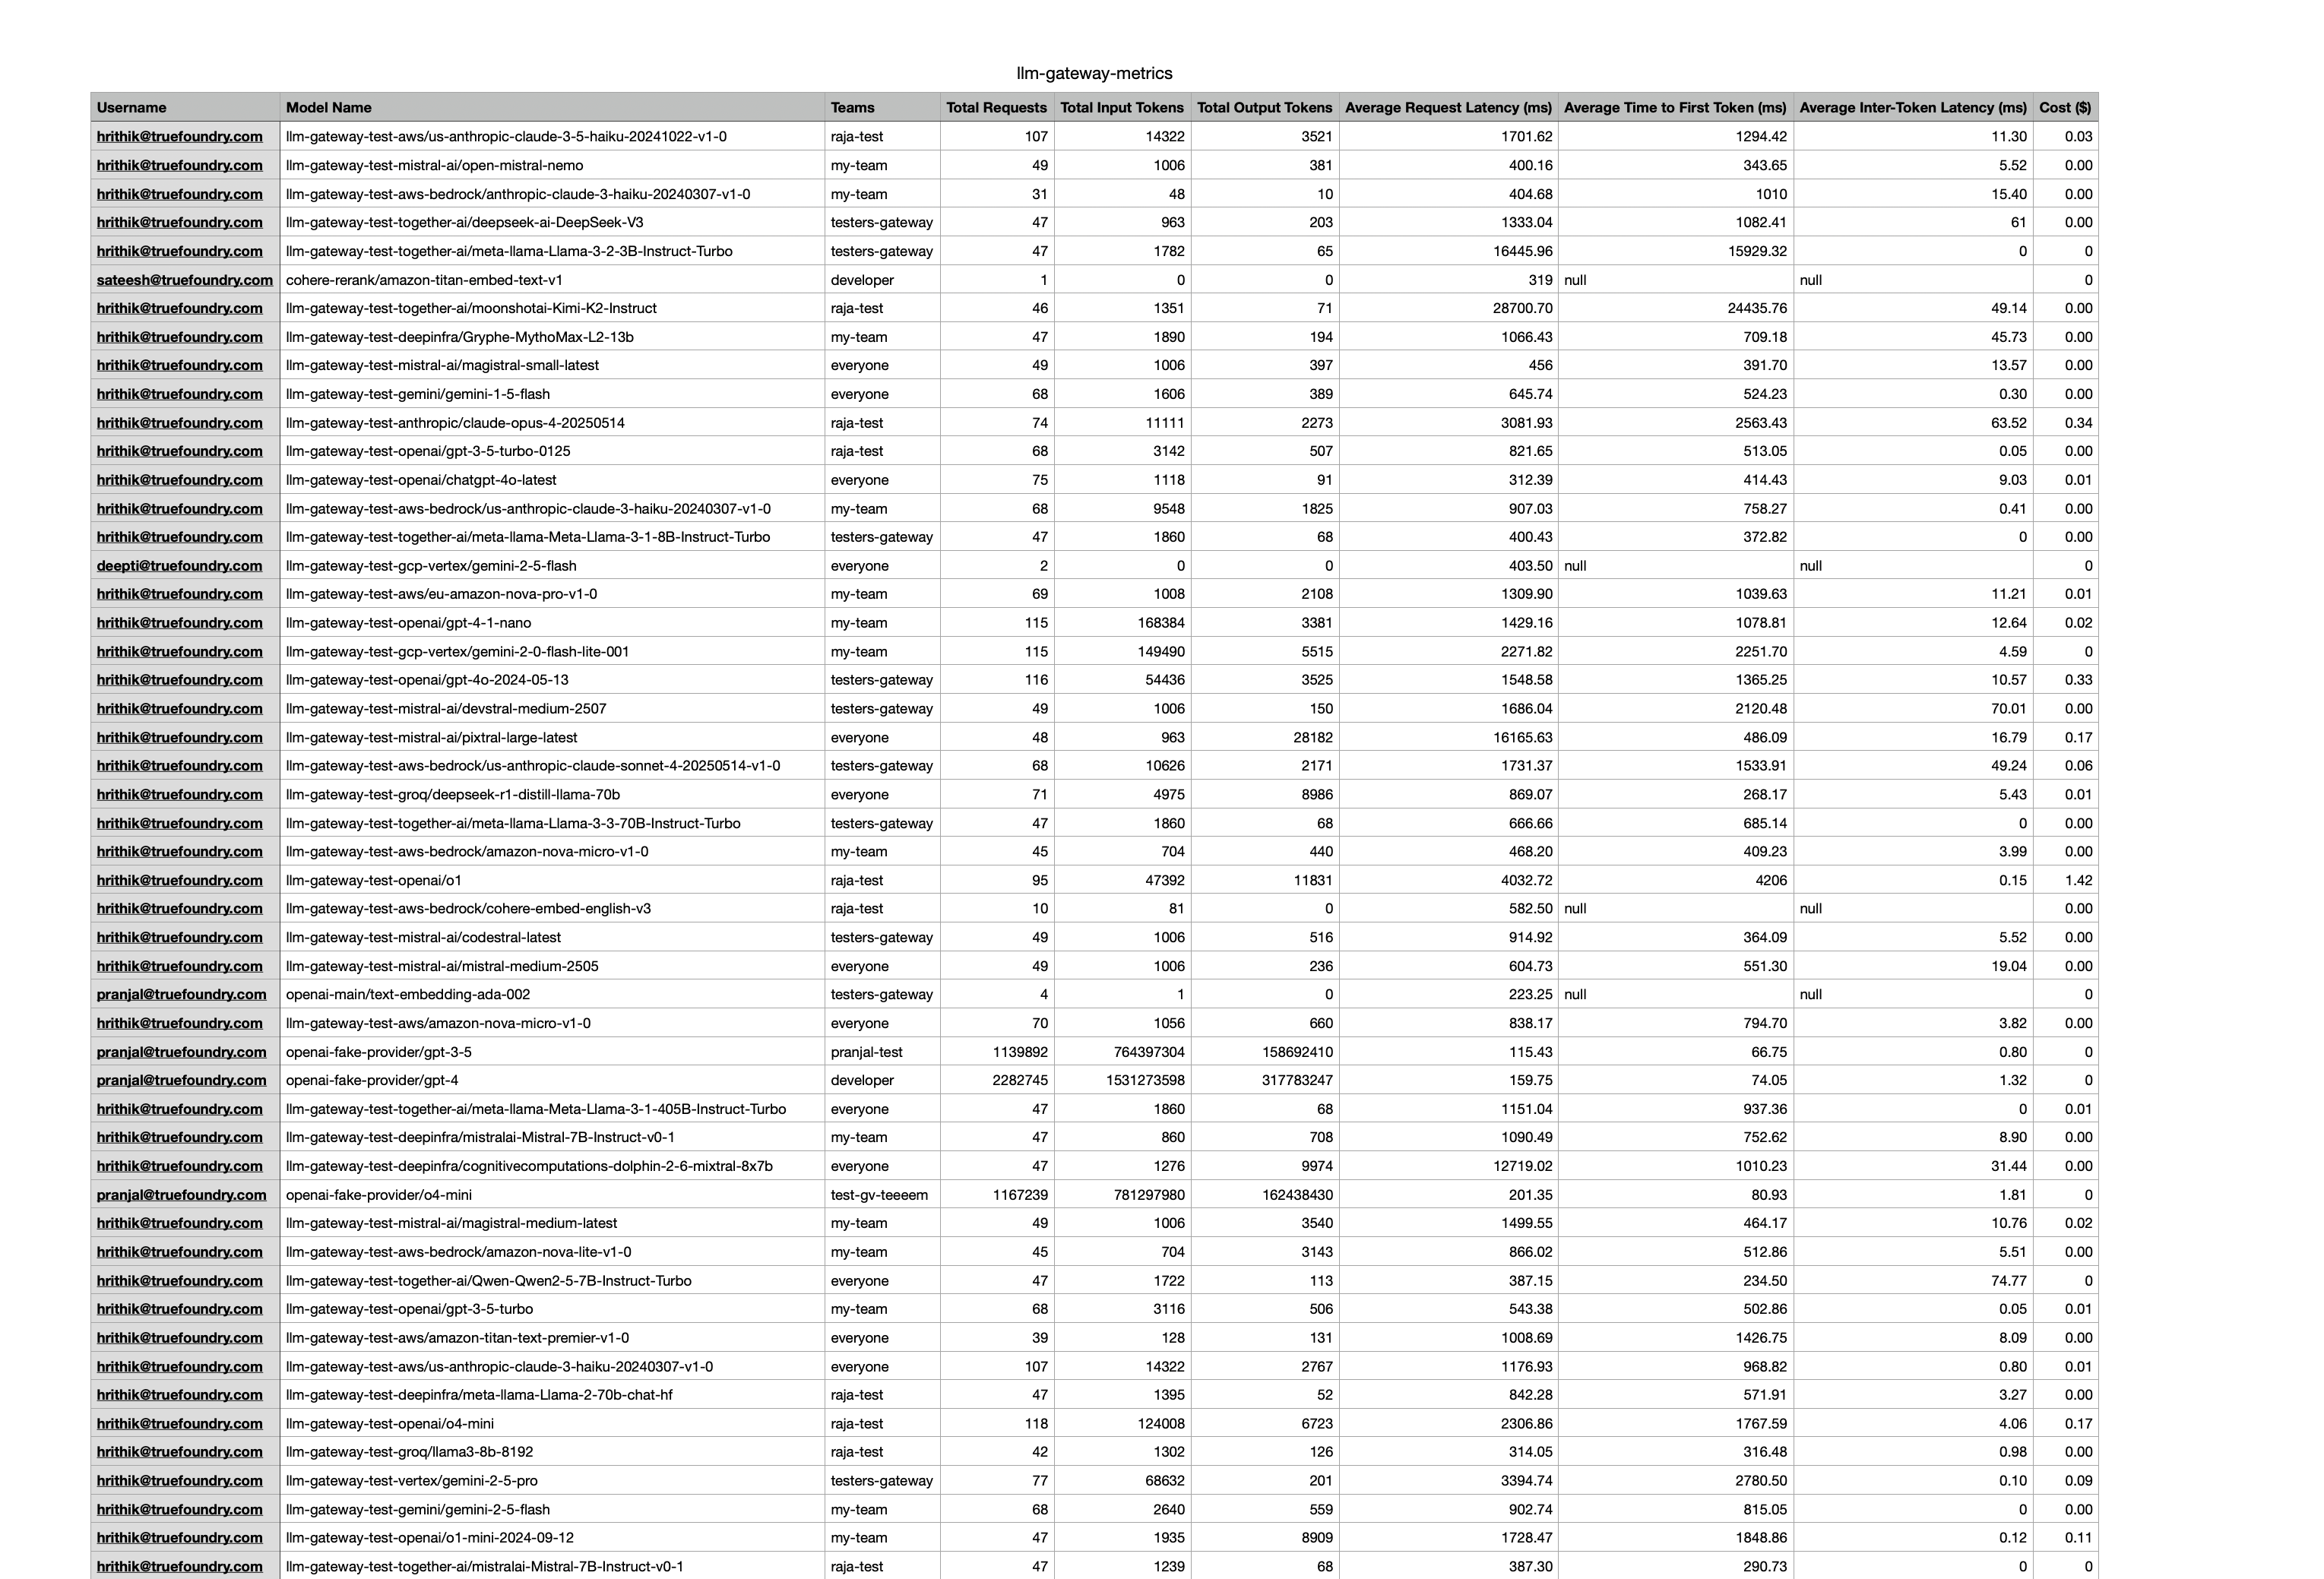
Custom grouping options