What is Roo Code?
Roo Code is an AI-powered VS Code extension that empowers developers to build better software faster with intelligent coding assistance.Key Features of Roo Code
- Intelligent Code Generation: Roo Code provides context-aware code completion, function generation, and entire code block creation based on natural language prompts. The extension understands your project context and coding patterns to generate relevant, high-quality code that follows best practices and maintains consistency with your existing codebase.
- AI-Powered Debugging and Refactoring: Advanced debugging assistance helps identify issues, suggest fixes, and explain error messages in plain language. The extension can also refactor existing code for better performance, readability, and maintainability while preserving functionality and following modern coding standards.
- Seamless VS Code Integration: Built specifically for Visual Studio Code, Roo Code integrates naturally with your existing development workflow. It works alongside other VS Code extensions, supports multiple programming languages, and provides contextual suggestions without disrupting your coding flow or requiring external tools.
Prerequisites
Before integrating Roo Code with TrueFoundry, ensure you have:- TrueFoundry Account: Create a Truefoundry account with atleast one model provider and generate a Personal Access Token by following the instructions in Generating Tokens
- Roo Code Extension: Install Roo Code from the VS Code Marketplace
Integration Guide
Step 1: Install Roo Code Extension
If you haven’t already installed Roo Code:- Open VS Code: Launch Visual Studio Code
- Access Extensions: Click the Extensions icon in the Activity Bar (Ctrl+Shift+X)
- Search for Roo Code: Type “Roo Code” in the search bar
- Install Extension: Click “Install” on the Roo Code extension by RooCode

Install Roo Code from VS Code Marketplace
Step 2: Get TrueFoundry Gateway Configuration
Before configuring Roo Code, gather your TrueFoundry Gateway details:- Navigate to AI Gateway Playground: Go to your TrueFoundry AI Gateway playground
- Access Unified Code Snippet: Use the unified code snippet
- Copy Base URL and Model Name: You will get both the base URL and model name from the unified code snippet (ensure you use the same model name as written)
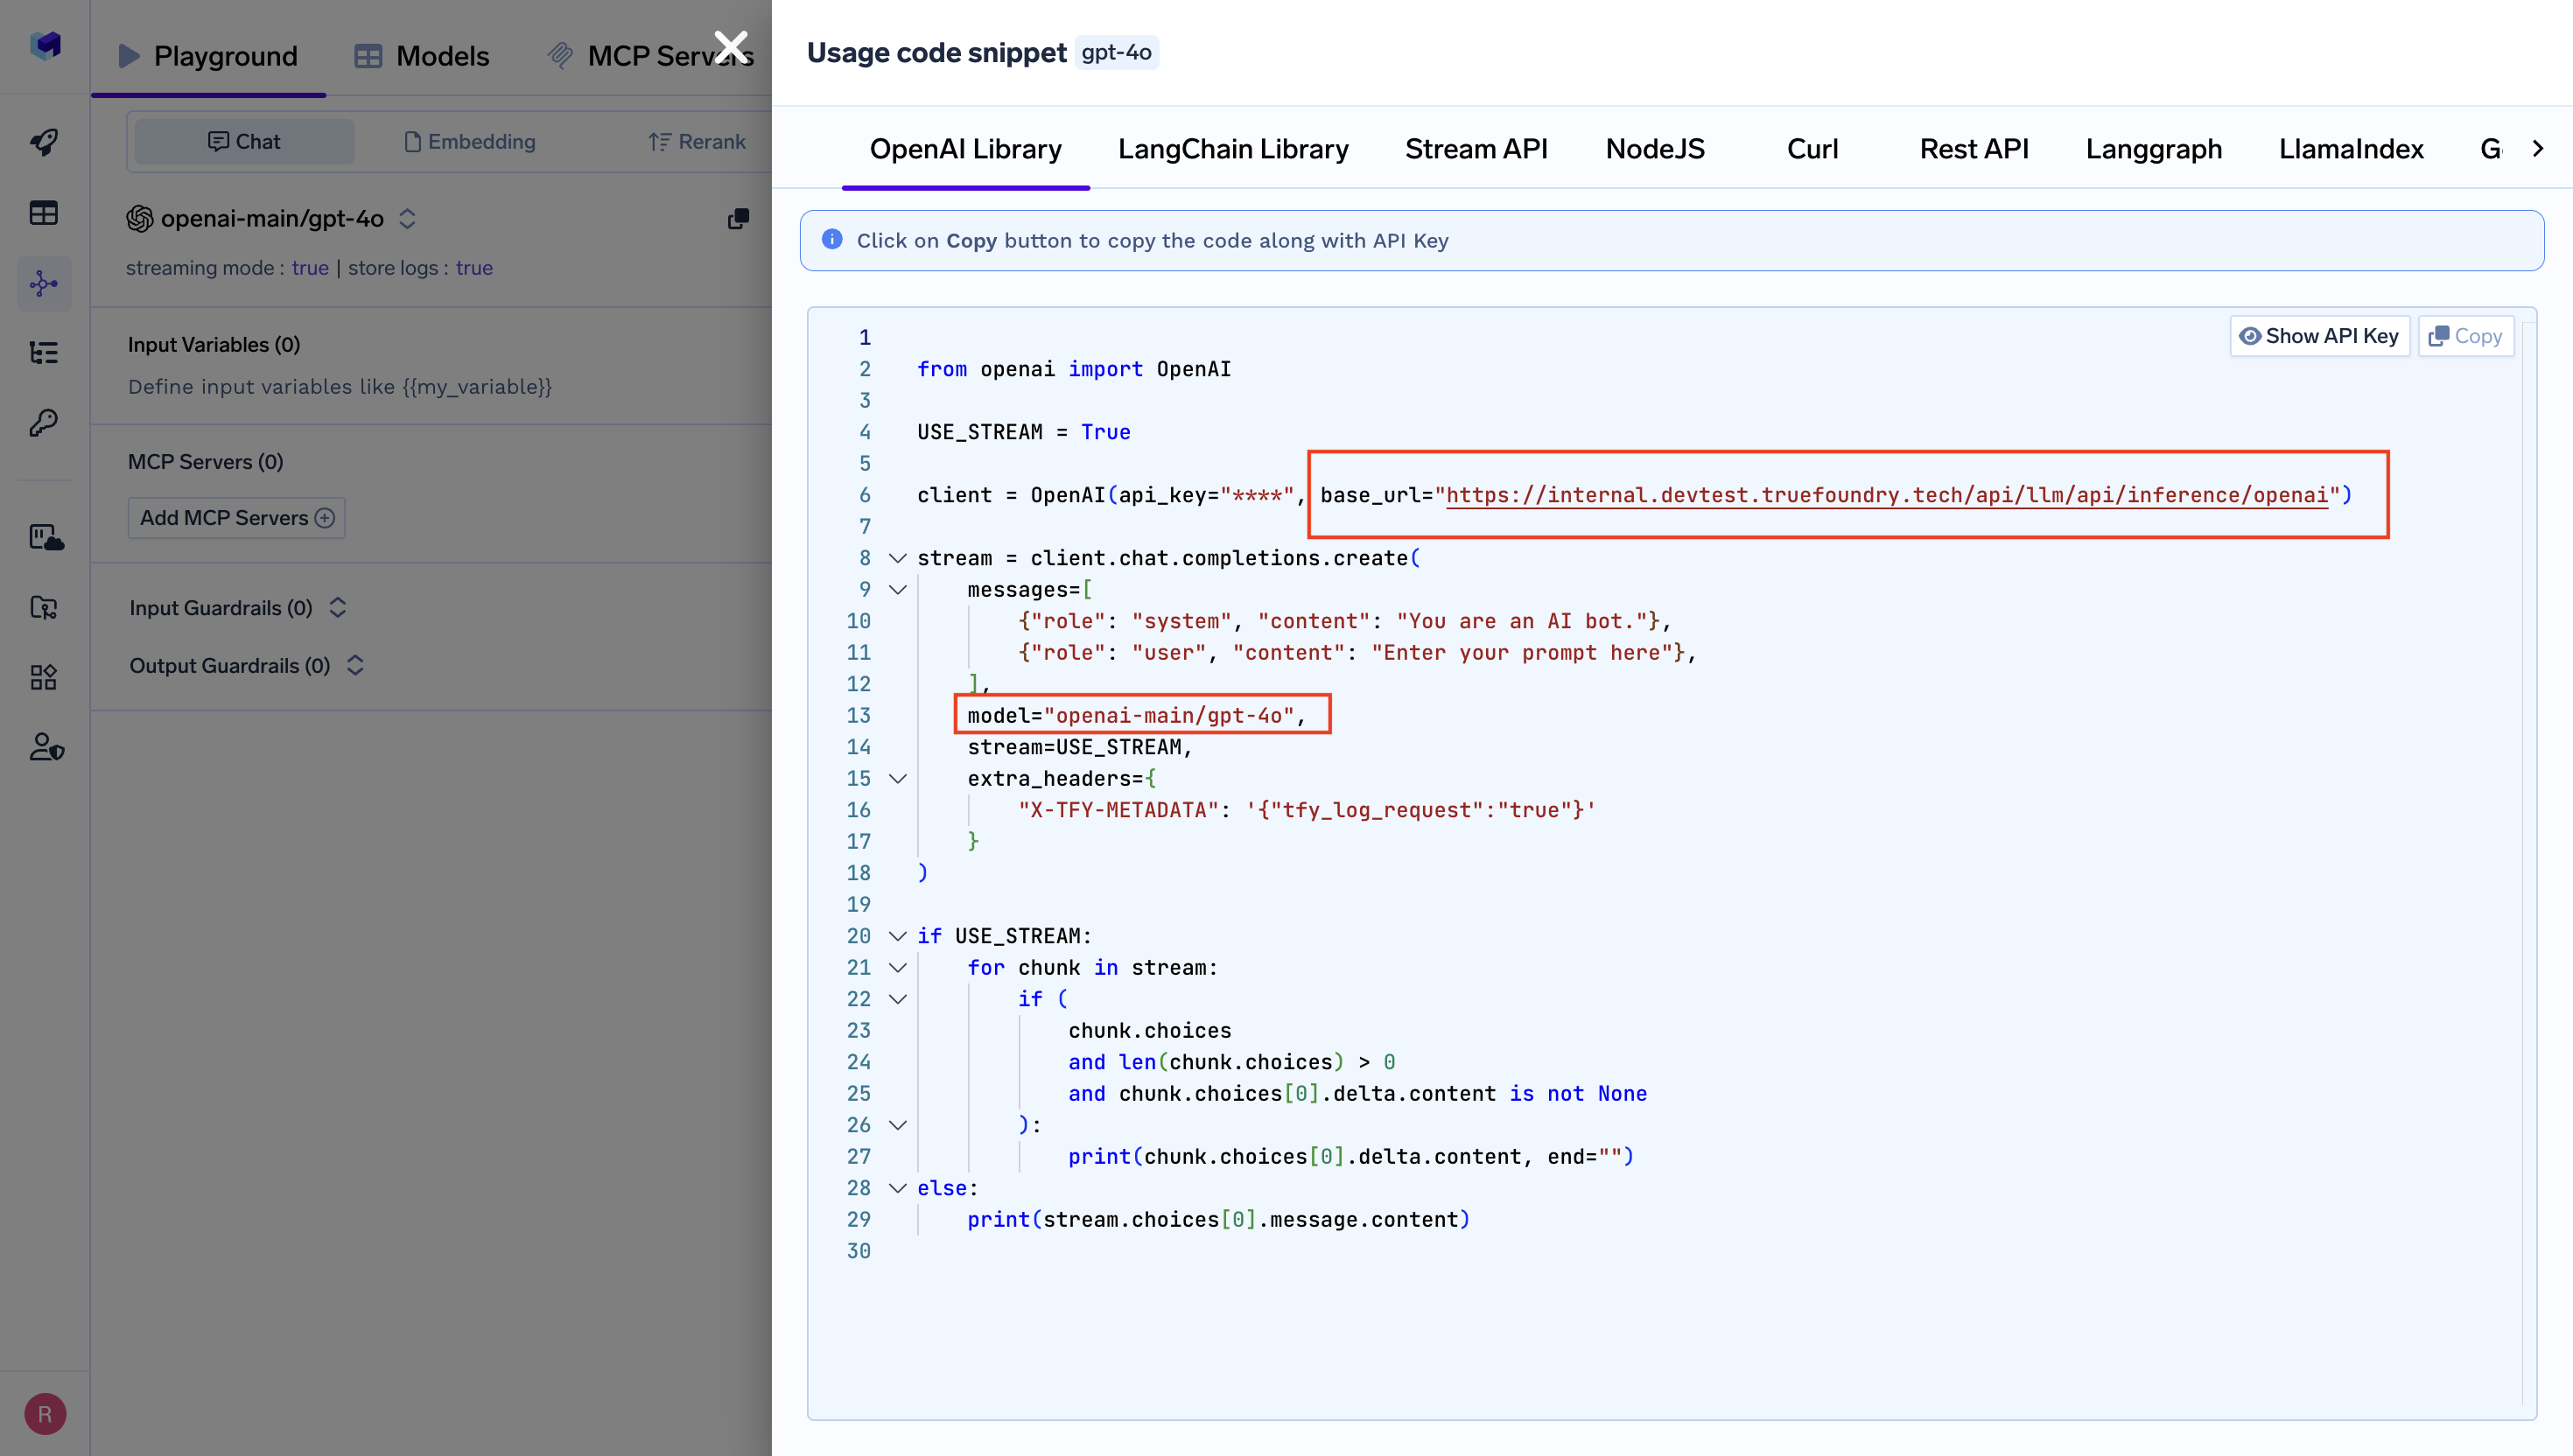
Get Base URL and Model Name from Unified Code Snippet
Step 3: Configure Roo Code with TrueFoundry Gateway
- Open Roo Code Sidebar: Click the Roo Code icon (🦘) in the VS Code Activity Bar
- Access Configuration: In the welcome screen or settings, look for API provider configuration
- Select Custom Provider: Choose “Custom” or “OpenAI Compatible” from the provider dropdown
-
Configure TrueFoundry Settings:
- Base URL: Enter your TrueFoundry Gateway URL (e.g.,
https://your-control-plane.truefoundry.cloud/api/llm) - API Key: Paste your TrueFoundry authentication token
- Model Name: Copy the model name from our Gateway playground”
- Base URL: Enter your TrueFoundry Gateway URL (e.g.,

TrueFoundry Configuration in Roo Code
Step 4: Complete Configuration
- Configure Model: Enter the model name from the unified code snippet you copied in Step 2
- Save Configuration: Click “Save” or “Let’s go!” to apply your settings
-
openai-main/gpt-4o: Best for complex code generation and reasoning tasks -
anthropic-main/claude-3-5-sonnet: Excellent for code understanding and following instructions - Use the exact model name as shown in your TrueFoundry Gateway unified code snippet
Step 5: Test Your Integration
- Test Connection: Open a code file and try asking Roo Code a question
- Verify Functionality: Ensure responses are generated through TrueFoundry Gateway

Testing Roo Code with TrueFoundry
Advanced Configuration
Multiple Model Profiles
Configure different profiles for various use cases:Custom Instructions
Enhance Roo Code’s performance with TrueFoundry by setting custom instructions:Instructions