iris_classifier.joblib: The model fileserver.py: The main FastAPI code that loads the model and provides a REST api to serve the model.requirements.txt: Contains the dependencies.
How to write the inference function in FastAPI
Here’s an explanation of the code inserver.py
Running the server locally
Shell gunicorn
http://localhost:8000/docs to try out our API.
Deploying with TrueFoundry
To deploy the model, we need to package both the model file and the code. To do this, we can follow the steps below:1
Log the Model To Model Registry
Logging the model to the registry is not mandatory to deploy the model, but is highly recommended. You can follow the guide here to log the model to the registry.
2
Push the code to a Git repository or directly deploy from local machine
Once you have tested your code locally, we highly recommend pushing the code a Git repository. This allows you to version control the code and also makes the deployment process much easier. However, if you don’t have access to a Git repository, or the Git repositories are not integrated with Truefoundry, you can directly deploy from local laptop.You can follow the guide here to deploy your code. A few key things to note:
3
Download Model from Model Registry in the deployment configuration
If you logged the model to the registry in Step 1, TrueFoundry can automatically download the model at the path specified in the 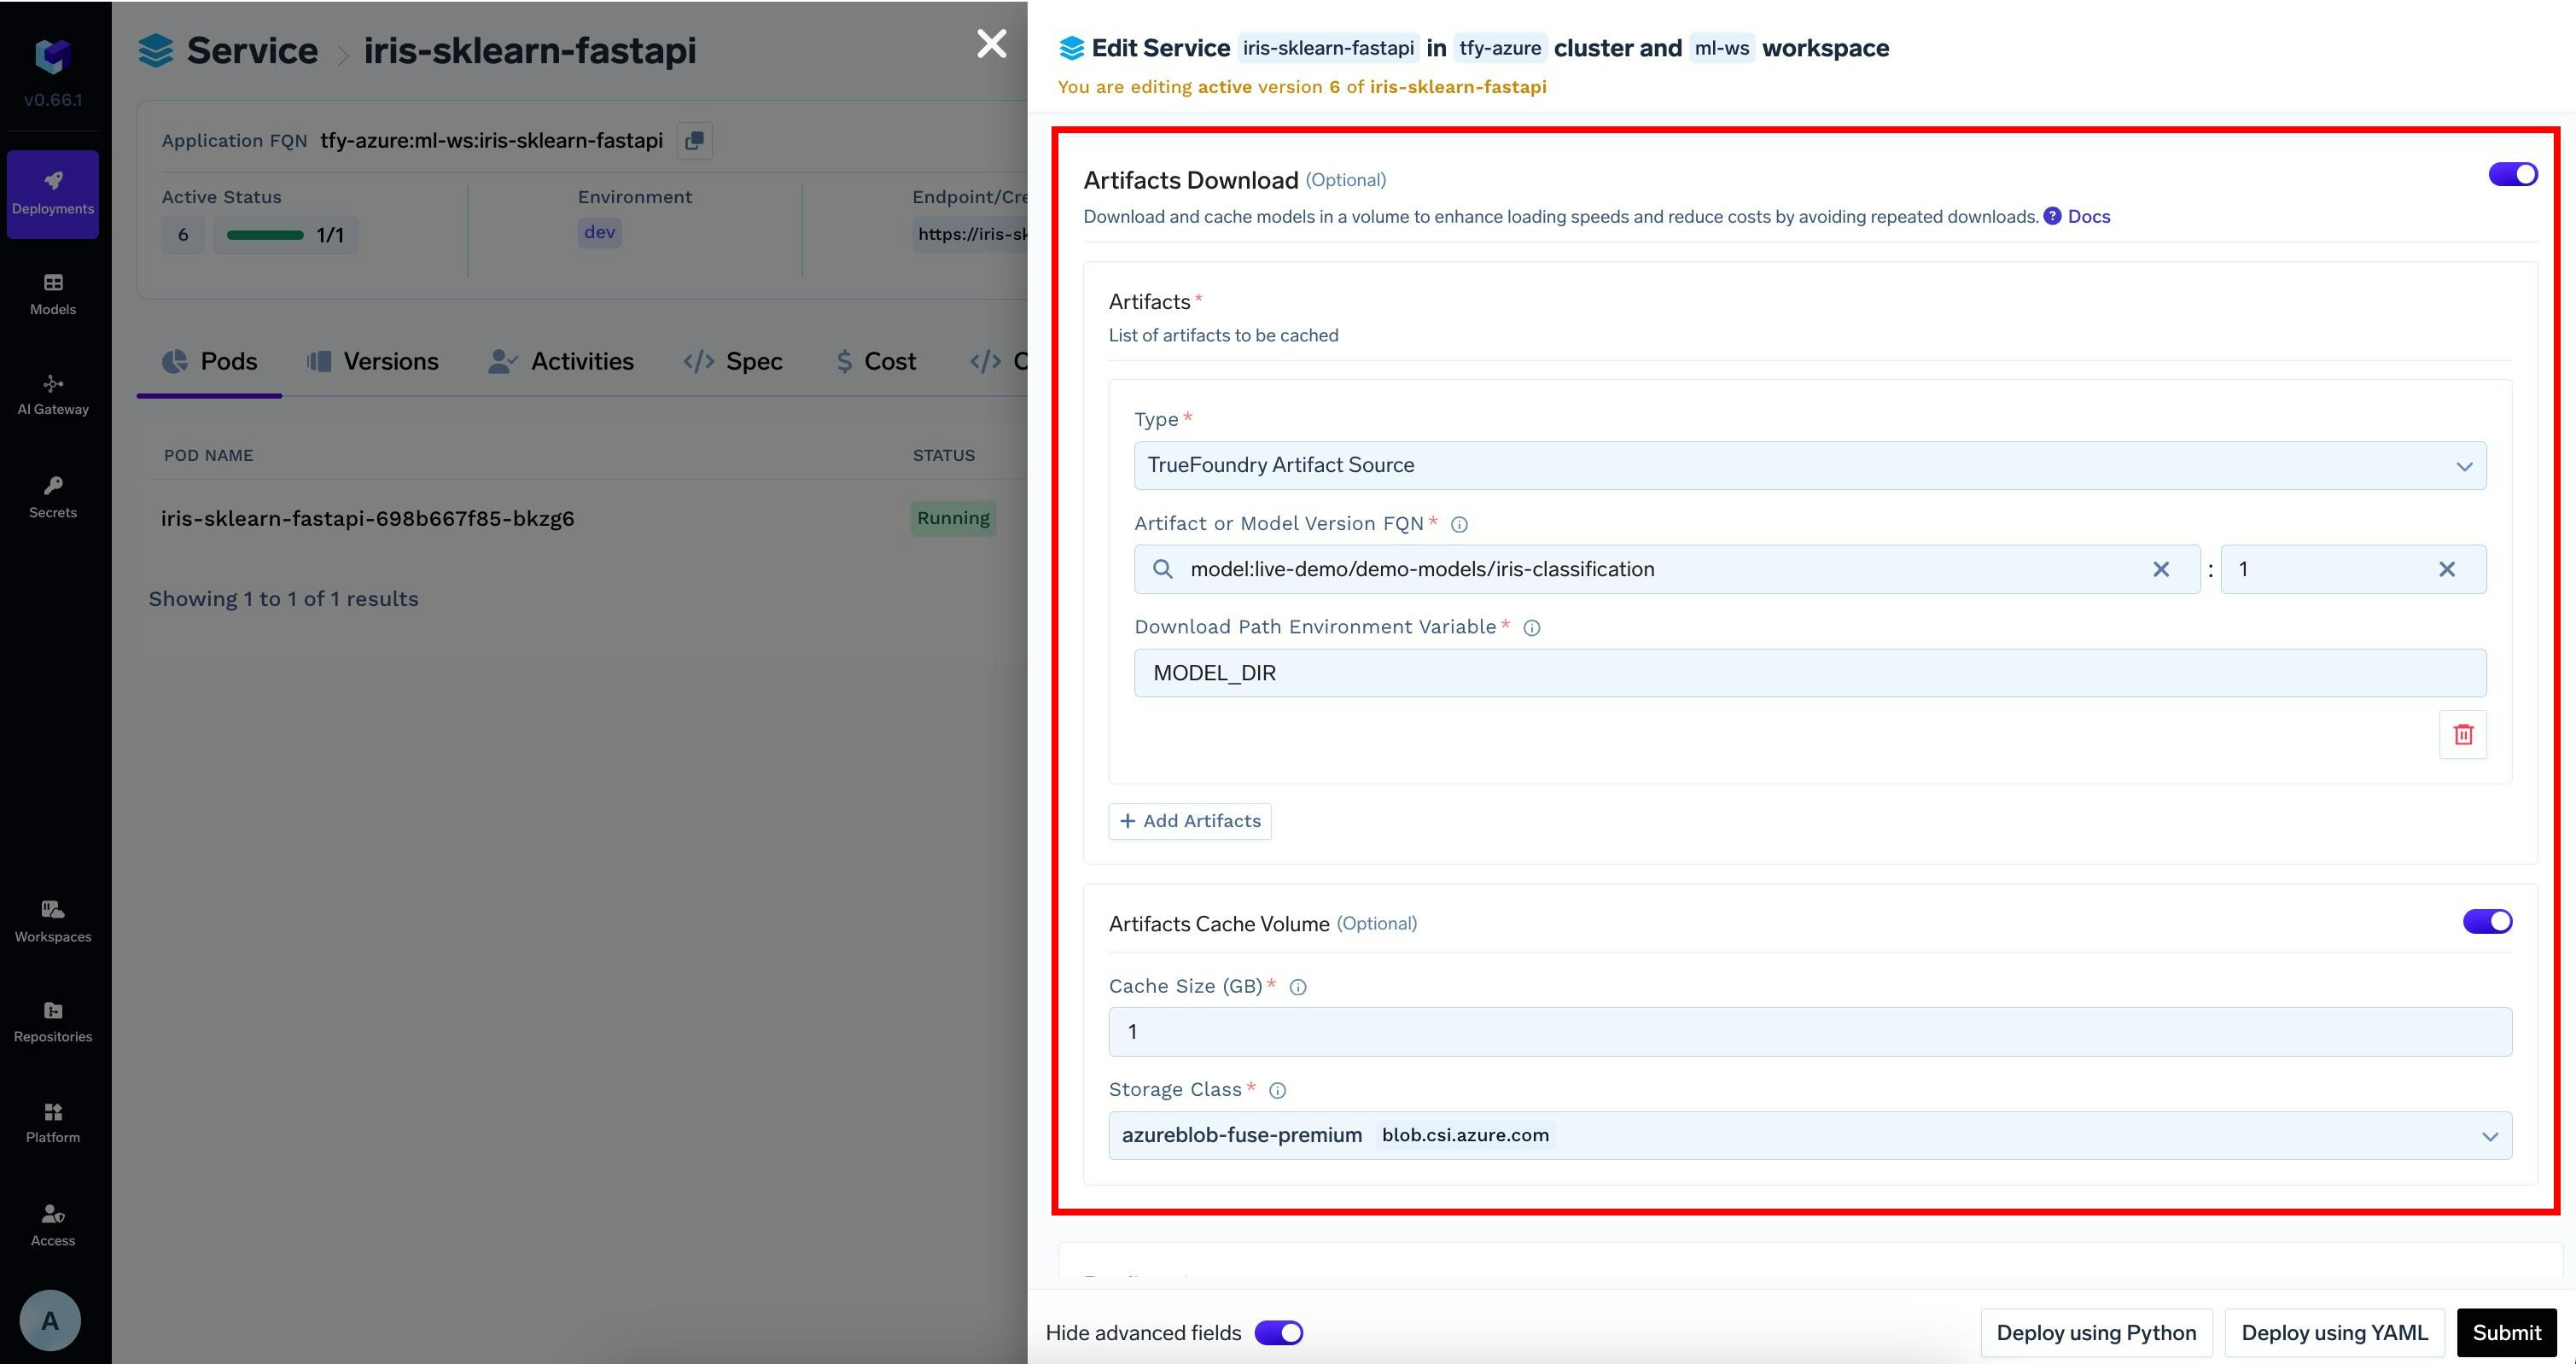
MODEL_DIR environment variable to the deployed service.
To enable this, you can modify the deployment configuration as follows:4
View the deployment, logs and metrics
Once the deployment goes through, you can view the deployment, the pods, logs, metrics and events to debug any issues.
FAQ
How do I decide the resources for the deployment?
How do I decide the resources for the deployment?
The best way is to start with something high - like 1 CPU, 2 GB RAM. Once the service is up, you can see the resource usage from the metrics section and then adjust the resources accordingly.
How many Gunicorn workers should I use?
How many Gunicorn workers should I use?
We usually recommend to use 1 Gunicorn worker and instead use replicas field to scale the number of containers. This has several benefits:
- Stable CPU and Memory usage across replicas
- Even distribution of requests across replicas
- Higher availability and fault tolerance
Can the service handle more than 1 request at a time?
Can the service handle more than 1 request at a time?
FastAPI / Starlette uses asyncio to handle requests concurrently. Starlette’s ThreadPool count is set to
40 by default.
While this is useful to run many requests concurrently, ML Inference is compute bound, if our resources are not well tuned, we might get CPU Throttling or OOM.We can tune the number of threads like so:Can I use gevent or geventlet
Can I use gevent or geventlet
Generally when working with ML Inference and FastAPI, avoid using
gevent or eventlet as they are not compatible with asyncio.
Several machine learning libraries also use ThreadPools and ProcessPools which can cause issues with gevent or eventlet.Can I deploy the same service using Flask + Gunicorn?
Can I deploy the same service using Flask + Gunicorn?
Yes, you can deploy the same service using Flask + Gunicorn. However, we generally recommend using FastAPI as it is more modern and has better support for asyncio. In case you are using Flask:
- Use Gunicorn as the application server
- Use Gunicorn’s
syncworker class (it is the default worker class) instead ofgeventoreventlet - Use Gunicorn’s
--workersargument to increase parallelism per container.- Although, don’t set this to too high. We generally recommend setting it to
2so that health check and inference can run concurrently. For scaling beyond that, use Servicereplicas.
- Although, don’t set this to too high. We generally recommend setting it to