Register a New Keycloak Client
Navigate to Clients -> Create Client to create a new Keycloak Client. Set the following values:- Client Type: OpenID Connect in General Settings tab
- Client ID: truefoundry or any other name you prefer in General Settings tab

- Set Client Authentication to On in Capability Config tab
- Select Standard flow, Direct access grants and OAuth 2.0 Device Authorization Grant under Authentication flow in Capability Config tab.

- Set Valid Redirect URIs to
https://login.truefoundry.com/oauth2/callbackin Login Settings tab. Root URL can be set as your control plane URL.

Please note that we do not support RSA-OAEP as encryption algorithm. Please ensure that Keys with RSA-OAEP algorithm are not used. Support algorithms are ES384, HS384, ES256, HS256, HS512, PS384, RS384, PS256, RS256, PS512, RS512, none, ES512.

You can disable algorithm by disabling the Key provider under Realm Settings -> Keys.
You can disable algorithm by disabling the Key provider under Realm Settings -> Keys.
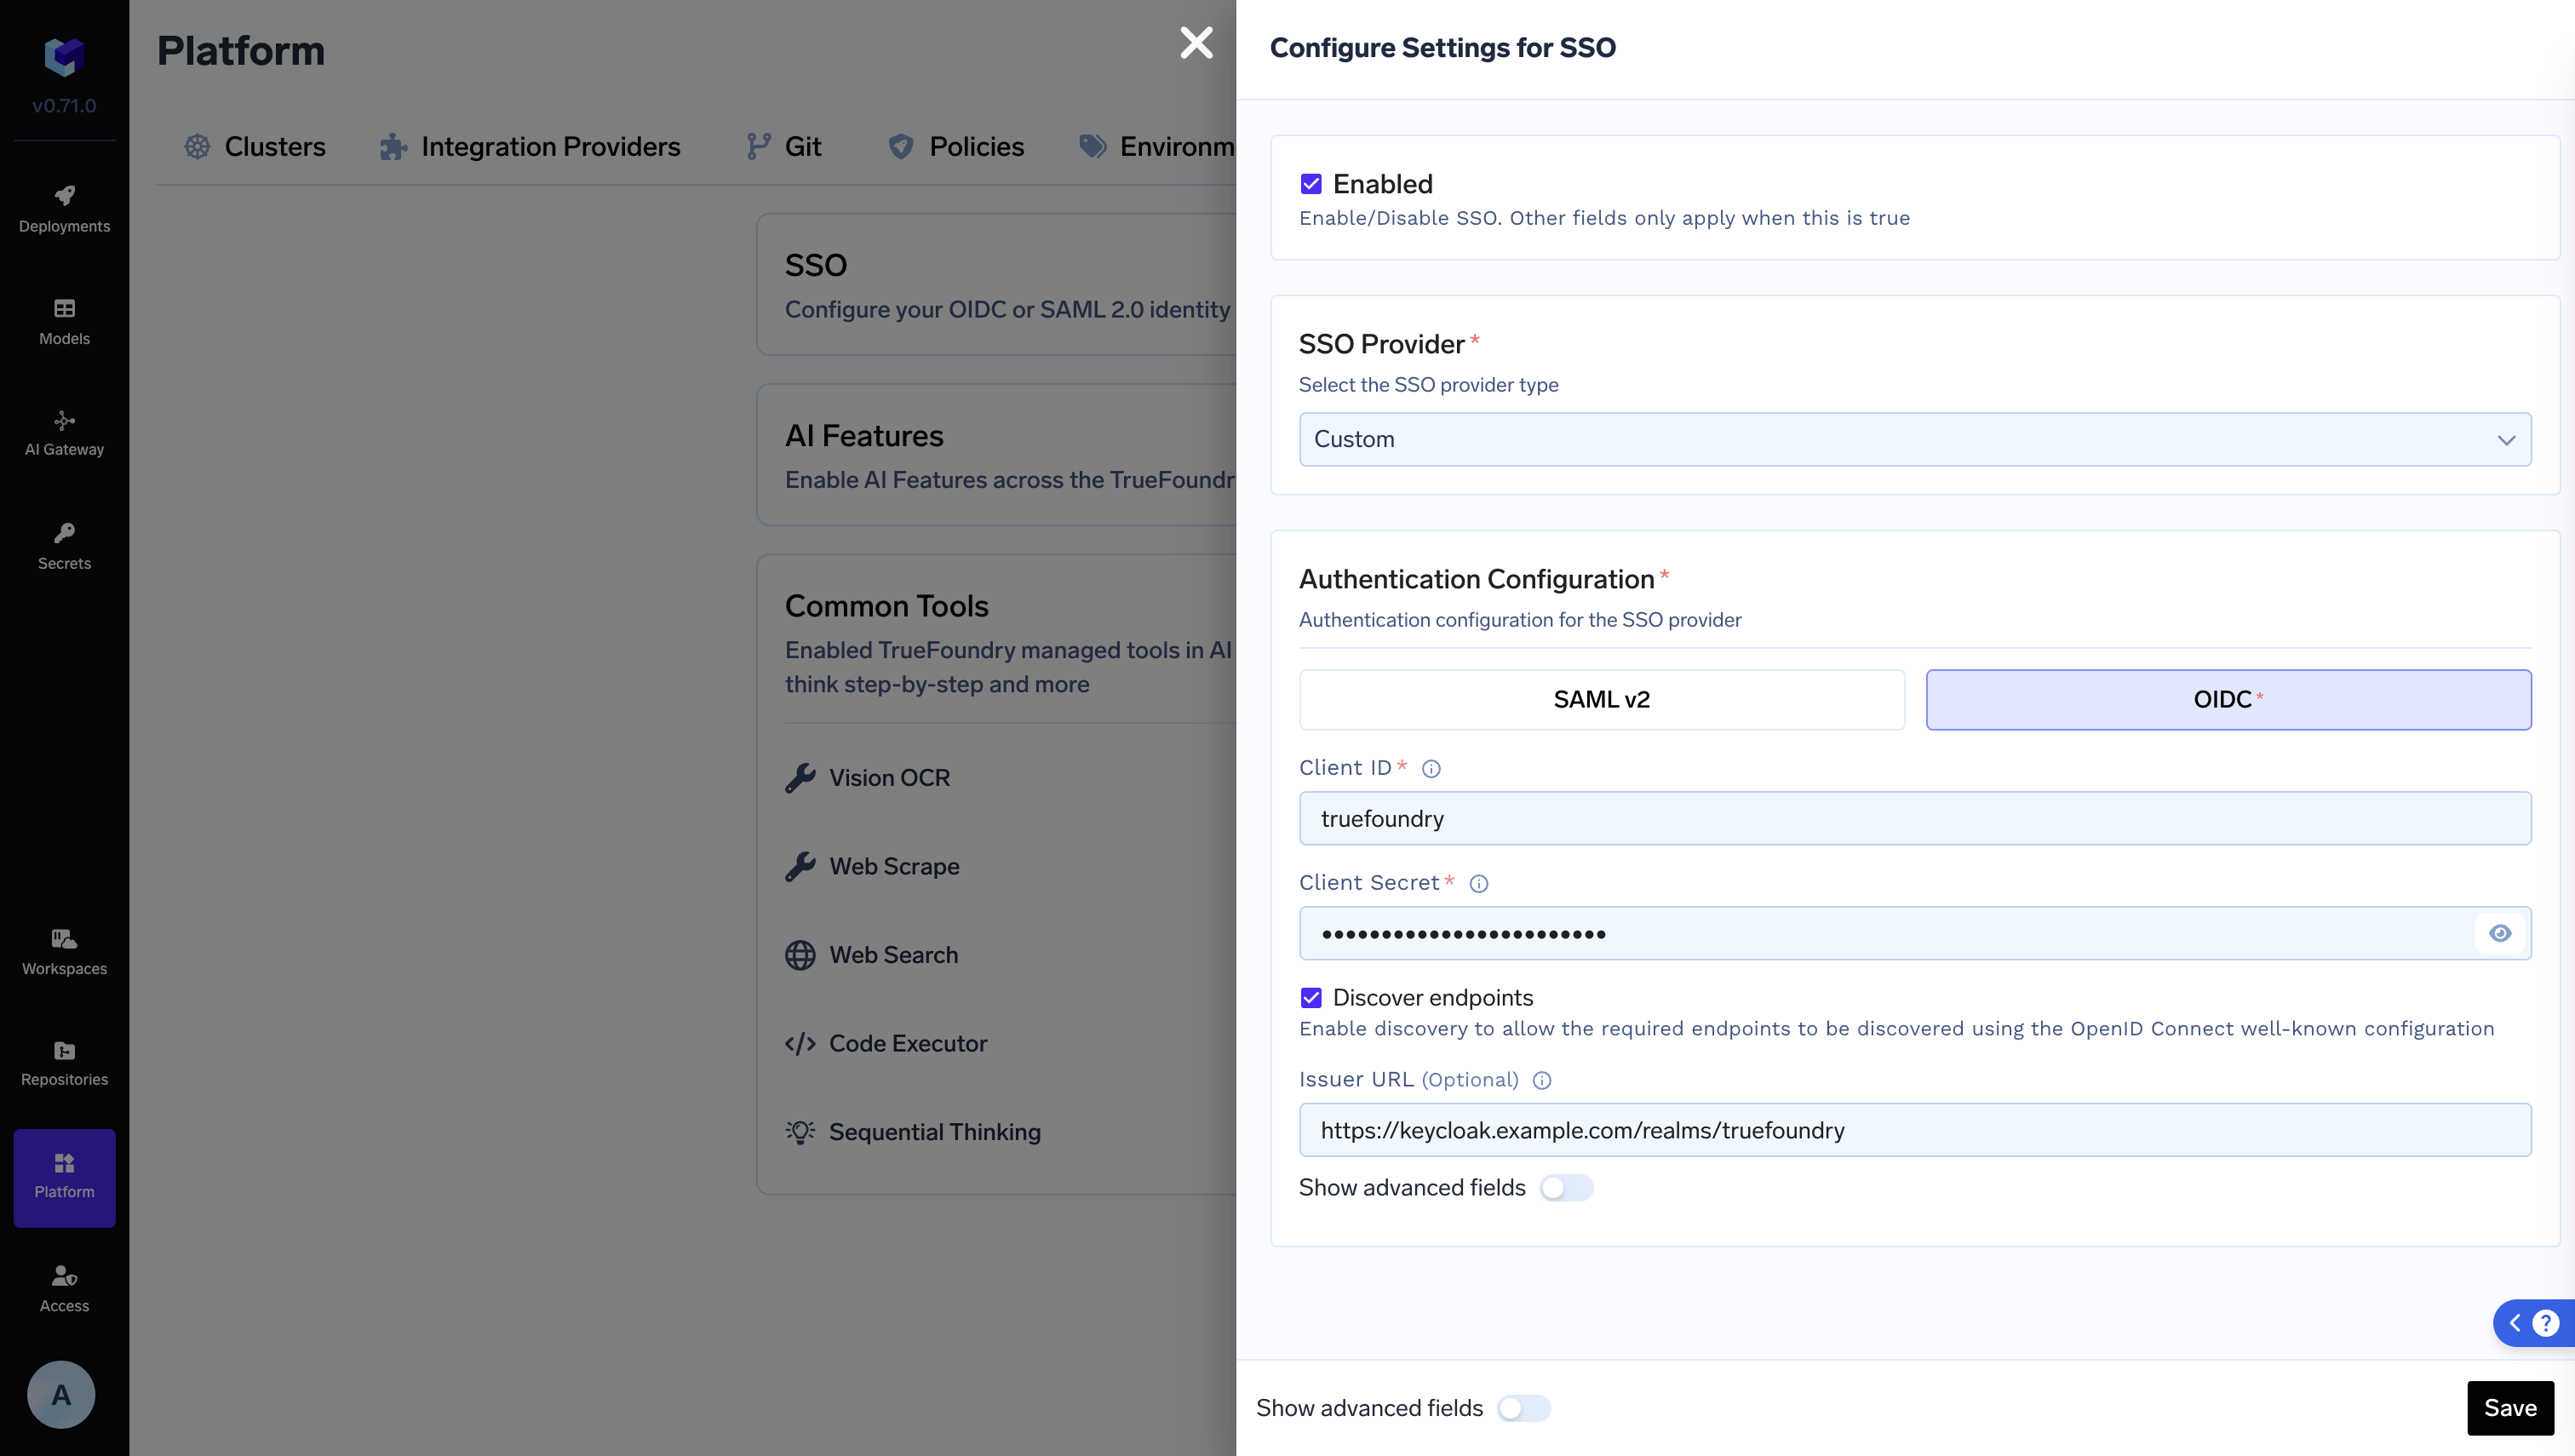
Integrate with TrueFoundry
To integrate Keycloak with TrueFoundry, Add the following configuration to TrueFoundry SSO settings- SSO Provider:
Custom - Select
OIDCas Authentication configuration - Set
Client IDto the client ID of your Keycloak application - Set
Client Secretto the client secret of your Keycloak application. Can be found inCredentialstab of your Keycloak client. - Set
Issuerto the issuer of your Keycloak application. Example:https://<keycloak-host>/realms/<realm-name>