Prerequisites
- Deploy your MCP Server and note the endpoint URL.
- Register a GitHub App in your GitHub account or organization.
Step 1: Deploy the GitHub MCP Server
- MCP Server code: GitHub MCP Server Repository
- Refer
github-mcp/truefoundry.yamlfor the deployment configuration on TrueFoundry. - Deploy it as a service on the TrueFoundry platform.
- Copy the deployment Endpoint URL—you’ll need it soon.
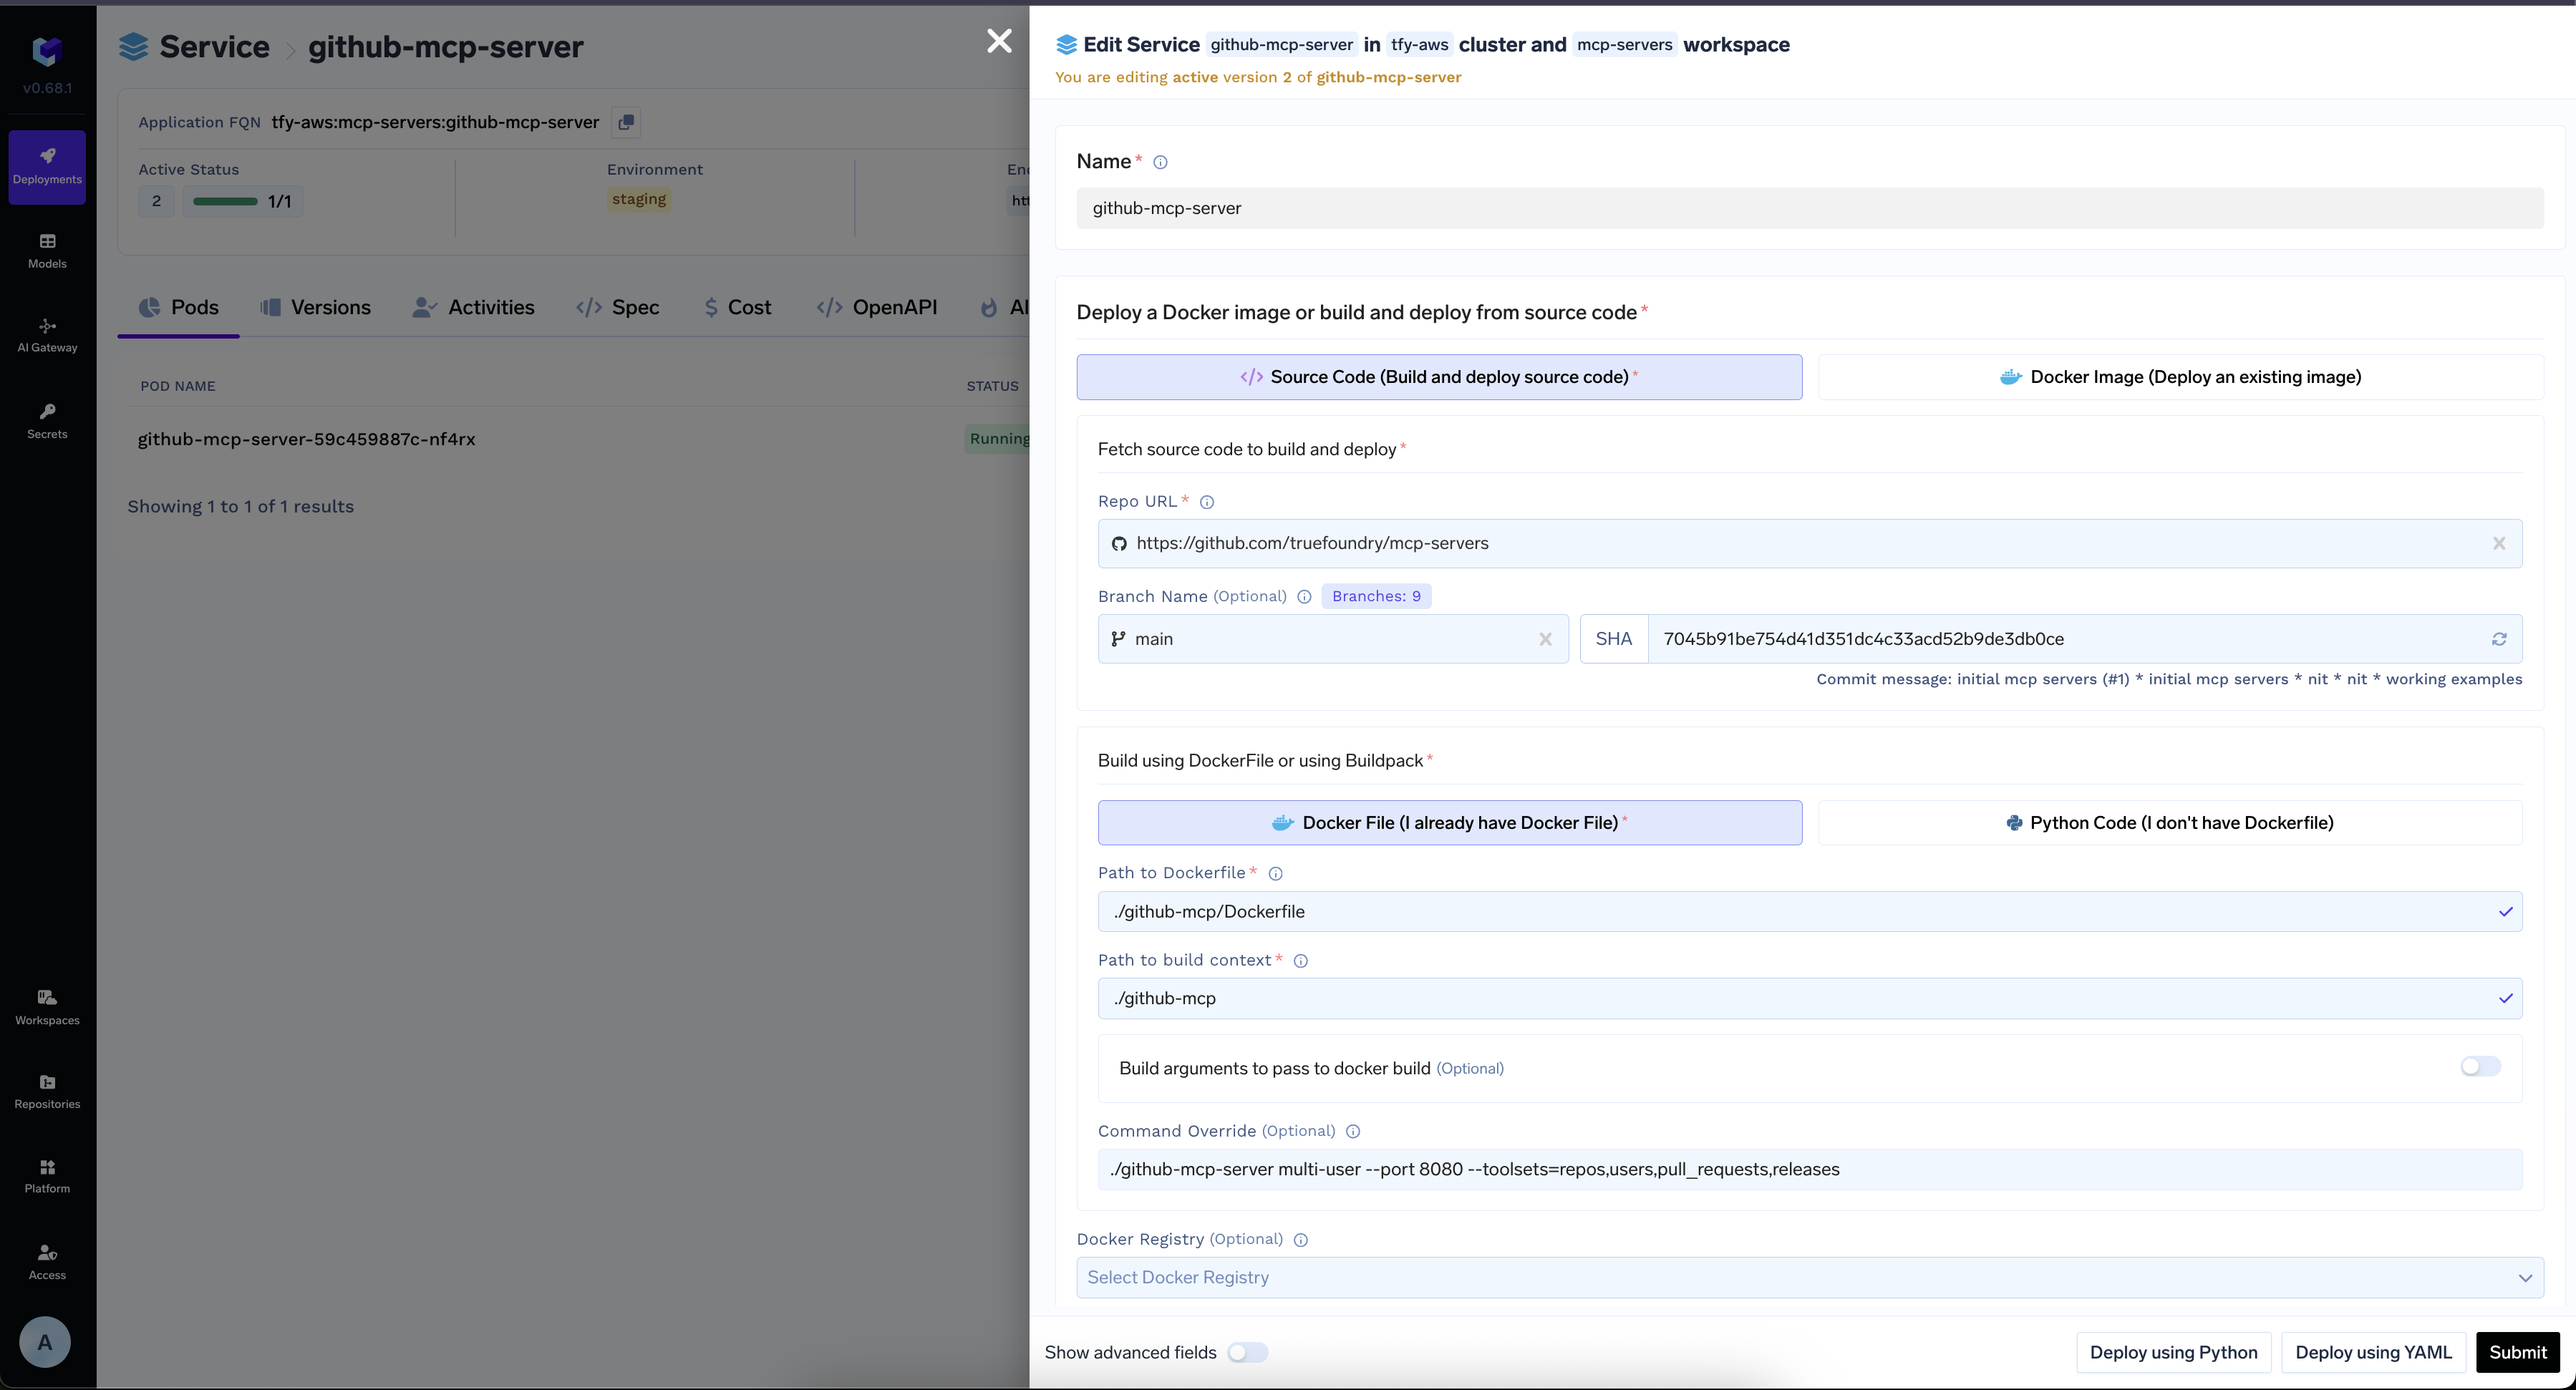
Deploying the GitHub MCP Server
Step 2: Register Your GitHub App
- Go to GitHub Apps settings (personal) or organization apps (org).
- Click New GitHub App.
- Fill out the form:
- App name: Pick a unique, clear name (max 34 chars).
- Description: (Optional) Add a short description.
- Homepage URL: Link to your app’s website or repo.
- Callback URL:
<tfy-control-plane-base-url> with your TrueFoundry control plane URL.
- (Optional) Add more callback URLs if needed.
- (Optional) Set up Webhook URL, secret, etc. as needed.
- Permissions: Select only what you need (see table below).
- Subscribe to events: Pick webhook events if required.
- Install options: Choose who can install the app.
- Click Create GitHub App.
- Click Generate a new client secret and save the Client ID and Client Secret.
- Install the App: Click Install App and pick the account or organization. You must select at least one repository (all or specific). You can change this later in settings.
Admin Approval: Installing the app on an organization may require admin approval. If you don’t have permission, ask your GitHub admin to approve it.
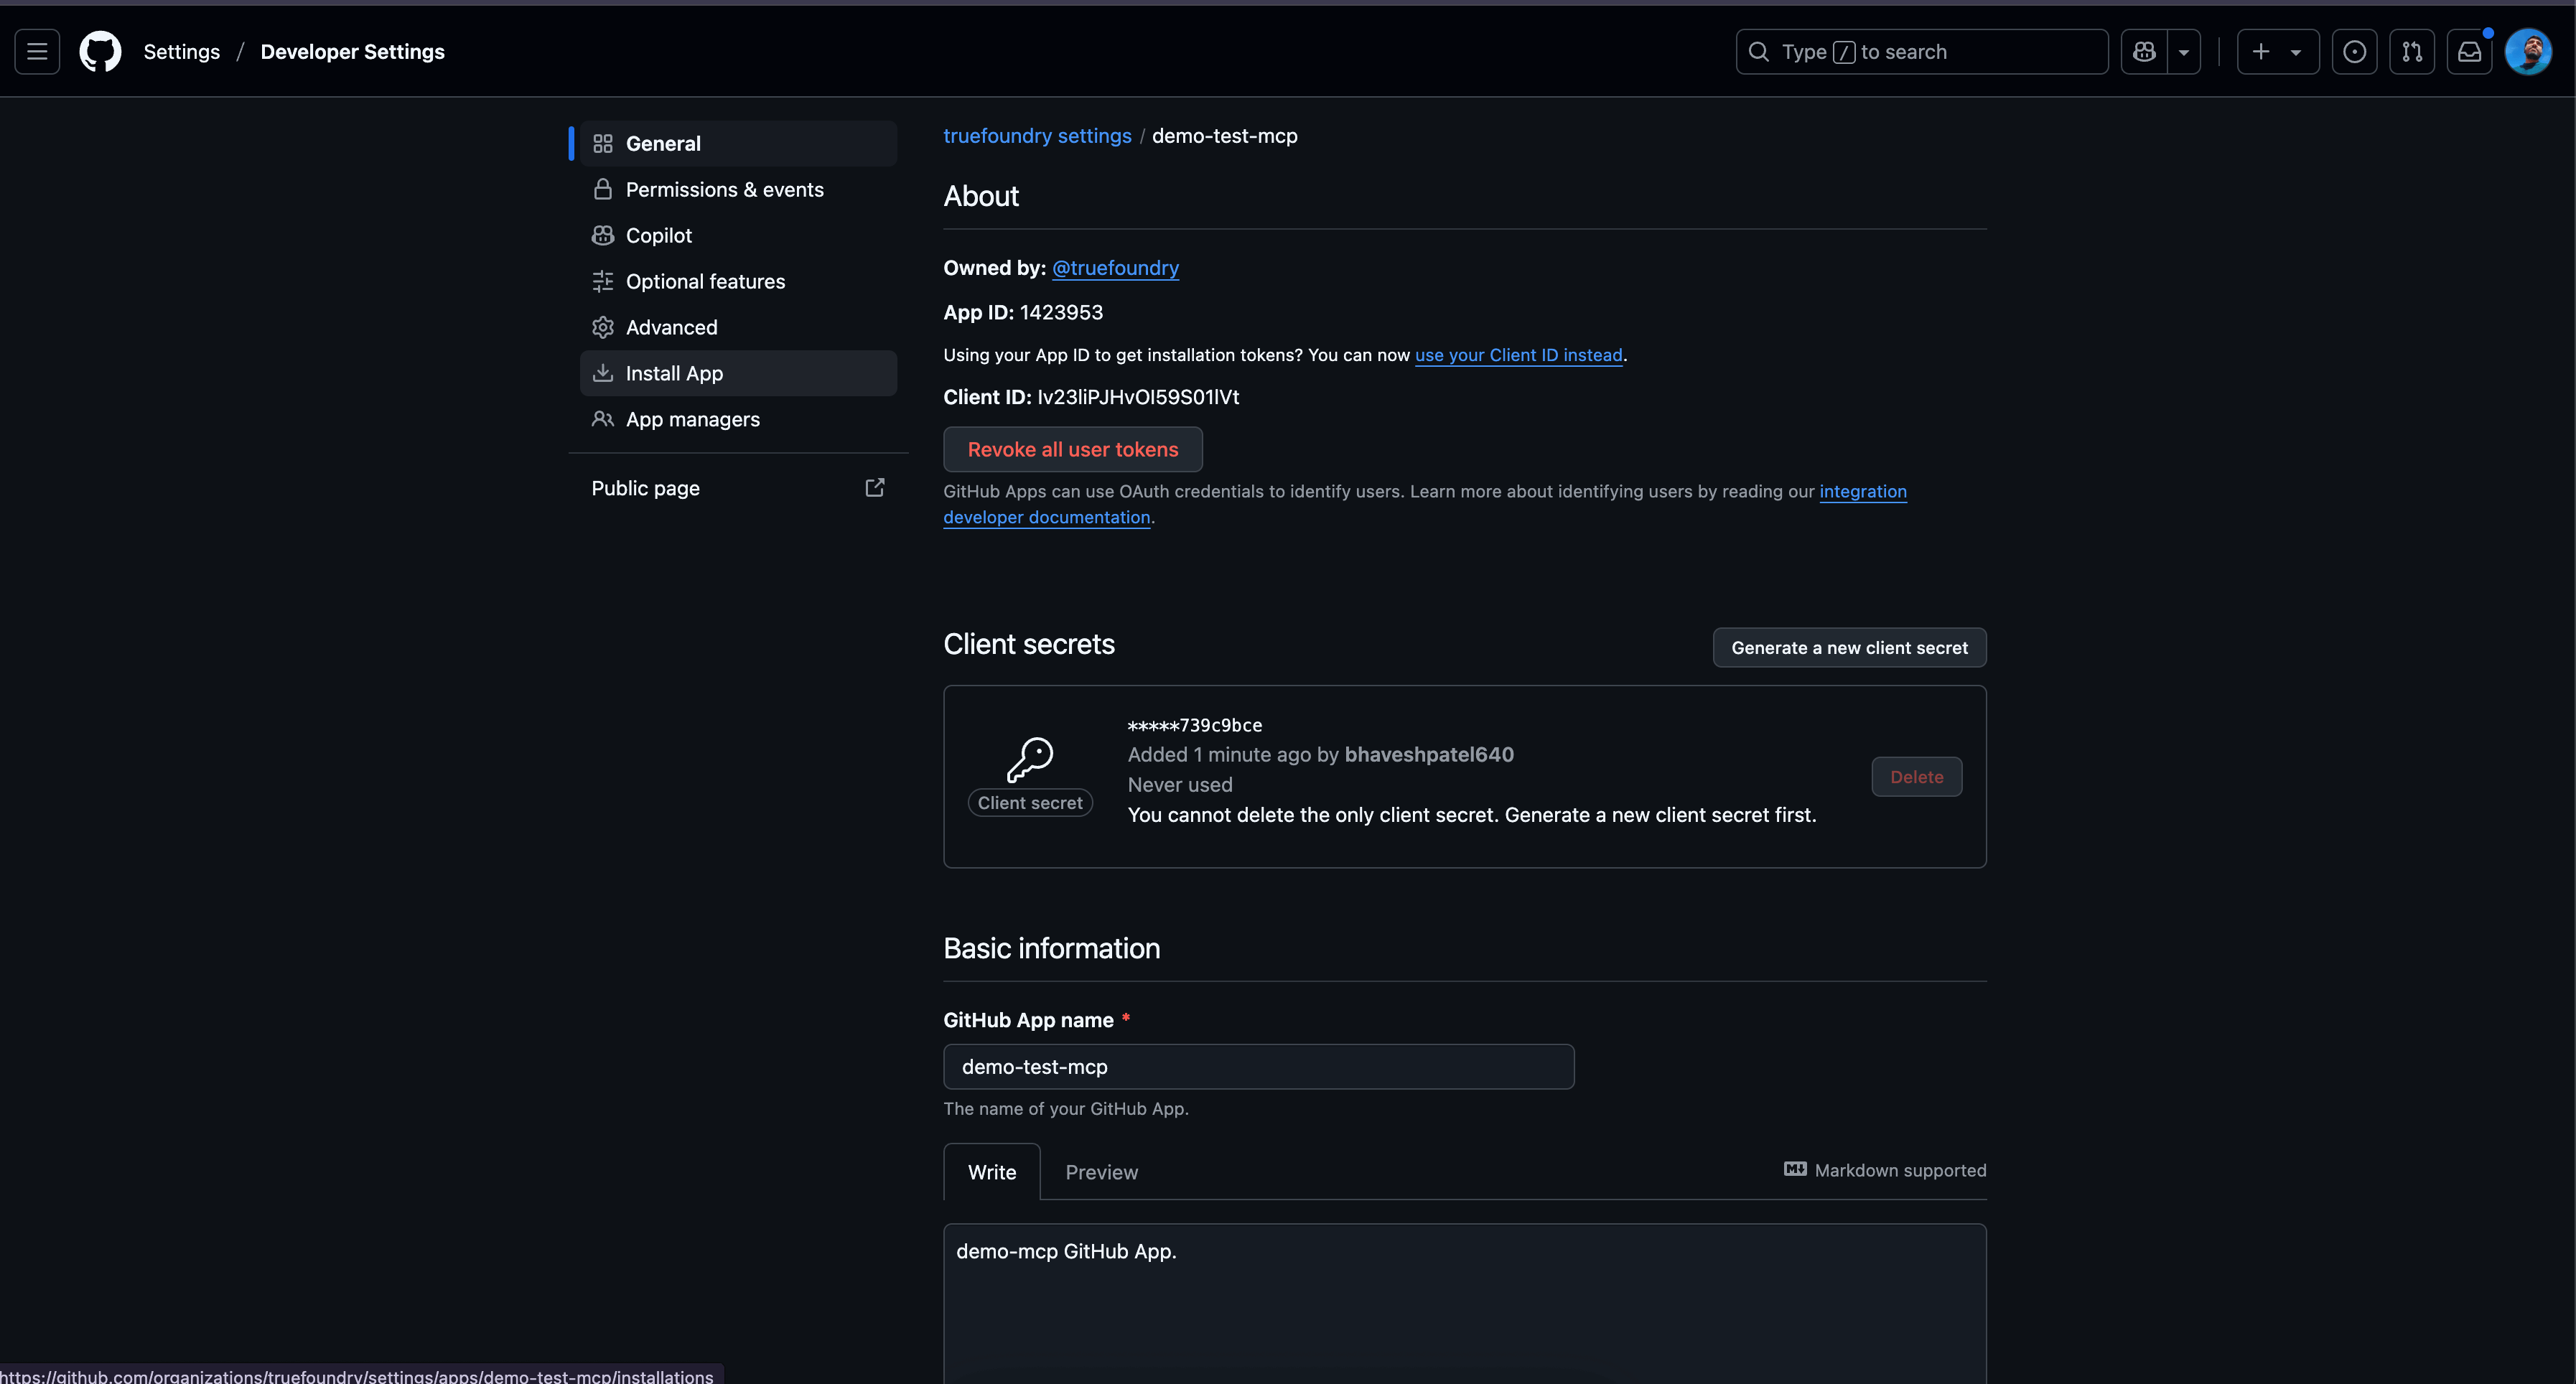
Registering a GitHub App
Step 3: Set Redirect URL, OAuth2, and Permissions
- Make sure the redirect URL is set as above.
- Set the permissions your use case needs:
Recommended Permissions
| Category | Permission | Access | Description |
|---|---|---|---|
| Repository | Contents | Read/Write | Code, branches, releases, merges |
| Repository | Issues | Read/Write | Issues, comments, labels, milestones |
| Repository | Pull requests | Read/Write | PRs, comments, merges |
| Repository | Discussions | Read/Write | Discussions and comments |
| Repository | Projects | Read/Write | Classic projects |
| Repository | Custom properties | Read/Write | Custom property values |
| Repository | Metadata | Read-only | Repo metadata (mandatory) |
| Organization | Members | Read-only | Org members and teams |
| Account | Email addresses | Read-only | User email addresses |
| Account | Events | Read-only | User activity events |
| Account | Gists | Read/Write | User gists and comments |
| … | … | … | … |
- For a full list, see GitHub App Permissions.
- Changing permissions later will prompt users to re-authorize the app.
Step 4: Register MCP Server on AI Gateway
- Go to the MCP Server tab in AI Gateway.
- Click Add New MCP Server Group (if needed).
- Add a new MCP Server:
- Endpoint URL: Your deployed MCP Server URL
- Authentication Type: OAuth2
- Client ID: Your GitHub app’s Client ID
- Client Secret: Your GitHub app’s Client Secret
- Scopes: The permissions you set
- See GitHub Docs for more details.
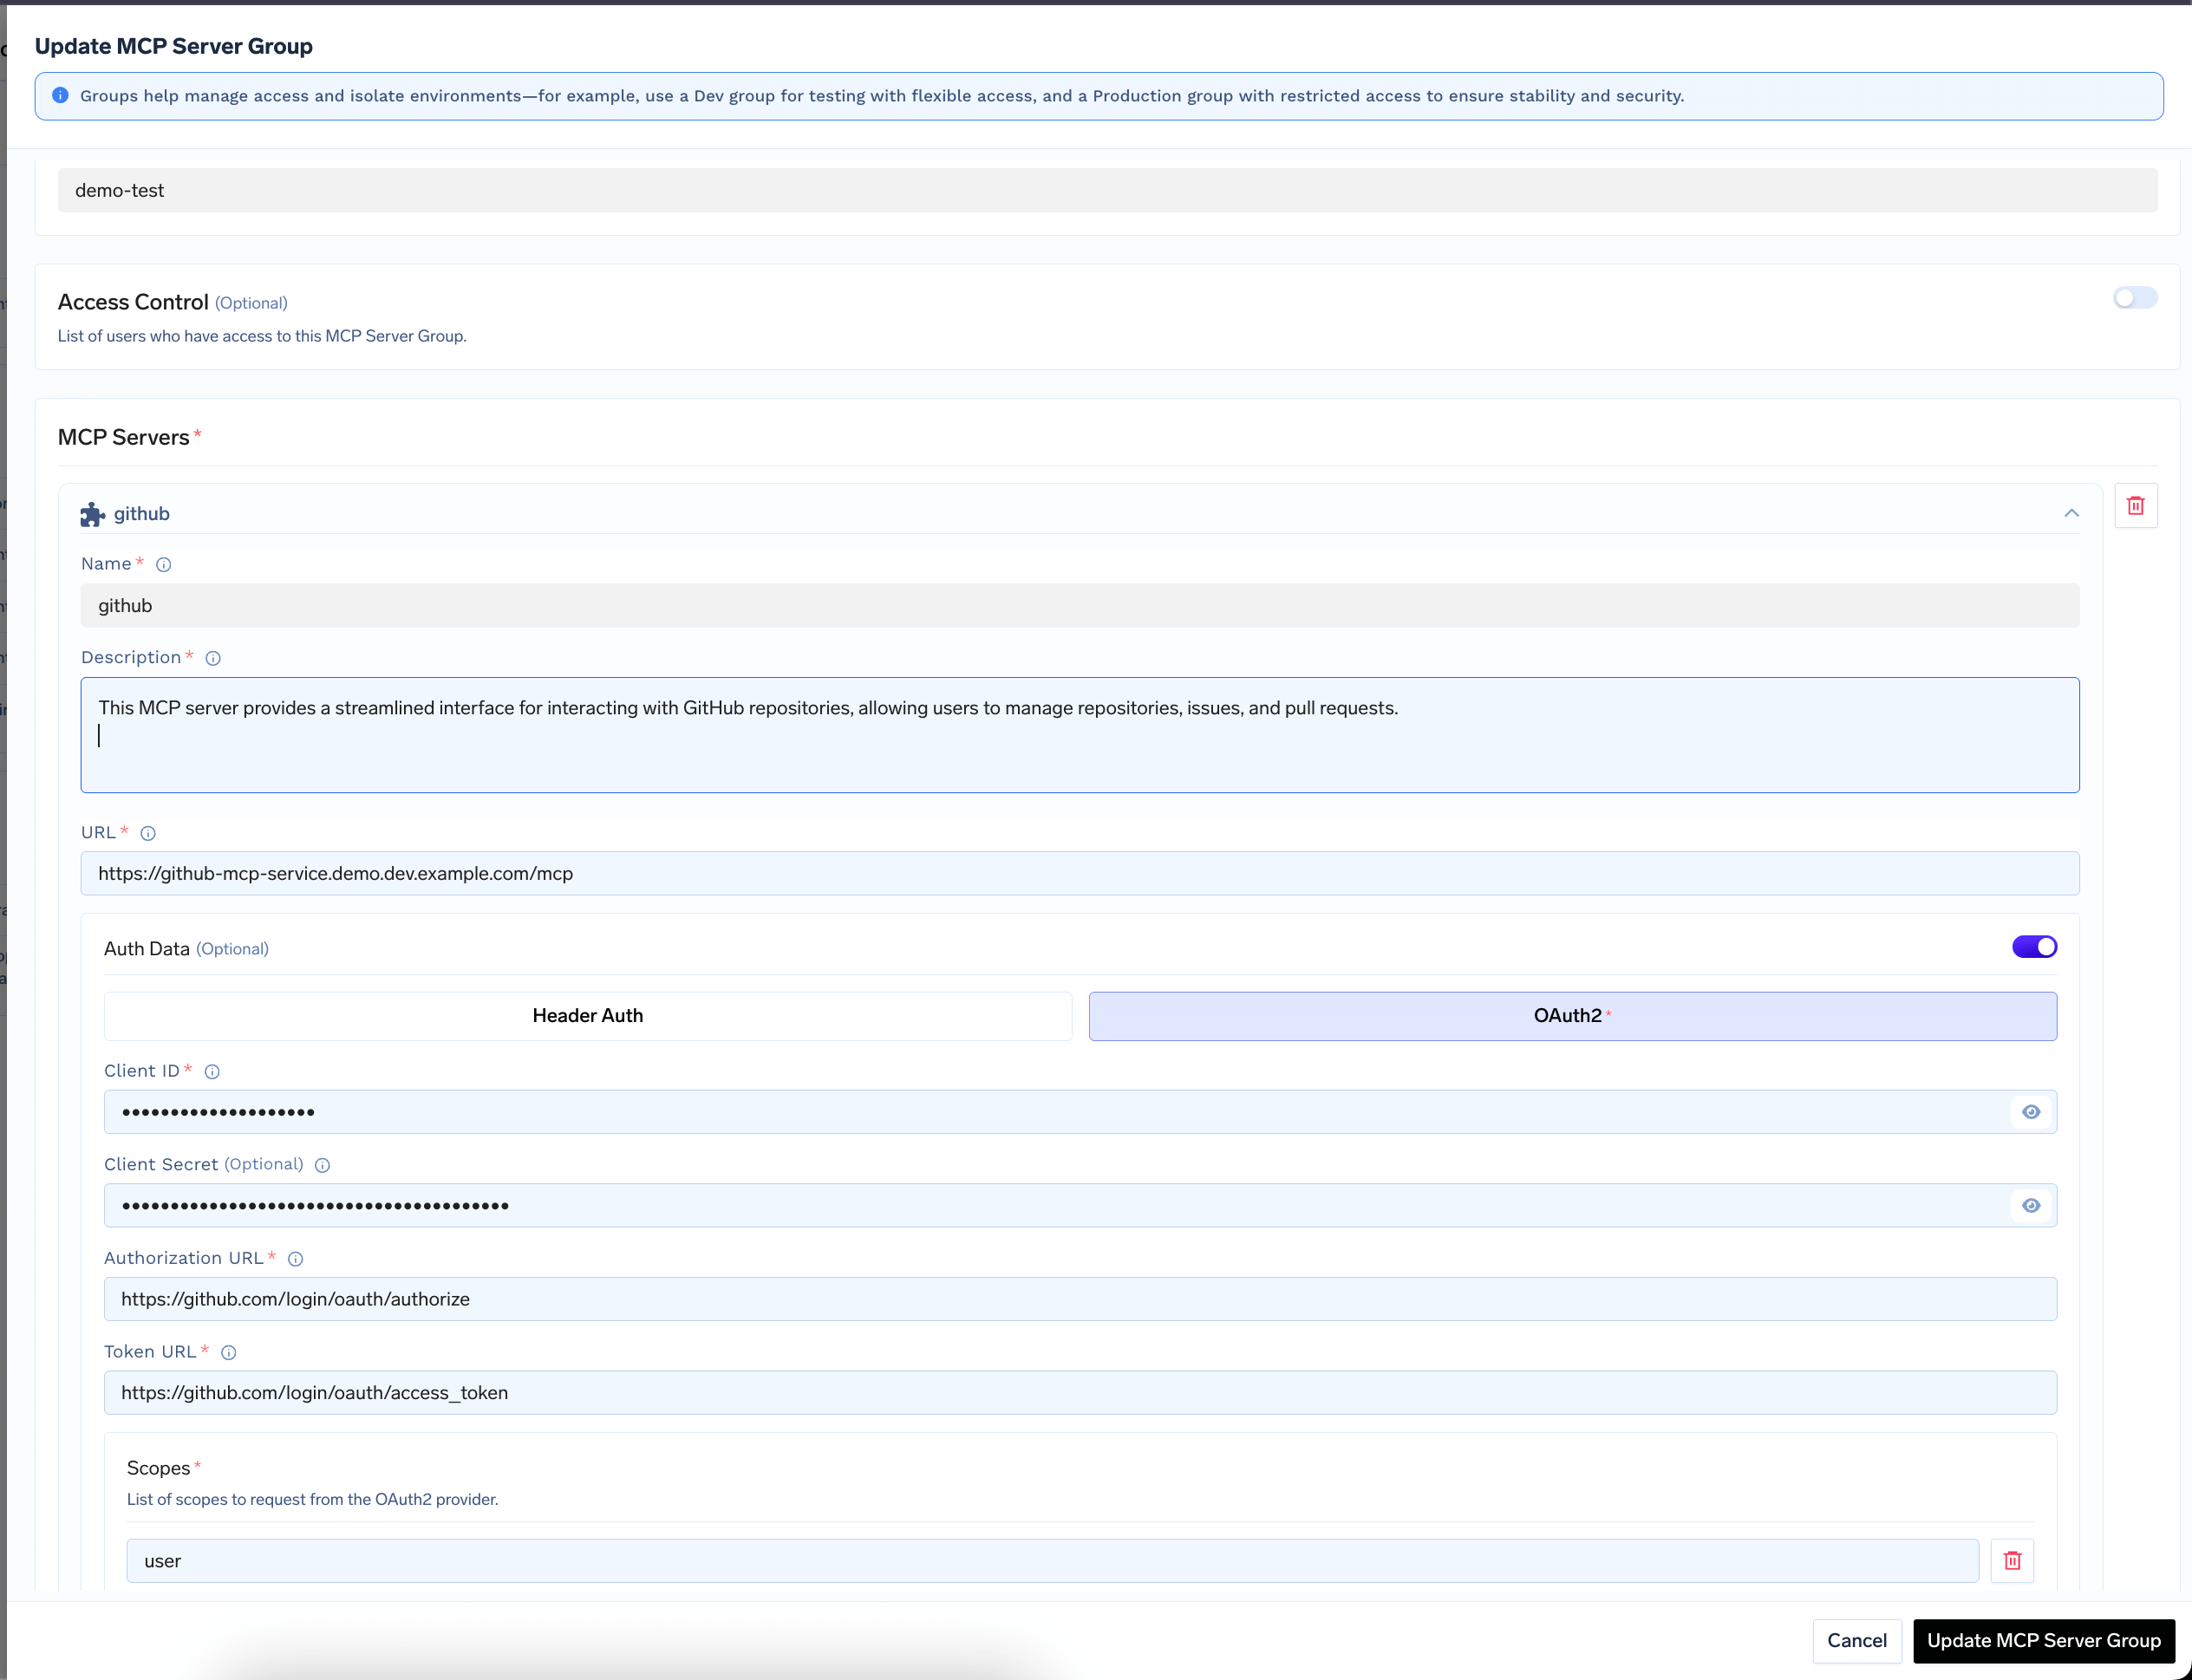
Adding GitHub MCP Server to AI Gateway
For security, store OAuth2 credentials as secrets using FQN references instead of plain text values.
Step 5: Test Your MCP Server
- Go to the MCP Server tab in AI Gateway.
- Find and select your GitHub MCP Server.
- Click Connect Now to start authorization.
- Authorize with your GitHub credentials in the popup.
- Once connected, your MCP Server will show up in the list.
- Select the tools you want and click Select Tools.
- You can now use the GitHub MCP Server and its tools in the AI Gateway Playground to interact with GitHub via LLMs.