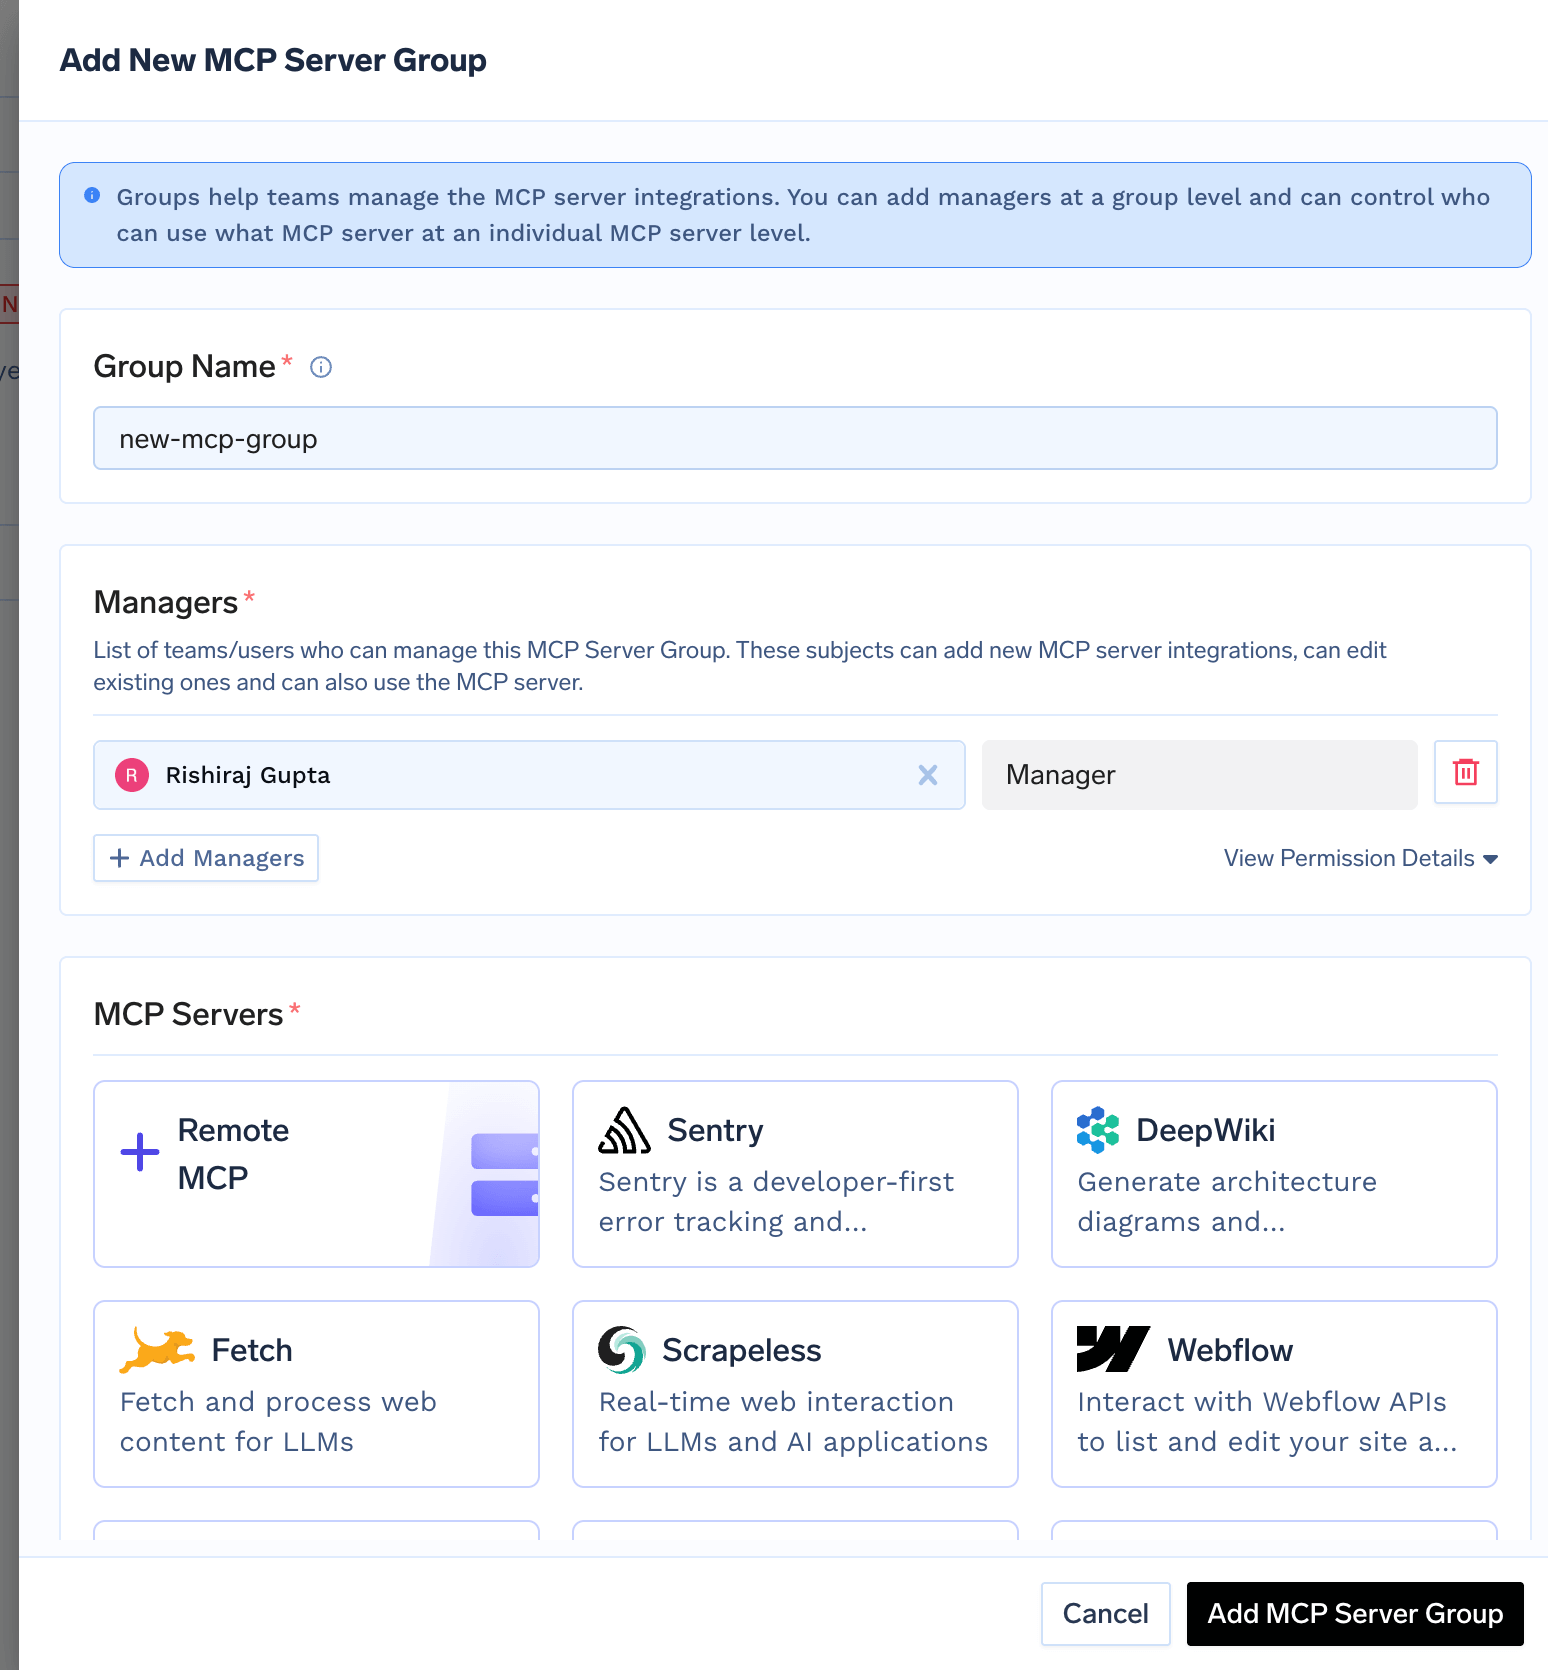
1. Create an MCP Server Group
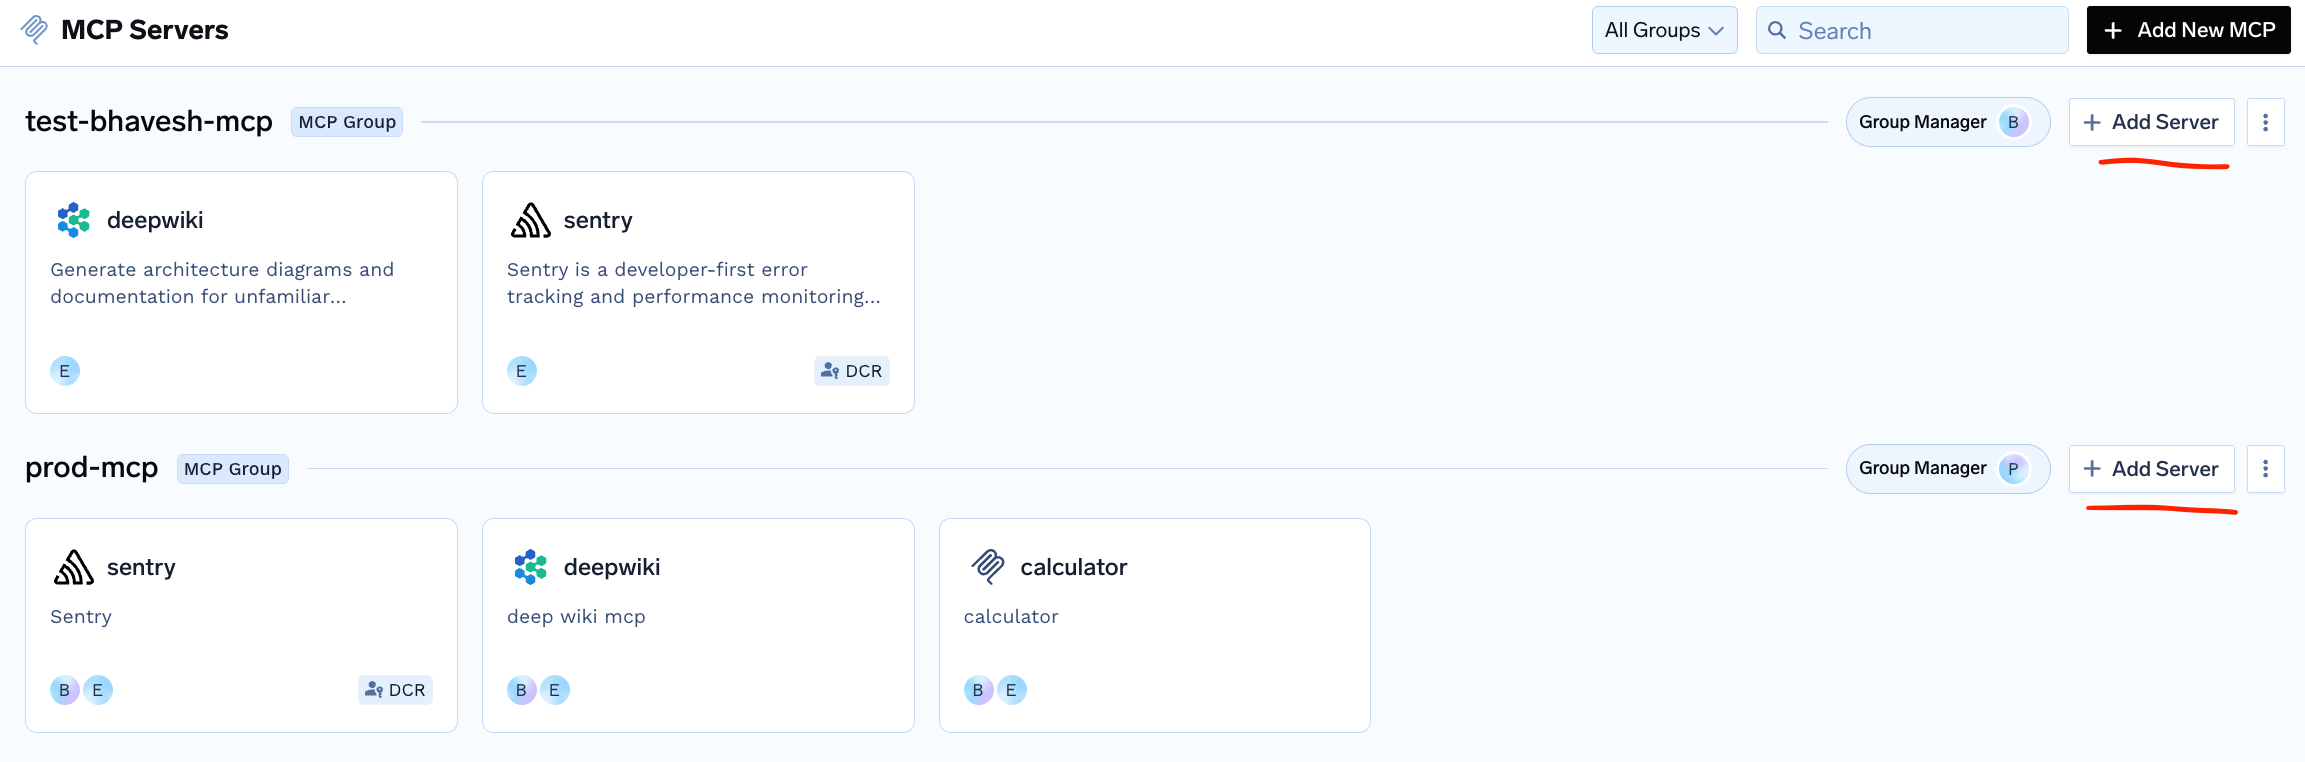
MCP Server Groups help you cluster MCP servers and govern who manage the MCP servers. To add an MCP server to the Gateway, you first need to create a MCP server group and then add the MCP server to the group. To create an MCP server group, follow the steps below:- Navigate to the MCP Servers section in the AI Gateway UI and click Add New MCP Group.
- Configure the group with the following:
Name: Enter a descriptive identifier (e.g.,platform-mcp-servers,saas-mcp-servers)Managers: List of teams/users who can manage this MCP Server Group. These subjects can add new MCP server integrations, can edit existing ones and can also use the MCP server.
2. Add an MCP Server to Group
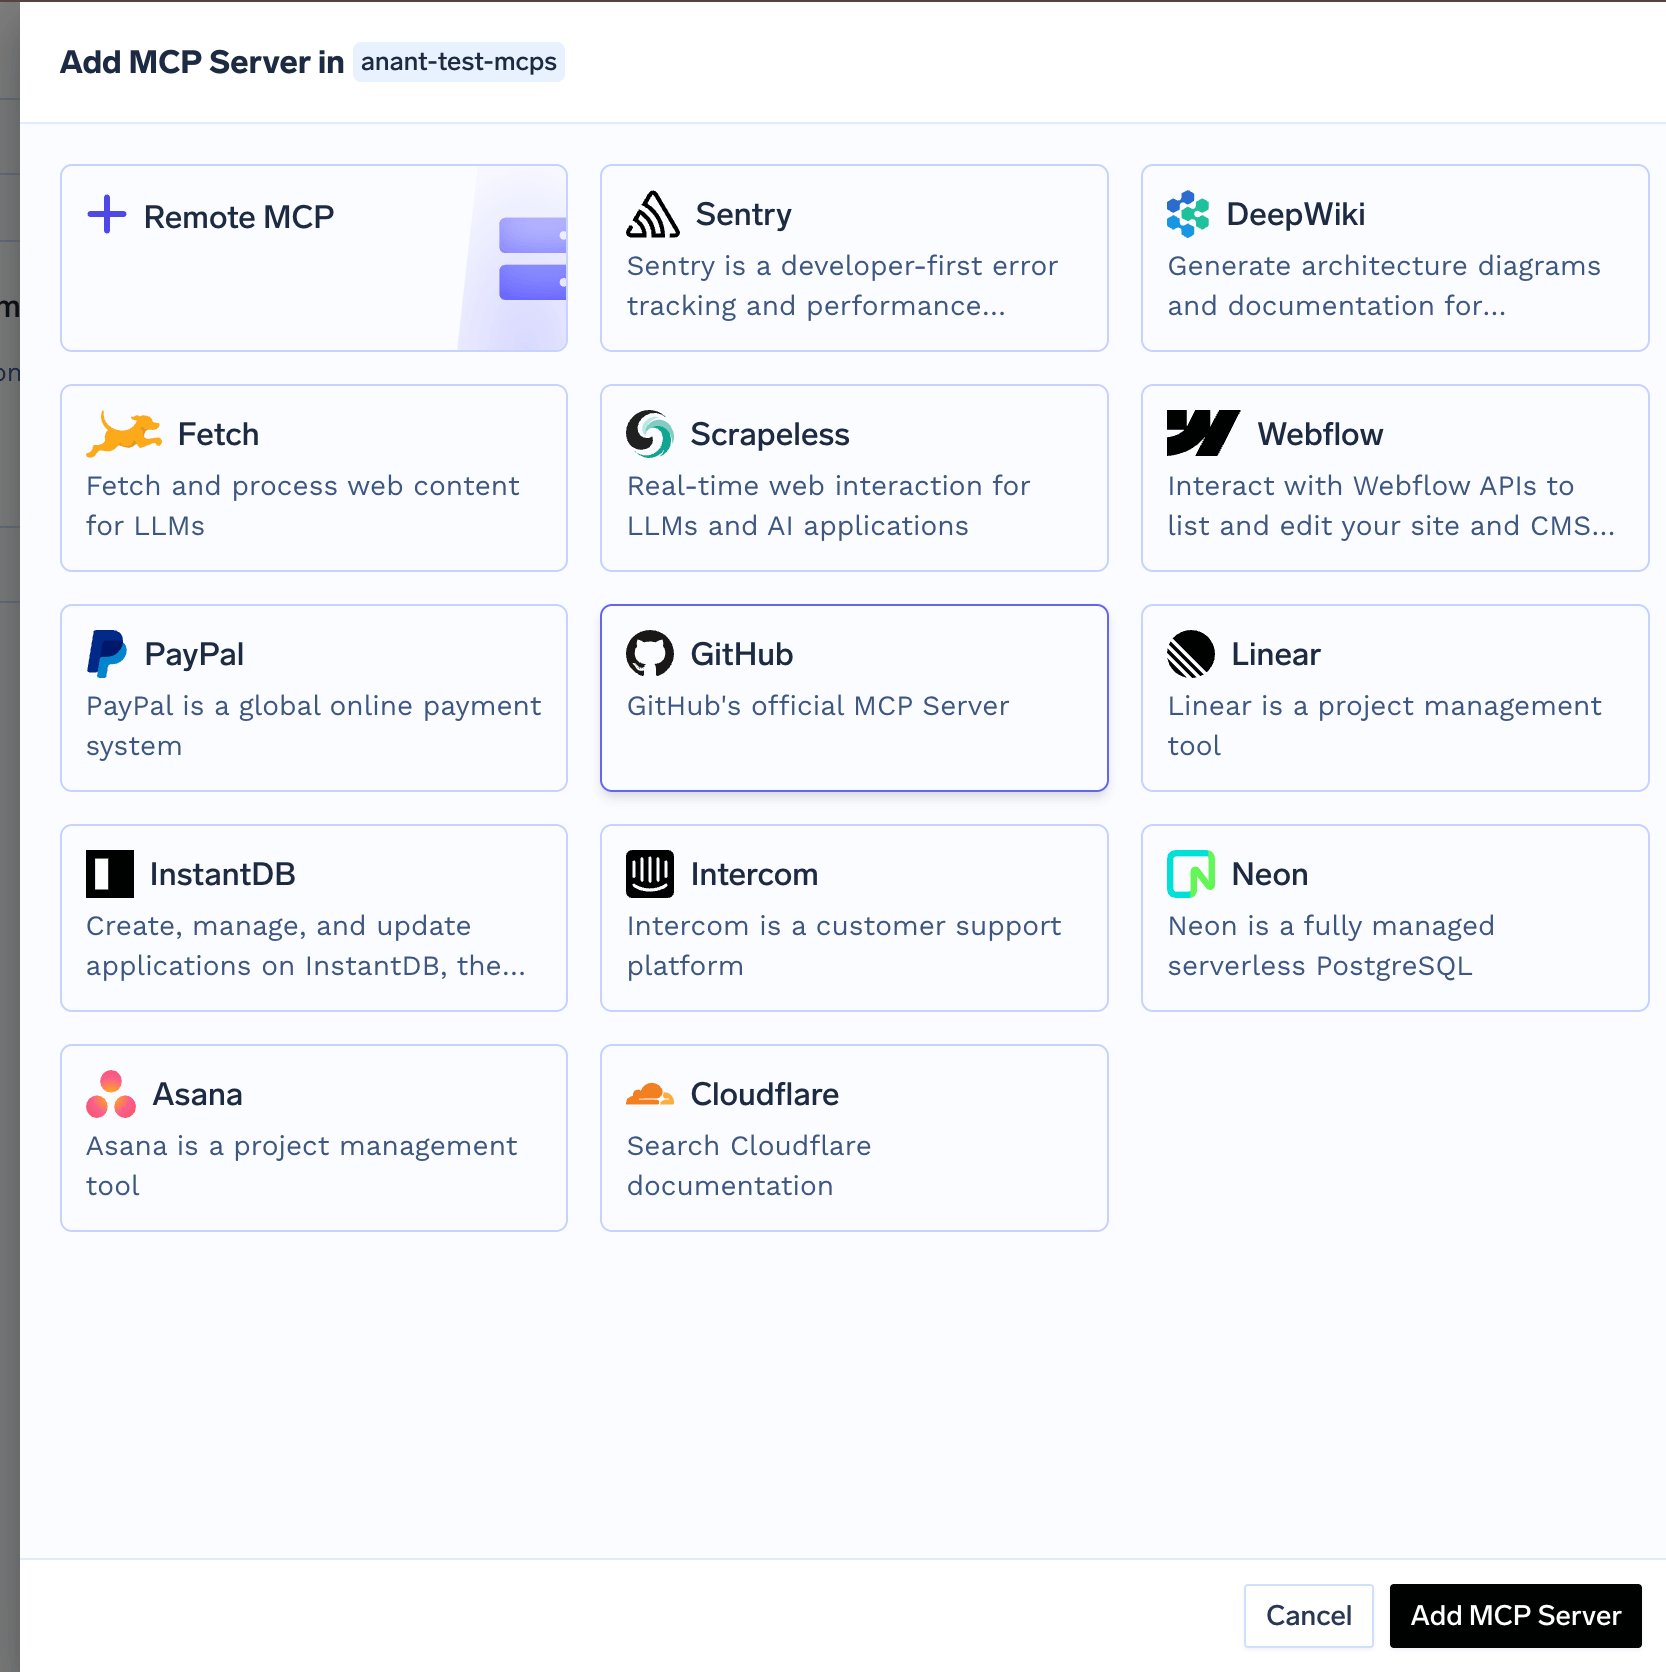
Remote MCP button and then provide the following details to add the server:
-
Name: A descriptive name for the MCP server. -
Description: A description of the MCP server. -
URL: The URL of the MCP server. -
Transport:streamable-httporsse. Note thatsseis deprecated. -
Access Control: List of teams/users who can use this MCP server. -
Auth Data: The authentication mechanism to use for the MCP server. This can either beNo Auth,Header Auth,DCR,OAuth2.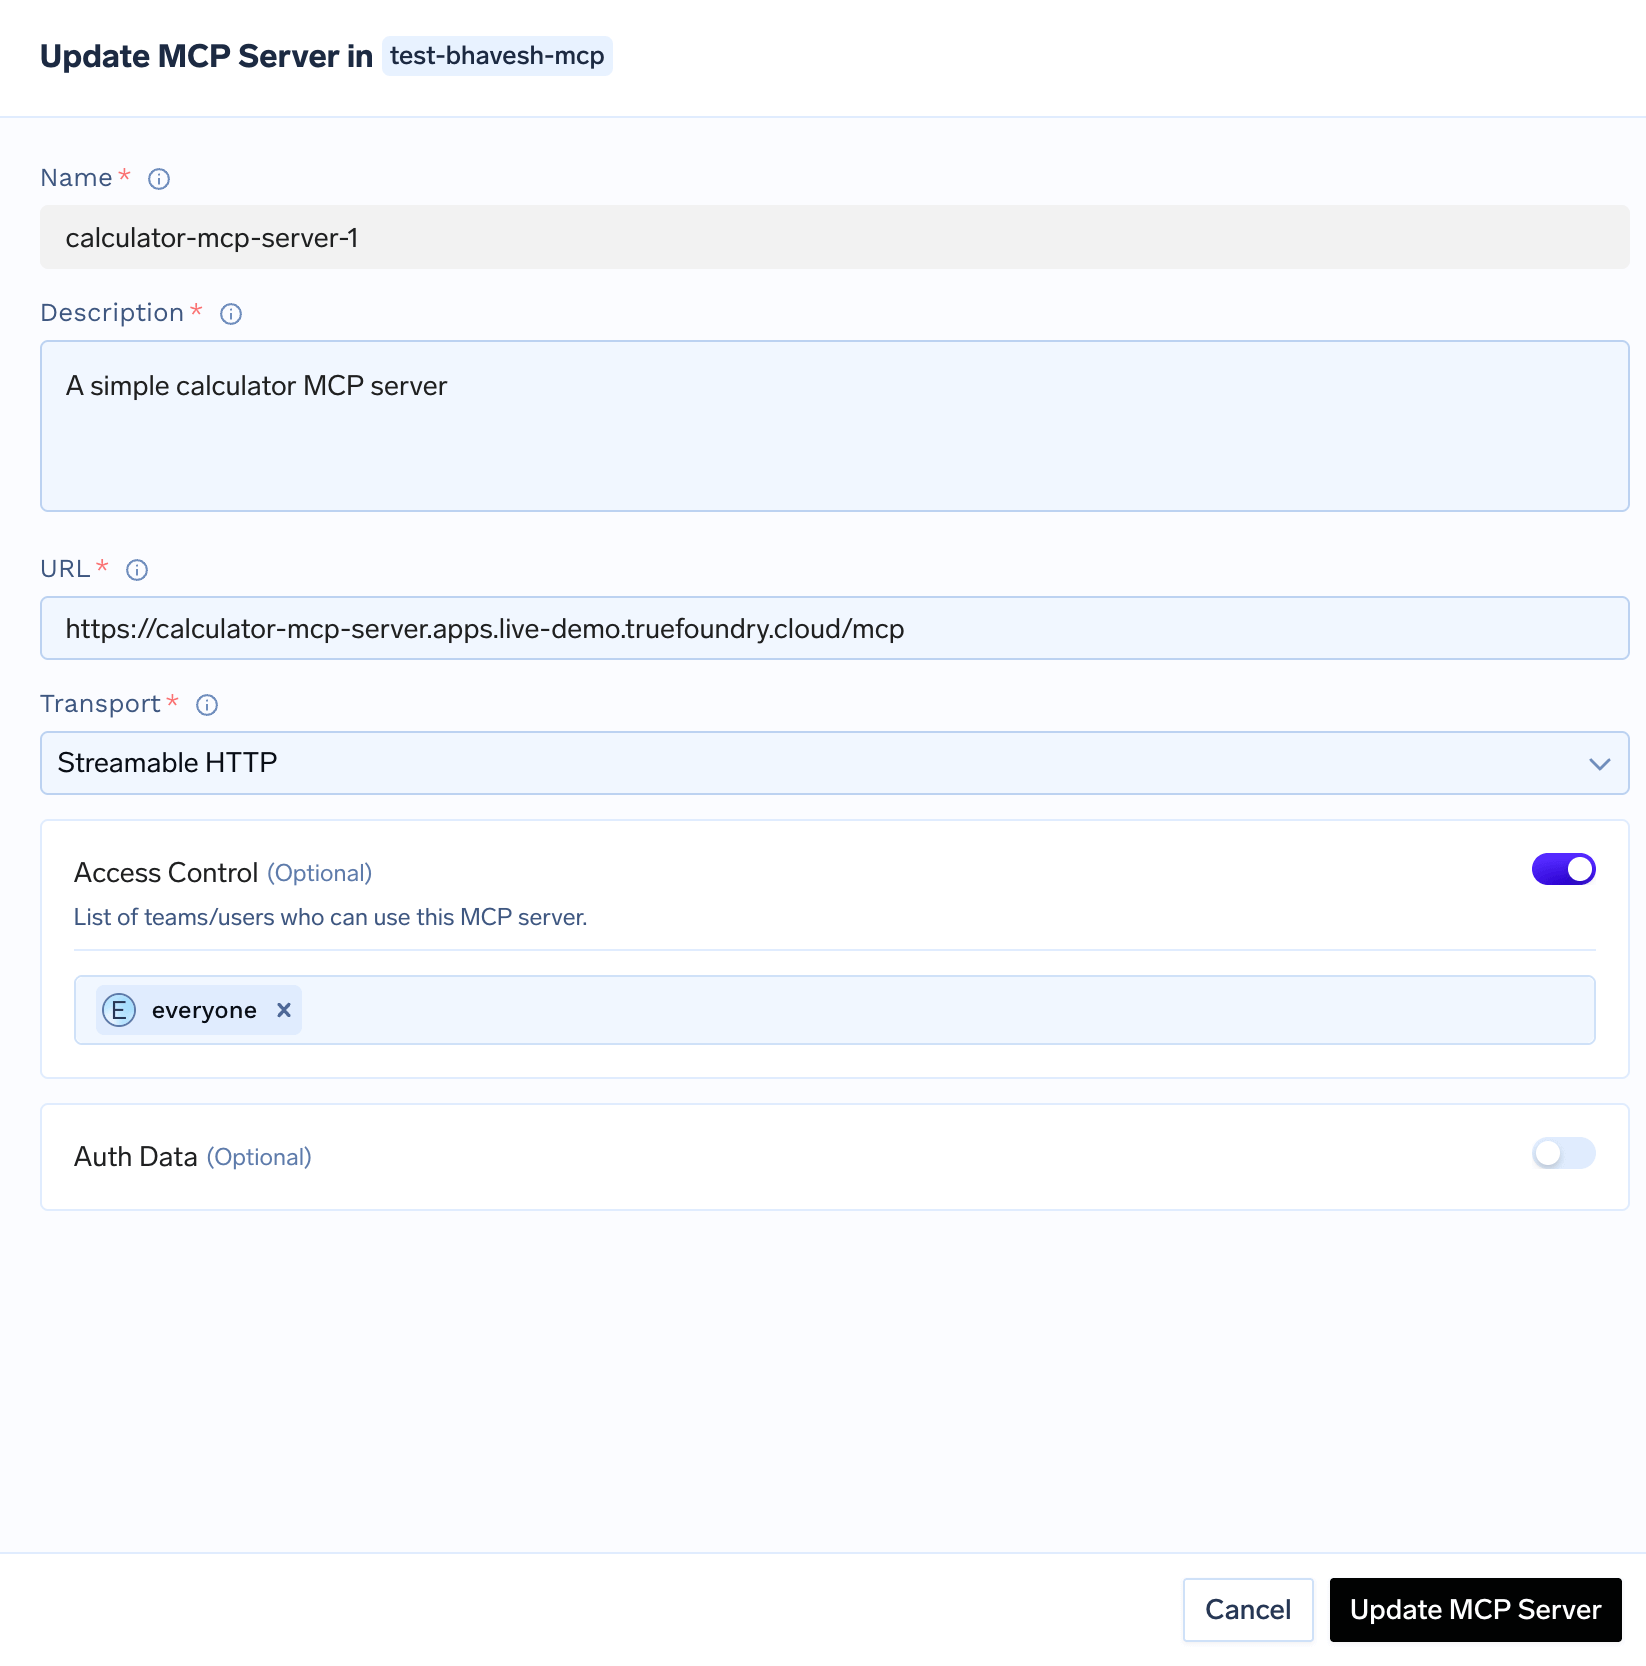
Create Calculator MCP Server
Create Calculator MCP Server
Let’s create a simple calculator MCP server that provides basic math operations.Run locally:Your MCP server will be available at
http://localhost:8000/mcp.To add this MCP server to your MCP group, provide the following details:Name: calculator-mcp-serverEndpoint URL: https://calculator-mcp-server.apps.live-demo.truefoundry.cloudDescription: A simple calculator MCP serverAuthentication: No Auth