1
Create a Guardrails Group
A guardrails group serves as a container for multiple guardrail integrations. You can assign who can add/edit/remove guardrails in a group and who can access the guardrails in a group. There are two type of roles for collaborators: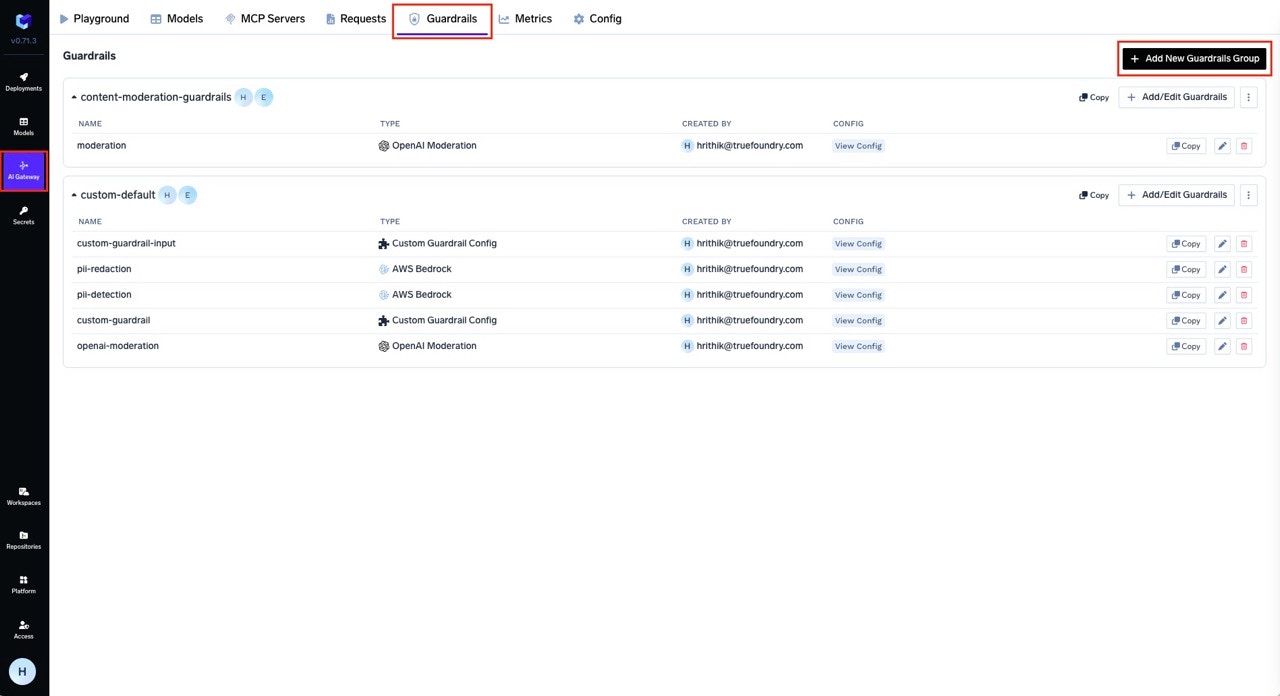
- Manager: Can create, edit, delete and use the guardrail integrations in the group.
- User: Can use the guardrail integrations in the group.
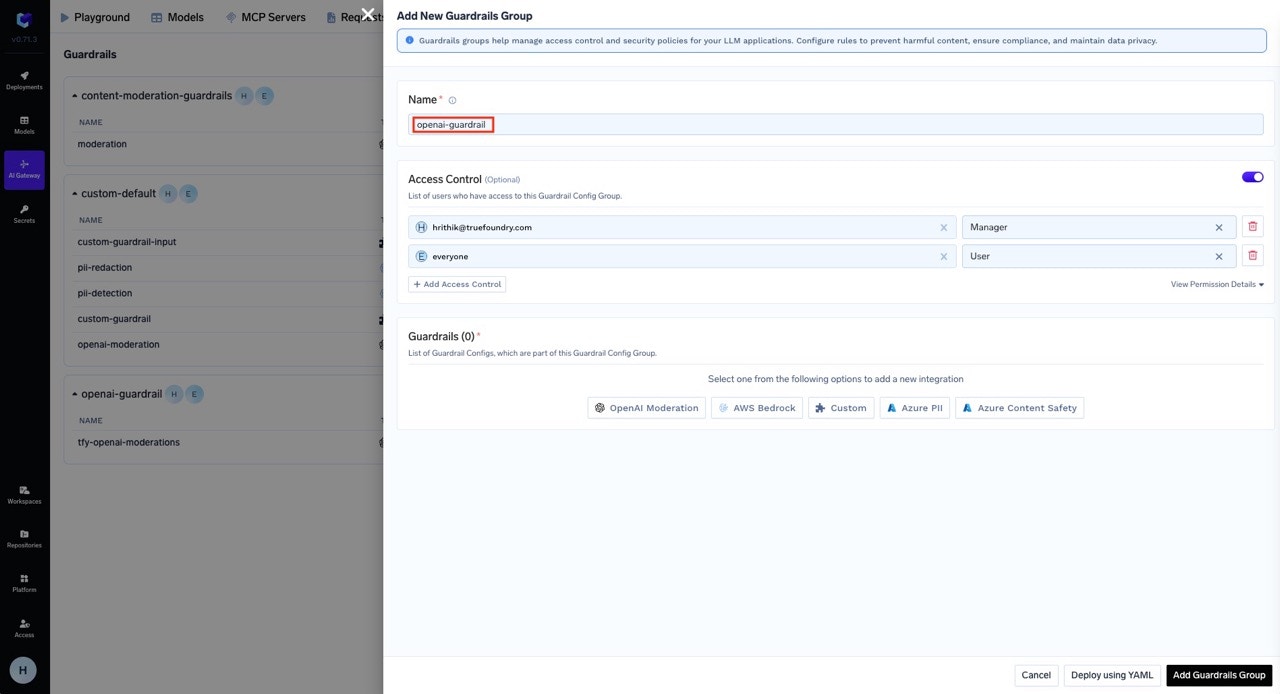
openai-guardrail.Create a Guardrails Group
Give your group a name
2
Add Guardrail Integration in Guardrails Group
You can add integrations to your guardrails for content moderation and safety. Let’s create an OpenAI guardrail integration, which we will later use as an output guardrail in our configuration example. This will allow us to automatically moderate and filter responses from the LLM using OpenAI’s moderation capabilities.
-
Select the OpenAI Moderation from the list of integrations.
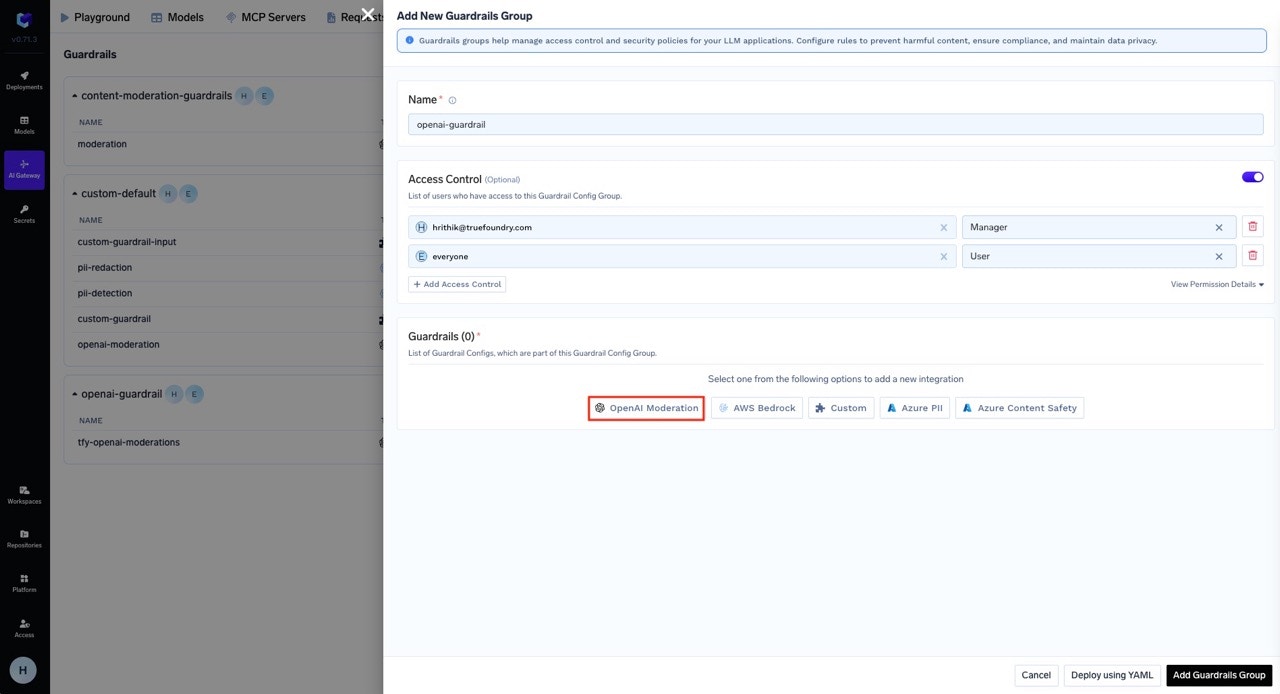
Select the OpenAI Moderation Integration
-
Fill in the OpenAI Moderation Guardrail Config form. For this tutorial, we’ve named it
tfy-openai-moderation.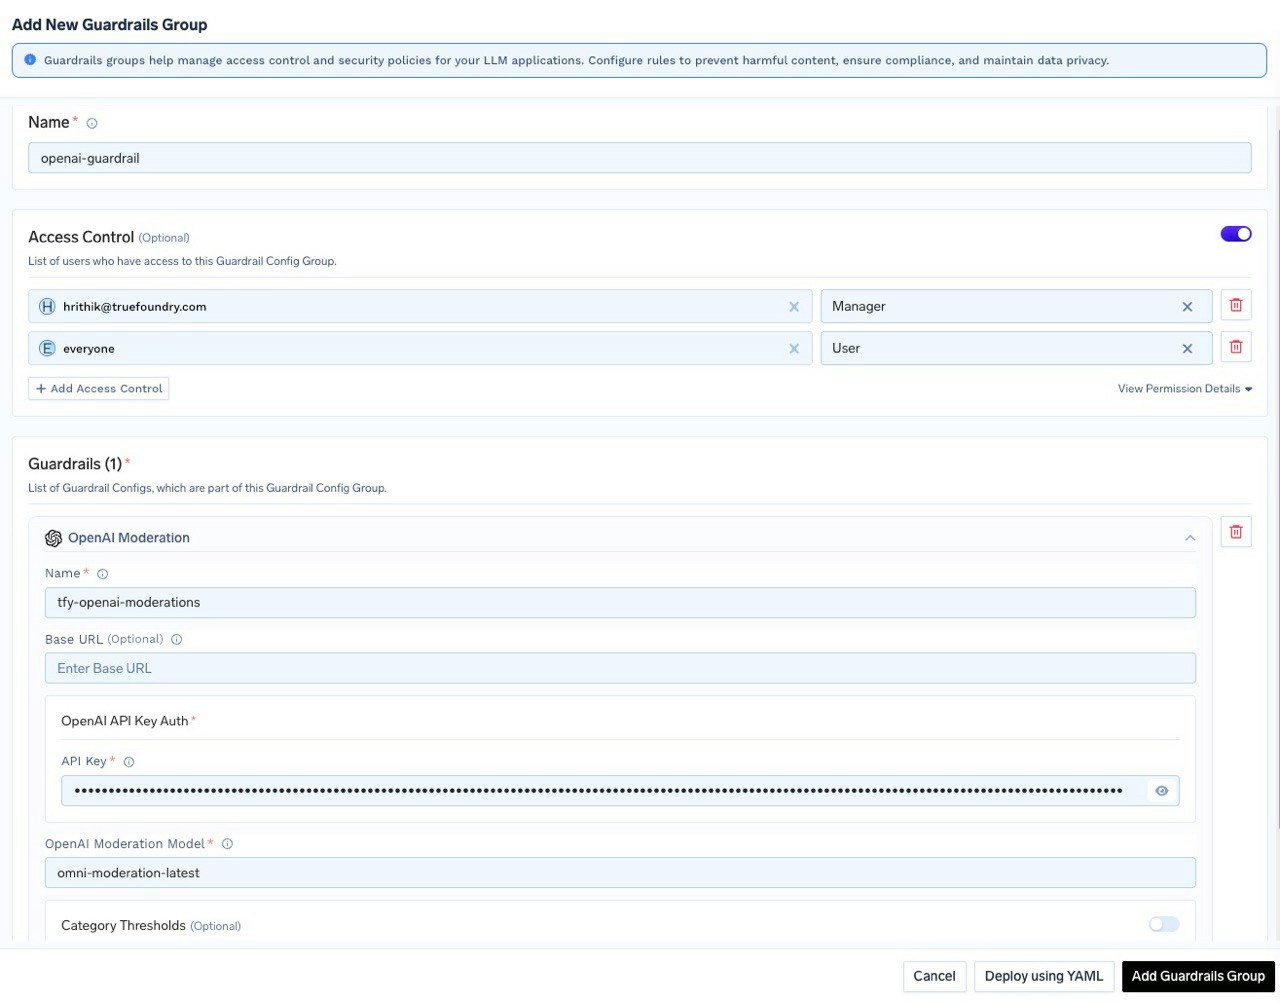
Fill in the OpenAI Moderation Form
- Save the guardrail group.
To customize moderation sensitivity for specific categories such as 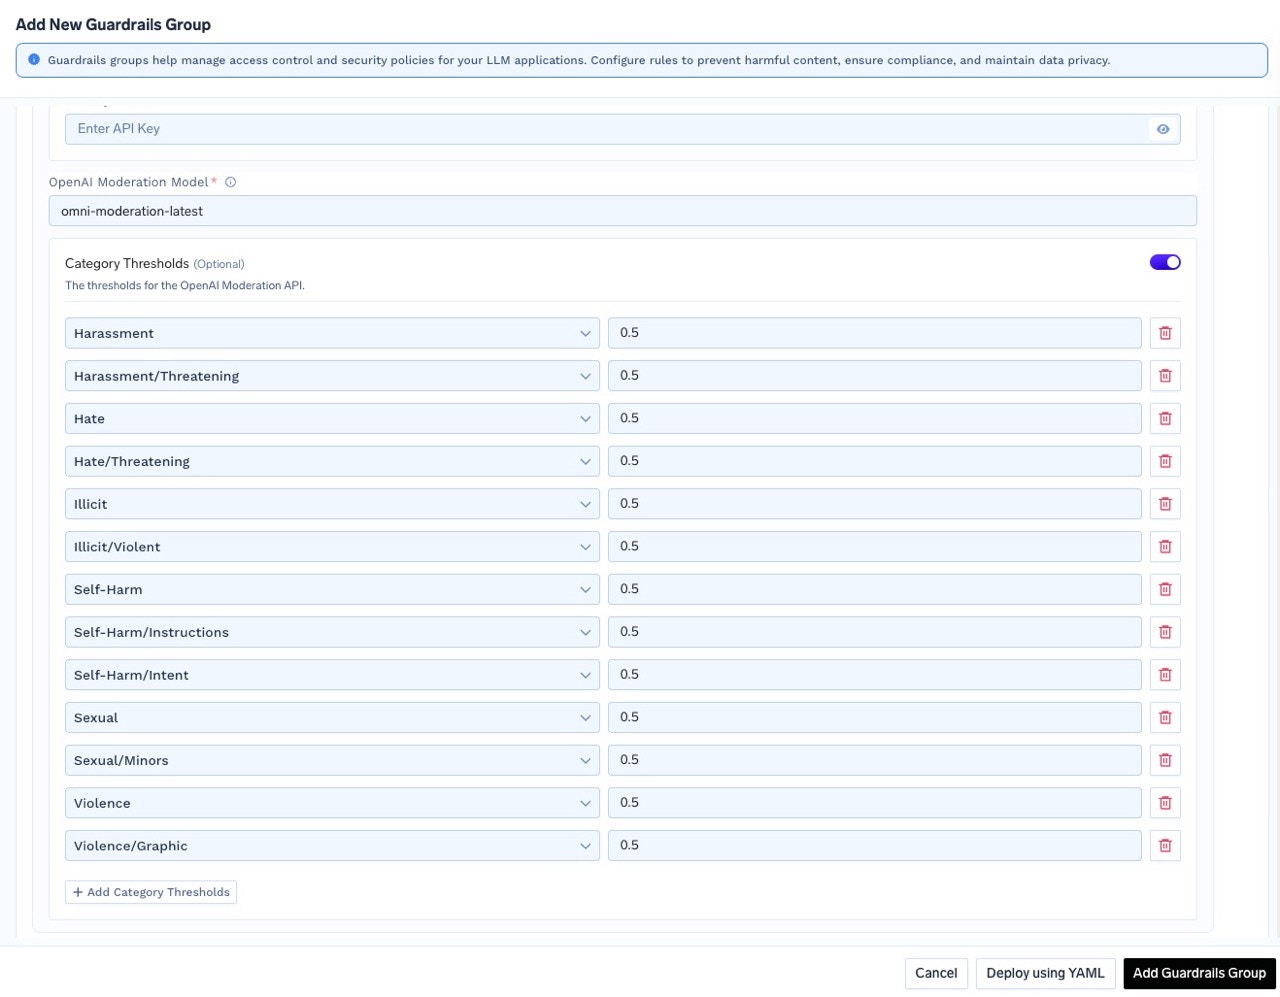
harassment, sexual, or hate, enable the Category Thresholds option. You can then adjust the threshold values for each category according to your requirements.3
Test Guardrails in Playground
-
Navigate to the Playground
Navigate to the AI Gateway -> Playground Tab. -
Select Guardrails
On the left side, you’ll see two options: Input Guardrails and Output Guardrails.- Click on either “Input Guardrails” or “Output Guardrails” depending on where you want to apply the guardrail.
- Add the guardrail you want to apply by clicking on the option and selecting the desired guardrail from the list.
tfy-openai-moderationin the previous steps, select this guardrail under Input Guardrails.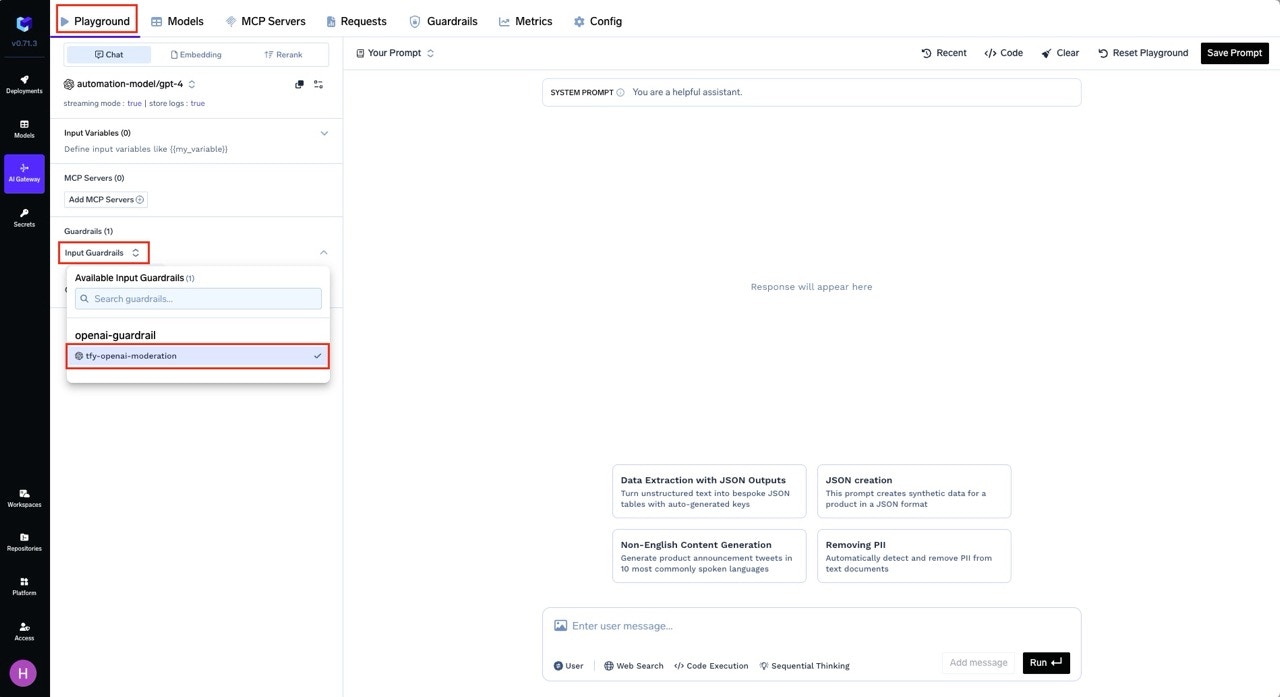
Select Guardrails
-
Test the Guardrail
- Enter a prompt that would typically be flagged as unsafe or offensive.
- Send the request to the model.
4
Trigger Guardrails in LLM requests from code
You can pass the guardrails to be associated as headers at a per request level by providing the
X-TFY-GUARDRAILS header in the request. You can copy the relevant code snippet from the Playground section.-
Select the Guardrail to Apply
On the left side, choose the Input Guardrails and Output Guardrails section, and select the guardrail you want to apply to your request. For this tutorial, we’ve selected thetfy-openai-moderationguardrail for both input and output.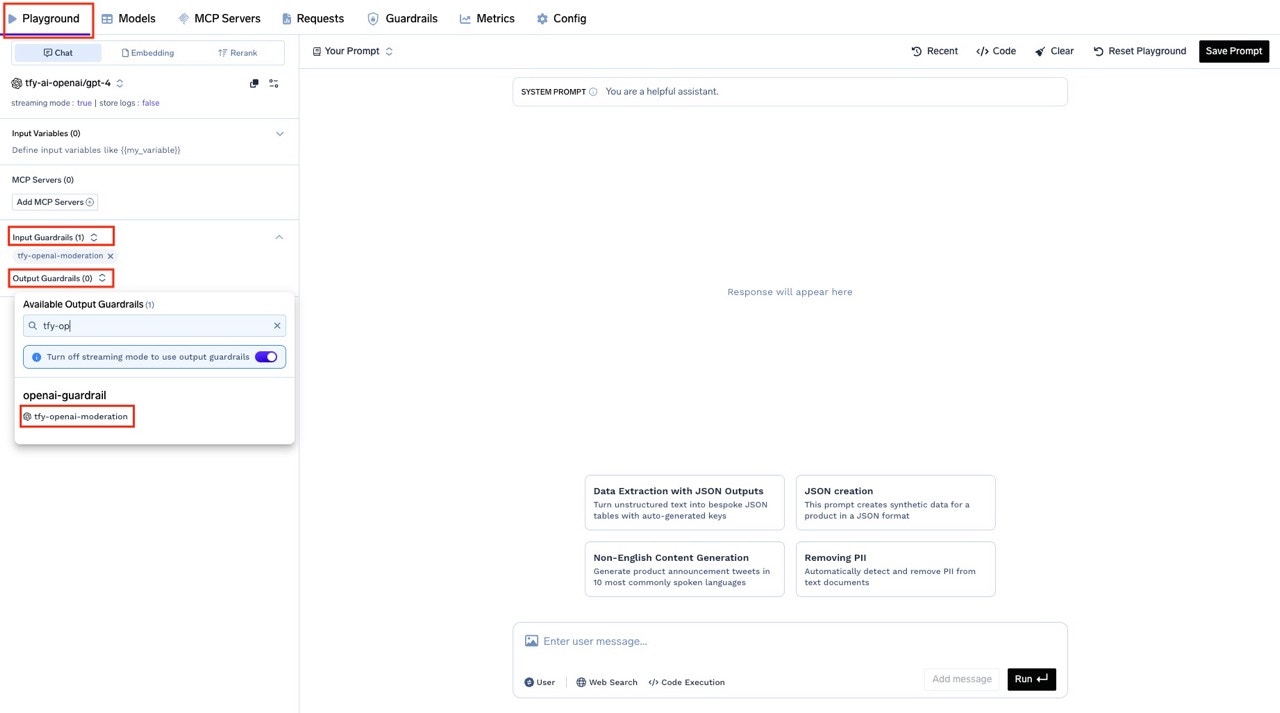
Select the Guardrail to Apply
-
Get the Code Snippet
After configuring your request and selecting the desired guardrail(s), click the Code button at the top right of the Playground.
In the code snippet section, you will see ready-to-use examples for different SDKs andcurl.
Note: The generated code will automatically include the necessaryX-TFY-GUARDRAILSheader with your selected guardrails.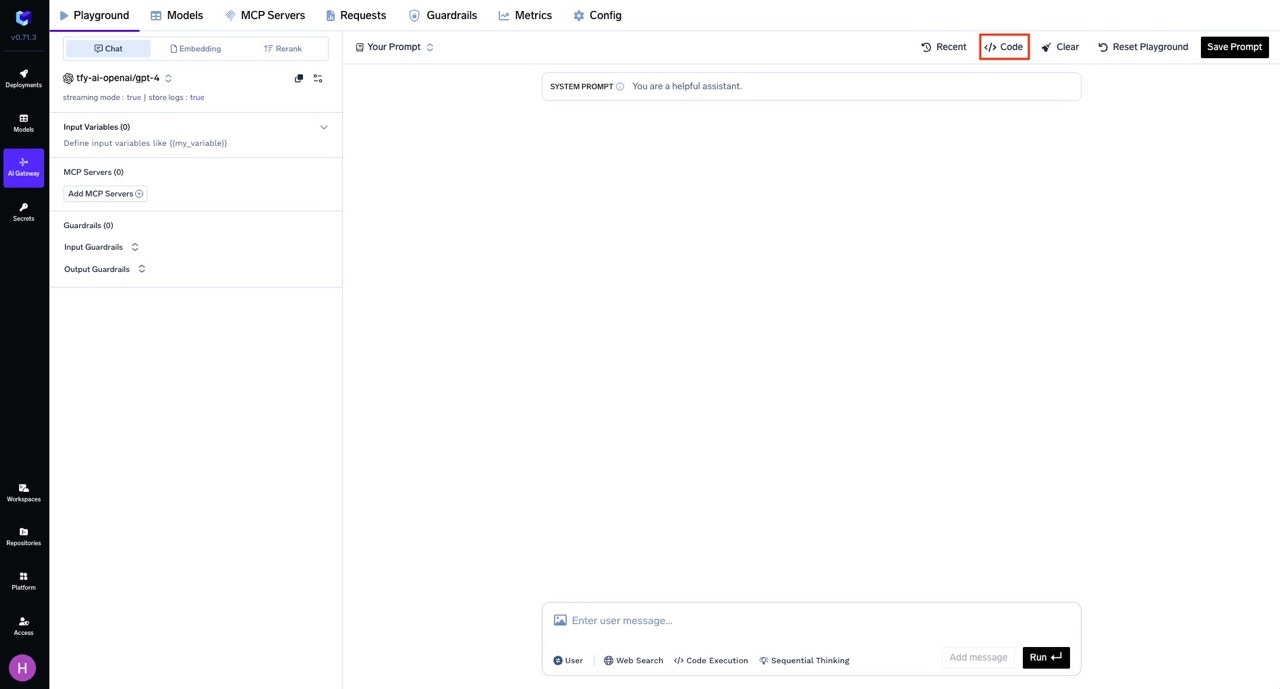
Code Snippet Section
-
Copy and Run the Code
Copy the generatedcurlcommand (or code for your preferred SDK) and run it.
The guardrails you selected in the Playground will be applied automatically, as reflected in the request headers.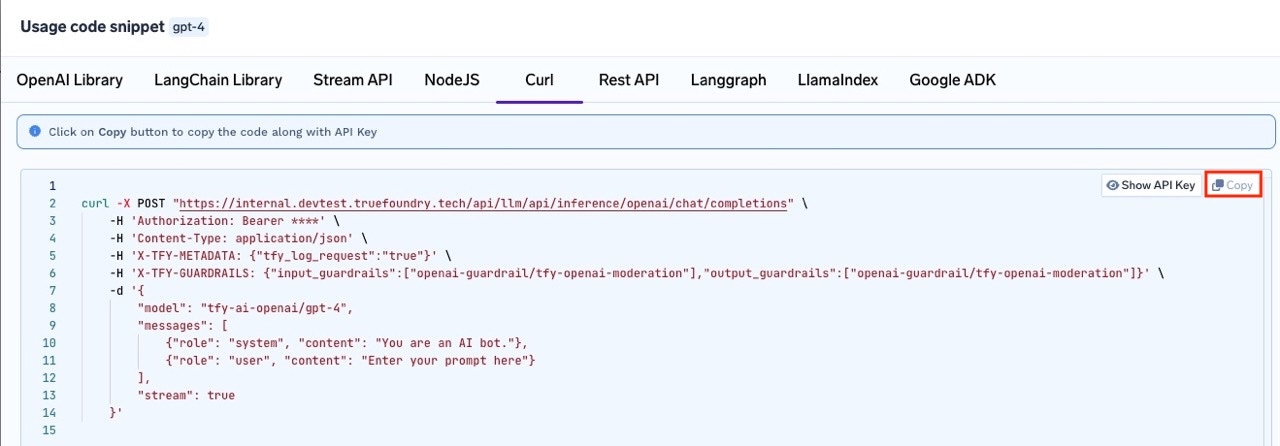
Copy the code snippet
5
Configure application of guardrails at gateway layer
-
Navigate to the Guardrails Section in Config
Go to the AI Gateway dashboard, then select the Config tab. In the left sidebar, click on the Guardrails section. -
Create a Guardrail Configuration
Click on Create/Edit Guardrail Config. Fill in the required details for your guardrail configuration, such as rules, input guardrails, and output guardrails. -
Save the Configuration
After filling out the form, click Save to apply your guardrail configuration.
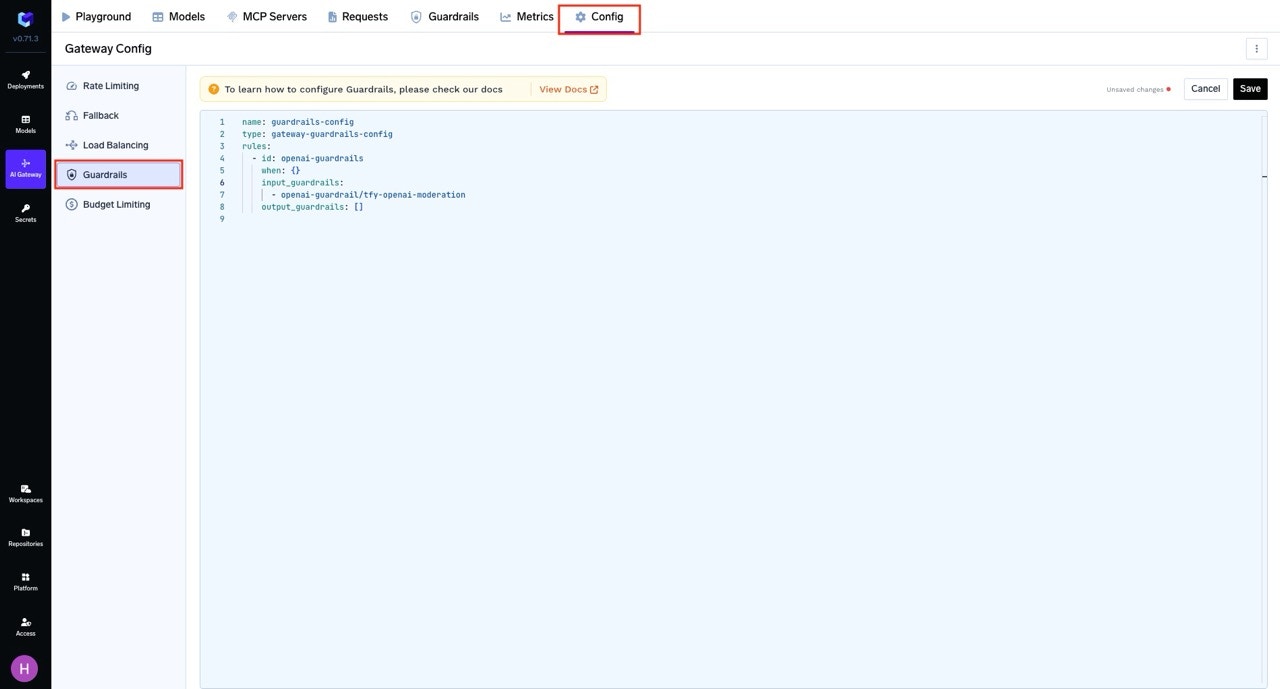
Configure application of guardrails at gateway layer