Create and connect new AWS EKS cluster
The following document shows how to create an AWS EKS cluster using the OCLI.
Prerequisites
- Install git if not already present.
- Install aws cli == 2.x.x and create an AWS profile locally with admin access to the AWS account where you want to create the new cluster.
Suggestion
We highly recommend you to please go through the AWS Infrastructure requirements carefully.
Installing OCLI
- Download the binary using the below command.
curl -H 'Cache-Control: max-age=0' -s "https://releases.ocli.truefoundry.tech/binaries/ocli_$(curl -H 'Cache-Control: max-age=0' -s https://releases.ocli.truefoundry.tech/stable.txt)_darwin_arm64" -o oclicurl -H 'Cache-Control: max-age=0' -s "https://releases.ocli.truefoundry.tech/binaries/ocli_$(curl -H 'Cache-Control: max-age=0' -s https://releases.ocli.truefoundry.tech/stable.txt)_darwin_amd64" -o oclicurl -H 'Cache-Control: max-age=0' -s "https://releases.ocli.truefoundry.tech/binaries/ocli_$(curl -H 'Cache-Control: max-age=0' -s https://releases.ocli.truefoundry.tech/stable.txt)_linux_arm64" -o oclicurl -H 'Cache-Control: max-age=0' -s "https://releases.ocli.truefoundry.tech/binaries/ocli_$(curl -H 'Cache-Control: max-age=0' -s https://releases.ocli.truefoundry.tech/stable.txt)_linux_amd64" -o ocli - Make the binary executable and move it to
$PATHsudo chmod +x ./ocli sudo mv ocli /usr/local/bin - Confirm by running the command
ocli --version
Configuring Input Config file
- To create a new cluster, you would require your AWS
Account ID,Region, and anAWS Profile - Run the following command to fill in the inputs interactively
ocli infra-init - For networking, there are two possible configurations:
- New VPC (Recommended) - This creates a new VPC for your new cluster.
- Existing VPC - You can enter your existing VPC and subnet IDs.
- Once all the inputs are filled, a config file with the name
tfy-config.yamlwould be generated in your current directory. We highly recommend you to once go through the generated config file and tally your inputs. You can also customize the inputs directly by editing the file. Below is the sample for the same:
aws:
  account:
    id: "xxxxxxxxxxxxxxxxx"
  cluster:
    name: "coolml"
    public_access:
      cidrs:
        - 0.0.0.0/0
      enabled: true
    version: "1.28"
  iam_role:
    assume_role_arns:
      - arn:aws:iam::416964291864:role/tfy-ctl-euwe1-production-truefoundry-deps
    ecr:
      enabled: true
    enabled: true
    role_enable_override: false
    role_override_name: ""
    s3:
      bucket_enable_override: false
      bucket_override_name: ""
      enabled: true
    ssm:
      enabled: true
  network:
    existing: true
    private_subnets_cidrs: []
    private_subnets_ids:
      - subnet-xxxxxxxxxxxxxxxxx
      - subnet-xxxxxxxxxxxxxxxxx
      - subnet-xxxxxxxxxxxxxxxxx
    public_subnets_cidrs: []
    public_subnets_ids:
      - subnet-xxxxxxxxxxxxxxxxx
      - subnet-xxxxxxxxxxxxxxxxx
      - subnet-xxxxxxxxxxxxxxxxx
    vpc_cidr: ""
    vpc_id: vpc-xxxxxxxxxxxxxxxxx
  profile:
    name: administrator-xxxxxxxxxxxxxxxxx
  region:
    availability_zones:
      - us-east-1a
      - us-east-1b
      - us-east-1c
    name: us-east-1
  tags: {}
azure: null
binaries:
  terraform:
    binary_path: null
  terragrunt:
    binary_path: null
gcp: null
provider: aws
aws:
  account:
    id: "xxxxxxxxxxxxxxxxx"
  cluster:
    name: coolml
    public_access:
      cidrs:
      - 0.0.0.0/0
      enabled: true
    version: "1.28"
  iam_role:
    assume_role_arns:
    - arn:aws:iam::416964291864:role/tfy-ctl-euwe1-production-truefoundry-deps
    ecr:
      enabled: true
    enabled: true
    role_enable_override: false
    role_override_name: ""
    s3:
      bucket_enable_override: false
      bucket_override_name: ""
      enabled: true
    ssm:
      enabled: true
  network:
    existing: false
    private_subnets_cidrs:
    - 10.222.0.0/20
    - 10.222.16.0/20
    - 10.222.32.0/20
    private_subnets_ids: []
    public_subnets_cidrs:
    - 10.222.176.0/20
    - 10.222.192.0/20
    - 10.222.208.0/20
    public_subnets_ids: []
    vpc_cidr: 10.222.0.0/16
    vpc_id: ""
  profile:
    name: administrator-xxxxxxxxxxxxxxxxx
  region:
    availability_zones:
    - us-east-2a
    - us-east-2b
    - us-east-2c
    name: us-east-2
  tags: {}
azure: null
binaries:
  terraform:
    binary_path: null
  terragrunt:
    binary_path: null
gcp: null
provider: aws
Create the cluster
Run the following command to create the EKS cluster and IAM roles needed to provide access to various infrastructure components as per the inputs configured above.
ocli infra-create --file tfy-config.yaml
This command may take around 30-45 minutes to complete.
Download the kubeconfig file for the cluster
aws eks update-kubeconfig --region CLUSTER_REGION --name CLUSTER_NAME
- Create a values.yaml file and paste the tenant, control plane URL and the token
Connecting the cluster
- Head over to the TrueFoundry platform and log in. If you haven't signed up yet, then you can sign up here.
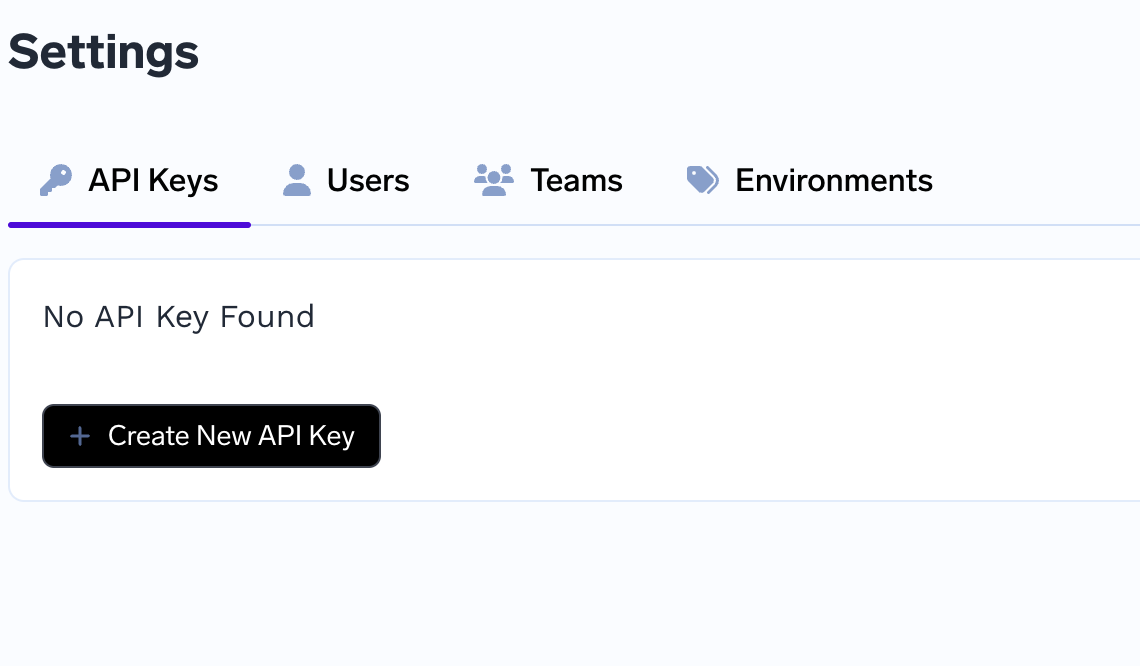
- Once you have logged in, navigate to
Settingstab from the left panel and create the new API key. Copy the API key as it will be used in the next set of commands.
- Run the following commands to create the cluster in the portal. The control plane URL is the URL where you are logged in
- Create a values.yaml file and paste the tenant, control plane URL and the token
## @section Global Parameters
## @param tenantName Parameters for tenantName
## Tenant Name - This is same as the name of the organization used to sign up
## on Truefoundry
##
tenantName: ""

## @param controlPlaneURL Parameters for controlPlaneURL
## URL of the control plane - Same as the URL of the Truefoundry dashboard
##
controlPlaneURL: ""

## @param clusterName Name of the cluster
## Name of the cluster that you have created on AWS/GCP/Azure
##
clusterName: ""

## @section Parameters for argocd
## @param argocd.enabled Flag to enable ArgoCD
## ArgoCD is mandatory for Truefoundry to work. You can make it false if ArgoCD is
## already installed in your cluster. Please make sure that the configuration of
## existing ArgoCD is same as the ArgoCD configuration required by Truefoundry.
argocd:
  enabled: true

## @section Parameters for argoWorkflows
## @param argoWorkflows.enabled Flag to enable Argo Workflows
##
argoWorkflows:
  enabled: true

## @section Parameters for argoRollouts
## @param argoRollouts.enabled Flag to enable Argo Rollouts
## Argo Rollouts is mandatory for Truefoundry to work.
##
argoRollouts:
  enabled: true

## @section Parameters for notebookController
## @param notebookController.enabled Flag to enable Notebook Controller
## Notebook Controller is required to power notebooks in Truefoundry
##
notebookController:
  enabled: true

## @section Parameters for certManager
## @param certManager.enabled Flag to enable Cert Manager
##
certManager:
  enabled: false

## @section Parameters for metricsServer
## @param metricsServer.enabled Flag to enable Metrics Server
##
metricsServer:
  enabled: true


## @section Parameters for AWS
## Parameters for AWS
##
aws:
  ## @subsection Parameters for awsLoadBalancerController
  ## @param aws.awsLoadBalancerController.enabled Flag to enable AWS Load Balancer Controller
  awsLoadBalancerController:
    enabled: true
    ## @param aws.awsLoadBalancerController.roleArn Role ARN for AWS Load Balancer Controller
    ##
    roleArn: ""

  ## @subsection Parameters for karpenter
  ## @param aws.karpenter.enabled Flag to enable Karpenter
  ##
  karpenter:
    enabled: true
    ## @param aws.karpenter.clusterEndpoint Cluster endpoint for Karpenter
    ##
    clusterEndpoint: ""
    ## @param aws.karpenter.roleArn Role ARN for Karpenter
    ##
    roleArn: ""
    ## @param aws.karpenter.instanceProfile Instance profile for Karpenter
    ##
    instanceProfile: ""
    ## @param aws.karpenter.defaultZones Default zones for Karpenter
    ##
    defaultZones: ""

    ## @param aws.karpenter.interruptionQueue Interruption queue name for Karpenter
    ##
    interruptionQueue: ""

  ## @subsection Parameters for awsEbsCsiDriver
  ## @param aws.awsEbsCsiDriver.enabled Flag to enable AWS EBS CSI Driver
  ##
  awsEbsCsiDriver:
    enabled: true
    ## @param aws.awsEbsCsiDriver.roleArn Role ARN for AWS EBS CSI Driver
    ##
    roleArn: ""

  ## @subsection Parameters for awsEfsCsiDriver
  ## @param aws.awsEfsCsiDriver.enabled Flag to enable AWS EFS CSI Driver
  ##
  awsEfsCsiDriver:
    enabled: true
    ## @param aws.awsEfsCsiDriver.fileSystemId File system ID for AWS EFS CSI Driver
    ##
    fileSystemId: ""
    ## @param aws.awsEfsCsiDriver.region Region for AWS EFS CSI Driver
    ##
    region: ""
    ## @param aws.awsEfsCsiDriver.roleArn Role ARN for AWS EFS CSI Driver
    ##
    roleArn: ""


## @section Parameters for gpu
## @param gpu.enabled Flag to enable Tfy GPU Operator
##
gpu:
  enabled: true
  ## @param gpu.clusterType Cluster type for Tfy GPU Operator
  ##
  clusterType: awsEks

## @section Parameters for truefoundry
## @param truefoundry.enabled Flag to enable TrueFoundry
## This installs the Truefoundry control plane helm chart. You can make it true
## if you want to install Truefoundry control plane.
##
truefoundry:
  enabled: false

  ## @param truefoundry.dev Flag to enable TrueFoundry Dev mode
  ##
  dev: true

## @section Parameters for loki
## @param loki.enabled Flag to enable Loki
##
loki:
  enabled: true

## @section Parameters for istio
## @param istio.enabled Flag to enable Istio
##
istio:
  enabled: true

## @section Parameters for keda
## @param keda.enabled Flag to enable Keda
##
keda:
  enabled: true

## @section Parameters for kubecost
## @param kubecost.enabled Flag to enable Kubecost
##
kubecost:
  enabled: true

## @section Parameters for prometheus
## @param prometheus.enabled Flag to enable Prometheus
##
prometheus:
  enabled: true

## @section Parameters for grafana
## @param grafana.enabled Flag to enable Grafana
##
grafana:
  enabled: true

## @section Parameters for tfyAgent
## @param tfyAgent.enabled Flag to enable Tfy Agent
##
tfyAgent:
  enabled: true
  ## @param tfyAgent.clusterToken Parameters for clusterToken
  ## Token for cluster authentication
  ##
  clusterToken: ""
- Execute the command
ocli compute-plane-install -f values.yaml --cluster-type aws-eks - Wait for the command to finish
Saving the output file
Once the above command finishes, save the output using the command below:
ocli output --file tfy-config.yaml > output.txt
Updated 1 day ago